配置flume
1.拓扑图
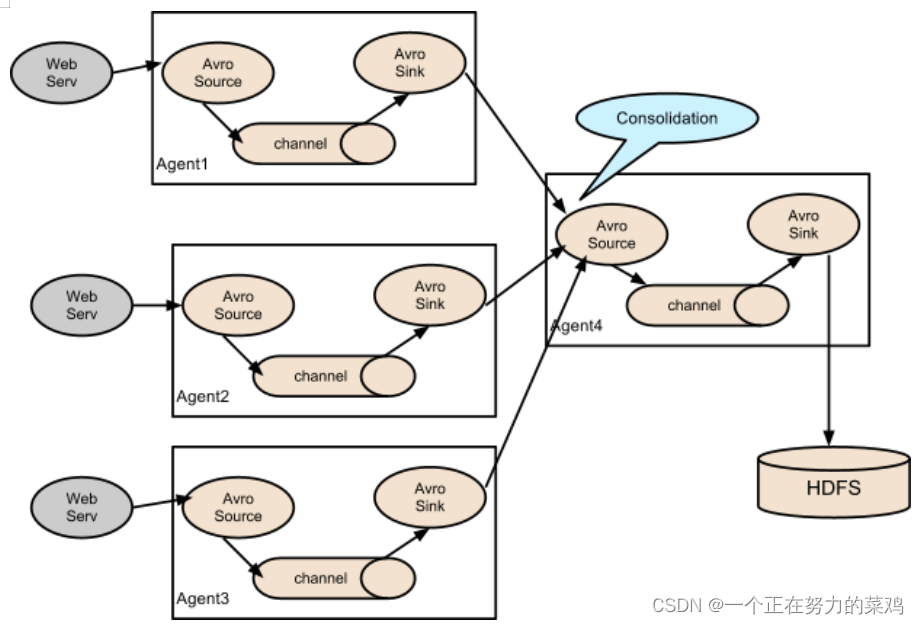
2.需求
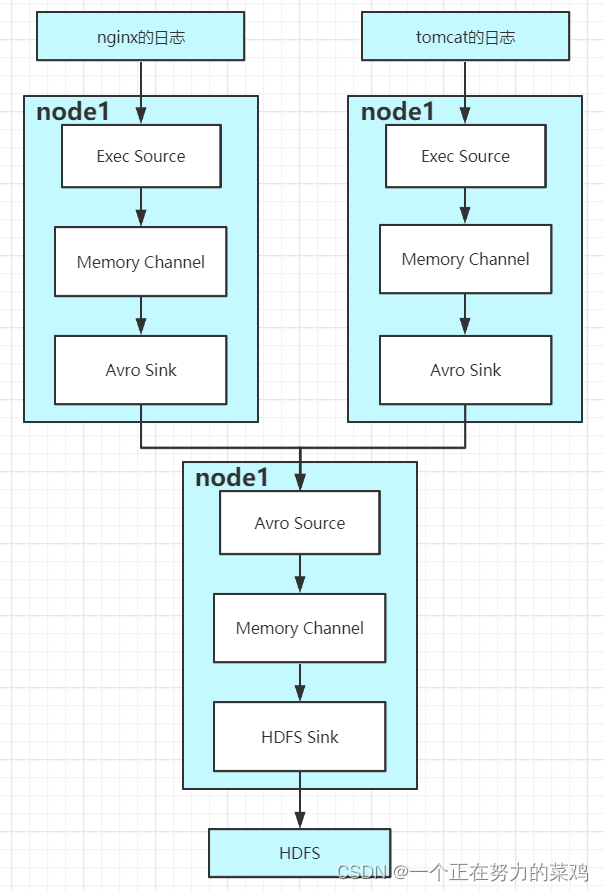
- Flume-1监控文件/usr/local/nginx/logs/access.log
- Flume-2监控文件/usr/local/tomcat-8.5.81/logs/catalina.2022-06-26.log
- Flume-1与Flume-2将数据发送给Flume-3,Flume-3将最终将数据保存在hdfs
3.原理图
4.在node1的/jobs/t10下创建nginxlog-flume-avro.conf文件
- vim nginxlog-flume-avro.conf
# Name the components on this agent
a1.sources = r1
a1.sinks = k1
a1.channels = c1

# Describe/configure the source
a1.sources.r1.type = exec
a1.sources.r1.command = tail -F /usr/local/nginx/logs/access.log
a1.sources.r1.shell = /bin/bash -c

# Describe the sink
a1.sinks.k1.type = avro
a1.sinks.k1.hostname = node1
a1.sinks.k1.port = 4141

# Describe the channel
a1.channels.c1.type = memory
a1.channels.c1.capacity = 1000
a1.channels.c1.transactionCapacity = 100

# Bind the source and sink to the channel
a1.sources.r1.channels = c1
a1.sinks.k1.channel = c1
5.在node1的/jobs/t10下创建tomcatlog-flume-avro.conf文件
- vim tomcatlog-flume-avro.conf
# Name the components on this agent
a2.sources = r1
a2.sinks = k1
a2.channels = c1

# Describe/configure the source
a2.sources.r1.type = exec
a2.sources.r1.command = tail -F /usr/local/tomcat-8.5.81/logs/catalina.2022-06-26.log
a2.sources.r1.shell = /bin/bash -c

# Describe the sink
a2.sinks.k1.type = avro
a2.sinks.k1.hostname = node1
a2.sinks.k1.port = 4141

# Use a channel which buffers events in memory
a2.channels.c1.type = memory
a2.channels.c1.capacity = 1000
a2.channels.c1.transactionCapacity = 100

# Bind the source and sink to the channel
a2.sources.r1.channels = c1
a2.sinks.k1.channel = c1
6.在node1的/jobs/t10下创建avro2-flume-logger.conf文件
- vim avro2-flume-logger.conf
# Name the components on this agent
a3.sources = r1
a3.sinks = k1
a3.channels = c1
# Describe/configure the source
a3.sources.r1.type = avro
a3.sources.r1.bind = node1
a3.sources.r1.port = 4141
# Describe the sink
a3.sinks.k1.type=hdfs
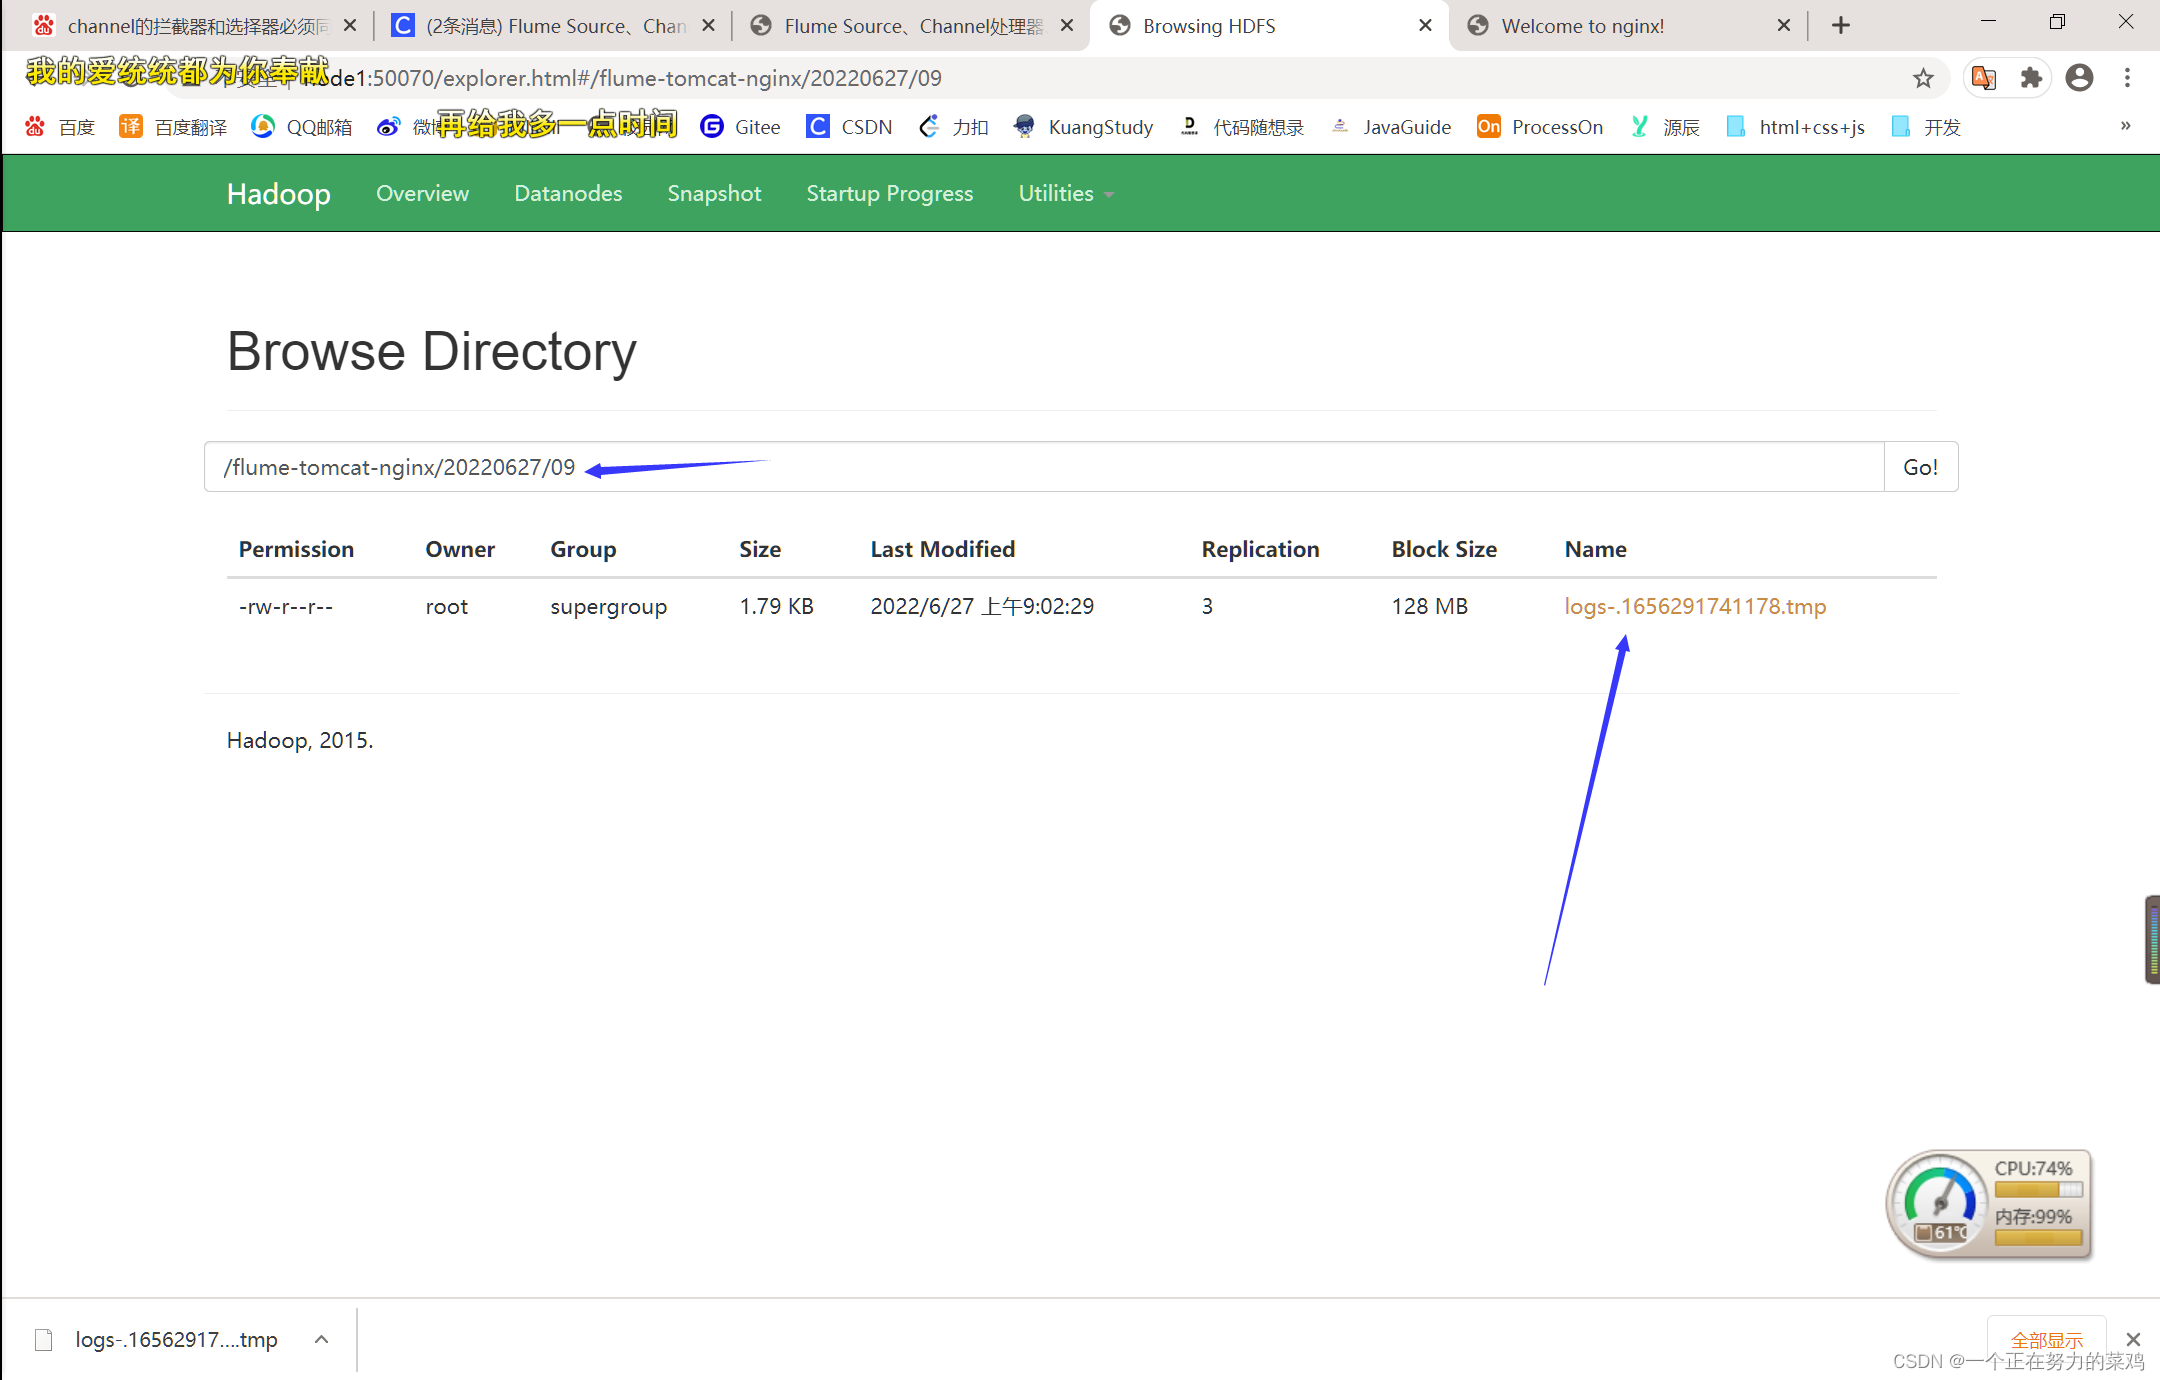
a3.sinks.k1.hdfs.path=hdfs://node1:8020/flume-tomcat-nginx/%Y%m%d/%H
a3.sinks.k1.hdfs.filePrefix=logs-
a3.sinks.k1.hdfs.round=true
a3.sinks.k1.hdfs.roundValue=1
#重新定义时间单位
a3.sinks.k1.hdfs.roundUnit = hour
#是否使用本地时间戳
a3.sinks.k1.hdfs.useLocalTimeStamp = true
#积攒多少个Event才flush到HDFS一次
a3.sinks.k1.hdfs.batchSize = 100
#设置文件类型,可支持压缩
a3.sinks.k1.hdfs.fileType = DataStream
#多久生成一个新的文件
a3.sinks.k1.hdfs.rollInterval = 600
#设置每个文件的滚动大小
a3.sinks.k1.hdfs.rollSize = 134217700
#文件的滚动与Event数量无关
a3.sinks.k1.hdfs.rollCount = 0
#最小冗余数
a3.sinks.k1.hdfs.minBlockReplicas = 1
# Describe the channel
a3.channels.c1.type = memory
a3.channels.c1.capacity = 1000
a3.channels.c1.transactionCapacity = 100
# Bind the source and sink to the channel
a3.sources.r1.channels = c1
a3.sinks.k1.channel = c1
7.启动顺序flume321
- bin/flume-ng agent --conf conf --conf-file
jobs/t10/avro2-flume-logger.conf --name a3
-Dflume.root.logger==INFO,console - bin/flume-ng agent --conf conf --conf-file
jobs/t10/tomcatlog-flume-avro.conf --name a2
-Dflume.root.logger==INFO,console - bin/flume-ng agent --conf conf --conf-file
jobs/t10/nginxlog-flume-avro.conf --name a1
-Dflume.root.logger==INFO,console
8.hdfs查看日志记录结果


 3848
3848


 被折叠的 条评论
为什么被折叠?
被折叠的 条评论
为什么被折叠?
 到【灌水乐园】发言


