


不同色彩空间的转换:
常用的色彩空间:
①灰度:去除彩色信息获得灰阶,对中间处理有效,如人脸检测。
②BGR:蓝-绿-红,每一个像素点都由一个三元组表示。
③HSV:色调(Hue)-饱和度(Saturation)-明度(Value)。
傅里叶变化:Joseph Fourier
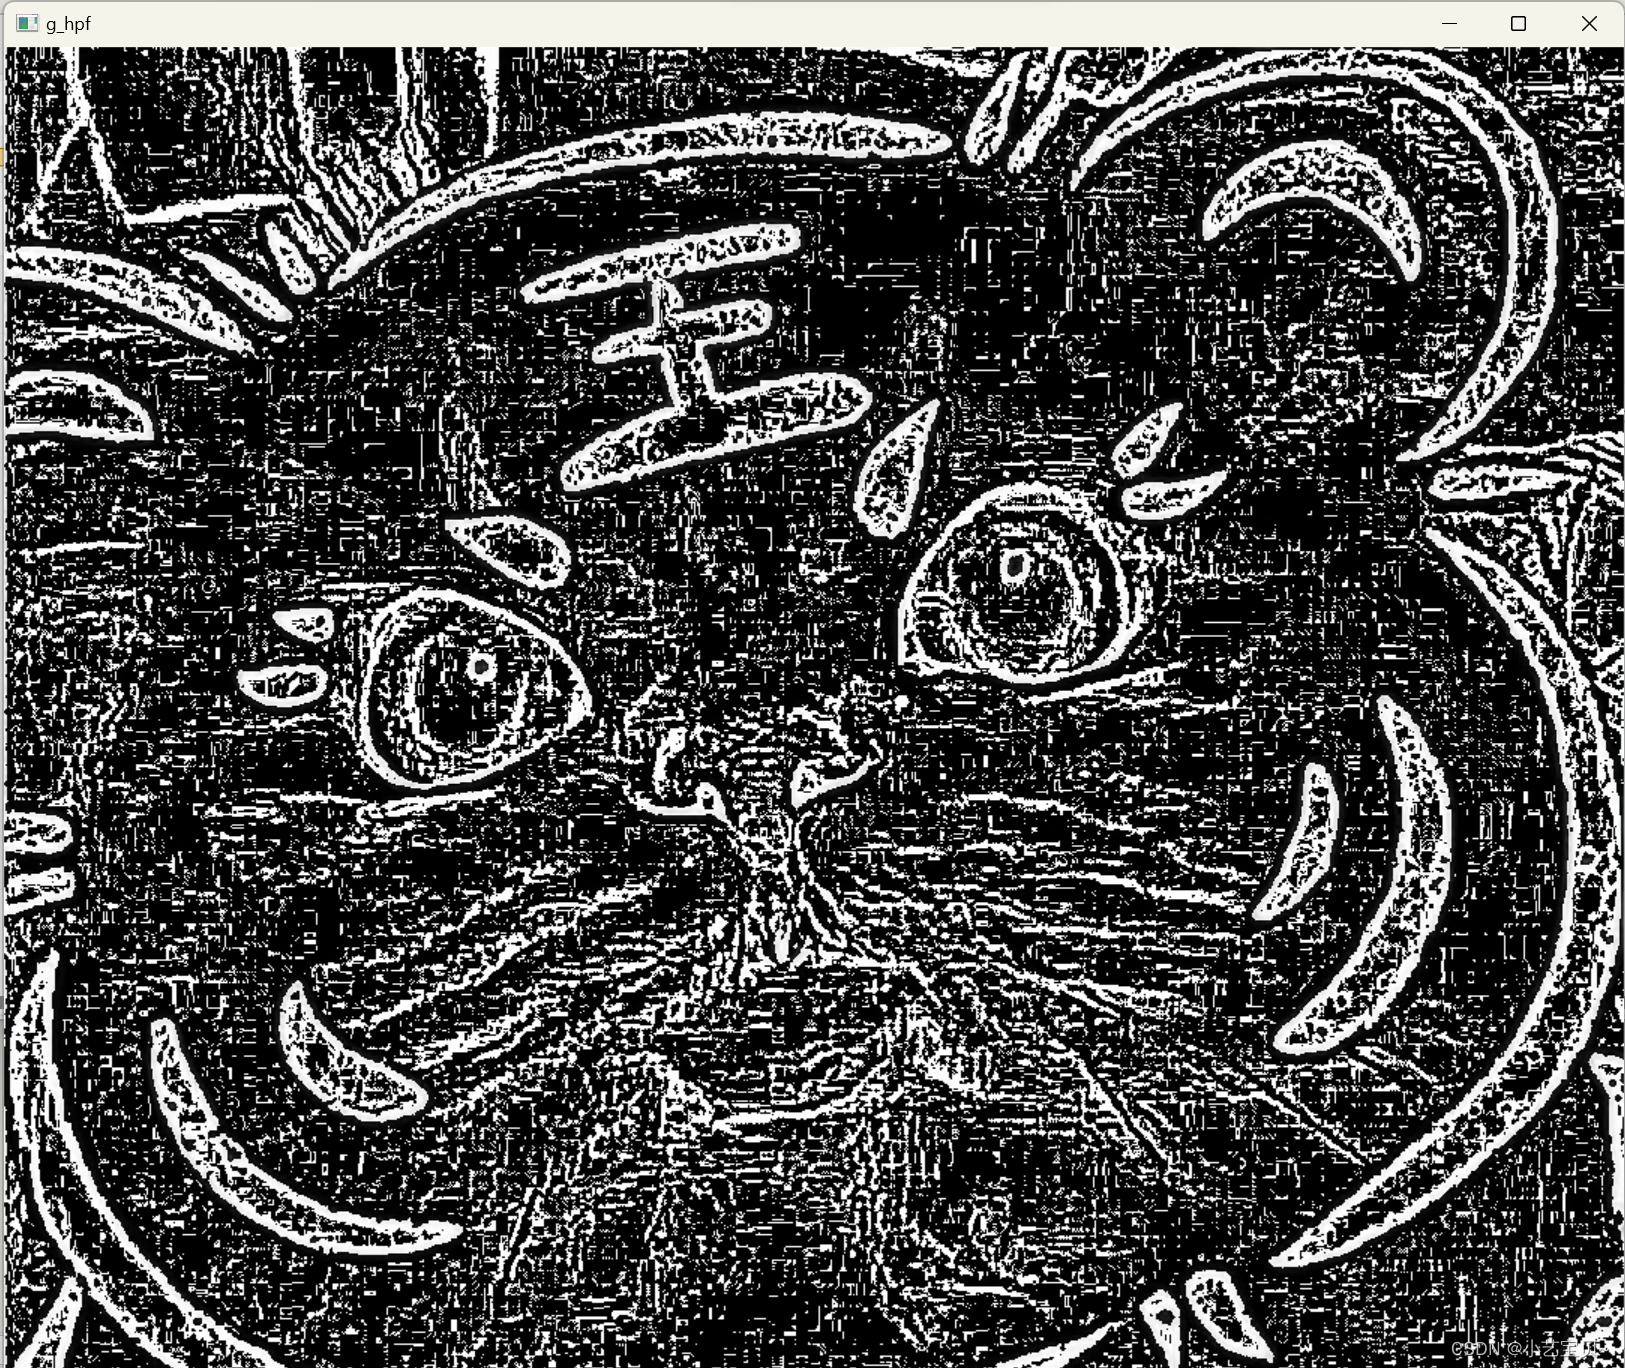
高通滤波器(HPF):检测图像的某个区域,然后根据像素与周围像素的亮度差值来提升该像素的亮度的滤波器。(边缘检测)
直白点说,就是中央像素如果与周围的亮度差值很大,中央像素的亮度增加。
import cv2
import numpy as np
from scipy import ndimage

kernel_3x3 = np.array(
    [[-1, -1, -1],
     [-1, 8, -1],
     [-1, -1, -1]]
)

kernel_5x5 = np.array(
    [[-1, -1, -1, -1, -1],
     [-1, 1, 2, 1, -1],
     [-1, 2, 4, 2, -1],
     [-1, 1, 2, 1, -1],
     [-1, -1, -1, -1, -1]]
)
# 滤波器中的所有值加起来为0

img = cv2.imread('Cat.jpg', 0)
k3 = ndimage.convolve(img, kernel_3x3)
k5 = ndimage.convolve(img, kernel_5x5)

blurred = cv2.GaussianBlur(img, (11,11), 0)
g_hpf = img - blurred
cv2.imshow("3x3", k3)
cv2.imshow("5x5", k5)
cv2.imshow("g_hpf", g_hpf)
cv2.waitKey()
cv2.destroyAllWindows()
处理效果:


低通滤波器(LPF):在像素与周围像素的亮度差值小于某一特定值时,平滑该像素的亮度。(去噪、模糊化)
边缘检测:
先对图像进行模糊处理,避免将噪声误认为边缘。blur()\medianBlur()\GaussianBlur()
img = cv2.imread('Cat.jpg')
blurKsize = 7
edgeKsize = 5
dst = 3
if blurKsize >= 3:
    blurredImg = cv2.medianBlur(img, blurKsize)
    grayImg = cv2.cvtColor(blurredImg, cv2.COLOR_BGR2GRAY)
else:
    grayImg = cv2.cvtColor(img, cv2.COLOR_BGR2GRAY)
cv2.Laplacian(grayImg, cv2.CV_8U, grayImg, ksize=edgeKsize)
normalizedInverseAlpha = (1.0 / 255) * (255 - grayImg)
channels = cv2.split(img)
for channel in channels:
    channel[:] = channel * normalizedInverseAlpha
cv2.merge(channels, dst)
cv2.imshow('jbkj', channels)
Canny边缘检测
步骤:
①使用高斯滤波器对图像进行去噪;
②计算梯度;
③在边缘上使用非最大抑制(NMS);
④在边缘上使用双阈值去除假阳性;
⑤分析所有的边缘及其之间的连接,保留真正的边缘并消除不明显的边缘。
img = cv2.imread('Cat.jpg', 0)
canny_img = cv2.Canny(img, 200, 300)
cv2.imshow('canny', canny_img)
cv2.waitKey()
cv2.destroyAllWindows()
轮廓检测
threshold函数,可用于二值化处理,设置阈值,选择不同的像素筛选策略。
# 200x200黑色图像
img = np.zeros((200, 200), dtype=np.uint8)
# 正中央白色正方形,切片
img[50:150, 50:150] = 255
# 当阈值大于127时,像素点设置为255;小于127时,设置为0;cv2.THRESH_BINARY
ret, thresh = cv2.threshold(img, 127, 255, 0)
# 输入图像、层次类型、轮廓逼近方式
"""
cv2.RETR_EXTERNAL表示只检测外轮廓
cv2.RETR_LIST检测的轮廓不建立等级关系
cv2.RETR_CCOMP建立两个等级的轮廓,上面的一层为外边界,里面的一层为内孔的边界信息。
cv2.RETR_TREE建立一个等级树结构的轮廓。


cv2.CHAIN_APPROX_NONE存储所有的轮廓点
cv2.CHAIN_APPROX_SIMPLE压缩水平方向,垂直方向,对角线方向的元素,只保留该方向的终点坐标
"""

contours, hierarchy = cv2.findContours(thresh, cv2.RETR_TREE, cv2.CHAIN_APPROX_SIMPLE)
color = cv2.cvtColor(img, cv2.COLOR_GRAY2BGR)
img = cv2.drawContours(color, contours, -1, (0, 255, 0), 2)
cv2.imshow("contours", color)
cv2.waitKey()
cv2.destroyAllWindows()
处理结果:

# 读入图像
image = cv2.imread("yoghurt.jpg")
gray = cv2.cvtColor(image, cv2.COLOR_BGR2GRAY)
# 当阈值大于127时,像素点设置为255;小于127时,设置为0;cv2.THRESH_BINARY
ret, thresh = cv2.threshold(gray, 127, 255, 0)
# 输入图像、层次类型、轮廓逼近方式
contours, hierarchy = cv2.findContours(thresh, cv2.RETR_TREE, cv2.CHAIN_APPROX_SIMPLE)
# color = cv2.cvtColor(img, cv2.COLOR_GRAY2BGR)
img = cv2.drawContours(image, contours, -1, (0, 0, 255), 2)
cv2.imshow("contours", image)
cv2.waitKey()
cv2.destroyAllWindows()
最小外接矩形/圆
现实应用涉及对目标边界框、最小矩形面积、最小外接圆的需求。
矩形边框(Bounding Rectangle)是说,用一个最小的矩形,把找到的形状包起来。还有一个带旋转的矩形,面积会更小
img = cv2.pyrDown(cv2.imread("hammer.jpg", cv2.IMREAD_UNCHANGED))
# pyrDown下采样;unchanged读入完整图片,包括alpha通道
ret, thresh = cv2.threshold(cv2.cvtColor(img.copy(), cv2.COLOR_BGR2GRAY), 127, 255, cv2.THRESH_BINARY)
# 二值化处理
contours, h = cv2.findContours(thresh, cv2.RETR_EXTERNAL, cv2.CHAIN_APPROX_SIMPLE)
# 最外轮廓
for c in contours:
    # 计算边界框,得到左上角坐标及长宽
    x, y, w, h = cv2.boundingRect(c)
    # 画矩形
    cv2.rectangle(img, (x, y), (x + w, y + h), (0, 255, 0), 2)
    # 计算包围目标的最小区域
    rect = cv2.minAreaRect(c)
    box = cv2.boxPoints(rect)
    box = np.int32(box)
    cv2.drawContours(img, [box], 0, (0, 0, 255), 3)
    (x, y), radius = cv2.minEnclosingCircle(c)
    center = (int(x), int(y))
    radius = int(radius)
    img = cv2.circle(img, center, radius, (0, 255, 0), 2)
# -1绘制所有的轮廓
cv2.drawContours(img, contours, -1, (255, 0, 0), 1)
cv2.imshow("cnt", img)
cv2.waitKey()
cv2.destroyAllWindows()
处理结果:

凸轮廓与Douglas-Peucker算法
凸形状内部的任意两点的连线都在形状内部。
# 轮廓的多边形拟合
img = cv2.imread("ploy.jpg", flags=1)
gray = cv2.cvtColor(img, cv2.COLOR_BGR2GRAY)  # 灰度图像
blur = cv2.boxFilter(gray, -1, (5, 5))  # 盒式滤波器,5*5 平滑核
_, binary = cv2.threshold(blur, 205, 255, cv2.THRESH_OTSU + cv2.THRESH_BINARY)

# 寻找二值化图中的轮廓
contours, hierarchy = cv2.findContours(binary, cv2.RETR_TREE, cv2.CHAIN_APPROX_SIMPLE)
print('len:', len(contours))

# 绘制轮廓函数会修改原始图像
imgCnts = np.zeros(gray.shape[:2], np.uint8)
# 绘制全部轮廓
imgCnts = cv2.drawContours(imgCnts, contours, -1, (255, 255, 255), thickness=2)

plt.figure(figsize=(9, 6))
plt.subplot(231), plt.axis('off'), plt.title("Origin")
plt.imshow(cv2.cvtColor(img, cv2.COLOR_BGR2RGB))
plt.subplot(232), plt.axis('off'), plt.title("Binary")
plt.imshow(binary, 'gray')
plt.subplot(233), plt.axis('off'), plt.title("Contour")
plt.imshow(imgCnts, 'gray')
# 所有轮廓按面积排序
cnts = sorted(contours, key=cv2.contourArea, reverse=True)
cnt = cnts[0]  # 第 0 个轮廓,面积最大的轮廓
print("shape of max contour:", cnt.shape[0])

eps = [50, 30, 10]
for i in range(len(eps)):
    polyFit = cv2.approxPolyDP(cnt, eps[i], True)
    print("eps={}, shape of fitting polygon:{}".format(eps[i], polyFit.shape[0]))
    fitContour = np.zeros(gray.shape[:2], np.uint8)  # 初始化最大轮廓图像
    cv2.polylines(fitContour, [cnt], True, 205, thickness=2)  # 绘制最大轮廓,多边形曲线
    cv2.polylines(fitContour, [polyFit], True, 255, 3)
    plt.subplot(2, 3, i + 4), plt.axis('off'), plt.title("approxPoly(eps={})".format(eps[i]))
    plt.imshow(fitContour, 'gray')

plt.tight_layout()
plt.show()
盒式滤波器:
直线检测:
HoughLines(标准Hough变换)和HoughLinesP(概率Hough变换)函数。
img = cv2.imread("lines.jpg")
gray = cv2.cvtColor(img, cv2.COLOR_BGR2GRAY)
edges = cv2.Canny(gray, 50, 120)
minLineLength = 20
maxLineGap = 5
lines = cv2.HoughLinesP(edges, 1, np.pi / 180, 100, minLineLength, maxLineGap)
for x1, y1, x2, y2 in lines[0]:
    cv2.line(img, (x1, y1), (x2, y2), (0, 255, 0), 2)
cv2.imshow("edges", edges)
cv2.imshow("lines", img)
cv2.waitKey()
cv2.destroyAllWindows()

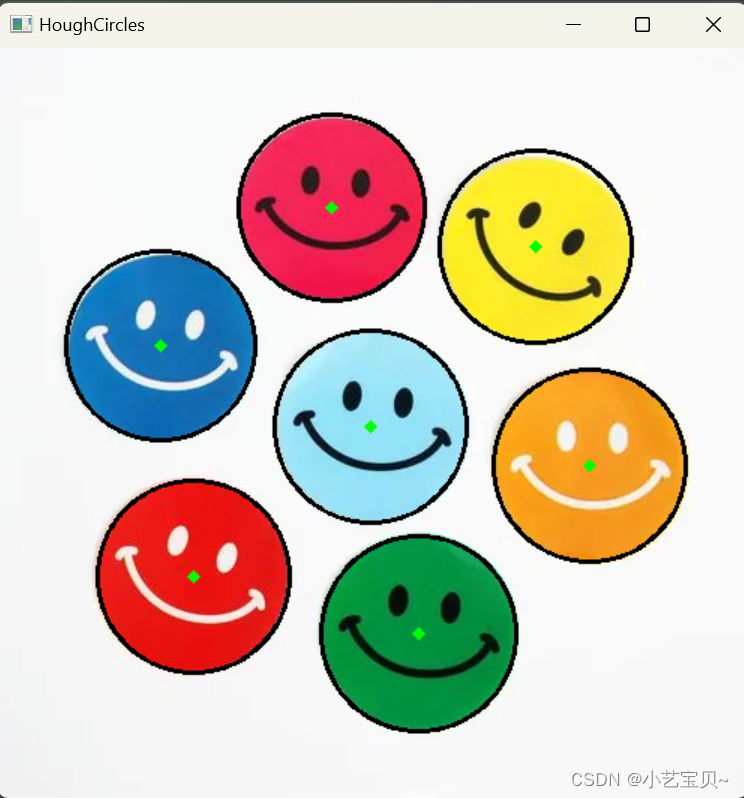
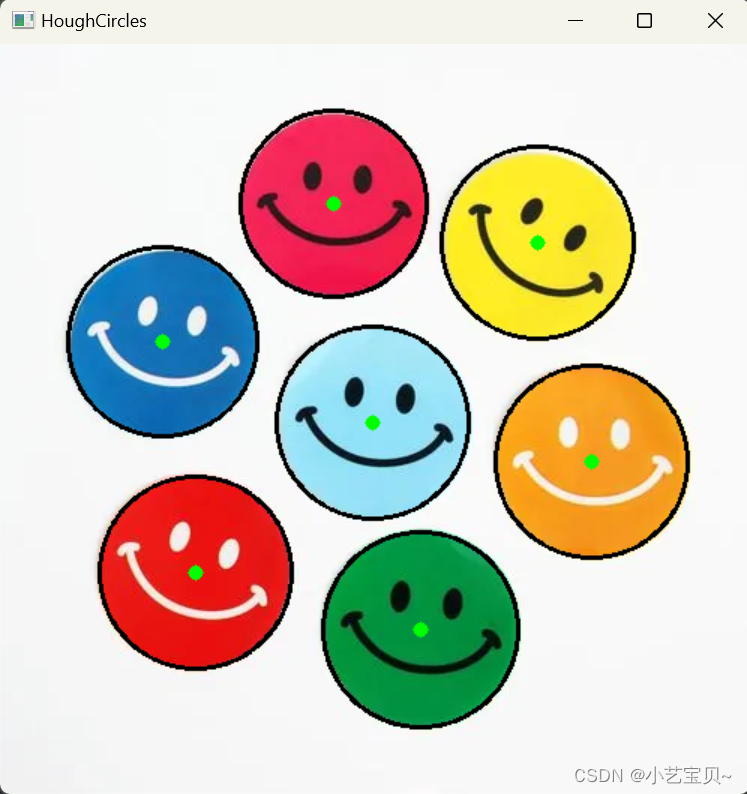
圆的检测
planets = cv2.imread('circle.jpg')
gray = cv2.cvtColor(planets, cv2.COLOR_BGR2GRAY)
img = cv2.medianBlur(gray, 5)
cimg = cv2.cvtColor(img, cv2.COLOR_GRAY2BGR)
circles = cv2.HoughCircles(img, cv2.HOUGH_GRADIENT, 1, 120, param1=100, param2=30, minRadius=0, maxRadius=0)
# 灰度图像,基于梯度,累加器分辨率,阈值,圆心精度,检测到的圆的最小半径,最小半径,最大半径。
circles = np.uint16(np.around(circles))
for i in circles[0, :]:
    cv2.circle(planets, (i[0], i[1]), i[2], (0, 0, 0), 2)
    cv2.circle(planets, (i[0], i[1]), 2, (0, 255, 0), 3)
cv2.imwrite("planet_circles.jpg", planets)
cv2.imshow('HoughCircles', planets)
cv2.waitKey()
cv2.destroyAllWindows()
thickness=1

thickness=3
thickness=5
二值化总结:OpenCV-二值化方法-CSDN博客


 287
287


 被折叠的 条评论
为什么被折叠?
被折叠的 条评论
为什么被折叠?
 到【灌水乐园】发言


