


1、Servlet 是什么
1.1 回顾 动态页面 vs 静态页面
而 B 站的主页哔哩哔哩 (゜-゜)つロ 干杯~-bilibili则是一个动态页面.

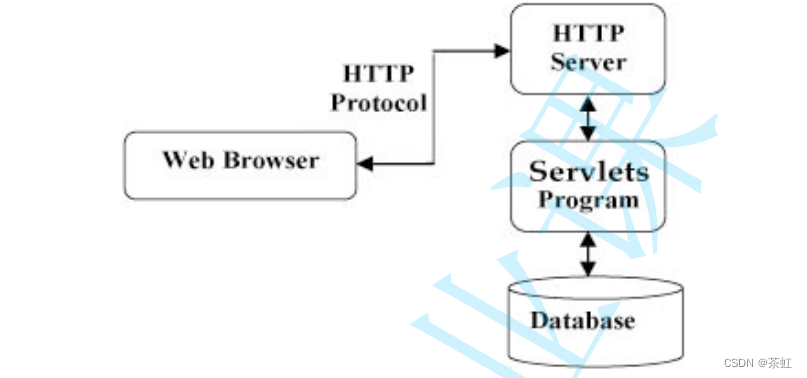
构建动态页面的技术有很多, 每种语言都有一些相关的库/框架来做这件事。Servlet 就是 Tomcat 这个 HTTP 服务器提供给 Java 的一组 API, 来完成构建动态页面这个任务.
1.2 Servlet 主要做的工作
- 允许程序猿注册一个类, 在 Tomcat 收到某个特定的 HTTP 请求的时候, 执行这个类中的一些代码.
- 帮助程序猿解析 HTTP 请求, 把 HTTP 请求从一个字符串解析成一个 HttpRequest 对象.
- 帮助程序猿构造 HTTP 响应. 程序猿只要给指定的 HttpResponse 对象填写一些属性字段, Servlet就会自动的安装 HTTP 协议的方式构造出一个 HTTP 响应字符串, 并通过 Socket 写回给客户端.
当然, Servlet 还支持一些其他的辅助功能, 此处暂时先不介绍.
2、第一个 Servlet 程序
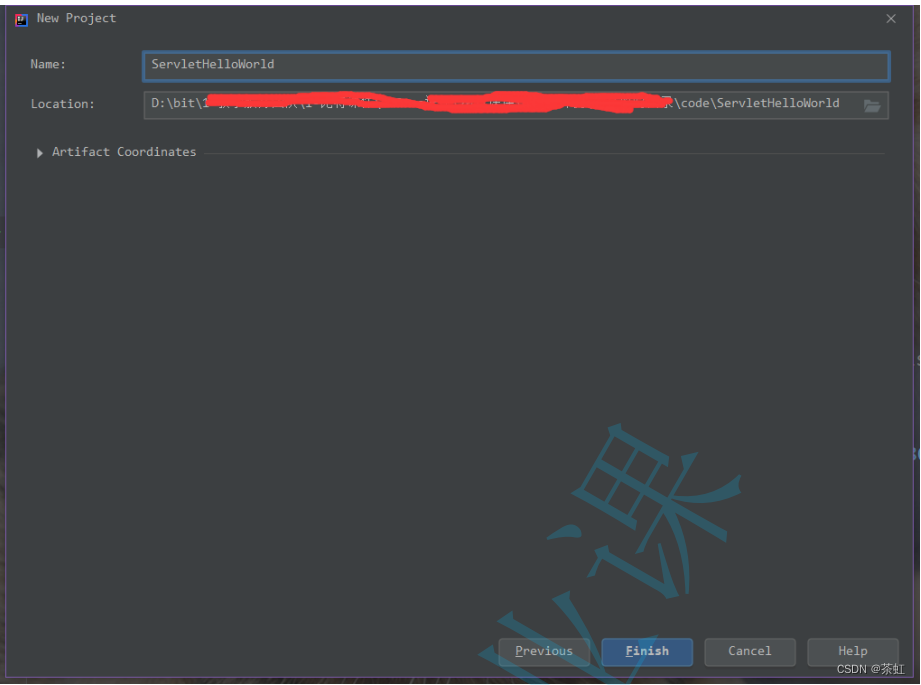
2.1 创建项目
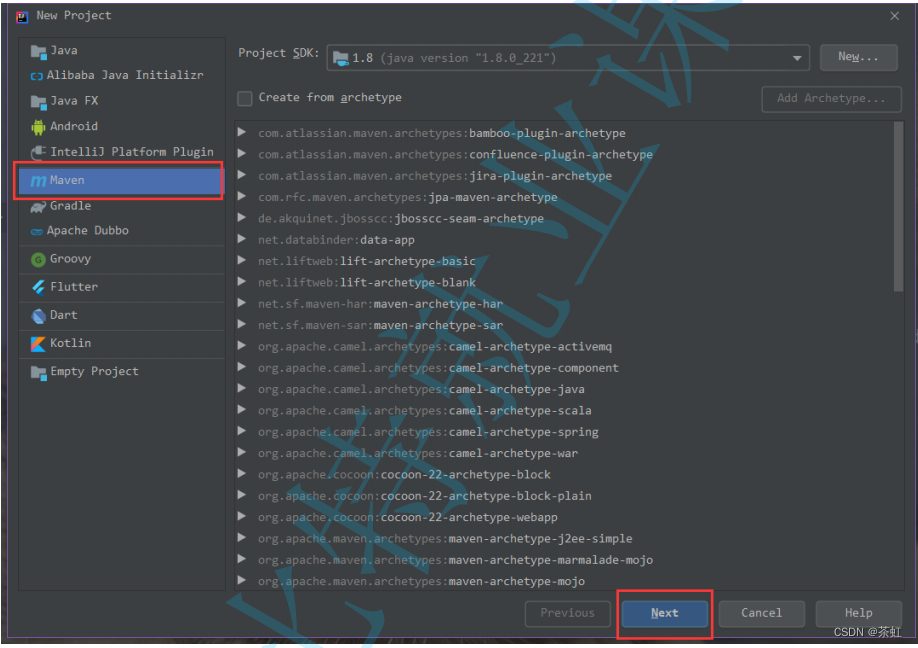
2) 选择项目要存放的目录
3) 项目创建完毕后, 一般右下角会弹出以下对话框. 选择 Enable Auto-Import

2.2 引入依赖
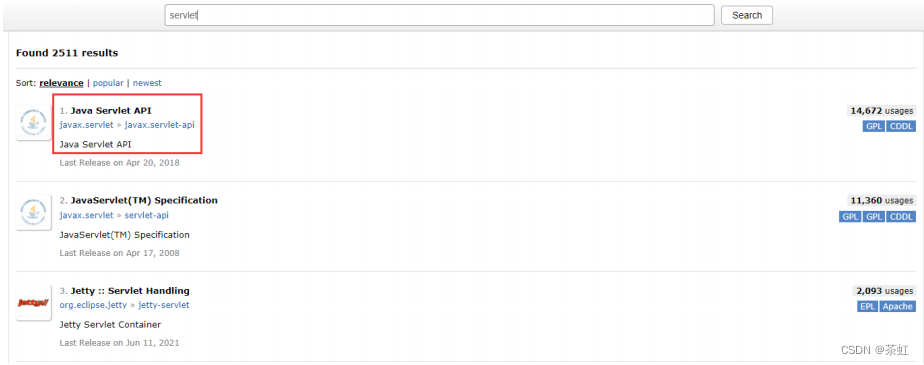
2) 选择版本. 一般我们使用 3.1.0 版本
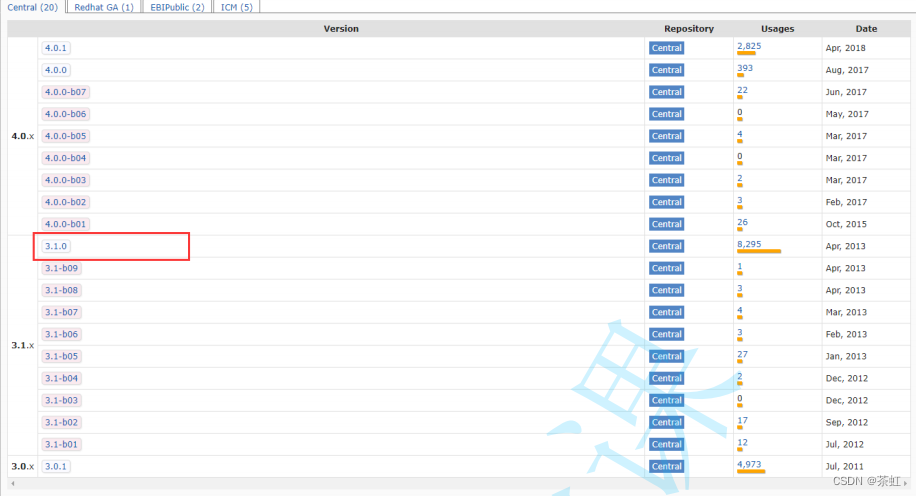
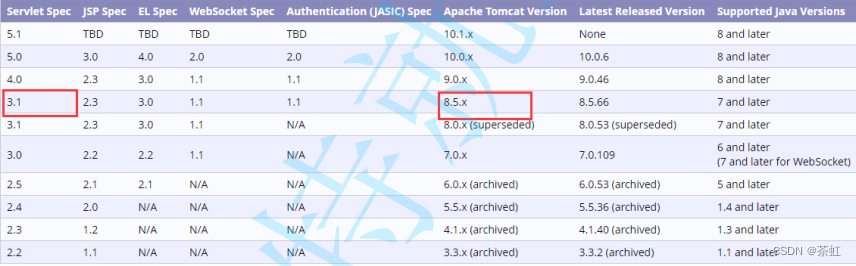
Servlet 的版本要和 Tomcat 匹配。如果我们使用 Tomcat 8.5, 那么就需要使用 Servlet 3.1.0可以在 Apache Tomcat® - 我想要哪个版本?查询版本对应关系.
3) 把中央仓库中提供的 xml 复制到项目的 pom.xml 中

修改后的 pom.xml 形如
<?xml version="1.0" encoding="UTF-8"?>
<project xmlns="http://maven.apache.org/POM/4.0.0"
xmlns:xsi="http://www.w3.org/2001/XMLSchema-instance"
xsi:schemaLocation="http://maven.apache.org/POM/4.0.0
http://maven.apache.org/xsd/maven-4.0.0.xsd">
<modelVersion>4.0.0</modelVersion>
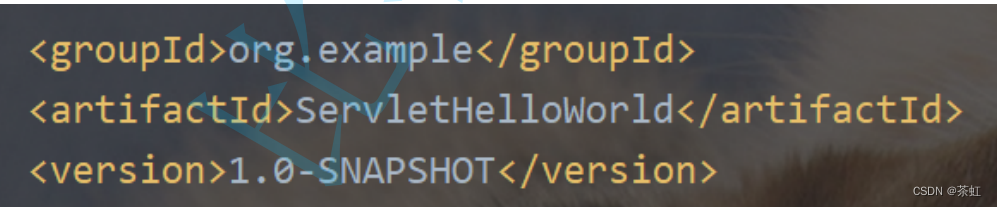
<groupId>org.example</groupId>
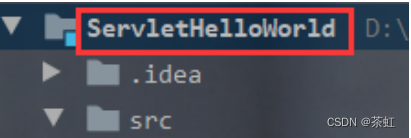
<artifactId>ServletHelloWorld</artifactId>
<version>1.0-SNAPSHOT</version>
<dependencies>
<!-- https://mvnrepository.com/artifact/javax.servlet/javax.servlet-api
-->
<dependency>
<groupId>javax.servlet</groupId>
<artifactId>javax.servlet-api</artifactId>
<version>3.1.0</version>
<scope>provided</scope>
</dependency>
</dependencies>
</project>关于 groupId, artifactId, version这几个东西暂时我们不关注. 啥时候需要关注呢? 如果我们要把这个写的代码发布到中央仓库上,那么就需要设定好这几个 ID 了.
- groupId: 表示组织名称
- artifactId: 表示项目名称
- version: 表示版本号
中央仓库就是按照这三个字段来确定唯一一个包的.
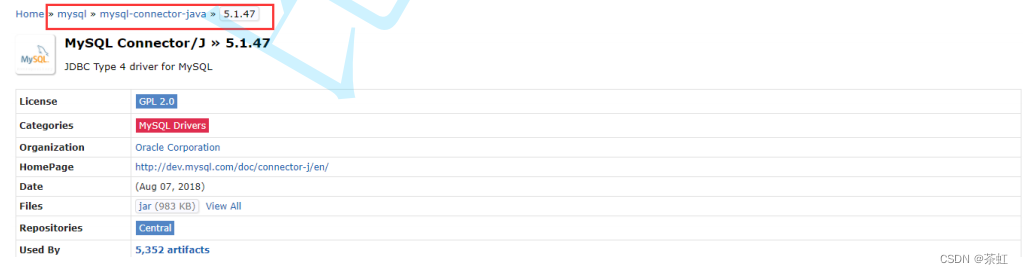
红色方框圈出来的部分, 就是这个 jar 包的 groupId, artifactId, version
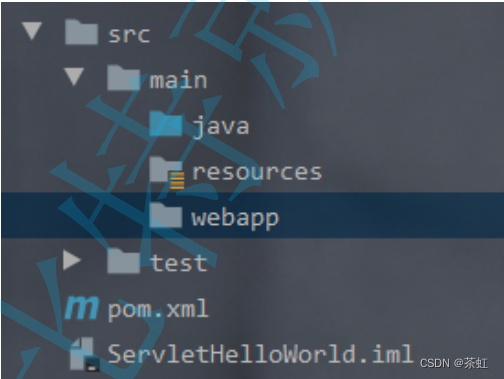
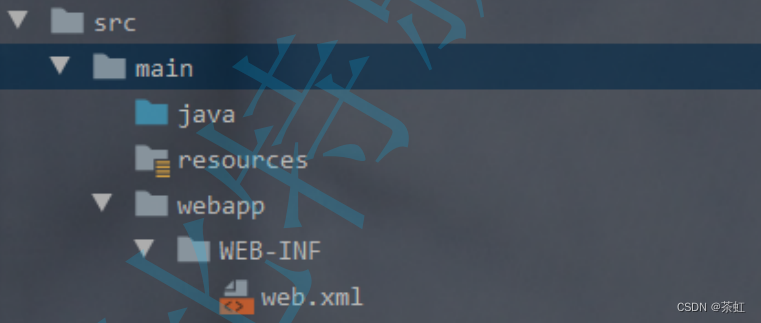
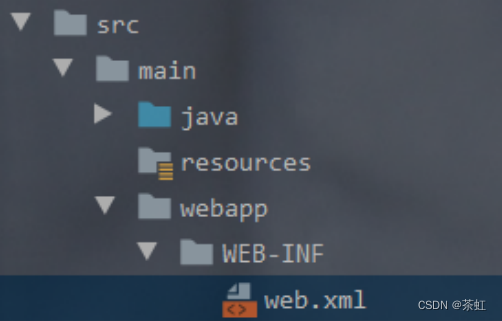
2.3 创建目录
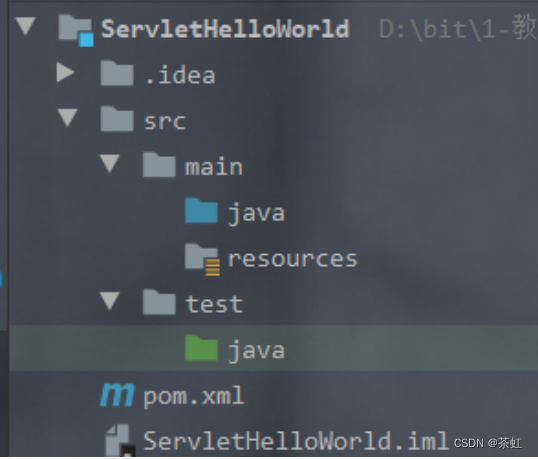
这些目录中:
- src 表示源代码所在的目录
- main/java 表示源代码的根目录. 后续创建 .java 文件就放到这个目录中.
- main/resources 表示项目的一些资源文件所在的目录. 此处暂时不关注.
- test/java 表示测试代码的根目录. 此处暂时不关注.
2) 创建 web.xml
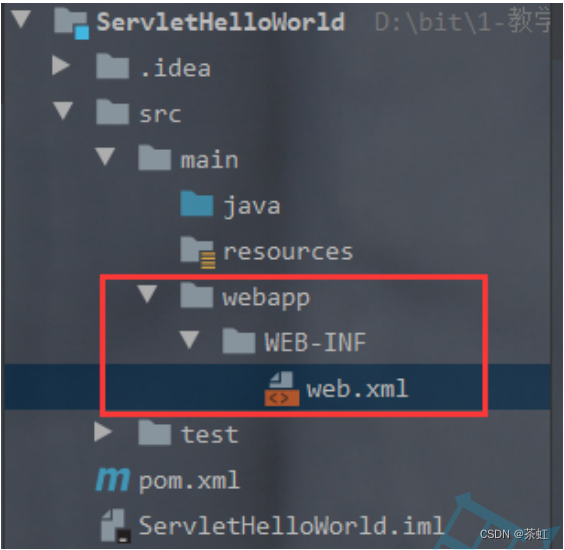
注意单词拼写.
<!DOCTYPE web-app PUBLIC
"-//Sun Microsystems, Inc.//DTD Web Application 2.3//EN"
"http://java.sun.com/dtd/web-app_2_3.dtd" >
<web-app>
  <display-name>Archetype Created Web Application</display-name>
</web-app>2.4 编写代码
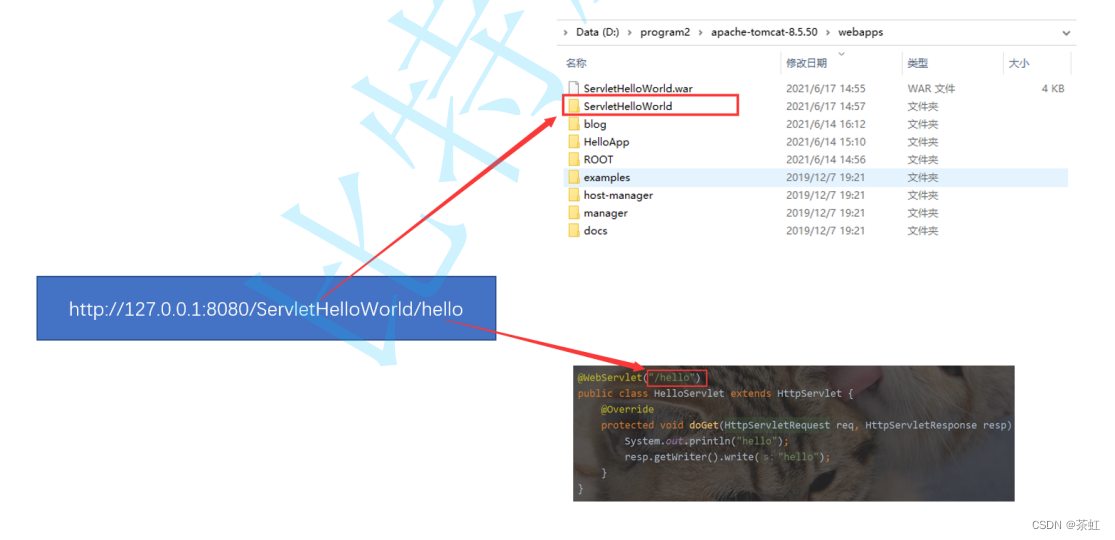
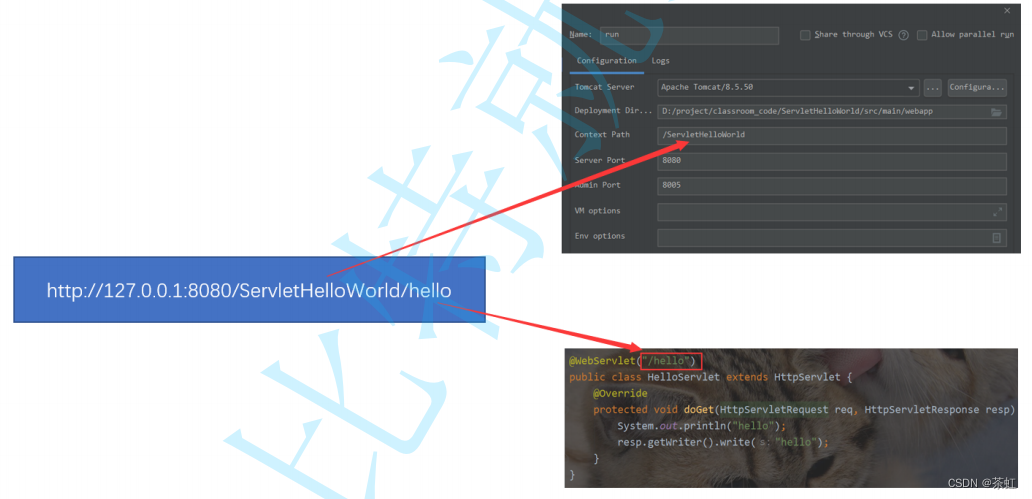
@WebServlet("/hello")
public class HelloServlet extends HttpServlet {
    @Override
    protected void doGet(HttpServletRequest req, HttpServletResponse resp)
throws ServletException, IOException {
        System.out.println("hello");
        resp.getWriter().write("hello");
   }
}- 创建一个类 HelloServlet , 继承自 HttpServlet
- 在这个类上方加上 @WebServlet("/hello") 注解, 表示 Tomcat 收到的请求中, 路径为 /hello的请求才会调用 HelloServlet 这个类的代码. (这个路径未包含 Context Path)
- 重写 doGet 方法. doGet 的参数有两个, 分别表示收到的 HTTP 请求和要构造的 HTTP 响应. 这个方法会在 Tomcat 收到 GET 请求时触发
- HttpServletRequest 表示 HTTP 请求. Tomcat 按照 HTTP 请求的格式把 字符串 格式的请求转成了一个 HttpServletRequest 对象. 后续想获取请求中的信息(方法, url, header, body 等) 都是通过这个对象来获取.
- HttpServletResponse 表示 HTTP 响应. 代码中把响应对象构造好(构造响应的状态码, header,body 等)
- resp.getWriter() 会获取到一个流对象, 通过这个流对象就可以写入一些数据, 写入的数据会被构造成一个 HTTP 响应的 body 部分, Tomcat 会把整个响应转成字符串, 通过 socket 写回给浏览器.
2.5 打包程序
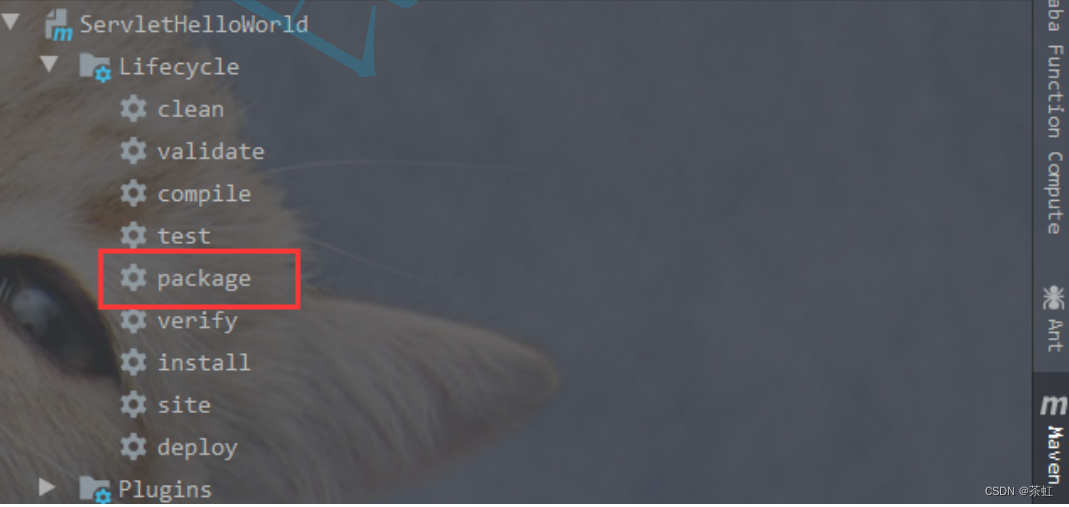
如果比较顺利的话, 能够看到 SUCCESS 这样的字样.

如果代码/配置/环境存在问题, 可能会提示 BUILD FAILED, 可以根据具体提示的错误信息具体解决.
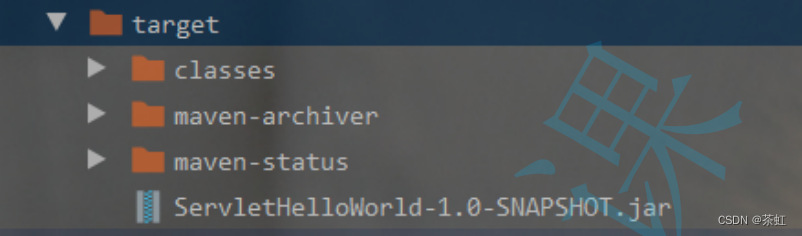
这样的 jar 包并不是我们需要的, Tomcat 需要识别的是另外一种 war 包格式.另外这个 jar 包的名字太复杂了, 我们也希望这个名字能更简单一点.
- war 包和 jar 包的区别
- ServletHelloWorld-1.0-SNAPSHOT.jar 的由来
相当于把 artifactId 和 version 拼接起来了.
<packaging>war</packaging><build>
<finalName>ServletHelloWorld</finalName>
</build><?xml version="1.0" encoding="UTF-8"?>
<project xmlns="http://maven.apache.org/POM/4.0.0"
xmlns:xsi="http://www.w3.org/2001/XMLSchema-instance"
xsi:schemaLocation="http://maven.apache.org/POM/4.0.0
http://maven.apache.org/xsd/maven-4.0.0.xsd">
<modelVersion>4.0.0</modelVersion>
<groupId>org.example</groupId>
<artifactId>ServletHelloWorld</artifactId>
<version>1.0-SNAPSHOT</version>
<dependencies>
<!-- https://mvnrepository.com/artifact/javax.servlet/javax.servlet-api
-->
<dependency>
<groupId>javax.servlet</groupId>
<artifactId>javax.servlet-api</artifactId>
<version>3.1.0</version>
<scope>provided</scope>
</dependency>
</dependencies>
<packaging>war</packaging>
<build>
    <finalName>ServletHelloWorld</finalName>
</build>
</project>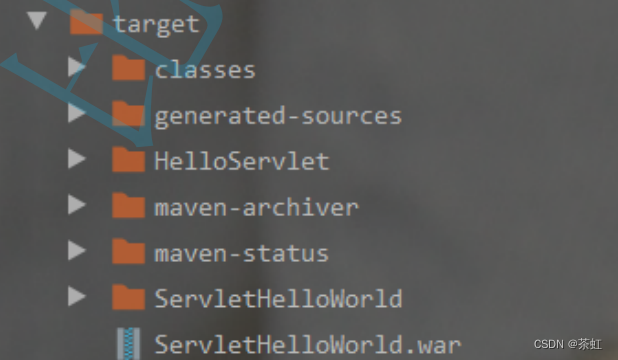
2.6 部署程序
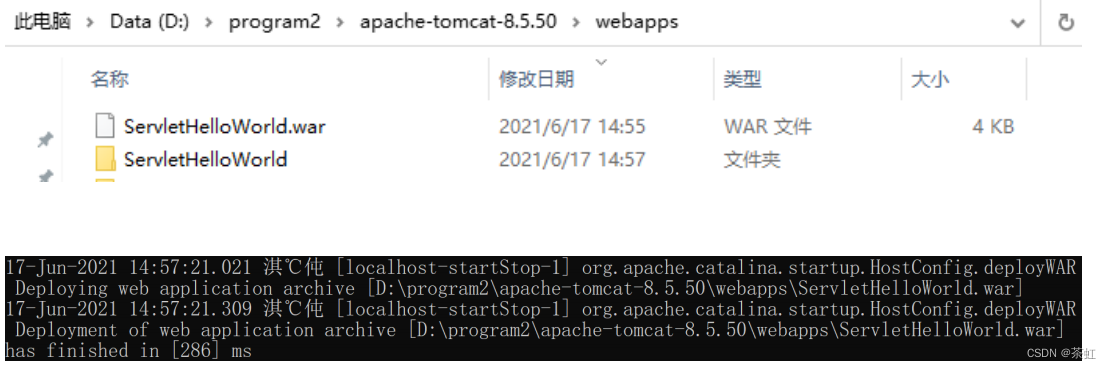
看到这个日志说明 Tomcat 已经正确识别了 ServletHelloWorld 这个 webapp.
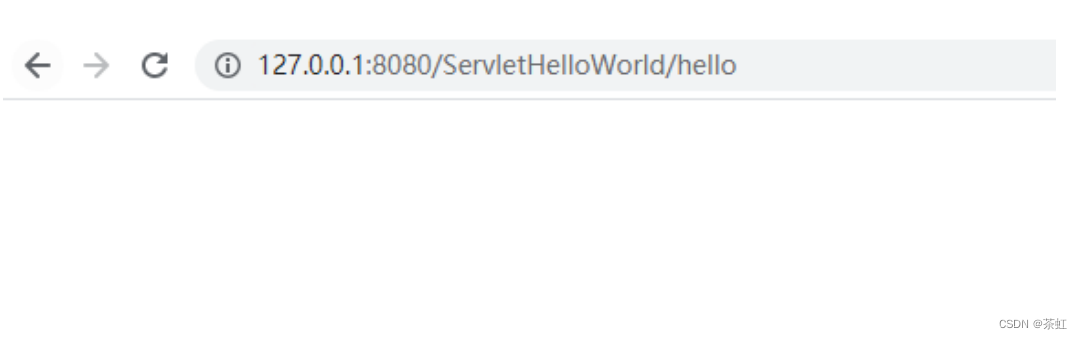
2.7 验证程序
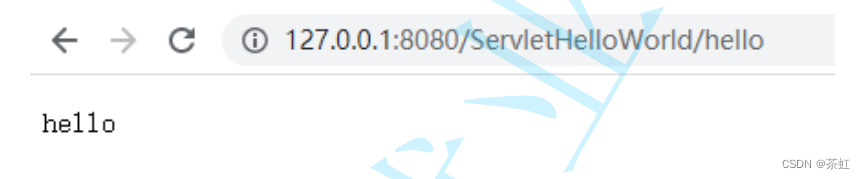
注意: URL 中的 PATH 分成两个部分, 其中 HelloServlet 为 Context Path, hello 为 Servlet Path
3、更方便的部署方式
3.1 安装 Smart Tomcat 插件
2) 选择 Plugins, 选择 Marketplace, 搜索 "tomcat", 点击 "Install".
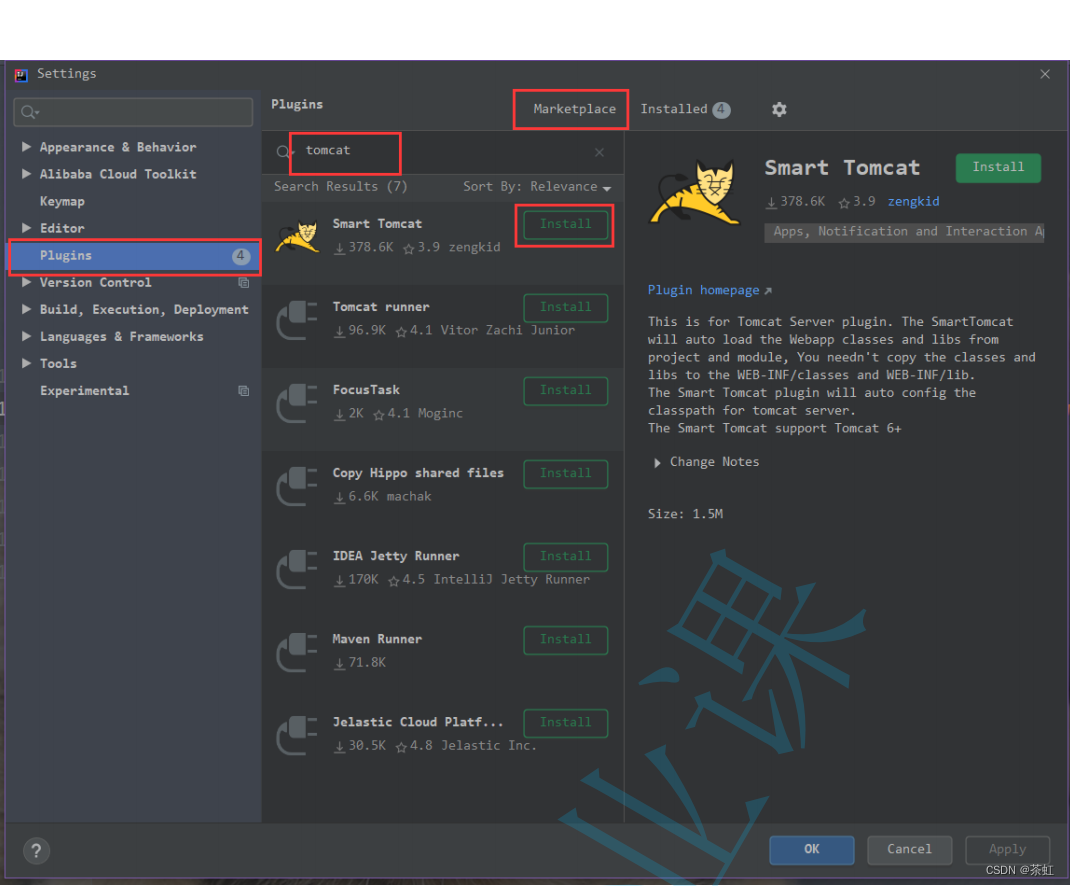
3) 安装完毕之后, 会提示 "重启 IDEA"
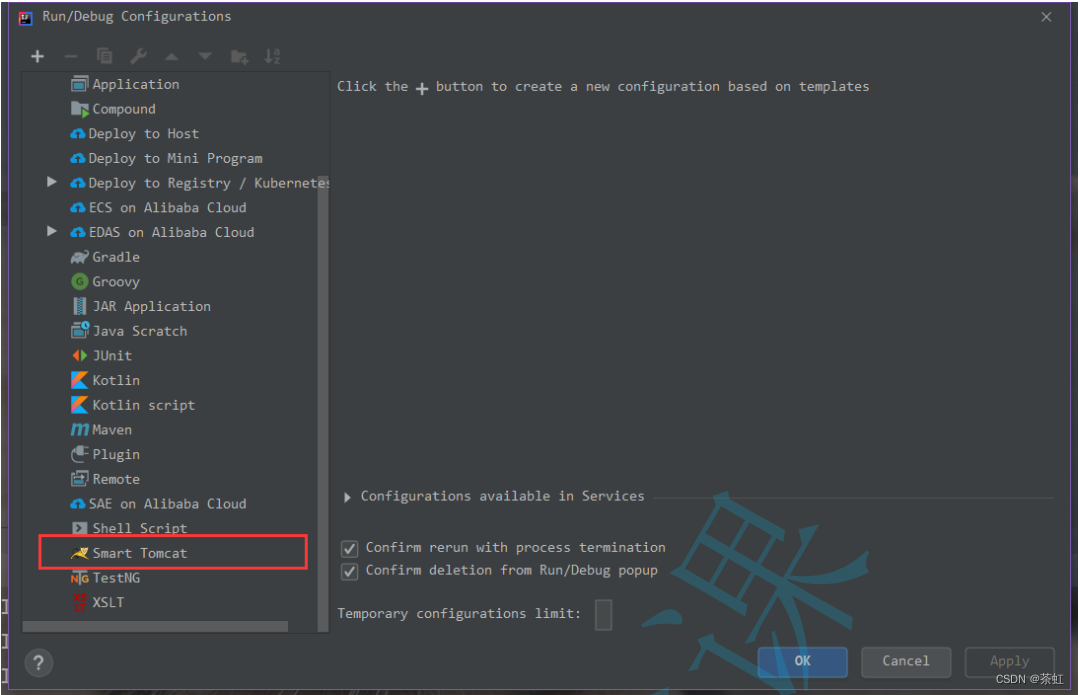
3.2 配置 Smart Tomcat 插件

2) 选择左侧的 "Smart Tomcat"
3) 在 Name 这一栏填写一个名字(可以随便写)
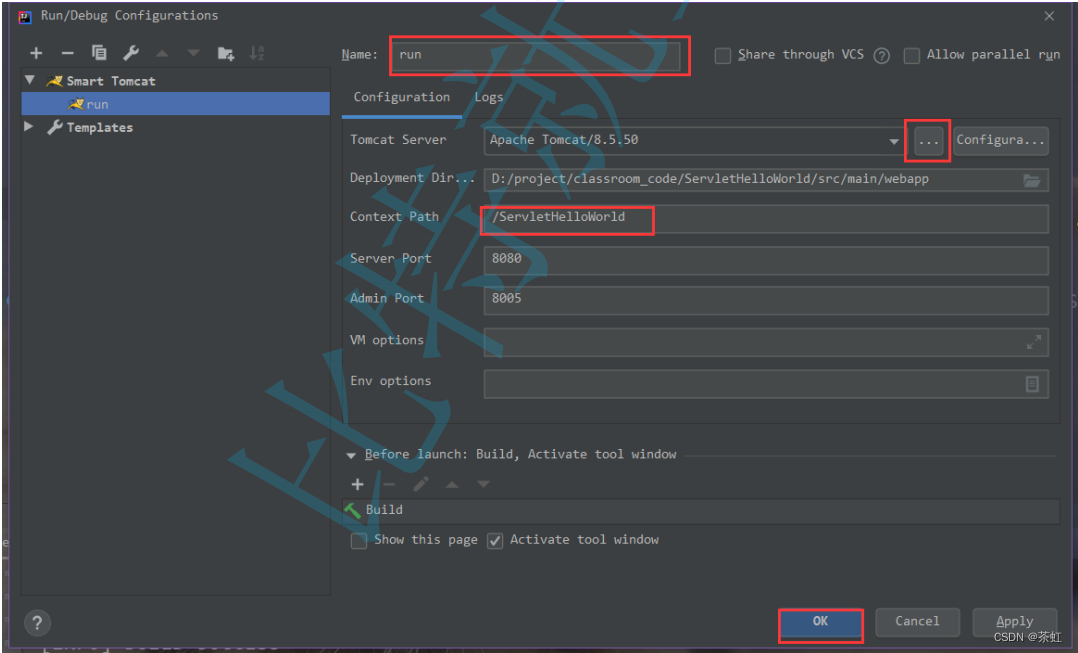
其中 Context Path 默认填写的值是项目名称.
这会影响到后面咱们的访问页面.

点击绿色的三角号, IDEA 就会自动进行编译, 部署, 启动 Tomcat 的过程

此时 Tomcat 日志就会输出在 IDEA 的控制台中, 可以看到现在就不再乱码了.

注意路径的对应关系.
使用 Smart Tomcat 部署的时候, 我们发现 Tomcat 的 webapps 内部并没有被拷贝一个 war 包,也没有看到解压缩的内容。Smart Tomcat 相当于是在 Tomcat 启动的时候直接引用了项目中的 webapp 和 target 目录.

4、访问出错怎么办?
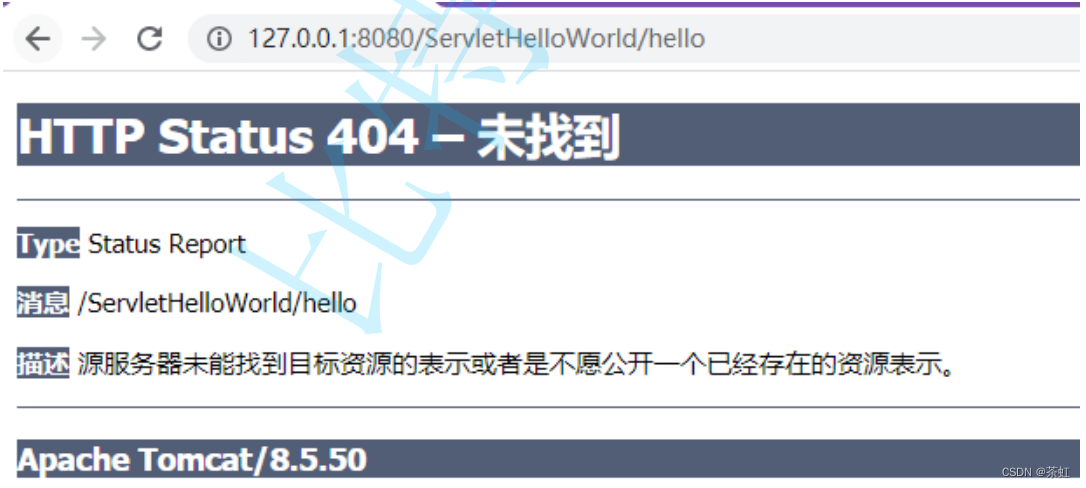
4.1 出现 404
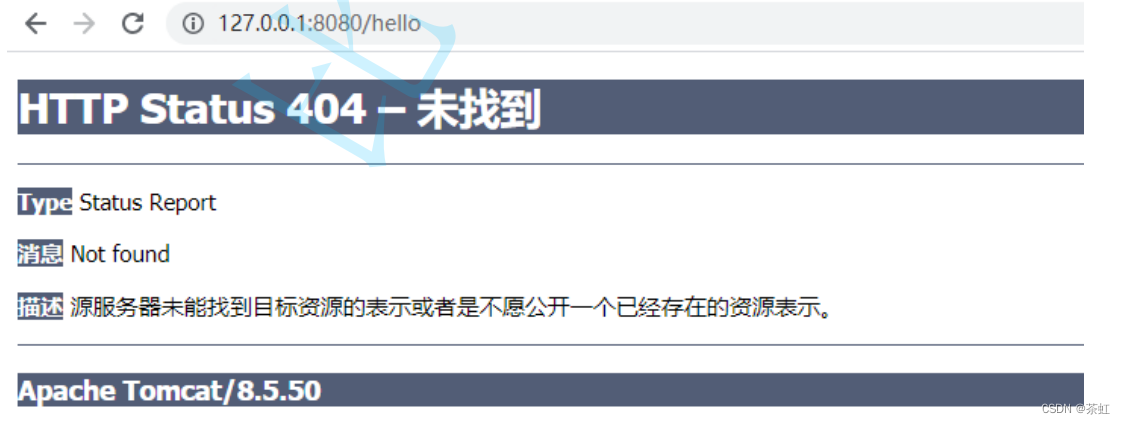
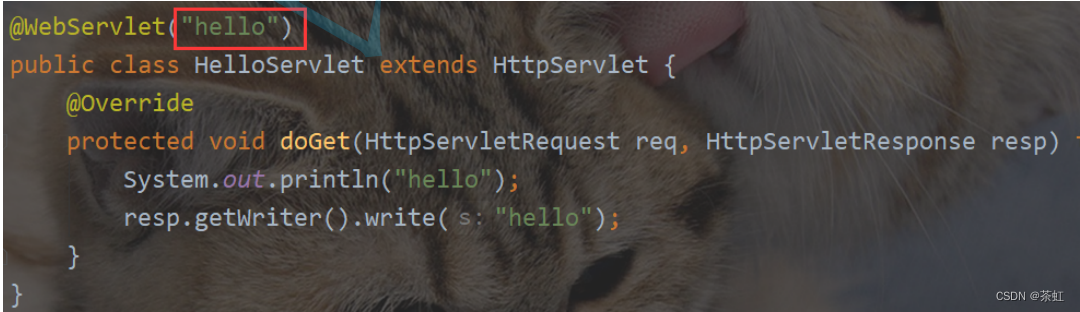
错误实例2: 少写了 Servlet Path

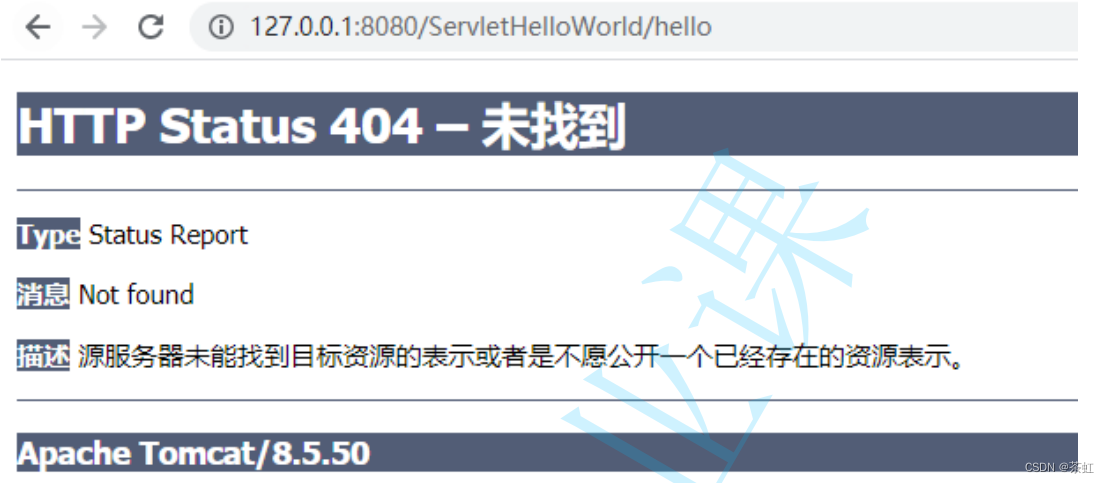
错误实例3: Servlet Path 写的和 URL 不匹配
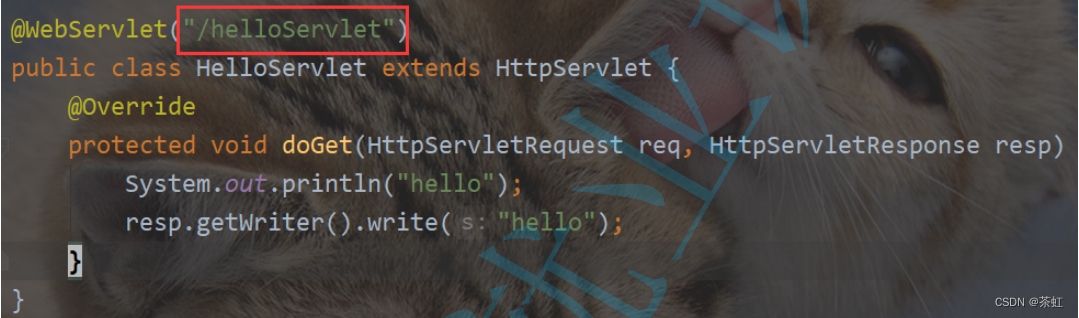
重启 Tomcat 服务器。URL 中的路径写作 "/hello" , 而代码中写作的 Servlet Path 为 "/helloServlet", 两者不匹配.
错误实例4: web.xml 写错了

重启 Tomcat 服务器.
在 Tomcat 启动的时候也有相关的错误提示

4.2 出现 405
@WebServlet("/hello")
public class HelloServlet extends HttpServlet {
}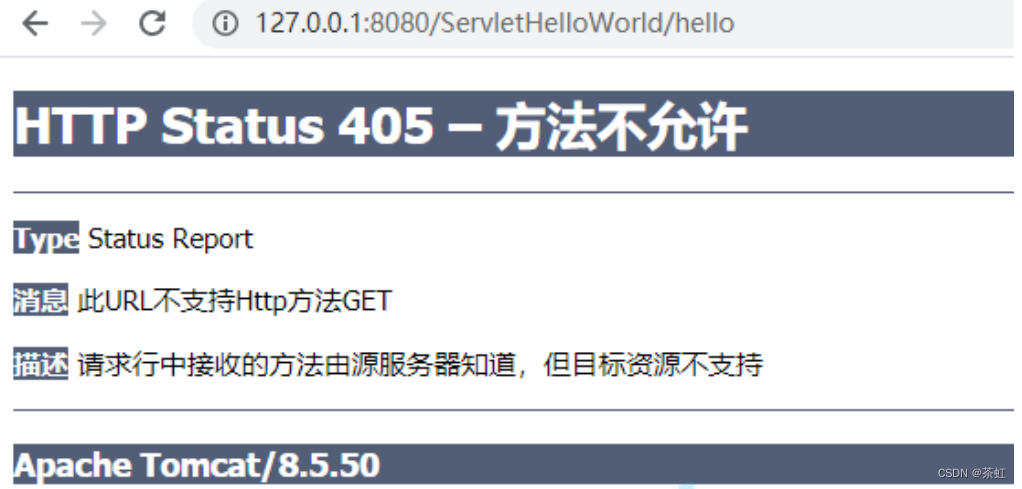
在浏览器地址栏直接输入 URL , 会发送一个 HTTP GET 请求。此时就会根据 /ServletHelloWorld/hello 这个路径找到 HelloServlet 这个类. 并且尝试调用HelloServlet 的 doGet 方法.但是如果没有实现 doGet 方法, 就会出现上述现象.
4.3 出现 500
@WebServlet("/hello")
public class HelloServlet extends HttpServlet {
    @Override
    protected void doGet(HttpServletRequest req, HttpServletResponse resp)
throws ServletException, IOException {
        String s = null;
        resp.getWriter().write(s.length());
   }
}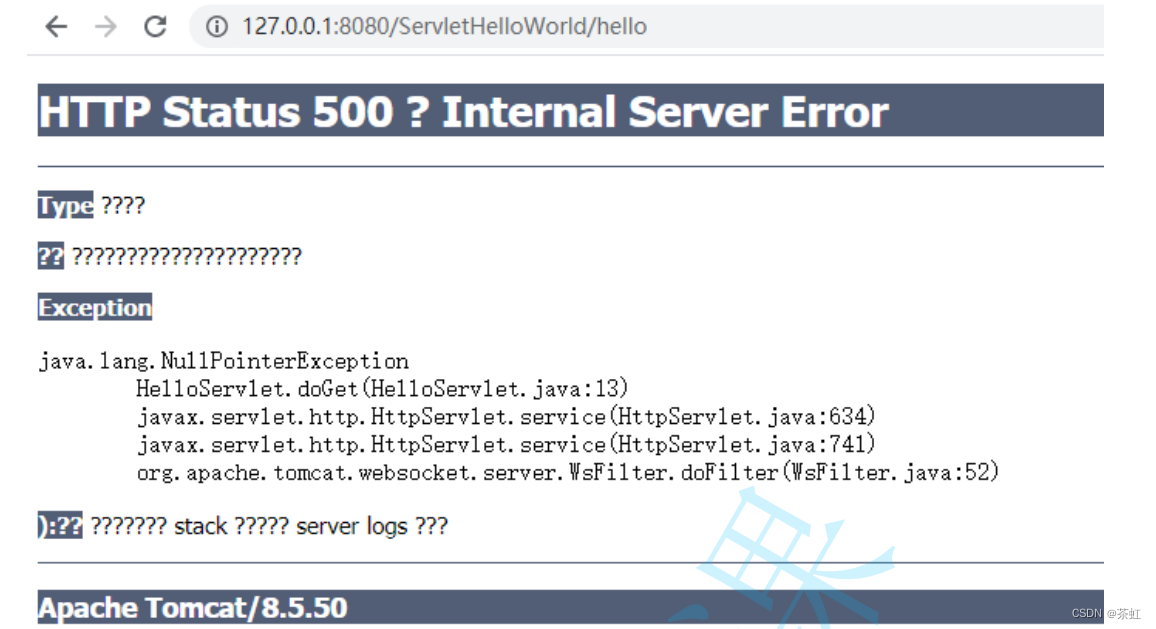
在页面上已经有具体的异常调用栈.
resp.getWriter().write(s.length());4.4 出现 "空白页面"
@WebServlet("/hello")
public class HelloServlet extends HttpServlet {
    @Override
    protected void doGet(HttpServletRequest req, HttpServletResponse resp)
throws ServletException, IOException {
        System.out.println("hello");
   }
}
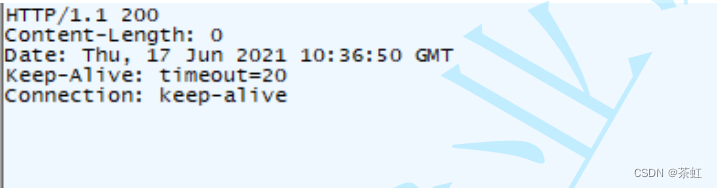
抓包可以看到, 响应 body 中的内容就是 "空数据"
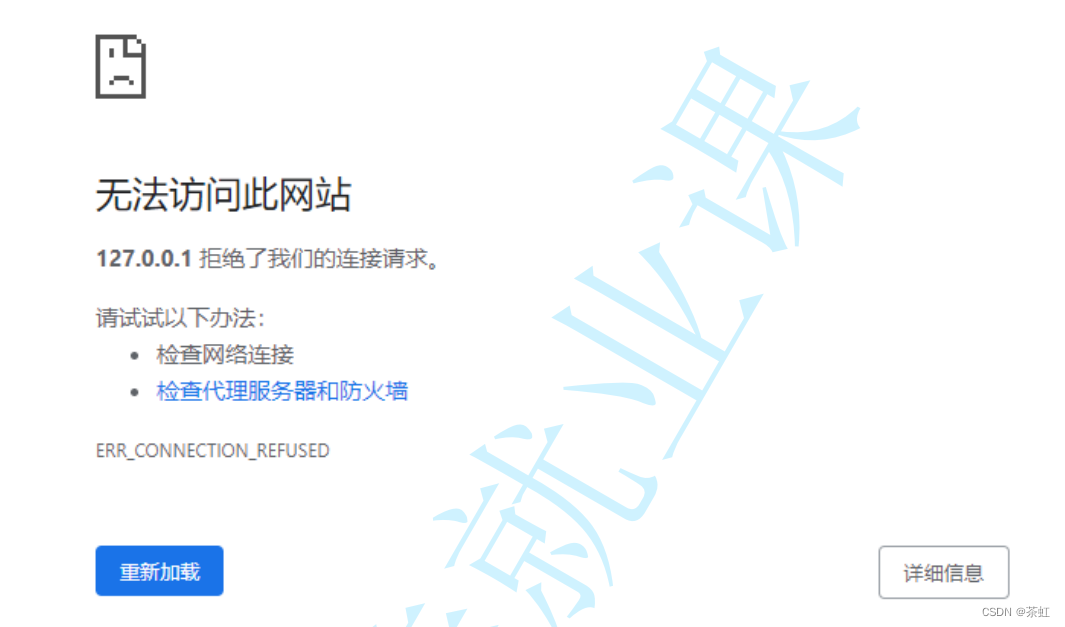
4.5 出现 "无法访问此网站"
应该写作 "/hello", Tomcat 在启动的时候已经提示了相关的错误。Tomcat 启动的日志里面报错信息可能比较多, 需要耐心观察, 找到关键的提示.

看到的现象
4.6 小结
- 4xx 的状态码表示路径不存在, 往往需要检查 URL 是否正确, 和代码中设定的 Context Path 以及Servlet Path 是否一致.
- 5xx 的状态码表示服务器出现错误, 往往需要观察页面提示的内容和 Tomcat 自身的日志, 观察是否存在报错.
- 出现连接失败往往意味着 Tomcat 没有正确启动, 也需要观察 Tomcat 的自身日志是否有错误提示.
- 空白页面这种情况则需要我们使用抓包工具来分析 HTTP 请求响应的具体交互过程.
5、Servlet 运行原理
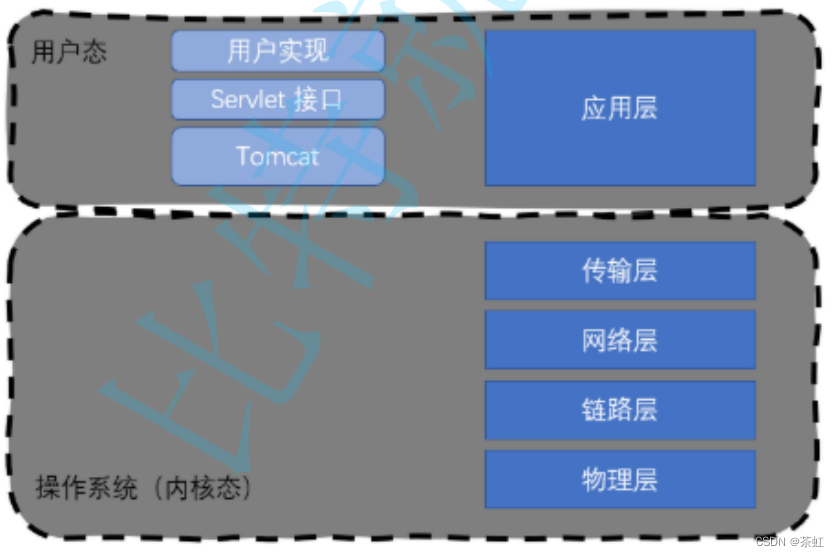
5.1 Tomcat 的定位
当浏览器给服务器发送请求的时候, Tomcat 作为 HTTP 服务器, 就可以接收到这个请求.HTTP 协议作为一个应用层协议, 需要底层协议栈来支持工作. 如下图所示:
更详细的交互过程可以参考下图:
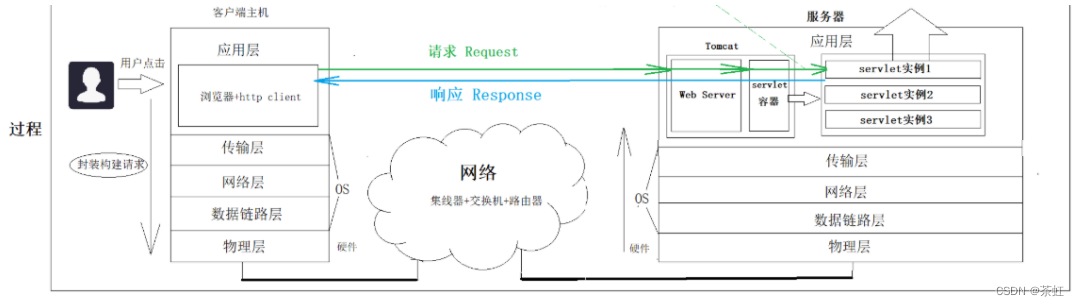
1) 接收请求:
- 用户在浏览器输入一个 URL, 此时浏览器就会构造一个 HTTP 请求.
- 这个 HTTP 请求会经过网络协议栈逐层进行 封装 成二进制的 bit 流, 最终通过物理层的硬件设备转换成光信号/电信号传输出去.
- 这些承载信息的光信号/电信号通过互联网上的一系列网络设备, 最终到达目标主机(这个过程也需要网络层和数据链路层参与).
- 服务器主机收到这些光信号/电信号, 又会通过网络协议栈逐层进行 分用, 层层解析, 最终还原成HTTP 请求. 并交给 Tomcat 进程进行处理(根据端口号确定进程)
- Tomcat 通过 Socket 读取到这个请求(一个字符串), 并按照 HTTP 请求的格式来解析这个请求, 根据请求中的 Context Path 确定一个 webapp, 再通过 Servlet Path 确定一个具体的 类. 再根据当前请求的方法 (GET/POST/...), 决定调用这个类的 doGet 或者 doPost 等方法. 此时我们的代码中的doGet / doPost 方法的第一个参数 HttpServletRequest 就包含了这个 HTTP 请求的详细信息.
- 在我们的 doGet / doPost 方法中, 就执行到了我们自己的代码. 我们自己的代码会根据请求中的一些信息, 来给 HttpServletResponse 对象设置一些属性. 例如状态码, header, body 等.
- 我们的 doGet / doPost 执行完毕后, Tomcat 就会自动把 HttpServletResponse 这个我们刚设置好的对象转换成一个符合 HTTP 协议的字符串, 通过 Socket 把这个响应发送出去.
- 此时响应数据在服务器的主机上通过网络协议栈层层 封装, 最终又得到一个二进制的 bit 流, 通过物理层硬件设备转换成光信号/电信号传输出去.
- 这些承载信息的光信号/电信号通过互联网上的一系列网络设备, 最终到达浏览器所在的主机(这个过程也需要网络层和数据链路层参与).
- 浏览器主机收到这些光信号/电信号, 又会通过网络协议栈逐层进行 分用, 层层解析, 最终还原成HTTP 响应, 并交给浏览器处理.
- 浏览器也通过 Socket 读到这个响应(一个字符串), 按照 HTTP 响应的格式来解析这个响应. 并且把body 中的数据按照一定的格式显示在浏览器的界面上.
5.2 Tomcat 的伪代码
class Tomcat {
 // 用来存储所有的 Servlet 对象
 private List<Servlet> instanceList = new ArrayList<>();
 public void start() {
       // 根据约定,读取 WEB-INF/web.xml 配置文件;
        // 并解析被 @WebServlet 注解修饰的类

        // 假定这个数组里就包含了我们解析到的所有被 @WebServlet 注解修饰的类.
        Class<Servlet>[] allServletClasses = ...;

        // 这里要做的的是实例化出所有的 Servlet 对象出来;
        for (Class<Servlet> cls : allServletClasses) {
            // 这里是利用 java 中的反射特性做的
           // 实际上还得涉及一个类的加载问题,因为我们的类字节码文件,是按照约定的
            // 方式(全部在 WEB-INF/classes 文件夹下)存放的,所以 tomcat 内部是
            // 实现了一个自定义的类加载器(ClassLoader)用来负责这部分工作。

            Servlet ins = cls.newInstance();
            instanceList.add(ins);
       }

        // 调用每个 Servlet 对象的 init() 方法,这个方法在对象的生命中只会被调用这一次;
        for (Servlet ins : instanceList) {
            ins.init();
       }

        // 利用我们之前学过的知识,启动一个 HTTP 服务器
        // 并用线程池的方式分别处理每一个 Request
        ServerSocket serverSocket = new ServerSocket(8080);
        // 实际上 tomcat 不是用的固定线程池,这里只是为了说明情况
        ExecuteService pool = Executors.newFixedThreadPool(100);

        while (true) {
            Socket socket = ServerSocket.accept();
            // 每个请求都是用一个线程独立支持,这里体现了我们 Servlet 是运行在多线程环境下的
            pool.execute(new Runnable() {
               doHttpRequest(socket);
           });
       }
        // 调用每个 Servlet 对象的 destroy() 方法,这个方法在对象的生命中只会被调用这一次;
        for (Servlet ins : instanceList) {
            ins.destroy();
       }
   }

    public static void main(String[] args) {
        new Tomcat().start();
   }
}- Tomcat 的代码中内置了 main 方法. 当我们启动 Tomcat 的时候, 就是从 Tomcat 的 main 方法开始执行的.
- 被 @WebServlet 注解修饰的类会在 Tomcat 启动的时候就被获取到, 并集中管理.
- Tomcat 通过 反射 这样的语法机制来创建被 @WebServlet 注解修饰的类的实例.
- 这些实例被创建完了之后, 会点调用其中的 init 方法进行初始化. (这个方法是 HttpServlet 自带的,我们自己写的类可以重写 init)
- 这些实例被销毁之前, 会调用其中的 destory 方法进行收尾工作. (这个方法是 HttpServlet 自带的,我们自己写的类可以重写 destory)
- Tomcat 内部也是通过 Socket API 进行网络通信.
- Tomcat 为了能同时相应多个 HTTP 请求, 采取了多线程的方式实现. 因此 Servlet 是运行在 多线程环境下的.
class Tomcat {
    void doHttpRequest(Socket socket) {
        // 参照我们之前学习的 HTTP 服务器类似的原理,进行 HTTP 协议的请求解析,和响应构建
        HttpServletRequest req = HttpServletRequest.parse(socket);
        HttpServletRequest resp = HttpServletRequest.build(socket);

        // 判断 URL 对应的文件是否可以直接在我们的根路径上找到对应的文件,如果找到,就是静态
内容
        // 直接使用我们学习过的 IO 进行内容输出
        if (file.exists()) {
            // 返回静态内容
            return;
       }

        // 走到这里的逻辑都是动态内容了

        // 根据我们在配置中说的,按照 URL -> servlet-name -> Servlet 对象的链条
        // 最终找到要处理本次请求的 Servlet 对象
        Servlet ins = findInstance(req.getURL());

        // 调用 Servlet 对象的 service 方法
        // 这里就会最终调用到我们自己写的 HttpServlet 的子类里的方法了
        try {
       ins.service(req, resp);
       } catch (Exception e) {
            // 返回 500 页面,表示服务器内部错误
       }
   }
}- Tomcat 从 Socket 中读到的 HTTP 请求是一个字符串, 然后会按照 HTTP 协议的格式解析成一个HttpServletRequest 对象.
- Tomcat 会根据 URL 中的 path 判定这个请求是请求一个静态资源还是动态资源. 如果是静态资源,直接找到对应的文件把文件的内容通过 Socket 返回. 如果是动态资源, 才会执行到 Servlet的相关逻辑.
- Tomcat 会根据 URL 中的 Context Path 和 Servlet Path 确定要调用哪个 Servlet 实例的 service方法.
- 通过 service 方法, 就会进一步调用到我们之前写的 doGet 或者 doPost
class Servlet {
    public void service(HttpServletRequest req, HttpServletResponse resp) {
        String method = req.getMethod();
        if (method.equals("GET")) {
            doGet(req, resp);
       } else if (method.equals("POST")) {
            doPost(req, resp);
       } else if (method.equals("PUT")) {
            doPut(req, resp);
       } else if (method.equals("DELETE")) {
            doDelete(req, resp);
       }
       ......
   }
}- Servlet 的 service 方法内部会根据当前请求的方法, 决定调用其中的某个 doXXX 方法.
- 在调用 doXXX 方法的时候, 就会触发 多态 机制, 从而执行到我们自己写的子类中的 doXXX 方法.
Servlet ins = new HelloServlet();
ins.doGet(req, resp);
6、Servlet API 详解
6.1 HttpServlet
- 核心方法
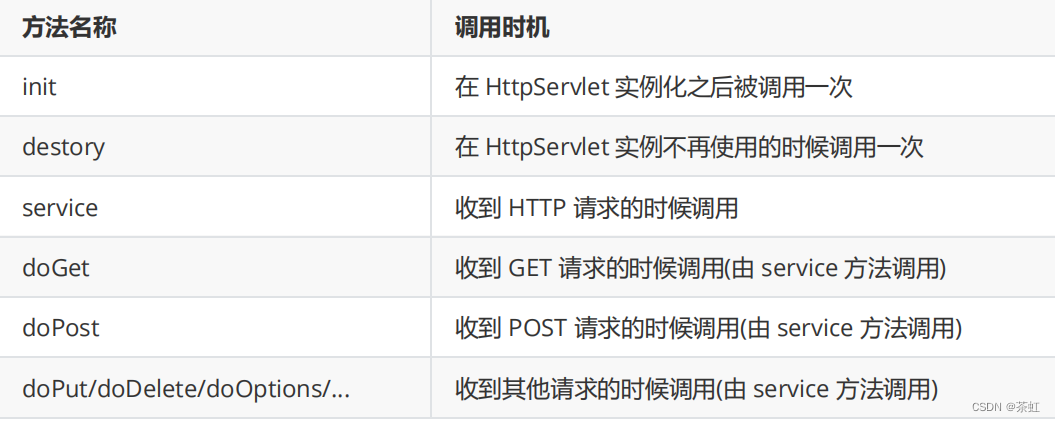
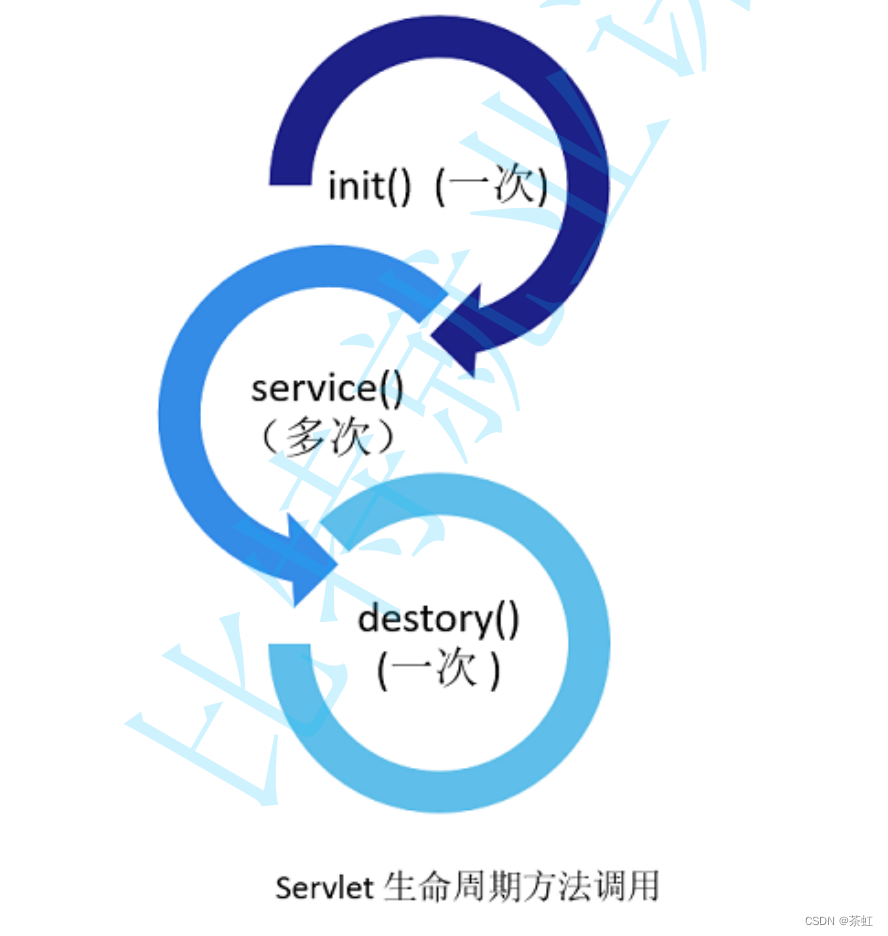
我们实际开发的时候主要重写 doXXX 方法, 很少会重写 init / destory / service .这些方法的调用时机, 就称为 "Servlet 生命周期". (也就是描述了一个 Servlet 实例从生到死的过程).
- 代码示例: 处理 GET 请求
@WebServlet("/method")
public class MethodServlet extends HttpServlet {
@Override
protected void doGet(HttpServletRequest req, HttpServletResponse resp)
throws ServletException, IOException {
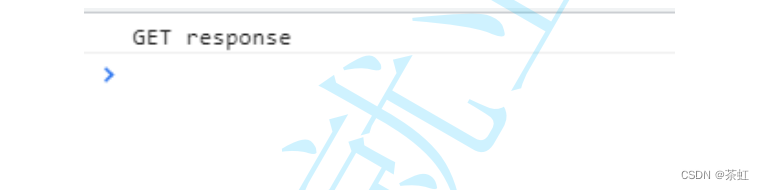
resp.getWriter().write("GET response");
}
}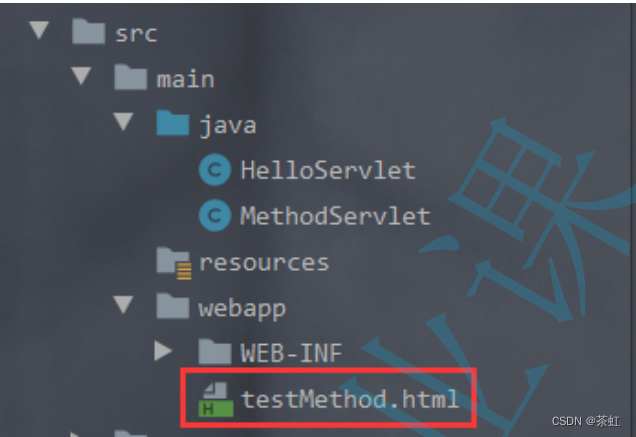
一个 Servlet 程序中可以同时部署静态文件. 静态文件就放到 webapp 目录中即可.
<button onclick="sendGet()">发送 GET 请求</button>
<script>
    function sendGet() {
        ajax({
            method: 'GET',
            url: 'method',
            callback: function (body, status) {
                console.log(body);
           }
       });
   }
    // 把之前封装的 ajax 函数拷贝过来
    function ajax(args) {
        var xhr = new XMLHttpRequest();
        xhr.onreadystatechange = function () {
            // 0: 请求未初始化
            // 1: 服务器连接已建立
            // 2: 请求已接收
            // 3: 请求处理中
            // 4: 请求已完成,且响应已就绪
            if (xhr.readyState == 4) {
                args.callback(xhr.responseText, xhr.status)
           }
       }
        xhr.open(args.method, args.url);
        if (args.contentType) {
            xhr.setRequestHeader('Content-type', args.contentType);
       }
        if (args.body) {
            xhr.send(args.body);
       } else {
            xhr.send();
       }
   }
</script>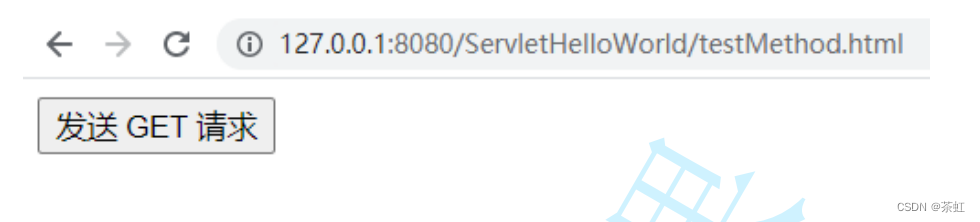
点击 "发送 GET 请求" 按钮, 即可在控制台看到响应内容
通过 Fiddler 抓包, 可以看到,
- 当浏览器中输入 URL 之后, 浏览器先给服务器发送了一个 HTTP GET 请求
- 当点击 "发送 GET 请求" 按钮, 浏览器又通过 ajax 给服务器发送了一个 HTTP GET 请求
注意这个 ajax 请求的 URL 路径. 代码中写的 URL url: 'method', 为一个相对路径, 最终真实发送的请求的 URL 路径为 /ServletHelloWorld/method


- 关于乱码问题
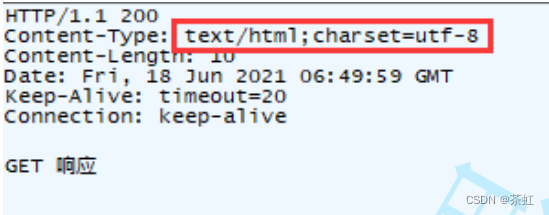
resp.getWriter().write("GET 响应");
关于 "乱码":中文的编码方式有很多种. 其中最常见的就是 utf-8 。如果没有显式的指定编码方式, 则浏览器不能正确识别编码, 就会出现乱码的情况.

此时通过抓包可以看到, 当加上了 resp.setContentType("text/html; charset=utf-8"); 代码之后, 响应中多了 Content-Type 字段, 内部指定了编码方式. 浏览器看到这个字段就能够正确解析中文了.
- 代码示例: 处理 POST 请求
@Override
protected void doPost(HttpServletRequest req, HttpServletResponse resp) throws
ServletException, IOException {
    resp.setContentType("text/html; charset=utf-8");
    resp.getWriter().write("POST 响应");
}
在 testMethod.html 中, 新增一个按钮, 和对应的点击事件处理函数
<button onclick="sendPost()">发送 POST 请求</button>
<script>
    function sendPost() {
        ajax({
            method: 'POST',
            url: 'method',
            callback: function (body, status) {
                console.log(body);
           }
       })
   }
</script>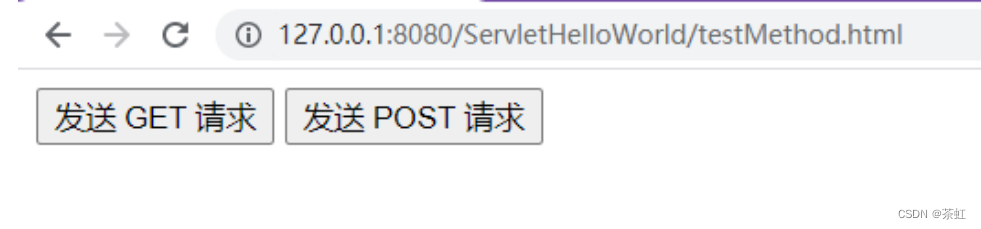

通过类似的方式还可以验证 doPut, doDelete 等方法. 此处不再一一演示.
6.2 HttpServletRequest
- 核心方法
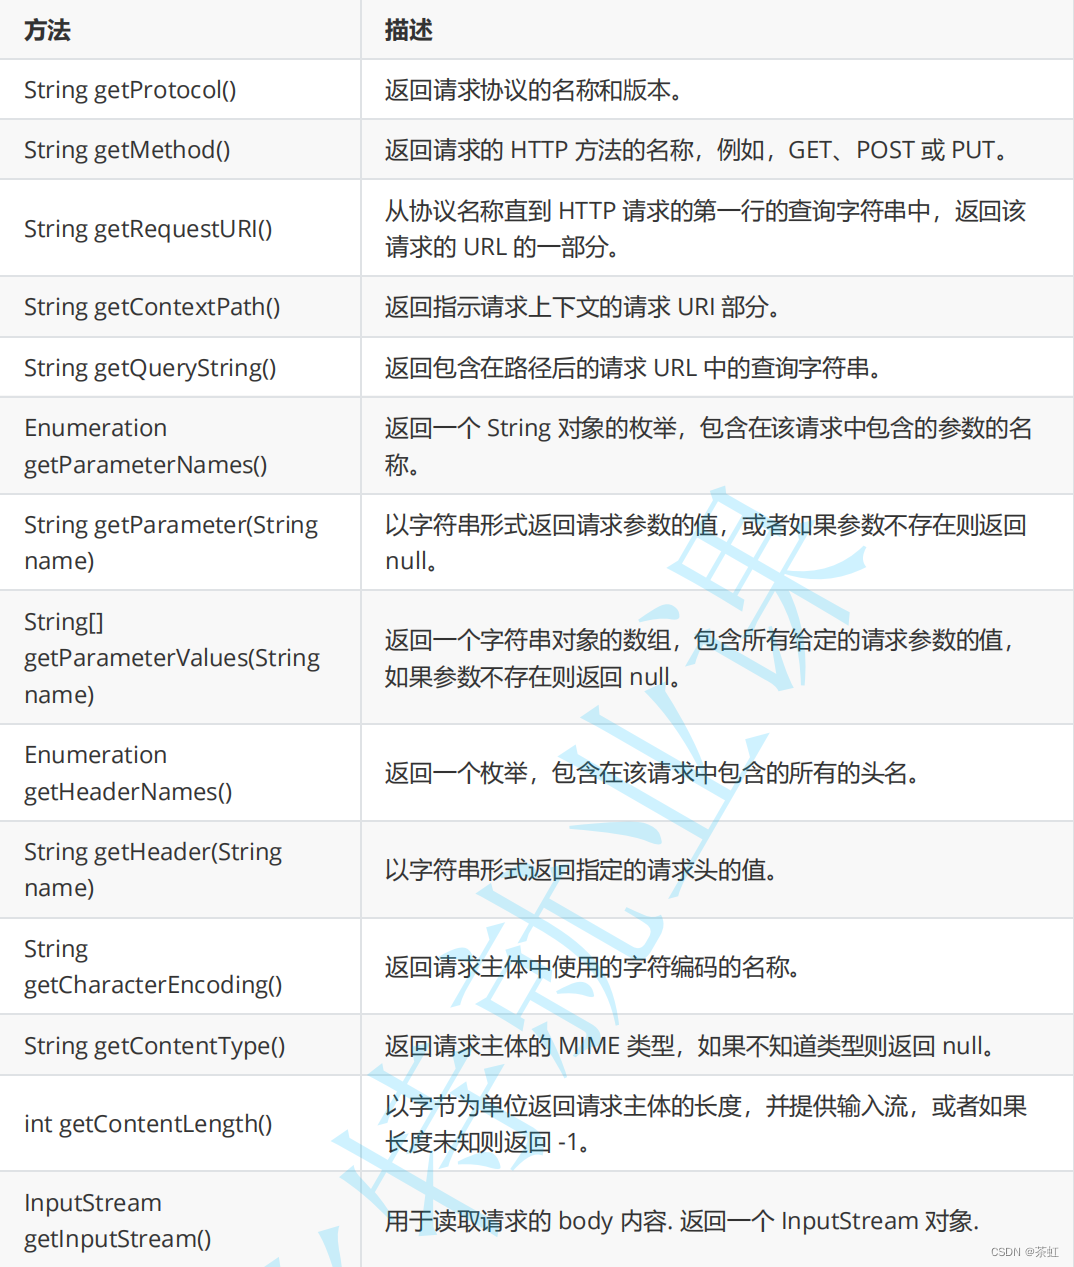
通过这些方法可以获取到一个请求中的各个方面的信息.
注意: 请求对象是服务器收到的内容, 不应该修改. 因此上面的方法也都只是 "读" 方法, 而不是 "写"方法.
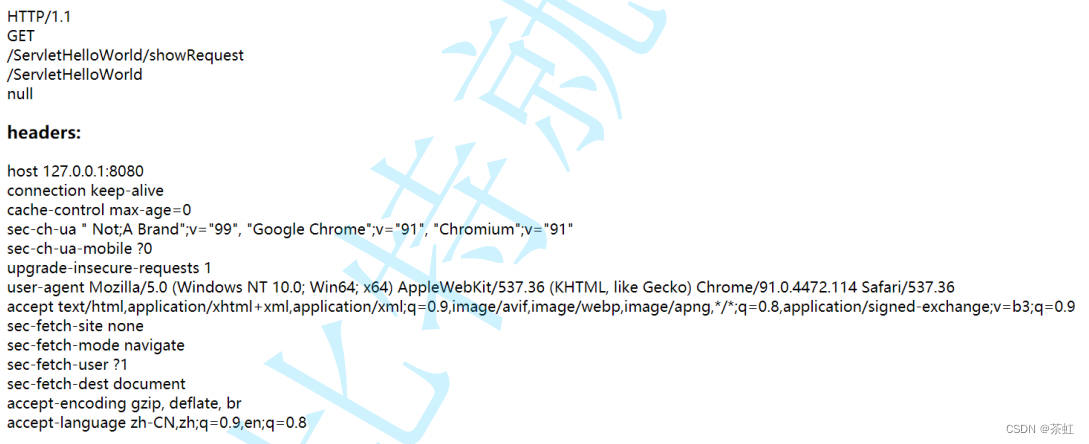
- 代码示例: 打印请求信息
@WebServlet("/showRequest")
public class ShowRequest extends HttpServlet {
    @Override
    protected void doGet(HttpServletRequest req, HttpServletResponse resp)
throws ServletException, IOException {
        resp.setContentType("text/html; charset=utf-8");
        StringBuilder respBody = new StringBuilder();
        respBody.append(req.getProtocol());
        respBody.append("<br>");
        respBody.append(req.getMethod());
        respBody.append("<br>");
        respBody.append(req.getRequestURI());
        respBody.append("<br>");
        respBody.append(req.getContextPath());
        respBody.append("<br>");
        respBody.append(req.getQueryString());
        respBody.append("<br>");
        respBody.append("<h3>headers:</h3>");
        Enumeration<String> headerNames = req.getHeaderNames();
        while (headerNames.hasMoreElements()) {
            String headerName = headerNames.nextElement();
            respBody.append(headerName + " ");
            respBody.append(req.getHeader(headerName));
            respBody.append("<br>");
       }
        resp.getWriter().write(respBody.toString());
   }
}
- 代码示例: 获取 GET 请求中的参数
GET 请求中的参数一般都是通过 query string 传递给服务器的。 形如https://v.bitedu.vip/personInf/student?userId=1111&classId=100。此时浏览器通过 query string 给服务器传递了两个参数 , userId 和 classId, 值分别是 1111 和 100。在服务器端就可以通过getParameter 来获取到参数的值。
创建 GetParameter类
@WebServlet("/getParameter")
public class GetParameter extends HttpServlet {
    @Override
    protected void doGet(HttpServletRequest req, HttpServletResponse resp)
throws ServletException, IOException {
        resp.setContentType("text/html; charset=utf-8");
        String userId = req.getParameter("userId");
        String classId = req.getParameter("classId");
        resp.getWriter().write("userId: " + userId + ", " + "classId: " +
classId);
   }
}
当没有 query string的时候, getParameter 获取的值为 null.

此时说明服务器已经获取到客户端传递过来的参数。getParameter 的返回值类型为 String. 必要的时候需要手动把 String 转成 int.
- 代码示例: 获取 POST 请求中的参数(1)
@WebServlet("/postParameter")
public class PostParameter extends HttpServlet {
    @Override
    protected void doPost(HttpServletRequest req, HttpServletResponse resp)
throws ServletException, IOException {
        resp.setContentType("text/html; charset=utf-8");
        String userId = req.getParameter("userId");
        String classId = req.getParameter("classId");
        resp.getWriter().write("userId: " + userId + ", " + "classId: " +
classId);
   }
}<form action="postParameter" method="POST">
<input type="text" name="userId">
<input type="text" name="classId">
<input type="submit" value="提交">
</form>
在输入框中输入内容, 点击提交

可以看到跳转到了新的页面, 并显示出了刚刚传入的数据.

此时通过抓包可以看到, form 表单构造的 body 数据的格式为:
POST http://127.0.0.1:8080/ServletHelloWorld/postParameter HTTP/1.1
Host: 127.0.0.1:8080
Connection: keep-alive
Content-Length: 22
Cache-Control: max-age=0
sec-ch-ua: " Not;A Brand";v="99", "Google Chrome";v="91", "Chromium";v="91"
sec-ch-ua-mobile: ?0
Upgrade-Insecure-Requests: 1
Origin: http://127.0.0.1:8080
Content-Type: application/x-www-form-urlencoded
User-Agent: Mozilla/5.0 (Windows NT 10.0; Win64; x64) AppleWebKit/537.36 (KHTML,
like Gecko) Chrome/91.0.4472.114 Safari/537.36
Accept:
text/html,application/xhtml+xml,application/xml;q=0.9,image/avif,image/webp,imag
e/apng,*/*;q=0.8,application/signed-exchange;v=b3;q=0.9
Sec-Fetch-Site: same-origin
Sec-Fetch-Mode: navigate
Sec-Fetch-User: ?1
Sec-Fetch-Dest: document
Referer: http://127.0.0.1:8080/ServletHelloWorld/testPost.html
Accept-Encoding: gzip, deflate, br
Accept-Language: zh-CN,zh;q=0.9,en;q=0.8
userId=123&classId=456
Content-Type: application/x-www-form-urlencoded, 对应的 body 数据格式就形如 userId=123&classId=456
- 代码示例: 获取 POST 请求中的参数(2)
@WebServlet("/postParameterJson")
public class PostParameterJson extends HttpServlet {
    @Override
    protected void doPost(HttpServletRequest req, HttpServletResponse resp)
throws ServletException, IOException {
        resp.setContentType("application/json;charset=utf-8");
        String body = readBody(req);
        resp.getWriter().write(body);
   }
    private String readBody(HttpServletRequest req) throws IOException {
        int contentLength = req.getContentLength();
        byte[] buffer = new byte[contentLength];
        InputStream inputStream = req.getInputStream();
        inputStream.read(buffer);
        return new String(buffer, "utf-8");
   }
}<button onclick="sendJson()">发送 JSON 格式 POST 请求</button>
<script>
function sendJson() {
ajax({
url: 'postParameterJson',
method: 'POST',
contentType: 'application/json; charset=utf-8',
body: JSON.stringify({ userId: 123, classId: 456 }),
callback: function (body, status) {
console.log(body);
}
});
}
function ajax(args) {
// 函数体略.... 参考之前封装的版本.
}
</script>
点击按钮, 则浏览器就会给服务器发送一个 POST 请求, body 中带有 JSON 格式.
POST http://127.0.0.1:8080/ServletHelloWorld/postParameterJson HTTP/1.1
Host: 127.0.0.1:8080
Connection: keep-alive
Content-Length: 28
sec-ch-ua: " Not;A Brand";v="99", "Google Chrome";v="91", "Chromium";v="91"
sec-ch-ua-mobile: ?0
User-Agent: Mozilla/5.0 (Windows NT 10.0; Win64; x64) AppleWebKit/537.36 (KHTML,
like Gecko) Chrome/91.0.4472.114 Safari/537.36
Content-Type: application/json; charset=utf-8
Accept: */*
Origin: http://127.0.0.1:8080
Sec-Fetch-Site: same-origin
Sec-Fetch-Mode: cors
Sec-Fetch-Dest: empty
Referer: http://127.0.0.1:8080/ServletHelloWorld/testPostJson.html
Accept-Encoding: gzip, deflate, br
Accept-Language: zh-CN,zh;q=0.9,en;q=0.8
{"userId":123,"classId":456}
注意: 到目前为止, 服务器拿到的 JSON 数据仍然是一个整体的 String 类型, 如果要想获取到 userId 和classId 的具体值, 还需要搭配 JSON 库进一步解析.
- 代码示例: 获取 POST 请求中的参数(3)

2) 把中央仓库中的依赖配置添加到 pom.xml 中, 形如:
<dependency>
    <groupId>com.fasterxml.jackson.core</groupId>
    <artifactId>jackson-databind</artifactId>
    <version>2.12.3</version>
</dependency>// 创建一个新的类表示 JSON 数据, 属性的名字需要和 JSON 字符串中的 key 一致.
class JsonData {
public String userId;
public String classId; }
@WebServlet("/postParameterJson")
public class PostParameterJson extends HttpServlet {
@Override
protected void doPost(HttpServletRequest req, HttpServletResponse resp)
throws ServletException, IOException {
resp.setContentType("text/html;charset=utf-8");
String body = readBody(req);
// 创建 ObjectMapper 对象. 这个是 Jackson 中的核心类.
ObjectMapper objectMapper = new ObjectMapper();
// 通过 readValue 方法把 body 这个字符串转成 JsonData 对象
JsonData jsonData = objectMapper.readValue(body, JsonData.class);
resp.getWriter().write("userId: " + jsonData.userId + ", " + "classId: "
+ jsonData.classId);
}
private String readBody(HttpServletRequest req) throws IOException {
int contentLength = req.getContentLength();
byte[] buffer = new byte[contentLength];
InputStream inputStream = req.getInputStream();
inputStream.read(buffer);
return new String(buffer, "utf-8");
}
}- JsonData 这个类用来表示解析之后生成的 JSON 对象. 这个类的属性的名字和类型要和 JSON 字符串的 key 相对应.
- Jackson 库的核心类为 ObjectMapper. 其中的 readValue 方法把一个 JSON 字符串转成 Java 对象. 其中的 writeValueAsString 方法把一个 Java 对象转成 JSON 格式字符串.
- readValue 的第二个参数为 JsonData 的 类对象. 通过这个类对象, 在 readValue 的内部就可以借助反射机制来构造出 JsonData 对象, 并且根据 JSON 中key 的名字, 把对应的 value 赋值给JsonData 的对应字段.
6.3 HttpServletResponse
Servlet 中的 doXXX 方法的目的就是根据请求计算得到相应 , 然后把响应的数据设置到 HttpServletResponse 对象中。 然后 Tomcat 就会把这个 HttpServletResponse 对象按照 HTTP 协议的格式 , 转成一个字符串 , 并通过Socket 写回给浏览器 .
- 核心方法
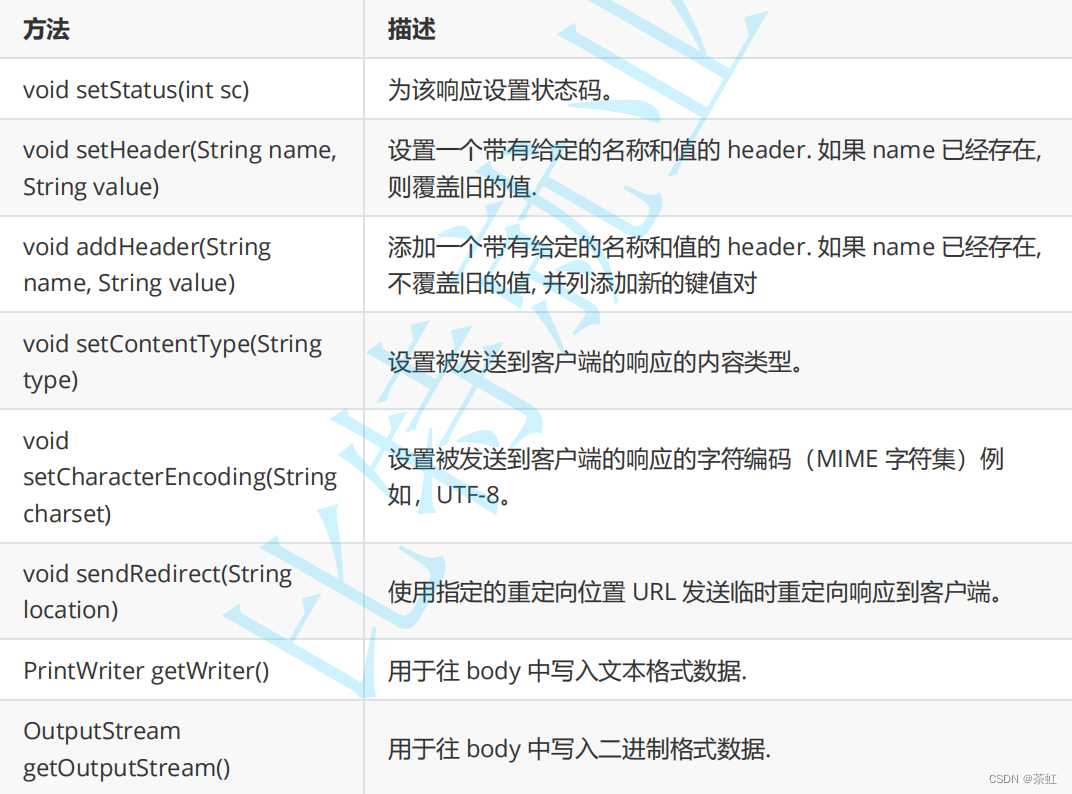
注意: 响应对象是服务器要返回给浏览器的内容, 这里的重要信息都是程序猿设置的. 因此上面的方法都是 "写" 方法.
注意: 对于状态码/响应头的设置要放到 getWriter / getOutputStream 之前. 否则可能设置失效.
- 代码示例: 设置状态码
@WebServlet("/statusServlet")
public class StatusServlet extends HttpServlet {
    @Override
    protected void doGet(HttpServletRequest req, HttpServletResponse resp)
throws ServletException, IOException {
        String statusString = req.getParameter("status");
        if (statusString != null) {
            resp.setStatus(Integer.parseInt(statusString));
       }
        resp.getWriter().write("status: " + statusString);
   }
}
抓包结果:
HTTP/1.1 200
Content-Length: 11
Date: Mon, 21 Jun 2021 08:05:37 GMT
Keep-Alive: timeout=20
Connection: keep-alive
status: 200- 代码示例: 自动刷新
@WebServlet("/autoRefreshServlet")
public class AutoRefreshServlet extends HttpServlet {
    @Override
    protected void doGet(HttpServletRequest req, HttpServletResponse resp)
throws ServletException, IOException {
        resp.setHeader("Refresh", "1");
        long timeStamp = new Date().getTime();
        resp.getWriter().write("timeStamp: " + timeStamp);
   }
}
通过 HTTP 响应报头中的 Refresh 字段 , 可以控制浏览器自动刷新的时机 .通过 Date 类的 getTime 方法可以获取到当前时刻的毫秒级时间戳 .

抓包结果
HTTP/1.1 200
Refresh: 1
Content-Length: 24
Date: Mon, 21 Jun 2021 08:14:29 GMT
Keep-Alive: timeout=20
Connection: keep-alive
timeStamp: 1624263269995- 代码示例: 重定向
@WebServlet("/redirectServlet")
public class RedirectServlet extends HttpServlet {
    @Override
    protected void doGet(HttpServletRequest req, HttpServletResponse resp)
throws ServletException, IOException {
        resp.sendRedirect("http://www.sogou.com");
   }
}
HTTP/1.1 302
Location: http://www.sogou.com
Content-Length: 0
Date: Mon, 21 Jun 2021 08:17:26 GMT
Keep-Alive: timeout=20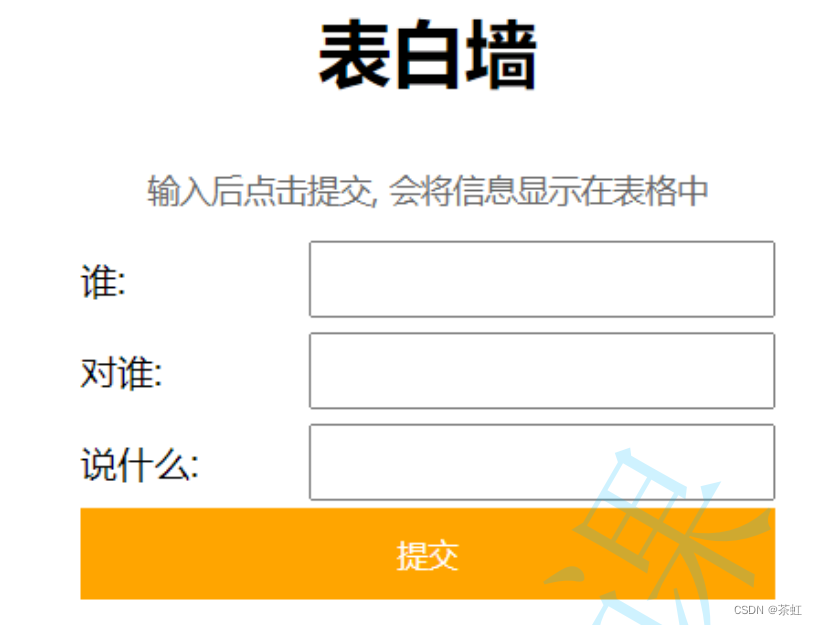
Connection: keep-alive- 代码示例: 服务器版表白墙
<!DOCTYPE web-app PUBLIC
        "-//Sun Microsystems, Inc.//DTD Web Application 2.3//EN"
        "http://java.sun.com/dtd/web-app_2_3.dtd" >
<web-app>
    <display-name>Archetype Created Web Application</display-name>
</web-app>
3) 调整 pom.xml
<?xml version="1.0" encoding="UTF-8"?>
<project xmlns="http://maven.apache.org/POM/4.0.0"
         xmlns:xsi="http://www.w3.org/2001/XMLSchema-instance"
         xsi:schemaLocation="http://maven.apache.org/POM/4.0.0
http://maven.apache.org/xsd/maven-4.0.0.xsd">
    <modelVersion>4.0.0</modelVersion>
    <groupId>org.example</groupId>
    <artifactId>表白墙服务器版</artifactId>
    <version>1.0-SNAPSHOT</version>
    <dependencies>
        <!-- 加入 servlet 依赖 -->
        <dependency>
            <groupId>javax.servlet</groupId>
            <artifactId>javax.servlet-api</artifactId>
            <!-- servlet 版本和 tomcat 版本有对应关系,切记 -->
            <version>3.1.0</version>
            <!-- 这个意思是我们只在开发阶段需要这个依赖,部署到 tomcat 上时就不需要了 -->
            <scope>provided</scope>
        </dependency>
        <!--
https://mvnrepository.com/artifact/com.fasterxml.jackson.core/jackson-databind -
->
        <dependency>
            <groupId>com.fasterxml.jackson.core</groupId>
            <artifactId>jackson-databind</artifactId>
            <version>2.12.3</version>
        </dependency>
    </dependencies>
    <packaging>war</packaging>
    <build>
        <finalName>MessageWall</finalName>
    </build>
</project>
2. 约定前后端交互接口
所谓 "前后端交互接口" 是进行 Web 开发中的关键环节。具体来说, 就是允许页面给服务器发送哪些 HTTP 请求, 并且每种请求预期获取什么样的 HTTP 响应.
GET /message[{from : " 黑猫 " ,to : " 白猫 " ,message : " 喵 "},{from : " 黑狗 " ,to : " 白狗 " ,message : " 汪 "},......]
POST / message{from : " 黑猫 " ,to : " 白猫 " ,message : " 喵 "}
{ok : 1}
public class Message {
    public String from;
    public String to;
public String message; }@WebServlet("/message")
public class MessageServlet extends HttpServlet {
// 用于保存所有的留言
private List<Message> messages = new ArrayList<Message>();
// 用于转换 JSON 字符串
private ObjectMapper objectMapper = new ObjectMapper();
// 获取所有留言
@Override
protected void doGet(HttpServletRequest req, HttpServletResponse resp)
throws ServletException, IOException {
resp.setContentType("application/json;charset=utf-8");
String respString = objectMapper.writeValueAsString(messages);
resp.getWriter().write(respString);
}
// 新增留言
@Override
protected void doPost(HttpServletRequest req, HttpServletResponse resp)
throws ServletException, IOException {
resp.setContentType("application/json;charset=utf-8");
Message message = objectMapper.readValue(req.getInputStream(),
Message.class);
messages.add(message);
resp.getWriter().write("{ \"ok\": 1 }");
}
}ObjectMapper 的 readValue 方法也能直接从一个 InputStream 对象读取数据 .ObjectMapper 的 writeValueAsString 方法也能把一个对象数组直接转成 JSON 格式的字符串 .
// 把之前封装的 ajax 函数拷贝过来function ajax ( args ) {// ...... 代码内容参考 HTTP 协议章节}
// 从服务器加载数据, 显示在界面上
function load() {
    ajax({
        url: 'message',
        method: 'GET',
        callback: function (data, status) {
            // 先把字符串格式的 body 转成 对象数组
            let messages = JSON.parse(data);
            // 把每个消息都构造一个 HTML 标签
            for (let message of messages) {
                var row = document.createElement('div');
                row.className = 'row';
                row.innerHTML = message.from + '对' + message.to + '说: ' +
message.message;
                // 3. 把构造好的元素添加进去
                var container = document.querySelector('.container');
                container.appendChild(row);
           }
       }
   });
}
// 调动 load 执行数据加载
load();// 给点击按钮注册点击事件
var submit = document.querySelector('.submit');
submit.onclick = function () {
// ...... 前面的代码略, 参考 JavaScript(WebAPI) 章节.
// 给服务器发送消息
ajax({
method: "POST",
url: "message",
contentType: "application/json; charset=utf-8",
body: JSON.stringify({ from: from, to: to, message: message }),
callback: function (data, status) {
if (status == 200) {
console.log("提交消息成功!");
} else {
console.log("提交消息失败! " + status);
}
}
});
}
此时我们每次提交的数据都会发送给服务器. 每次打开页面的时候页面都会从服务器加载数据. 因此及时关闭页面, 数据也不会丢失.但是数据此时是存储在服务器的内存中 ( private List<Message> messages = new ArrayList<Message>(); ), 一旦服务器重启, 数据仍然会丢失.
修改 MessageServlet 代码.
- 删掉之前的 messages 成员.
- 创建新的成员 String filePath, 表示要存储的文件的路径.
- 新增 load 方法, 用来从文件中读取内容. (会在页面加载的时候调用 load)
- 新增 save 方法, 用来往文件中写入内容. (会在提交留言的时候调用 save)
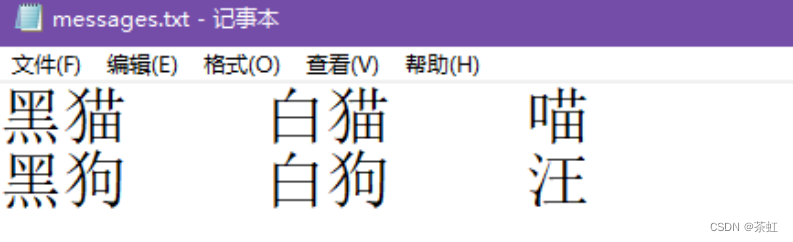
- 文件格式按照 行文本 的方式存储. 每个记录占用一行, 每个记录的字段之间(from, to, message) 使用 \t 分隔.
@WebServlet("/message")
public class MessageServlet extends HttpServlet {
    // 用于保存所有的留言
    // private List<Message> messages = new ArrayList<Message>();
    // 用于转换 JSON 字符串
    private ObjectMapper objectMapper = new ObjectMapper();
    // 数据文件的路径
    private String filePath = "d:/messages.txt";
    public List<Message> load() {
        List<Message> messages = new ArrayList<>();
        System.out.println("从文件读取数据");
        try (BufferedReader bufferedReader = new BufferedReader(new
FileReader(filePath))) {
            while (true) {
                String line = bufferedReader.readLine();
                if (line == null) {
                    break;
               }
                String[] tokens = line.split("\t");
                Message message = new Message();
                message.from = tokens[0];
                message.to = tokens[1];
                message.message = tokens[2];
                messages.add(message);
           }
       } catch (IOException e) {
            // 首次运行的时候文件不存在, 可能会在这里触发异常.
            e.printStackTrace();
       }
        System.out.println("共读取数据 " + messages.size() + " 条!");
        return messages;
   }
    public void save(Message message) {
        System.out.println("向文件写入数据");
        // 使用追加写的方式打开文件
        try (FileWriter fileWriter = new FileWriter(filePath, true)) {
            fileWriter.write(message.from + "\t" + message.to + "\t" +
message.message + "\n");
       } catch (IOException e) {
            e.printStackTrace();
       }
   }
    // 获取所有留言
    @Override
    protected void doGet(HttpServletRequest req, HttpServletResponse resp)
throws ServletException, IOException {
        List<Message> messages = load();
        resp.setContentType("application/json;charset=utf-8");
        String respString = objectMapper.writeValueAsString(messages);
        resp.getWriter().write(respString);
   }
    // 新增留言
    @Override
    protected void doPost(HttpServletRequest req, HttpServletResponse resp)
throws ServletException, IOException {
        resp.setContentType("application/json;charset=utf-8");
        Message message = objectMapper.readValue(req.getInputStream(),
Message.class);
        save(message);
        resp.getWriter().write("{ \"ok\": 1 }");
   }
}<dependency>
<groupId>mysql</groupId>
<artifactId>mysql-connector-java</artifactId>
<version>5.1.45</version>
</dependency>set character_set_database=utf8;
set character_set_server=utf8;
create database if not exists MessageWall;
use MessageWall;
drop table if exists messages;
create table messages (`from` varchar(255), `to` varchar(255), `message`
varchar(2048));- 创建 MysqlDataSource 实例, 设置 URL, username, password 等属性.
- 提供 getConnection 方法, 和 MySQL 服务器建立连接.
- 提供 close 方法, 用来释放必要的资源.
// 负责和数据库建立连接
public class DBUtil {
private static final String URL = "jdbc:mysql://127.0.0.1:3306/MessageWall?
characterEncoding=utf8&useSSL=false";
private static final String USERNAME = "root";
private static final String PASSWORD = "";
private static DataSource dataSource = null;
private static DataSource getDataSource() {
if (dataSource == null) {
synchronized (DBUtil.class) {
if (dataSource == null) {
dataSource = new MysqlDataSource();
((MysqlDataSource)dataSource).setUrl(URL);
((MysqlDataSource)dataSource).setUser(USERNAME);
((MysqlDataSource)dataSource).setPassword(PASSWORD);
}
}
}
return dataSource;
}
public static Connection getConnection() {
try {
return getDataSource().getConnection();
} catch (SQLException e) {
e.printStackTrace();
}
return null;
}
public static void close(Connection connection,
PreparedStatement statement,
ResultSet resultSet) {
try {
if (resultSet != null) {
resultSet.close();
}
if (statement != null) {
statement.close();
}
if (connection != null) {
connection.close();
}
} catch (SQLException e) {
e.printStackTrace();
}
}
}private List<Message> load() {
List<Message> messages = new ArrayList<>();
// 1. 和数据库建立连接
Connection connection = DBUtil.getConnection();
PreparedStatement statement = null;
ResultSet resultSet = null;
try {
// 2. 拼装 SQL
String sql = "select * from messages";
statement= connection.prepareStatement(sql);
// 3. 执行 SQL
resultSet = statement.executeQuery();
// 4. 遍历结果集合
while (resultSet.next()) {
Message message = new Message();
message.from = resultSet.getString("from");
message.to = resultSet.getString("to");
message.message = resultSet.getString("message");
messages.add(message);
}
} catch (SQLException e) {
e.printStackTrace();
} finally {
// 5. 释放必要的资源
DBUtil.close(connection, statement, resultSet);
}
return messages; }
private void save(Message message) {
// 1. 和数据库建立连接
Connection connection = DBUtil.getConnection();
PreparedStatement statement = null;
try {
// 2. 拼装 SQL
String sql = "insert into messages values(?, ?, ?)";
statement = connection.prepareStatement(sql);
statement.setString(1, message.from);
statement.setString(2, message.to);
statement.setString(3, message.message);
// 3. 执行 SQL
statement.executeUpdate();
} catch (SQLException e) {
e.printStackTrace();
} finally {
// 4. 释放必要的资源
DBUtil.close(connection, statement, null);
}
}思考虽然都是把数据存储在磁盘上, 为什么我们说 "使用文件" 不优雅, "使用数据库" 更科学 呢?当前看起来, 明显是数据库操作的代码量要比文件操作的代码量更多呀。但是实际上, 当前我们写的程序比较简单, 存储的数据比较少, 数据格式也不复杂. 这种情况下使用文件是比数据库代码更精简一些。但是如果我们的程序更复杂, 数据更多并且数据格式也更复杂的时候, 单纯的文件操作就要比数据库操作更麻烦了。因为数据库已经给我们提供了很多功能可以开箱即用. (例如数据类型的校验, 约束, 聚合查询, 联合查询, 子查询, 索引, 事务等等). 而如果基于文件来完成类似的功能, 就需要我们自己写很多代码来手动实现了
7、Cookie 和 Session
7.1 回顾 Cookie
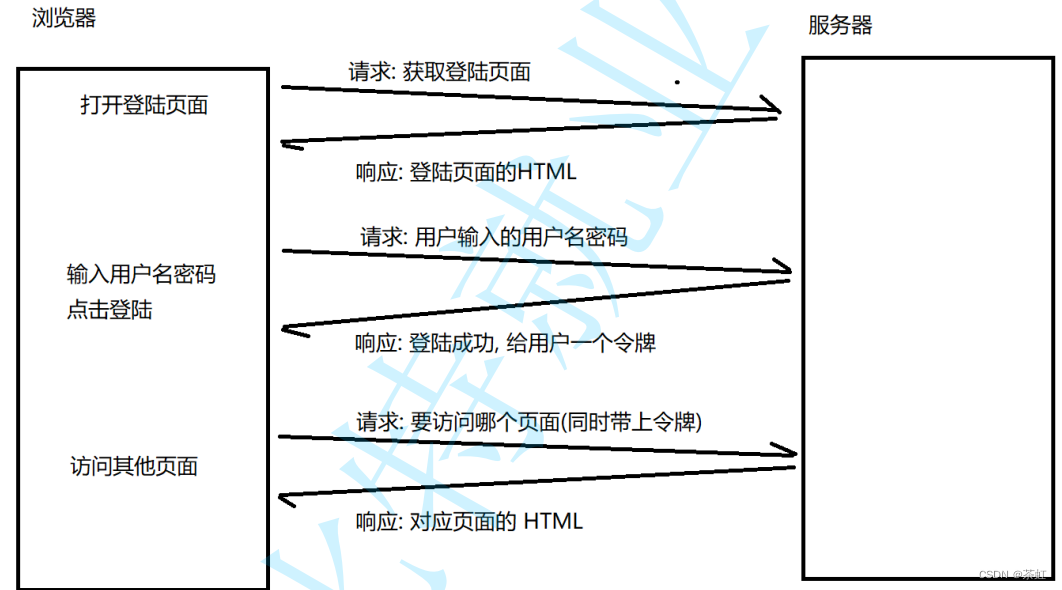
图中的 "令牌" 通常就存储在 Cookie 字段中.
回忆之前的例子:1. 到了医院先挂号. 挂号时候需要提供身份证, 同时得到了一张 "就诊卡", 这个就诊卡就相当于患者的 "令牌".2. 后续去各个科室进行检查, 诊断, 开药等操作, 都不必再出示身份证了, 只要凭就诊卡即可识别出当前患者的身份.3. 看完病了之后, 不想要就诊卡了, 就可以注销这个卡. 此时患者的身份和就诊卡的关联就销毁了. (类似于网站的注销操作)4. 又来看病, 可以办一张新的就诊卡, 此时就得到了一个新的 "令牌"
7.2 理解会话机制 (Session)
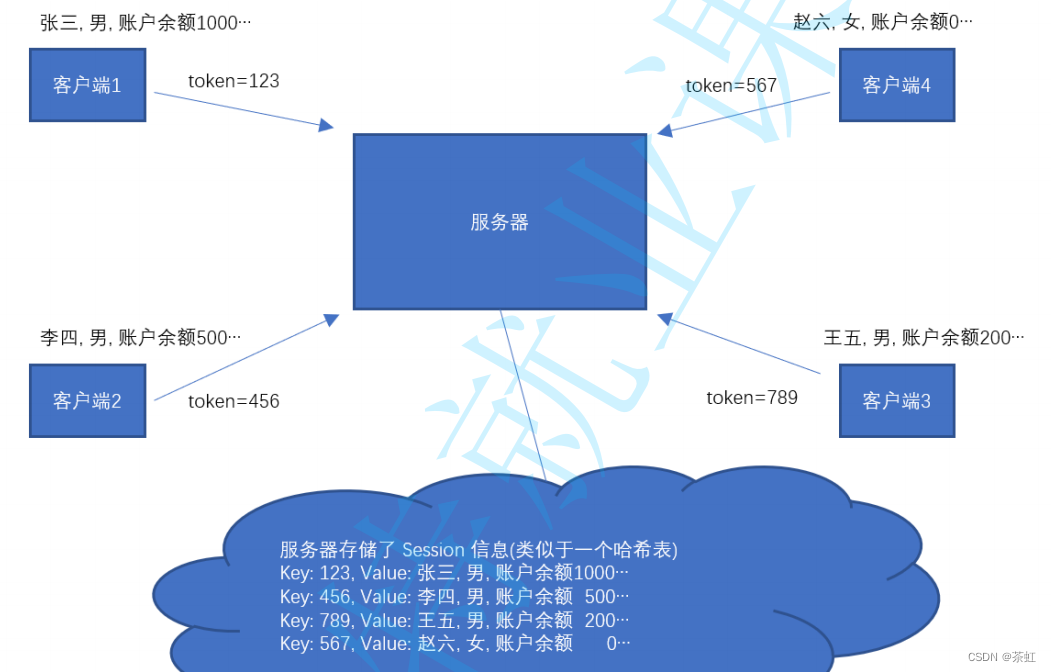
- 当用户登陆的时候, 服务器在 Session 中新增一个新记录, 并把 sessionId / token 返回给客户端.(例如通过 HTTP 响应中的 Set-Cookie 字段返回).
- 客户端后续再给服务器发送请求的时候, 需要在请求中带上 sessionId/ token. (例如通过 HTTP 请求中的 Cookie 字段带上).
- 服务器收到请求之后, 根据请求中的 sessionId / token 在 Session 信息中获取到对应的用户信息, 再进行后续操作.
7.3 Cookie 和 Session 的区别
- Cookie 是客户端的机制. Session 是服务器端的机制.
- Cookie 和 Session 经常会在一起配合使用. 但是不是必须配合.
- 完全可以用 Cookie 来保存一些数据在客户端. 这些数据不一定是用户身份信息, 也不一定是 token / sessionId
- Session 中的 token / sessionId 也不需要非得通过 Cookie / Set-Cookie 传递.
7.4 核心方法
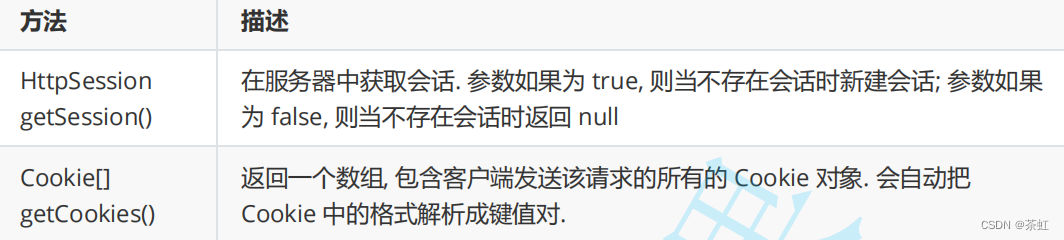
HttpServletResponse 类中的相关方法

Cookie 类中的相关方法
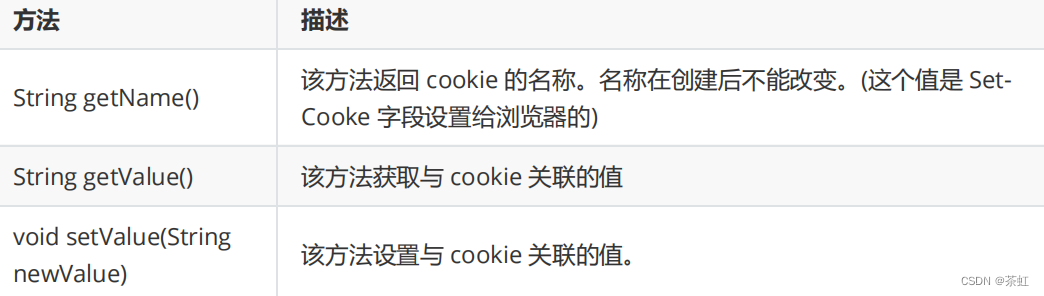
- HTTP 的 Cooke 字段中存储的实际上是多组键值对. 每个键值对在 Servlet 中都对应了一个 Cookie对象.
- 通过 HttpServletRequest.getCookies() 获取到请求中的一系列 Cookie 键值对.
- 通过 HttpServletResponse.addCookie() 可以向响应中添加新的 Cookie 键值对.
7.5 代码示例: 实现用户登陆
@WebServlet("/index")
public class IndexServlet extends HttpServlet {
@Override
protected void doGet(HttpServletRequest req, HttpServletResponse resp)
throws ServletException, IOException {
resp.setContentType("text/html; charset=utf-8");
// 1. 判定当前用户是否已经登陆
HttpSession session = req.getSession(false);
if (session == null) {
// 用户没有登陆, 重定向到 login.html
resp.sendRedirect("login.html");
return;
}
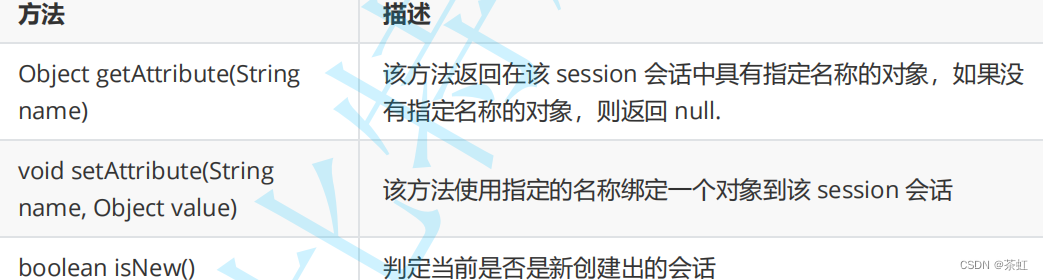
// 2. 如果已经登陆, 则从 Session 中取出访问次数数据
String userName = (String)session.getAttribute("username");
String countString = (String)session.getAttribute("loginCount");
int loginCount = Integer.parseInt(countString);
loginCount += 1;
session.setAttribute("loginCount", loginCount + "");
// 3. 展示到页面上.
StringBuilder html = new StringBuilder();
html.append(String.format("<div>用户名: %s</div>", userName));
html.append(String.format("<div>loginCount: %d</div>", loginCount));
resp.getWriter().write(html.toString());
}
}- 在这个代码中是看不到 "哈希表", 也看不到 sessionId 这样的概念的. getSession 操作内部提取到请求中的 Cookie 里的 sessionId, 然后查找哈希表, 获取到对应的 HttpSession 对象.
- getSession 参数为 false, 则获取不到 HttpSession 对象, 不会创建新的 HttpSession, 而是返回null. 此时说明用户没有登陆.
<form action="login" method="POST">
<input type="text" name="username">
<input type="password" name="password">
<input type="submit" value="提交">
</form>@WebServlet("/login")
public class LoginServlet extends HttpServlet {
@Override
protected void doPost(HttpServletRequest req, HttpServletResponse resp)
throws ServletException, IOException {
resp.setContentType("text/html; charset=utf-8");
// 1. 获取到用户提交的用户名和密码
String username = req.getParameter("username");
String password = req.getParameter("password");
// 2. 判定用户名密码是否正确
if (!username.equals("admin") || !password.equals("123")) {
// 登陆失败
resp.getWriter().write("登陆失败");
return;
}
// 登陆成功
System.out.println("登陆成功");
// 设置 Session
HttpSession session = req.getSession(true);
session.setAttribute("username", "admin");
session.setAttribute("loginCount", "0");
resp.sendRedirect("index");
}
}- 此处的 getSession 参数为 true, 表示查找不到 HttpSession 时会创建新的 HttpSession 对象, 并生成一个 sessionId, 插入到 哈希表 中, 并且把 sessionId 通过 Set-Cookie 返回给浏览器.
- 首次访问的时候可以看到, 当前用户尚未登陆, 此时页面自动重定向到 login.html
HTTP/1.1 302
Location: login.html
Content-Type: text/html;charset=utf-8
Content-Length: 0
Date: Mon, 21 Jun 2021 14:02:14 GMT
Keep-Alive: timeout=20
Connection: keep-alive- 在 login.html 中输入用户名密码之后, 会跳转到 /login 路径. 此时服务器返回了一个 token, 并在Session 中记录用户信息, 然后重定向到 /index
HTTP/1.1 302
Set-Cookie: JSESSIONID=1CBA3519A24801120ADC3C00A70FF047;
Path=/ServletHelloWorld; HttpOnly
Location: index
Content-Type: text/html;charset=utf-8
Content-Length: 0
Date: Mon, 21 Jun 2021 14:02:17 GMT
Keep-Alive: timeout=20
Connection: keep-alive8、上传文件
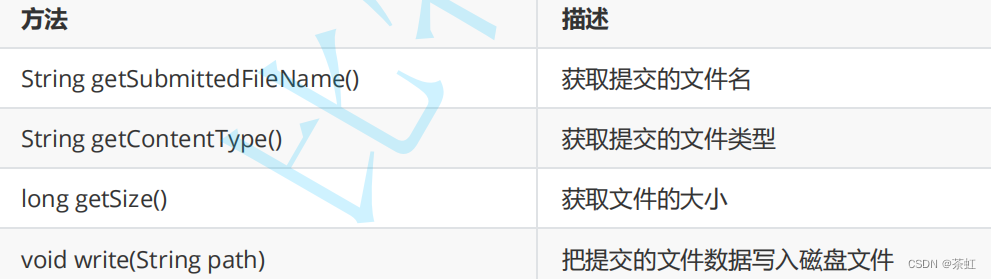
8.1 核心方法

Part 类方法
8.2 代码示例
<form action="upload" enctype="multipart/form-data" method="POST">
<input type="file" name="MyImage">
<input type="submit" value="提交图片">
</form>- 上传文件一般通过 POST 请求的表单实现.
- 在 form 中要加上 multipart/form-data 字段.
@MultipartConfig
@WebServlet("/upload")
public class UploadServlet extends HttpServlet {
@Override
protected void doPost(HttpServletRequest req, HttpServletResponse resp)
throws ServletException, IOException {
Part part = req.getPart("MyImage");
System.out.println(part.getSubmittedFileName());
System.out.println(part.getContentType());
System.out.println(part.getSize());
part.write("d:/MyImage.jpg");
resp.getWriter().write("upload ok");
}
}- 需要给 UploadServlet 加上 @MultipartConfig 注解. 否则服务器代码无法使用 getPart 方法
- getPart 的 参数 需要和 form 中 input 标签的 name 属性对应.
- 客户端一次可以提交多个文件. (使用多个 input 标签). 此时服务器可以通过 getParts 获取所有的Part 对象.
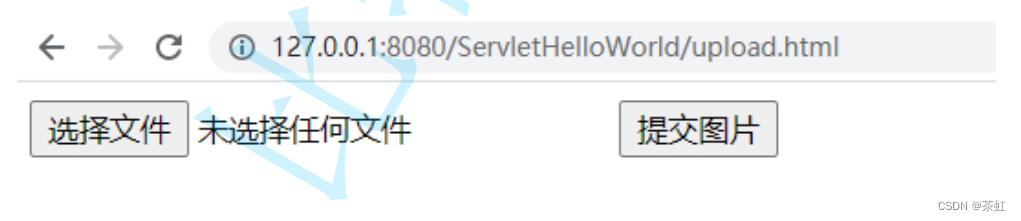
选择文件后, 点击提交图片, 则页面跳转到 /upload 页面.

此时可以看到服务器端的打印日志
rose.jpg
image/jpeg
13058
上传图片请求的抓包结果为
POST http://127.0.0.1:8080/ServletHelloWorld/upload HTTP/1.1
Host: 127.0.0.1:8080
Connection: keep-alive
Content-Length: 13243
Cache-Control: max-age=0
sec-ch-ua: " Not;A Brand";v="99", "Google Chrome";v="91", "Chromium";v="91"
sec-ch-ua-mobile: ?0
Upgrade-Insecure-Requests: 1
Origin: http://127.0.0.1:8080
Content-Type: multipart/form-data; boundary=----
WebKitFormBoundaryTlrGjpjXbKJl4y5B
User-Agent: Mozilla/5.0 (Windows NT 10.0; Win64; x64) AppleWebKit/537.36 (KHTML,
like Gecko) Chrome/91.0.4472.114 Safari/537.36
Accept:
text/html,application/xhtml+xml,application/xml;q=0.9,image/avif,image/webp,imag
e/apng,*/*;q=0.8,application/signed-exchange;v=b3;q=0.9
Sec-Fetch-Site: same-origin
Sec-Fetch-Mode: navigate
Sec-Fetch-User: ?1
Sec-Fetch-Dest: document
Referer: http://127.0.0.1:8080/ServletHelloWorld/upload.html
Accept-Encoding: gzip, deflate, br
Accept-Language: zh-CN,zh;q=0.9,en;q=0.8
Cookie: JSESSIONID=1CBA3519A24801120ADC3C00A70FF047
------WebKitFormBoundaryTlrGjpjXbKJl4y5B
Content-Disposition: form-data; name="MyImage"; filename="rose.jpg"
Content-Type: image/jpeg
•JFIF •• • • ;CREATOR: gd-jpeg v1.0 (using IJG JPEG v62), quality = 95
C ••••••••••••••••••••••••••••••••••• •• •••
•可以看到Content-Type 为 multipart/form - data , 这样的请求中带有一个 boundary= ----WebKitFormBoundaryTlrGjpjXbKJl4y5B , 这个 boundary 在 body 这边作为一个 " 分隔线 ", 分隔线下面是上传的文件的属性和文件内容.
9、附录: 代码片段
9.1 目录结构
pom.xml
<?xml version="1.0" encoding="UTF-8"?>
<project xmlns="http://maven.apache.org/POM/4.0.0"
xmlns:xsi="http://www.w3.org/2001/XMLSchema-instance"
xsi:schemaLocation="http://maven.apache.org/POM/4.0.0
http://maven.apache.org/xsd/maven-4.0.0.xsd">
<modelVersion>4.0.0</modelVersion>
<groupId>com.bit</groupId>
<artifactId>test</artifactId>
<version>1.0-SNAPSHOT</version>
<!-- 指定属性信息 -->
<properties>
<encoding>UTF-8</encoding>
<maven.compiler.source>1.8</maven.compiler.source>
<maven.compiler.target>1.8</maven.compiler.target>
</properties>
<dependencies>
<!-- 加入 servlet 依赖 -->
<dependency>
<groupId>javax.servlet</groupId>
<artifactId>javax.servlet-api</artifactId>
<!-- servlet 版本和 tomcat 版本有对应关系,切记 -->
<version>3.1.0</version>
<!-- 这个意思是我们只在开发阶段需要这个依赖,部署到 tomcat 上时就不需要了 -->
<scope>provided</scope>
</dependency>
<dependency>
    <groupId>mysql</groupId>
    <artifactId>mysql-connector-java</artifactId>
    <version>5.1.45</version>
</dependency>
<!--
https://mvnrepository.com/artifact/com.fasterxml.jackson.core/jackson-databind -
->
<dependency>
<groupId>com.fasterxml.jackson.core</groupId>
<artifactId>jackson-databind</artifactId>
<version>2.12.3</version>
</dependency>
</dependencies>
<!-- 打包方式是 war 包,一种用于 web 应用的包,原理类似 jar 包 -->
<packaging>war</packaging>
<build>
<!-- 指定最终 war 包的名称 -->
<finalName>test</finalName>
</build>
</project><!DOCTYPE web-app PUBLIC
"-//Sun Microsystems, Inc.//DTD Web Application 2.3//EN"
"http://java.sun.com/dtd/web-app_2_3.dtd" >
<web-app>
<display-name>Archetype Created Web Application</display-name>
</web-app>@WebServlet("/hello")
public class HelloServlet extends HttpServlet {
@Override
protected void doGet(HttpServletRequest req, HttpServletResponse resp)
throws ServletException, IOException {
resp.getWriter().write("hello");
}
}9.2 读取请求报头
@WebServlet("/getParameter")
public class GetParameter extends HttpServlet {
@Override
protected void doGet(HttpServletRequest req, HttpServletResponse resp)
throws ServletException, IOException {
String contentType = req.getHeader("Content-Type");
// 或者使用
String contentType = req.getContentType();
}
}9.3 读取 GET 请求的 query string
@WebServlet("/getParameter")
public class GetParameter extends HttpServlet {
@Override
protected void doGet(HttpServletRequest req, HttpServletResponse resp)
throws ServletException, IOException {
String userId = req.getParameter("userId");
String classId = req.getParameter("classId");
}
}9.4 读取 POST 请求的 body
@WebServlet("/postParameter")
public class PostParameter extends HttpServlet {
@Override
protected void doPost(HttpServletRequest req, HttpServletResponse resp)
throws ServletException, IOException {
resp.setContentType("text/html; charset=utf-8");
req.setCharacterEncoding("utf-8");
String userId = req.getParameter("userId");
String classId = req.getParameter("classId");
resp.getWriter().write("userId: " + userId + ", " + "classId: " +
classId);
}
}9.5 设置状态码
@WebServlet("/statusServlet")
public class StatusServlet extends HttpServlet {
@Override
protected void doGet(HttpServletRequest req, HttpServletResponse resp)
throws ServletException, IOException {
resp.setStatus(200);
}
}9.6 设置响应报头
@WebServlet("/autoRefreshServlet")
public class AutoRefreshServlet extends HttpServlet {
@Override
protected void doGet(HttpServletRequest req, HttpServletResponse resp)
throws ServletException, IOException {
resp.setHeader("Refresh", "1");
}
}9.7 重定向
@WebServlet("/redirectServlet")
public class RedirectServlet extends HttpServlet {
@Override
protected void doGet(HttpServletRequest req, HttpServletResponse resp)
throws ServletException, IOException {
resp.sendRedirect("http://www.sogou.com");
}
}9.8 登陆页面
<form action="login" method="POST">
    <input type="text" name="username">
    <input type="password" name="password">
    <input type="submit" value="提交">
</form>9.9 创建新 Session
@WebServlet("/login")
public class LoginServlet extends HttpServlet {
@Override
protected void doPost(HttpServletRequest req, HttpServletResponse resp)
throws ServletException, IOException {
HttpSession session = req.getSession(true);
session.setAttribute("username", "admin");
session.setAttribute("loginCount", "0");
}
}9.10 获取已有 Session
@WebServlet("/login")
public class LoginServlet extends HttpServlet {
HttpSession session = req.getSession(false);
if (session == null) {
// 用户没有登陆, 重定向到 login.html
resp.sendRedirect("login.html");
return;
}
// 如果已经登陆, 则从 Session 中取出数据
String userName = (String)session.getAttribute("username");
String countString = (String)session.getAttribute("loginCount");
}9.11 上传文件
@MultipartConfig
@WebServlet("/upload")
public class UploadServlet extends HttpServlet {
    @Override
    protected void doPost(HttpServletRequest req, HttpServletResponse resp)
throws ServletException, IOException {
        Part part = req.getPart("MyImage");
        System.out.println(part.getSubmittedFileName());
        System.out.println(part.getContentType());
        System.out.println(part.getSize());
        part.write("d:/MyImage.jpg");
        resp.getWriter().write("upload ok");
   }
}<form action="upload" enctype="multipart/form-data" method="POST">
<input type="file" name="MyImage">
<input type="submit" value="提交图片">
</form>


 232
232


 被折叠的 条评论
为什么被折叠?
被折叠的 条评论
为什么被折叠?
 到【灌水乐园】发言


