


1.软件版本
jdk 1.8
mysql 8.13
node 14.16.0
navicat
idea2020.1
vue-cli安装:npm install -g@vue/cli
npm 设置淘宝镜像加速:npm cpnfig set registry http://registry.npm.tao.org
查看安装成功:
C:\Users\34539>vue -V
@vue/cli 5.0.8
创建vue vue create vue
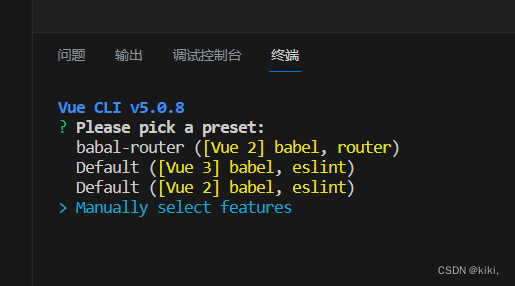
取消 ( ) Linter / Formatter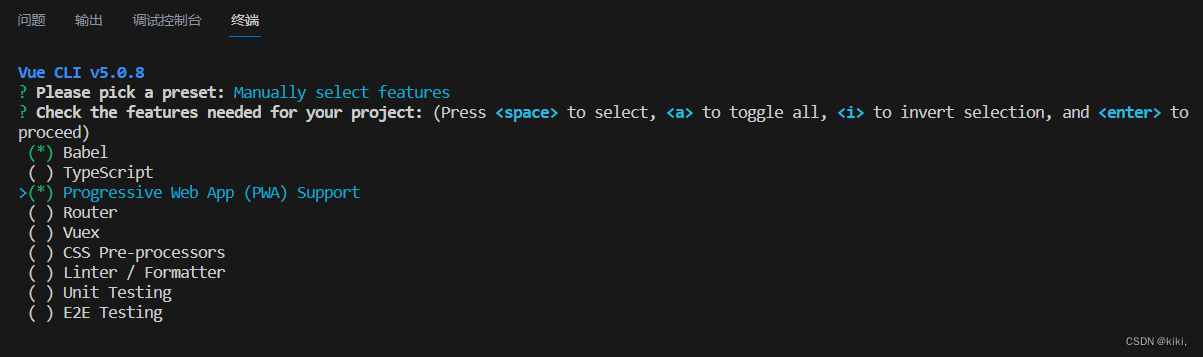
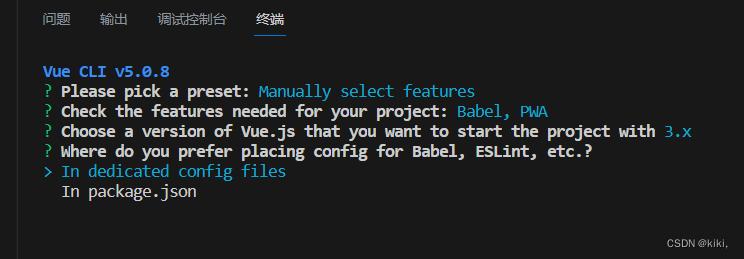
选择vue2或3,vue3包含vue2.
选择配置文件存放位置:默认

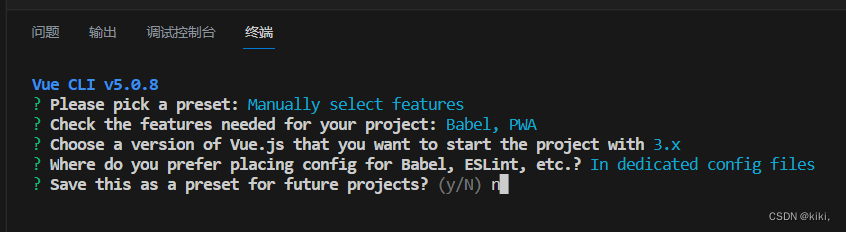
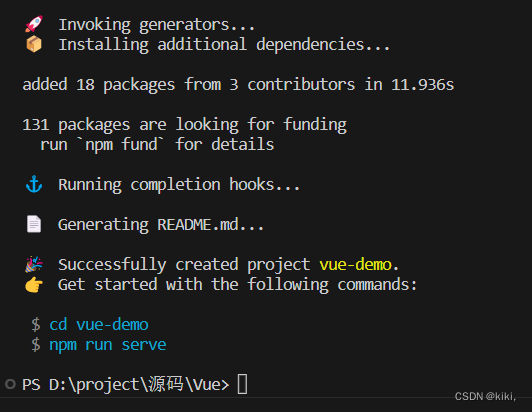
创建成功后运行项目:
第一条命令:cd vue-demo
第二条命令:npm run serve
简介 | Vue.js (vuejs.org)![]() https://cn.vuejs.org/guide/introduction.html#what-is-vuevue模版语法:
https://cn.vuejs.org/guide/introduction.html#what-is-vuevue模版语法:
<template>
  <div class="hello">
    <h1>学习Vue:模版语法</h1>
    <!-- 动态数据 -->
    <p>{{ message }}</p>
    <div>{{ rawHTML }}</div>
    <!-- 通过  v-html识别标签-->
    <div v-html="rawHTML"></div>
    <!-- 通过 v-bind:id="" v-bind简写成:也可以属性动态化-->
    <div :id="dynamicId"></div>
    <!-- 单个表达式 -->
    <p>{{ num + 10 }}</p>
    <p>{{ flag ? "真" : "假" }}</p>
  </div>
</template>

<script>
export default {
  // innnerHTML innerText
  name: "HelloWorld",
  data() {
    return {
      message: "学习vue",
      rawHTML: "<a href='http://www.itbaizhan.com'>百战</a>",
      dynamicId: 1001,
      num: 10,
      flag:true,
    };
  },
};
</script>
v-if和v-show
<template>
  <div class="hello">
    <!-- 通过v-if指令 页面内容会根据某种条件显示 若flag为true则显示-->
    <p v-if="flag">我是孙悟空</p>
    <!--  flag为false显示-->
    <p v-else>你是孙悟空</p>

    <!-- 控制大的块的显示和隐藏 控制父级容器的显示-->
    <div v-if="flag">
      <p></p>
      <p></p>
      <p></p>
    </div>

    <!-- v-show 控制页面内容显示 比较独立-->
    <p v-show="flag">你真是孙悟空</p>

    <!-- v-if和v-show的区别:
    v-if:是真正的条件渲染,它确保在切换过程中,条件块内的事件监听和子组件适当被销毁和重建
    也是惰性的,若条件是假的则不会渲染,直到条件为真时
    v-show:不管初始条件是什么,元素总会被渲染,并且只是简单地基于css进行切换。
    基于display为none;
     <p style="display: none;">你真是孙悟空</p>
     v-if有更高的切换开销,v-show:有更高的初始渲染开销,如果需要频繁地切换,则用v-show,运行时条件很少改变,则用v-if
    -->
  </div>
</template>

<script>
export default {
  name: "HelloWorld",
  data(){
    return{
      flag:false
    }
  }

};
</script>
列表渲染
当Vue正在使用v-for渲染元素列表时,它默认使用就地更新的策略,如果数据项的顺序被改变,Vue将不会移动DOM元素来匹配数据项的顺序,而是就地更新每个元素,并且确保它们在每个索引位置正确渲染
<template>
  <div class="hello">

    <h3>列表渲染</h3>
    <ul>
      <!-- 使用v-for="item in items指令"
      item代表数组中的每一个元素 -->
      <!-- 渲染了整个对象 -->
      <li v-for="item in newsList">{{ item }}</li>
      <!-- 只渲染title -->
      <!-- :key="item.id"比对id,若id没有发生变化则不渲染 -->
      <li v-for="item in newsList" :key="item.id">{{ item.title }}</li>
    </ul>
  </div>
</template>

<script>
export default {
  name: "HelloWorld",
  data(){
    return{
      // 对象类型的数据
      newsList:[
        {
          id:1001,
          title:"今日新闻1"

        },
        {
          id:1002,
          title:"今日新闻2"

        },
        {
          id:1003,
          title:"今日新闻3"

        },
        // 新增这一条,只需渲染这一条,节省性能,js做法:整个数组变了,要渲染整个数组
        {
          id:1004,
          title:"今日新闻4"

        },
      ]
    }
  }

};
</script>
事件处理
<template>
  <div class="hello">
    <!-- v-on:和@符号效果一样 -->
    <button v-on:click="counter += 1">点击{{ counter }}</button>
    <button @click="counter += 1">点击{{ counter }}</button>
    <!-- 希望点击按钮改变文本信息 -->
    <button @click="clickHandle">按钮</button>
    <p>{{ message }}</p>

    <button @click="say('hi')">say hi</button>
    <button @click="say('what')">say what</button>

    <ul>
      <li @click="clickItemHandle(item)" v-for="(item,index) in names" :key="index">{{ item }}</li>
    </ul>
  </div>
</template>

<script>
export default {
  name: "HelloWorld",
  data() {
    return {
      counter: 1,
      message: "消息通知",
      names: ["kiki", "ime", "baby"],
    };
  },
  methods: {
    clickHandle(event) {
      // 在事件中,读取data中的属性,是需要通过this.属性
      this.message = "消息撤回";
      // event是原生DOM event
      console.log(event);
      event.target.innerHTML = "点击之后";
    },
    say(data) {
      console.log(data);
    },
    clickItemHandle(item){
      console.log(item);
    }
  },
};
</script>
表单双向的数据绑定
可以用v-model监听输入数据的更新
<template>
  <div class="hello">

    <input type="text" v-model.lazy="password">
    <input type="text" v-model.trim="username">
    <p>{{ username }},{{ password }}</p>
    <button @click="clickGetUsername">获取用户民</button>
  </div>
</template>

<script>
export default {
  name: "HelloWorld",
  data() {
    return {

      username:"",
      password:"",
    };
  },
  methods:{
    clickGetUsername(){

      console.log(this.username);
    }
  }

};
</script>
组件基础
第一步:引入组件
第二步:挂载组件
第三步:显示组件
<template>
  <img alt="Vue logo" src="./assets/logo.png">
  <!-- 第三步:显示组件 -->
  <MyComponent/>
</template>
<!-- App 根组件 -->
<script>

// 第一步:引入组件
import MyComponent from './components/MyComponent.vue';

export default {
  name: 'App',
  // 挂载组件
  components: {
    MyComponent
  }
}
</script>

<style>

</style>
组件交互
Prop可以实现组件与组件之间的传递
<template>
  <img alt="Vue logo" src="./assets/logo.png" />
  <MyCompentVue :title="title" :age="age" :names="names"/>
</template>

<script>
import MyCompentVue from "./components/MyCompentVue.vue";

export default {
  name: "App",
  data(){
    return{
      title:"我是一个标题",
      age:20,
      names:["kik","ds","sdc"]
    }

  },
  components: {
    MyCompentVue,
  },
};
</script>

<style>
#app {
  font-family: Avenir, Helvetica, Arial, sans-serif;
  -webkit-font-smoothing: antialiased;
  -moz-osx-font-smoothing: grayscale;
  text-align: center;
  color: #2c3e50;
  margin-top: 60px;
}
</style>


<template>
  <h3>prop传递数据</h3>
  <p>{{ title }}</p>
  <p>age={{ age }}</p>
  <ul>
    <li v-for="(item, index) in names" :key="index">{{ item }}</li>
  </ul>
</template>

<script>
export default {
  name: "MyCompentVue",
  props: {
    title: {
      type: String,
      default: "",
    },
    age: {
      type: Number,
      default: 0,
    },
    names: {
      type: Array,
      // 数组和对象必须使用函数进行返回
      default: function () {
        return [];
      },
    },
  },
};
</script>

<style scoped>
h3 {
  color: red;
}
</style>
自定义事件的组件交互(可反向传递)
prop是从app->mycomponent
prop不能反向传递
<template>
  <img alt="Vue logo" src="./assets/logo.png" />
  <p>{{ message }}</p>
  <MyCompentVue @onEvent="getDataHandle" />
</template>

<script>
import MyCompentVue from "./components/MyCompentVue.vue";

export default {
  name: "App",
  data(){
    return{
      message:""

    }

  },
  methods:{
    getDataHandle(data){
      this.message=data

    }
  },
  components: {
    MyCompentVue,
  },
};
</script>

<style>
#app {
  font-family: Avenir, Helvetica, Arial, sans-serif;
  -webkit-font-smoothing: antialiased;
  -moz-osx-font-smoothing: grayscale;
  text-align: center;
  color: #2c3e50;
  margin-top: 60px;
}
</style>


<template>
  <h3>自定义事件传递数据</h3>
  <button @click="sendClickHandle">点击传递</button>

</template>

<script>
export default {
  name: "MyCompentVue",
  data(){
    return{
      messgae:"我是mycompent数据"
    }
  },
  methods:{
    sendClickHandle(){
      this.$emit("onEvent",this.messgae)
    }
  }

};
</script>

<style scoped>
h3 {
  color: red;
}
</style>
组件生命周期
每个组件创建时都要经过一系列初始化过程,Vue中有8个生命周期
创建时:beforeCreate ,created
渲染时:beforeMount,mounted
更新时:beforeUpdated, updated
卸载时:beforeUnmount, unmounted
Vue引入第三方
Swiper。。。
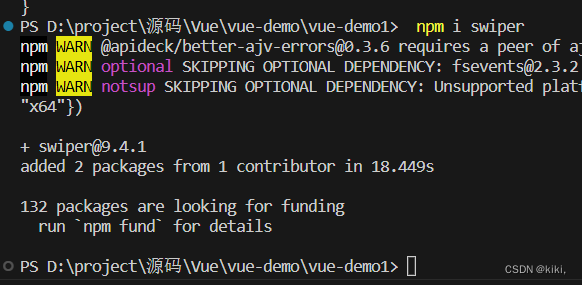
温馨提示:安装指定版本npm install --save swiper@9.4.1
卸载第三方库: npm uninstall swiper
npm install --save swiper@8.1.6
<template>
  <swiper>
    <swiper-slide>
      <img src="../assets/logo.png" alt="" />
    </swiper-slide>
    <swiper-slide><img src="../assets/logo.png" alt="" /></swiper-slide>
    <swiper-slide><img src="../assets/logo.png" alt="" /></swiper-slide>
  </swiper>
</template>

<script>
// Import Swiper Vue.js components
import { Swiper, SwiperSlide } from "swiper/vue";
// Import Swiper styles
import "swiper/css";

export default {
  name: "HelloWorld",
  components: {
    Swiper,
    SwiperSlide,
  },
};
</script>

<!-- Add "scoped" attribute to limit CSS to this component only -->
<style scoped>

</style>
第三方库:Axios是一个基于promise的网络请求库
独立安装:npm install --save axios
<template>
  <div class="hello">

    <p>{{ chengpin.title }}</p>
  </div>
</template>

<script>
import axios from 'axios';

export default {
  name: "HelloWorld",
  data(){
    return{
      chengpin:{}
    }

  },
  mounted(){
    axios({
      method:"get",
      url:"http://iwenwiki.com/api/blueberrypai/getChengpinDetails.php"
    }).then(res=>{
      this.chengpin=res.data.chengpinDetails[0]
    })

    // post请求方式,需要额外安装querystring
    // npm install --save querystring
    axios({
      method:"post",

    })
  }

};
</script>
安装element-ui组件npm i element-ui -S
安装好package.json中会提示
"element-ui": "^2.15.12",
可查找官网引用安装好的组件
组件 | Element![]() https://element.eleme.cn/#/zh-CN/component/quickstart
https://element.eleme.cn/#/zh-CN/component/quickstart


 31万+
31万+


 被折叠的 条评论
为什么被折叠?
被折叠的 条评论
为什么被折叠?
 到【灌水乐园】发言


