


edgeboard 环境配置
安装paddlelite,无法使用pip install 进行安装,需要自己编译源码,然后再安装(有一定的机率失败)。步骤如下:
1 编译环境准备
sudo apt update
sudo apt-get installl -y gcc g++ make wget python unzip patchelf python-dev
# 2. install cmake 3.10 or above
wget https://www.cmake.org/files/v3.10/cmake-3.10.3.tar.gz
tar -zxvf cmake-3.10.3.tar.gz
cd cmake-3.10.3
./configure
make
sudo make install
2 编译Paddle-Lite 的 python Whl 包(建议选择2.9版本)
#1.下载Paddle-Lite源码并切换到release分支,这里从gitee上下载,节约时间
git clone https://gitee.com/paddlepaddle/paddle-lite
cd paddle-lite && git checkout release/v2.6
#删除此目录,编译脚本会自动从国内CDN下载第三方库文件
rm -rf third-party
编译:./lite/tools/build_linux.sh --with_python=ON --python_version=3.6 - with_log=ON
3 安装Paddle Lite 预测库
cd /build.lite.linux.armv8.gcc/inference_lite_lib.armlinux.armv8/python/install/dist
pip3 install xxxxxx.whl
如果编译失败可以直接用我编译好的2.9版本的 paddlelite-2.9-cp36-cp36m-linux_aarch64.whl(当时我们为了安装这个废了好多天时间)
链接:https://pan.baidu.com/s/1X0cBLnt0X3DVwjH76L2lzw
提取码:t5h8
4 模型部署
(部署之间需要先将自己训练的模型转化为.nb模型)
import paddle.jit as jit
# 定义模型参数的状态字典
state_dict = paddle.load('/home/aistudio/model/model.pdparam')
# 加载模型参数状态字典
model.set_state_dict(state_dict)
model.eval()
# 编译模型为 JIT 模型
compiled_model = jit.to_static(model,input_spec=[paddle.static.InputSpec(shape=[None, 1, 150, 150], dtype='float32')])
# 保存 JIT 模型
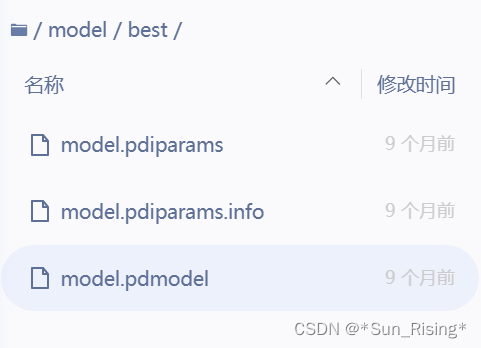
jit.save(compiled_model, '/home/aistudio/model/best/model')模型权重被保存到best文件夹,模型名称为model,如下:
模型部署和预测如下
from paddlelite.lite import *
from PIL import Image
import cv2

config = MobileConfig()
config.set_model_from_file("/home/edgeboard/mycode/mymodel/seg/mobileseg_shufflenetv2_160.nb") #加载模型
predictor1 = create_paddle_predictor(config) #创建predictor
input_tensor = predictor.get_input(0)
input_tensor.from_numpy(resized_image) #将图像numpy数据输入模型
predictor.run()#预测
output_tensor = predictor.get_output(0)#获取结果
其中还涉及到一些图像的预预处理等步骤,完整的代码如下所示(以语义分割模型为例)
from paddlelite.lite import *
import numpy as np
from PIL import Image
import cv2
import os
import time
import threading

def normalize(input_img):
    '''数据归一化
        input_img: 图像数据--numpy.ndarray
    '''
    # 对RGB通道进行均值-方差的归一化
    img_means = [0.5,0.5,0.5]
    img_stds = [0.5,0.5,0.5]
    input_img[0, 0] = (input_img[0, 0] / 255. - img_means[0]) / img_stds[0]
    input_img[0, 1] = (input_img[0, 1] / 255. - img_means[1]) / img_stds[1]
    input_img[0, 2] = (input_img[0, 2] / 255. - img_means[2]) / img_stds[2]
    return input_img

def seg(img_path,predictor,image_size):
    image = cv2.imread(img_path)
    image = cv2.cvtColor(image, cv2.COLOR_BGR2RGB)
    resized_image=cv2.resize(image, image_size)
    # cv2.imshow('',resized_image)
    input_data = np.array(resized_image).transpose(2, 0, 1).reshape([1, 3, image_size[0], image_size[1]]).astype('float32') #转换成numpy
    resized_image = normalize(input_data) #归一化
    input_tensor = predictor.get_input(0)
    input_tensor.from_numpy(resized_image) #将图像numpy数据输入模型
    predictor.run()
    output_tensor = predictor.get_output(0)
    # print(output_tensor.numpy().shape)
    sc_img = output_tensor.numpy()[0] #获取单通道label图
    return sc_img#返回label图和渲染图

def follow(image_path):
    image_size=(150,150)
    sc_img=seg(image_path,predictor1,image_size)
    # 计算帧率
    result=np.array(sc_img).reshape(image_size)
    result = result.astype(np.uint8)*255  # 将图像数据类型转换为8位无符号整数
    new_image_path=os.path.join(new_dir_path,img[:-4]+'.png')
    cv2.imwrite(new_image_path,result)
    # cv2.imshow('1',result)

config = MobileConfig()
# config2 = MobileConfig()
# config.set_power_mode(PowerMode.LITE_POWER_NO_BIND)
config.set_model_from_file("/home/edgeboard/mycode/mymodel/seg/mobileseg_shufflenetv2_160.nb") #加载模型

# config.set_threads(4)#设置线程数
predictor1 = create_paddle_predictor(config) #创建predictor
# predictor2 = create_paddle_predictor(config2) #创建predictor
# print(666)

# name='t18'
# path=f"/home/edgeboard/mycode/data/{name}_image/"
# new_dir_path=f'/home/edgeboard/mycode/data/{name}_result'
#RGB图片地址
path=f"/home/edgeboard/mycode/data/vortex_image/"
#分割完之后图像保存地址
new_dir_path=f"/home/edgeboard/mycode/data/vortex_150/"
images=os.listdir(path)
start_time=time.time()
count=0
for img in images:
    if img.endswith(".jpg"):
        pass
    else:
        continue
    count+=1
    print(count)
    image_path=os.path.join(path,img)
    #分割巡线
    fps_counter = 0
    fps_start_time = time.time()
    follow(image_path)
    # yolo()
    fps_counter += 1
    fps = fps_counter / (time.time() - fps_start_time)
    print(f"Frame rate: {fps:.2f} fps")
    fps_counter = 0
    fps_start_time = time.time()
    # cv2.waitKey(0)
end_time=time.time()
print('FPS:',len(images)/(end_time-start_time))
之后将会介绍yolo模型的部署,yolo模型的部署和语义分割类似,数据处理有些不同


 2409
2409

 被折叠的 条评论
为什么被折叠?
被折叠的 条评论
为什么被折叠?
 到【灌水乐园】发言


