


 本文介绍了如何在Windows环境下安装Nginx,配置nginx.conf文件,包括设置服务器监听端口、指定静态文件目录、处理404错误以及设置代理。同时,讲解了如何为Vue项目打包并设置publicPath,通过Nginx部署时添加访问路径前缀。还提到了一些Nginx在Windows下的常用命令,以及解决配置中可能遇到的问题。
文章目录
一、安装nginx
【phpstudy下载官网】https://www.xp.cn/download.html
【nginx下载】http://nginx.org/en/download.html
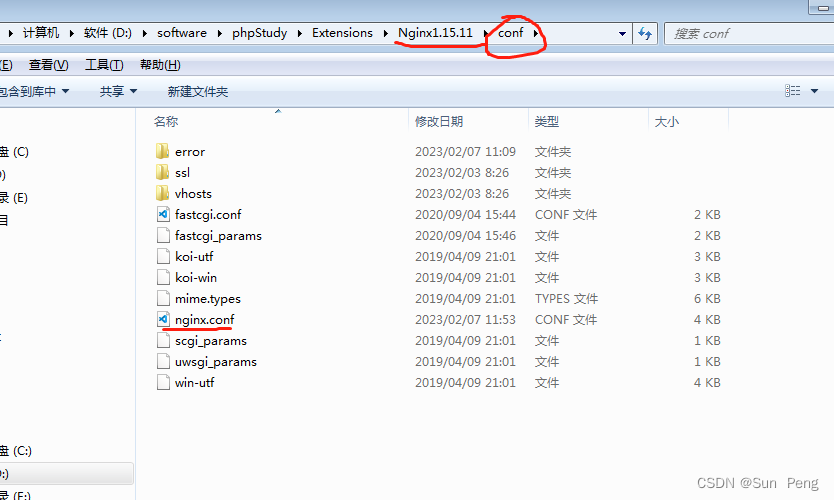
二、配置nginx.conf:
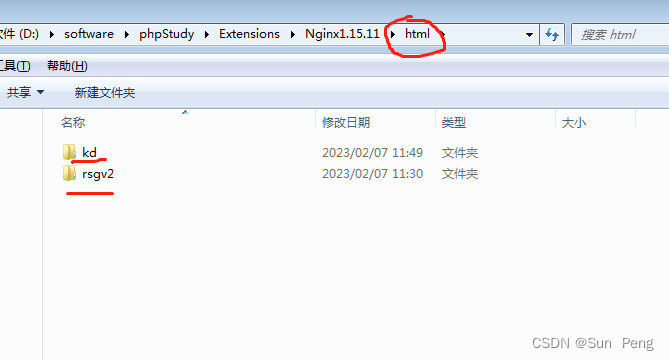
html里面存放项目名称(如kd),kd里面放打包dist文件包(解压后的)

配置完,记得
重启nginx
server {
listen 9001;
server_name localhost;
location / {
#使用phpphpStudy,默认为www目录使用dist包放在www=>html=>rsgv2=>dist
root html/rsgv2/dist;
#改为D:\software\phpStudy\Extensions\Nginx1.15.11\html\rsgv2\dist或者更改nginx配置里面的网站目录,就可以放在Nginx1.15.11\html里面了
# root D:\software\phpStudy\Extensions\Nginx1.15.11\html\rsgv2\dist
index index.html index.htm;
#解决404错误
try_files $uri $uri/ /index.html;
}
#设置代理
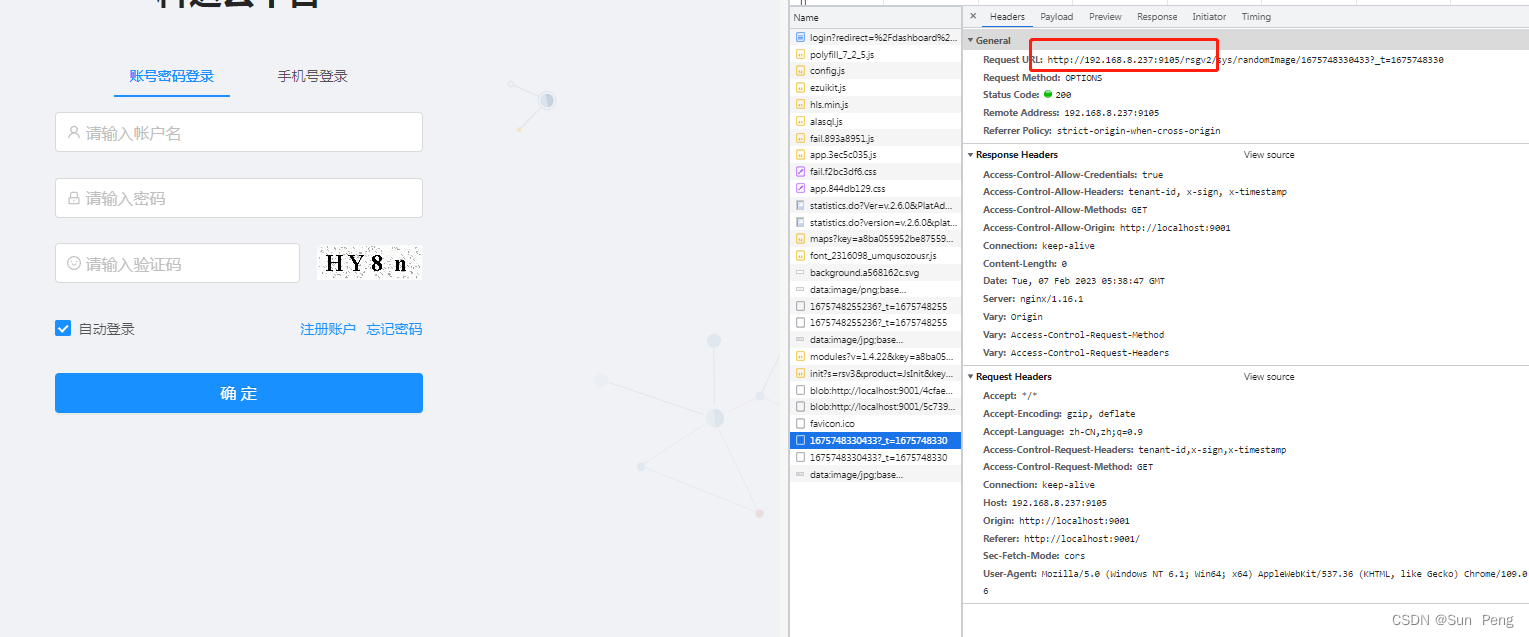
location /rsgv2/ {
proxy_pass http://192.168.8.237:9105/;
}
}
server {
listen 9002;
server_name localhost;
location / {
root html/kd/dist;
index index.html index.htm;
#解决404错误
try_files $uri $uri/ /index.html;
}
#设置代理
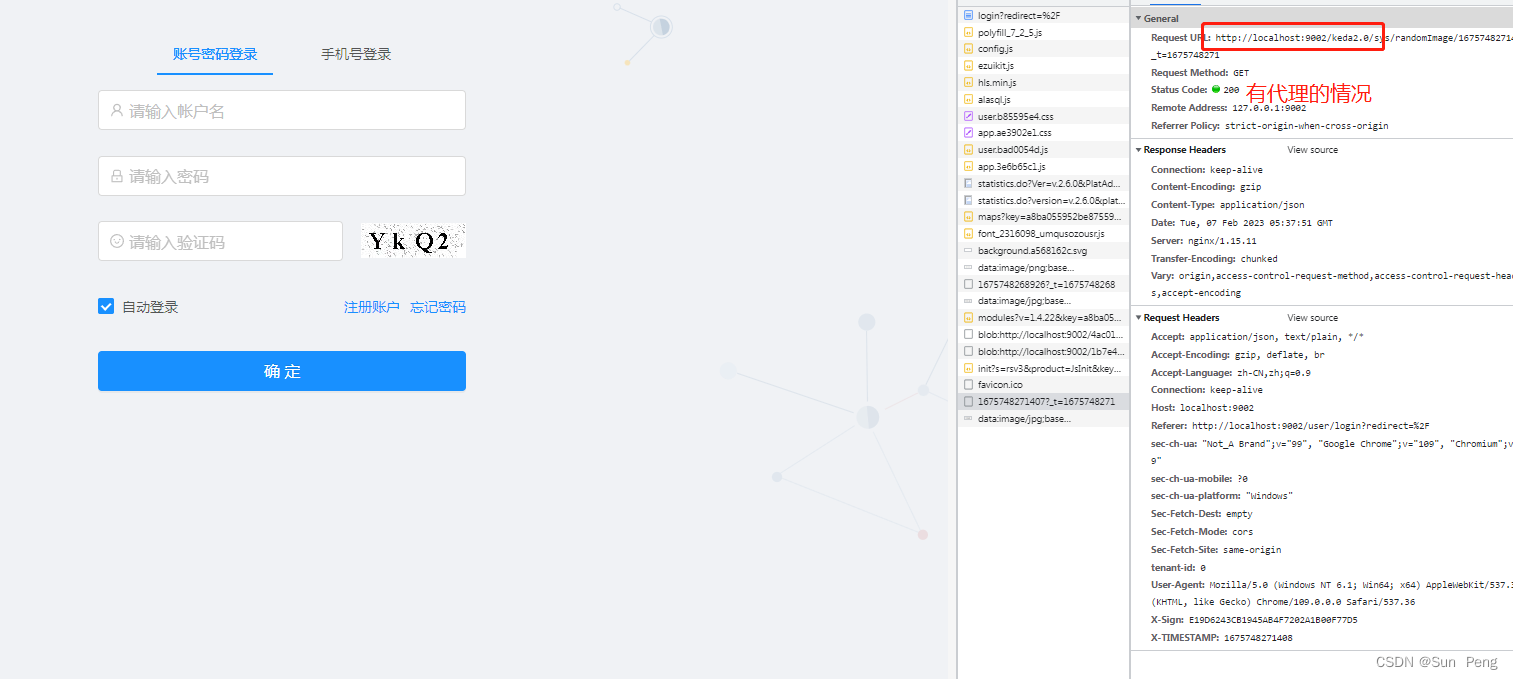
location /keda2.0/ {
proxy_pass http://192.168.8.237:9100/keda2.0/;#keda2.0/要就加上,不要就去除
}
}
三、效果
四、Nginx在windows下常用命令:
直接点击Nginx目录下的nginx.exe 或者 cmd运行start nginx  #启动

nginx -s stop 或者 nginx -s quit  #关闭  stop表示立即停止nginx,不保存相关信息 ; quit表示正常退出nginx,并保存相关信息

nginx -s reload #修改配置后重新加载生效

nginx -s reopen #重新打开日志文件

nginx -t -c /path/to/nginx.conf #测试nginx配置文件是否正确

nginx -s reopen #重启Nginx

nginx -s reload #重新加载Nginx配置文件,然后以优雅的方式重启Nginx

nginx -s stop #强制停止Nginx服务

nginx -s quit #优雅地停止Nginx服务(即处理完所有请求后再停止服务)

nginx -t #检测配置文件是否有语法错误,然后退出

nginx -?,-h #打开帮助信息

nginx -v #显示版本信息并退出

nginx -V #显示版本和配置选项信息,然后退出

nginx -t #检测配置文件是否有语法错误,然后退出

nginx -T #检测配置文件是否有语法错误,转储并退出

nginx -q #在检测配置文件期间屏蔽非错误信息

nginx -p prefix #设置前缀路径(默认是:/usr/share/nginx/)

nginx -c filename #设置配置文件(默认是:/etc/nginx/nginx.conf)

nginx -g directives #设置配置文件外的全局指令

killall nginx #杀死所有nginx进程
五、问题:
nginx报错: [warn] conflicting server name “localhost“ on 0.0.0.0:80, ignored
【解决】重复绑定了server name,但这个警告不会影响到服务器运行,可以不用管它
\会报错的话,改为/并在最后面加/;

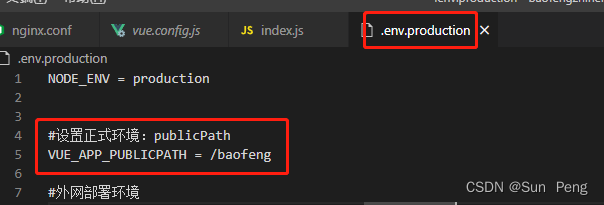
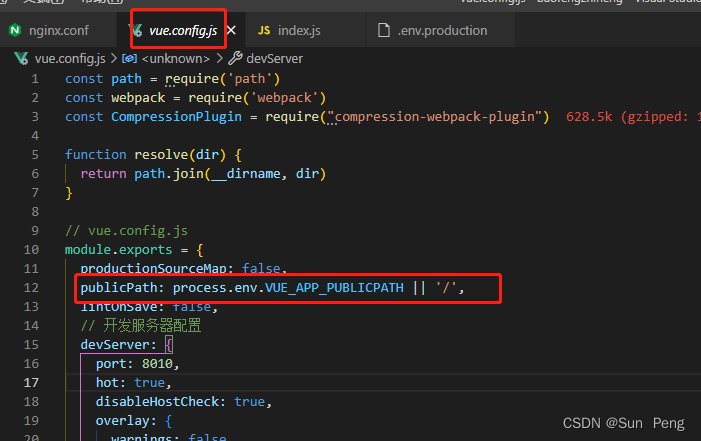
六、nginx部署vue项目,给访问路径加前缀:
【1】前端打包=》publicPath:‘/baofeng’
【2】nginx配置:
server {
        listen       9001;
        server_name  localhost;
        location /baofeng {
            #使用phpphpStudy,默认为www目录使用dist包放在www=>html=>rsgv2=>dist
            # root   html/rsgv2/dist;

            #改为D:\software\phpStudy\Extensions\Nginx1.15.11\html\rsgv2\dist或者更改nginx配置里面的网站目录,就可以放在Nginx1.15.11\html里面了
            # root   E:/项目目录/宝丰智能/baofengzhineng/dist/;
            alias  E:/项目目录/宝丰智能/baofengzhineng/dist/;
            index  index.html index.htm;
            #解决404错误history模式
            try_files $uri $uri/ /baofeng/index.html;
        }
}
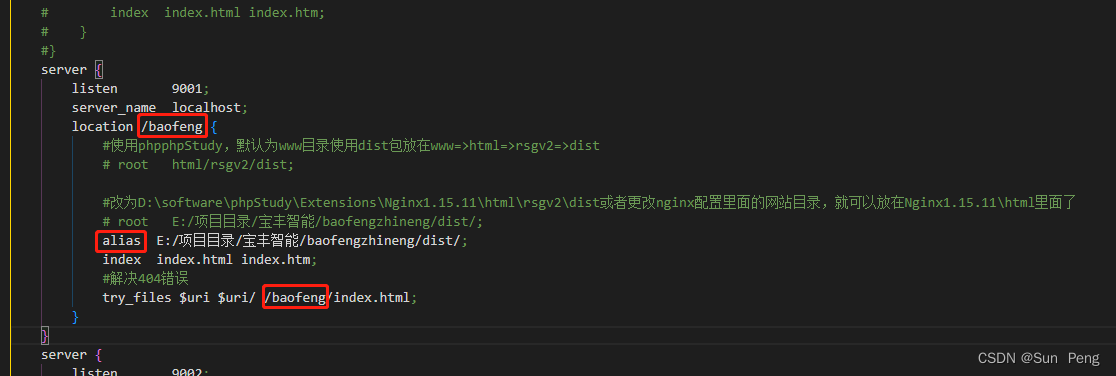
注意:此时打开的网址是locahost:9001/baofeng,而不是locahost:9001


 2598
2598

 被折叠的 条评论
为什么被折叠?
被折叠的 条评论
为什么被折叠?
 到【灌水乐园】发言


