


一、文档:
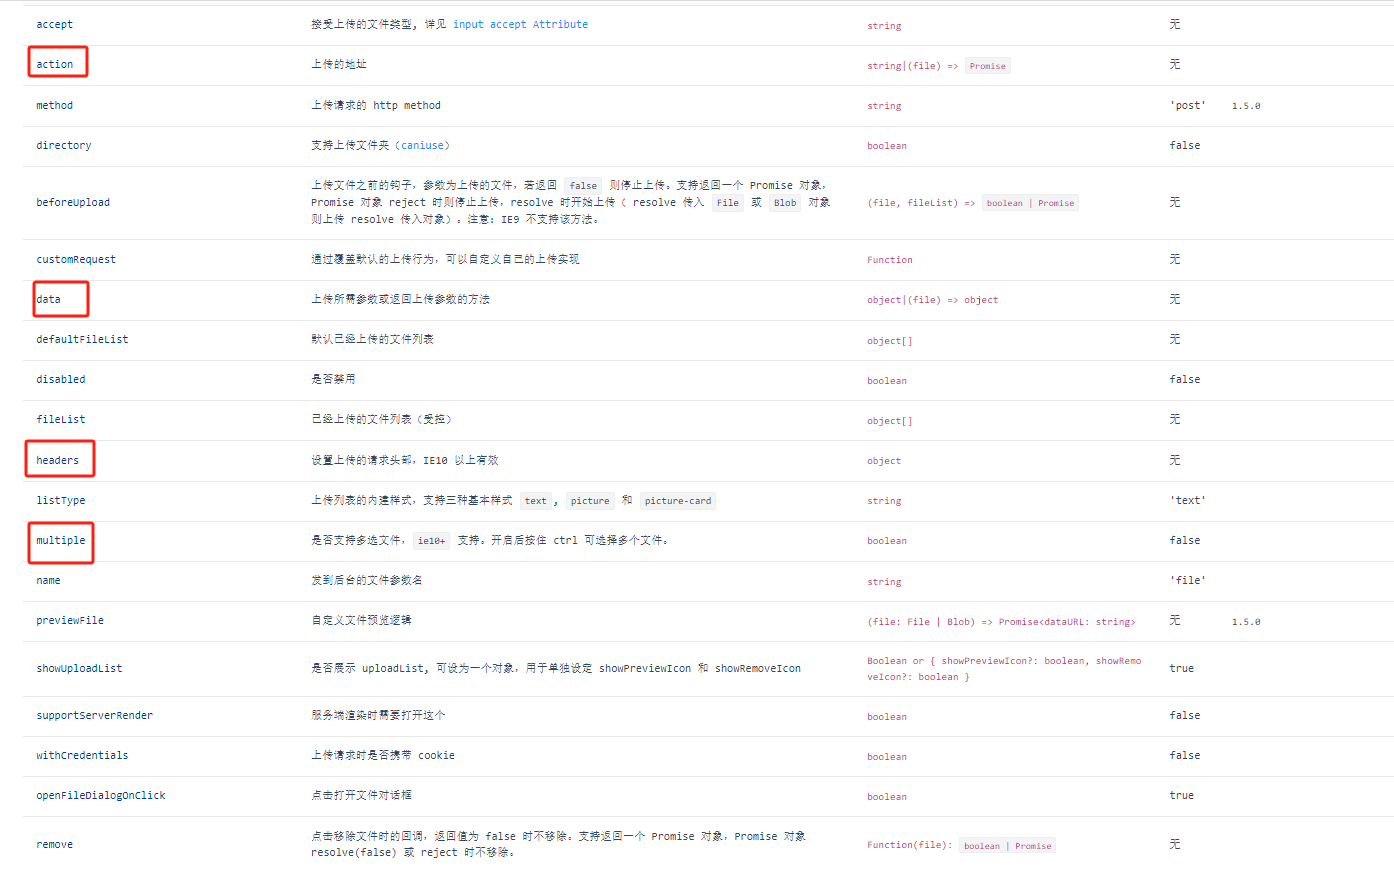
二、使用(以Jeecg为例):
【1】template:
<a-upload name="file" :showUploadList="false" :multiple="false" :headers="tokenHeader"
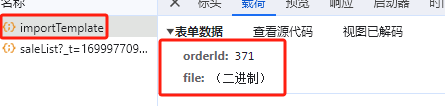
:data="{ 'orderId': record.id }" :action="importExcelUrlDispatchCar"
@change="handleImportExcel">导入
</a-upload>
【2】script:
<script>
export default {
data() {
return {
url:{
importExcelUrlDispatchCar:"/kd/xxx/importTemplate"
}
}
},
computed: {
//拼接上传的地址
importExcelUrlDispatchCar: function () {
return `${window._CONFIG['domianURL']}/${this.url.importExcelUrlDispatchCar}`;
},
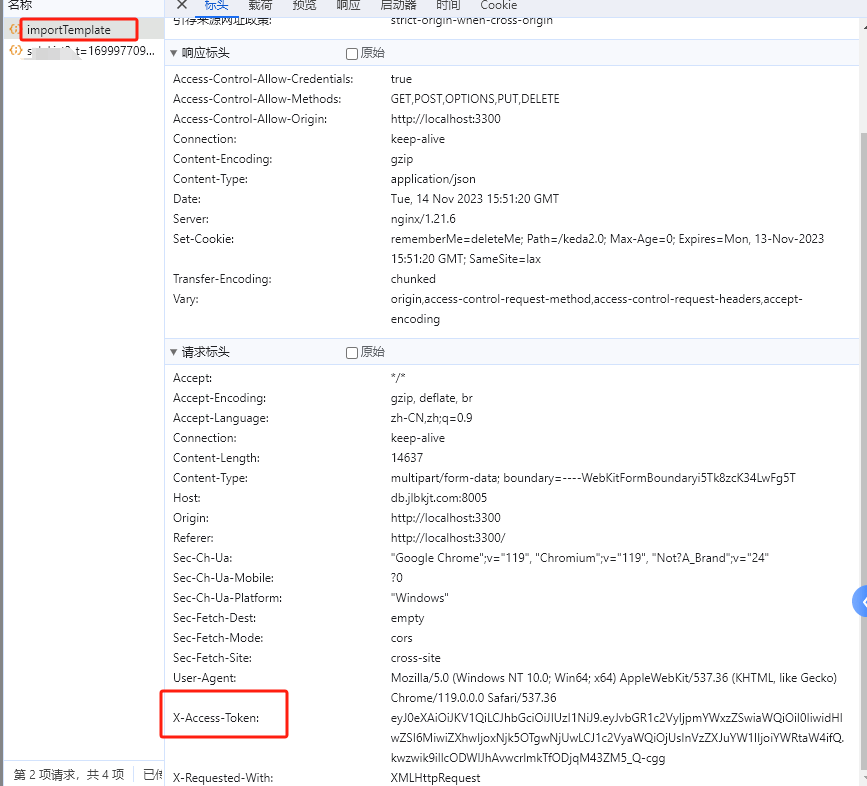
// 设置上传的Header参数
tokenHeader() {
let head = { 'X-Access-Token': Vue.ls.get(ACCESS_TOKEN) }
let tenantid = Vue.ls.get(TENANT_ID)
if (tenantid) {
head['tenant-id'] = tenantid
}
return head;
},
},
methods:{
handleImportExcel(info){
this.loading = true;
if (info.file.status !== 'uploading') {
console.log(info.file, info.fileList);
}
if (info.file.status === 'done') {
this.loading = false;
if (info.file.response.success){
if (info.file.response.code === 201) {
let { message, result:{ msg, fileUrl, fileName } }= info.file.response
let href = window._CONFIG['domianURL'] + fileUrl
this.$warning({
title: message,
content: (<div><span>{msg}</span>
<span>具体详情请
<a href={href}target="_blank" download={fileName}>点击下载</a>
</span></div>)
})
} else {
this.$message.success(info.file.response.message ||`${info.file.name} 文件上传成功`)
}
this.loadData()
} else {
this.$message.error(`${info.file.name} ${info.file.response.message}.`);
}
}else if (info.file.status === 'error') {
this.loading = false;
if (info.file.response.status === 500) {
let data = info.file.response
const token = Vue.ls.get(ACCESS_TOKEN)
if (token && data.message.includes("Token失效")) {
this.$error({
title: '登录已过期',
content: '很抱歉,登录已过期,请重新登录',
okText: '重新登录',
mask: false,
onOk: () => {
store.dispatch('Logout').then(() => {
Vue.ls.remove(ACCESS_TOKEN)
window.location.reload();
})
}
})
}
}
}else{
this.$message.error(`文件上传失败: ${info.file.msg} `);
}
},
}
}
</script>
三、效果图:


 1万+
1万+


 被折叠的 条评论
为什么被折叠?
被折叠的 条评论
为什么被折叠?
 到【灌水乐园】发言


