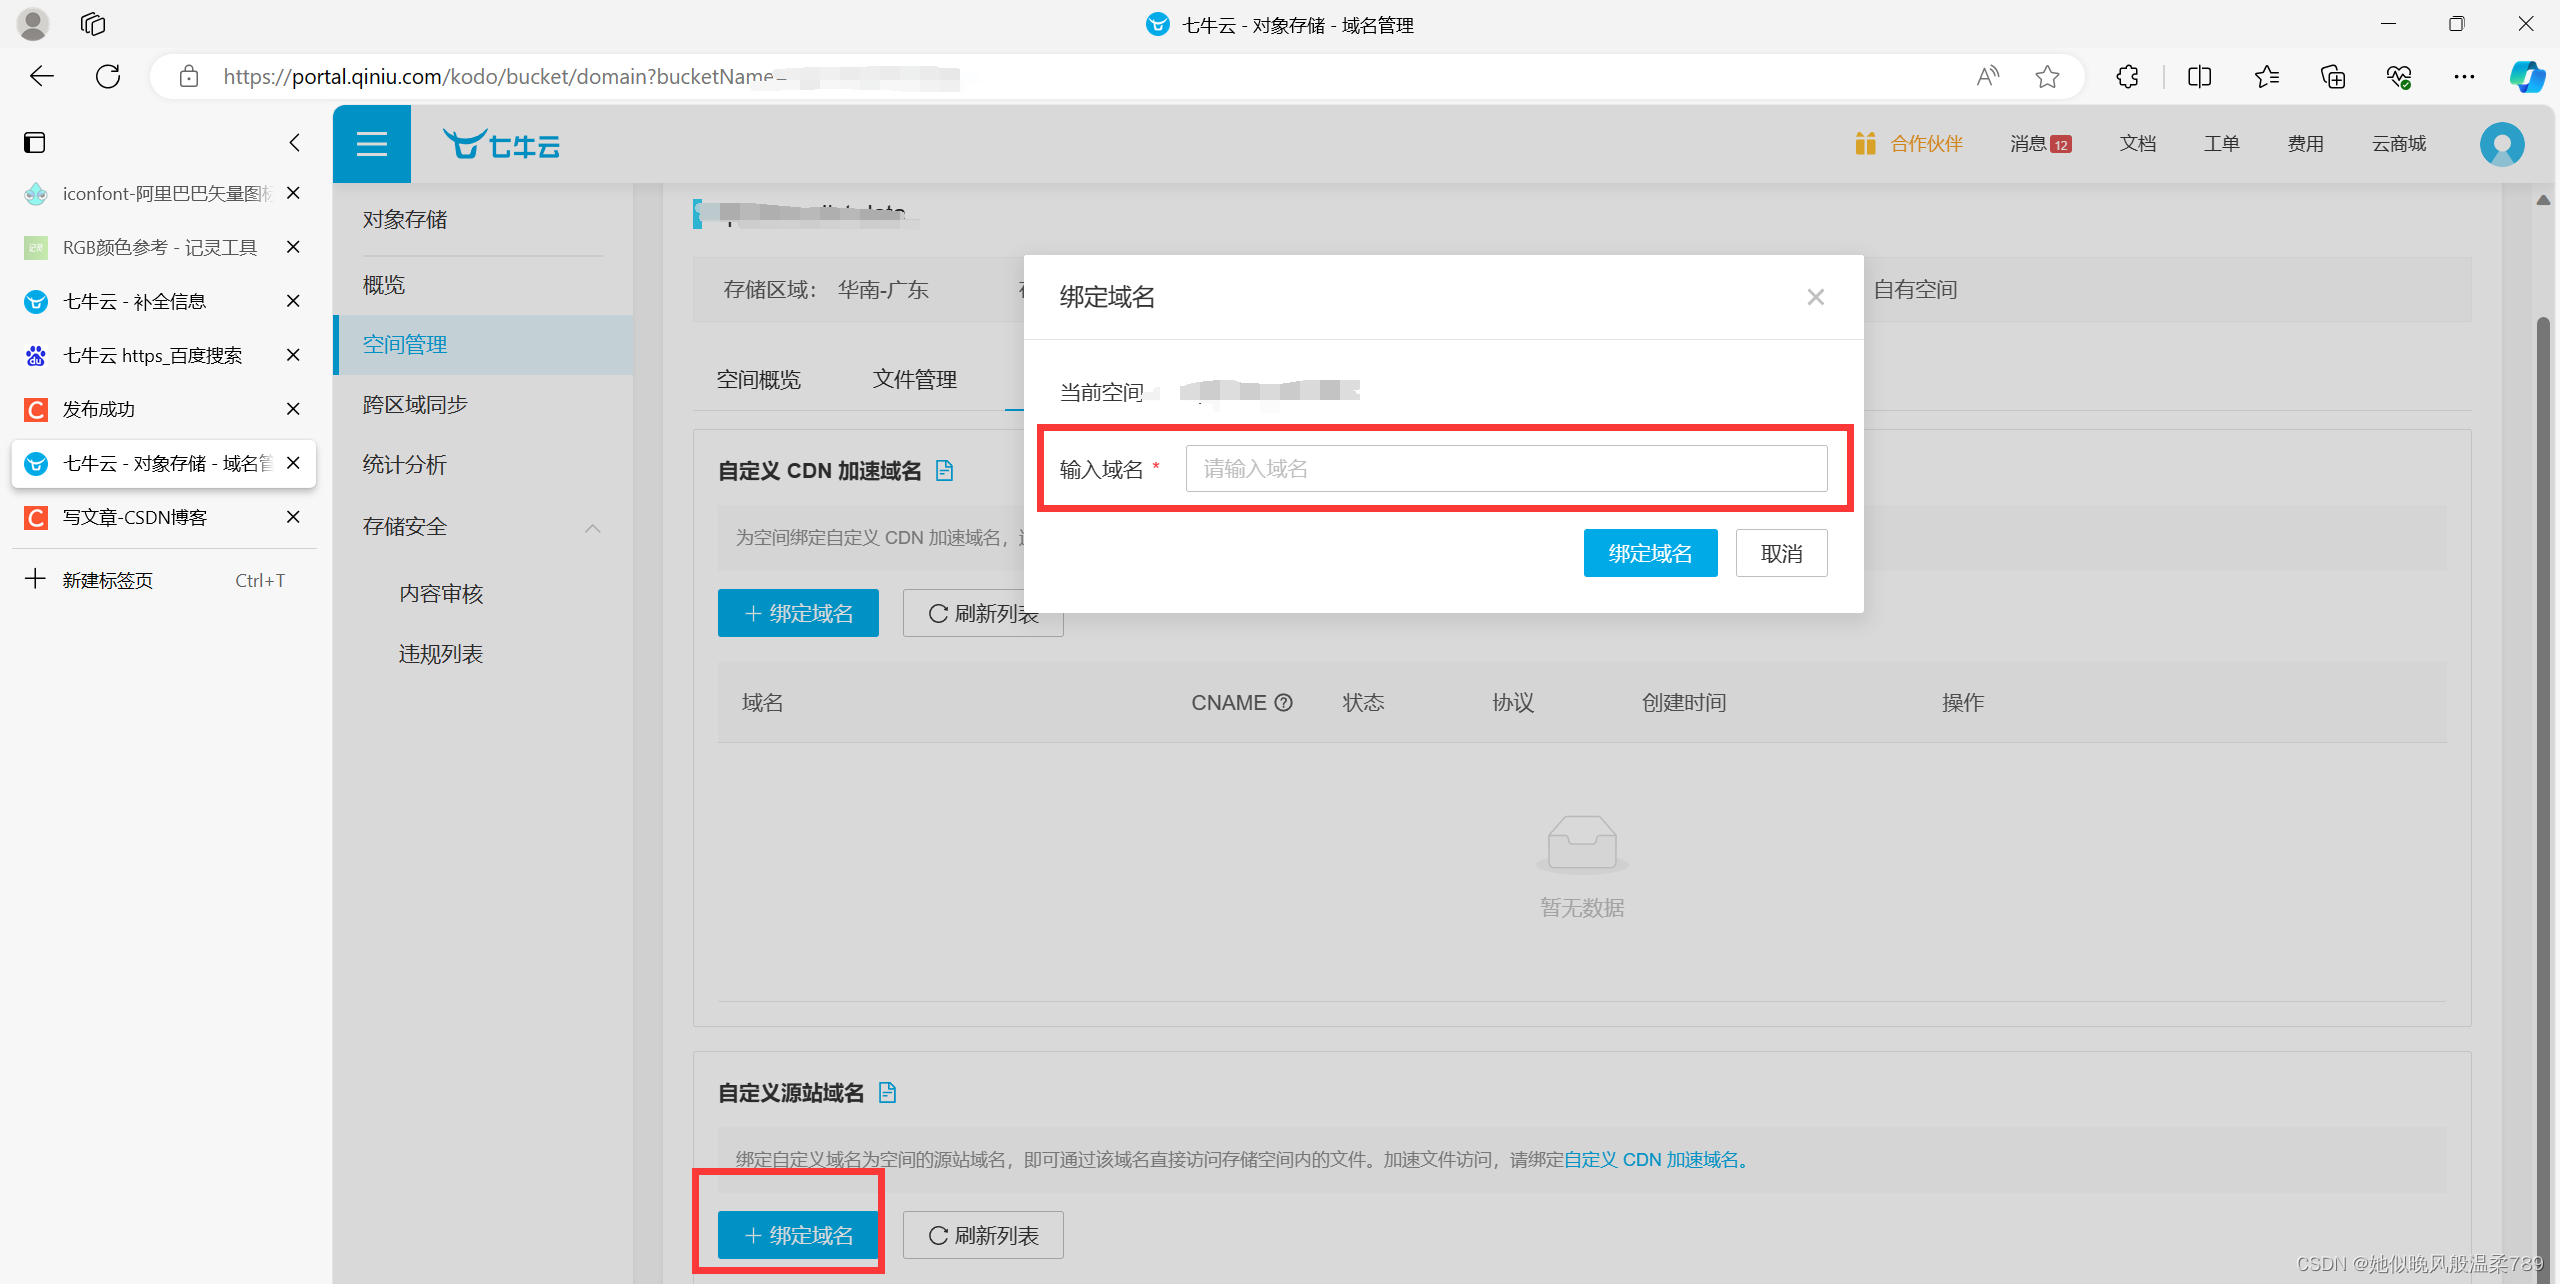
实用-----七牛云绑定自定义域名(无废话 无尿点)
1.打开七牛云 点击自己需要绑定的实例
https://portal.qiniu.com/kodo/bucket
![在这里插入图片描述](https://img-blog.csdnimg.cn/aeafc1d81a1e4928a6db878b9e4de2a3.png)
2. 点击域名管理
![在这里插入图片描述](https://img-blog.csdnimg.cn/212fbdcee16f45f3bca908fb5e8a4e43.png)
3.点击添加域名 输入你要绑定的域名
![在这里插入图片描述](https://img-blog.csdnimg.cn/789f925cd2bc4a8b949e4607b4164385.png)
4. 配置 CACHE
- 复制 CACHE 码
![在这里插入图片描述](https://img-blog.csdnimg.cn/25957eccc91449f58221a23477a16ff6.png)
- 访问腾讯云 CDN 官网
https://console.cloud.tencent.com/cns
- 添加域名
![在这里插入图片描述](https://img-blog.csdnimg.cn/62dd3542f910492eb0152881883dcbf0.png)
- 这里输入我们复制的 CACHE 码
![在这里插入图片描述](https://img-blog.csdnimg.cn/70f5878941ad48b49288c2b7869c1601.png)
- 点击确定后效验 等待半个小时左右
5.查看是否能使用
- 已可以正常使用
![在这里插入图片描述](https://img-blog.csdnimg.cn/47389ab4078a43188e3ff301f3948ce3.png)
- 注: 如果访问出现错误 请信任 因为我们没有配置 Https
![在这里插入图片描述](https://img-blog.csdnimg.cn/72e4af6edd654eca85e94b5b1968c782.png)