


目录
一、前情提要
mysql有两种存储图片的方法,分别是:1、将图片保存的路径存储到数据库;2、将图片以二进制数据流的形式直接写入数据库字段中。
此处使用第一种方法,若用第二种方法可以参考我这篇文章:
使用Unity从MySQL中提取图片(图片使用LONGBLOB存储)
二、准备
2.1 MySQL数据库
2.1.1 创建数据库并创建数据库表
以我自己创建的举例 :
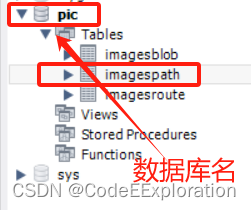
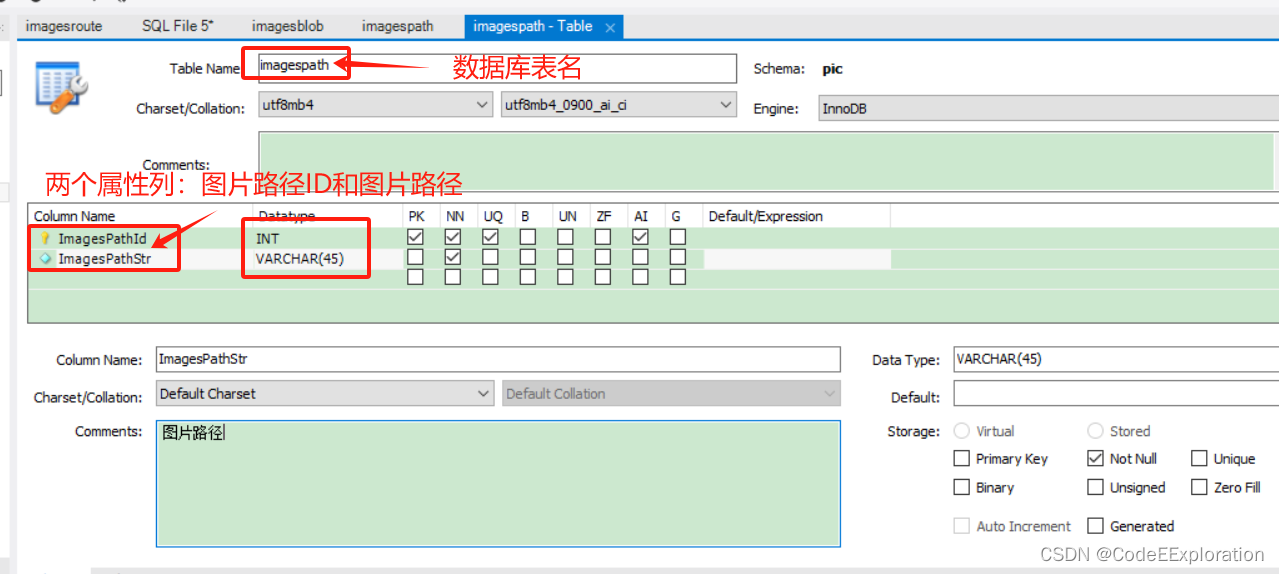
数据库名:pic
表名:imagespath,列名:ImagesPathId(表示图片路径ID)、ImagesPathStr(表示图片路径)
2.1.2 插入数据
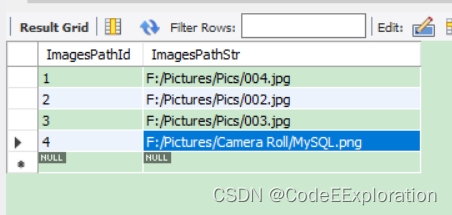
以我自己插入的图片路径举例:F:/Pictures/Pics/004.jpg
2.1.3 MySQL数据库与Unity连接
可以参考我这篇文章
2.2 创建项目
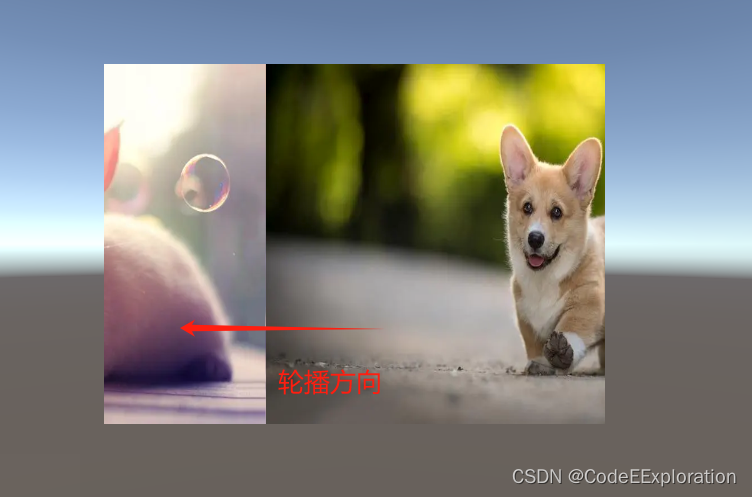
在Unity中新建场景,并按照自己的需求布局UI界面,我这里为了将数据库中的图片全部呈现出来使用了轮播的形式实现:提取全部图片并轮播。
该原理实现可以参考我这两篇文章:
Unity自动从本地加载图片实现图片轮播(图片数量可任意删减)
三、具体步骤
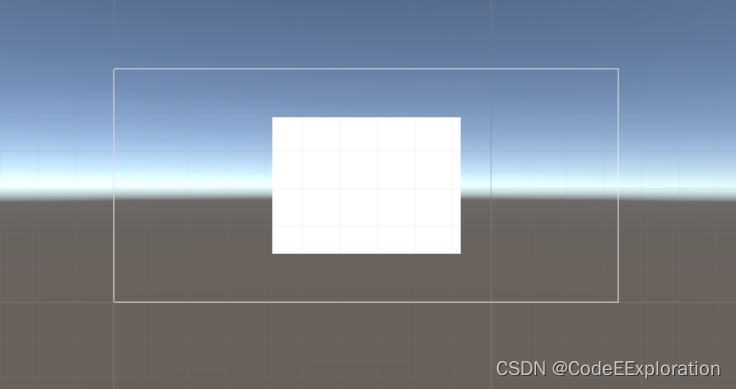
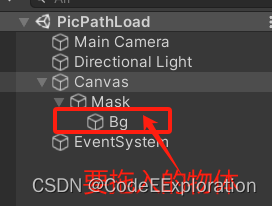
3.1 布局UI界面
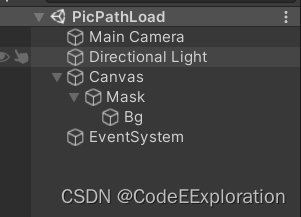
3.2 创建预制体

3.3 编写脚本
using System.Collections;
using DG.Tweening;
using UnityEngine;
using UnityEngine.Networking;
using UnityEngine.UI;
using MySql.Data.MySqlClient;
using System.Collections.Generic;

public class ImagePathloader : MonoBehaviour
{
    //file:///F:/Pictures/Pics/002.jpg
    private string filePathheader = "file:///";
    private string filePath;


    public GameObject go;
    public GameObject prefabToInstantiate;
    Dictionary<int, string> picdic = new Dictionary<int, string>();
    //string[] array;
    int index = 0;
    int picnum = 0;
    Transform parentTransform;
    GameObject newObject;

    #region①与MySQL建立链接的方法
    /*此方法返回一个MySqlConnection,我们需要去接收这个方法的返回值,
     *在之后的增删改查中需要用到这个返回值,
     *这个返回值相当于建立了一个与MySQL进行连接的通道。
     */
    private MySqlConnection ConnectSql(string server, int port,
                 string database, string user, string password)
    {
        string sqlSer = "server = " + server + ";" +
                        "port =" + port + ";" +
                        "database =" + database + ";" +
                        "user =" + user + ";" +
                        "password =" + password;
        MySqlConnection conn = new MySqlConnection(sqlSer);
        try
        {
            conn.Open();
            Debug.Log("________________链接成功_________________");
            return conn;
        }
        catch (System.Exception e)
        {
            Debug.Log(e.Message + "\n 链接失败");
            return null;
        }
        finally
        {
            conn.Close();
        }
    }
    #endregion


    #region⑥ 在MySQL中查询多条数据

    /*查询多条与查询一条类似。执行此方法同样会返回查询的所有结果。*/
    private void MysqlSelect(MySqlConnection conn, string sql)
    {
        int imid = 0;
        string imstr = "";
        int j=0;
        try
        {
            conn.Open();
            MySqlCommand commd = new MySqlCommand(sql, conn);
            MySqlDataReader reader = commd.ExecuteReader();

            while (reader.Read())
            {
                j++;
                imid = reader.GetInt32("ImagesPathId");
                imstr = reader.GetString("ImagesPathStr");
                Debug.Log("picid: " + imid + "\n picstr: " + imstr);
                picdic.Add(j, imstr);
                //array[j++] = imstr;
                //Debug.Log("picaryid: " + j + "\n picarystr: " + array[j]);
            }
        }
        catch (System.Exception e)
        {
            Debug.Log(e.Message);
        }
        finally
        {
            conn.Close();
        }


    }
    #endregion


    #region 7向MySQL中查询数据数量的方法
    /*此方法需要我们传入刚刚建立的链接和需要执行的MySQL 算数量语句。
     * 调用此方法并传入参数,运行后会在unity的控制台输出刚刚的sql语句所影响的行数和sql语句。
     * 如果执行不成功,则会在控制台输出异常原因。
     */
    private int MysqlCount(MySqlConnection conn, string sql)
    {
        int count = 0;
        try
        {
            conn.Open();
            MySqlCommand commd = new MySqlCommand(sql, conn);
            MySqlDataReader reader = commd.ExecuteReader();
            if (reader.HasRows)
            {
                reader.Read();
                count = reader.GetInt16("count(ImagesPathId)");
            }
        }
        catch (System.Exception e)
        {
            Debug.Log(e.Message);
        }
        finally
        {
            conn.Close();
        }
        return count;
    }
    #endregion


    // Start is called before the first frame update
    void Start()
    {
        MySqlConnection conn = ConnectSql("localhost", 3306, "pic", "root", "123456");
        picnum = MysqlCount(conn, "select count(ImagesPathId) from imagespath");
        //array = new string[picnum]; // 初始化数组大小为图片数量
        MysqlSelect(conn, "select * from imagespath");


        parentTransform = go.transform; // 替换 go为实际的父级对象
        Debug.Log("Image loaded .....");

        InvokeRepeating("lunbo", 1, 4);

        StartCoroutine(LoadLocalImageCoroutine());
    }

    IEnumerator LoadLocalImageCoroutine()
    {
        for (int i = 1; i <= picnum; i++)
        {
            newObject = Instantiate(prefabToInstantiate);
            newObject.transform.SetParent(parentTransform);
            newObject.transform.localPosition = new Vector3((500f * i - 250), 0f, 0f);

            filePath = filePathheader + picdic[i];
            //filePath = filePathheader + array[i];
            Debug.Log(filePath);
            using (UnityWebRequest www = UnityWebRequestTexture.GetTexture(filePath))
            {
                // 必须指定HTTP方法为GET,因为本地路径无法使用POST方法
                www.method = UnityWebRequest.kHttpVerbGET;

                yield return www.SendWebRequest();

                if (www.result == UnityWebRequest.Result.ConnectionError || www.result == UnityWebRequest.Result.ProtocolError)
                {
                    Debug.LogError("Error fetching texture: " + www.error);
                }
                else
                {
                        Texture2D texture = DownloadHandlerTexture.GetContent(www);
                        newObject.GetComponent<Image>().sprite = Sprite.Create(texture, new Rect(0, 0, texture.width, texture.height), new Vector2(0.5f, 0.5f));
               }
            }
        }
    }


    void lunbo()
    {
        if (index == (picnum - 1))
        {
            index = 0;
            //go.transform.localPosition = new Vector3(-250, 0, 0);
            go.transform.DOLocalMoveX(-250, 1);
        }
        else
        {
            index++;
            go.transform.DOLocalMoveX(-250 - 500 * index, 1);
        }
    }
}
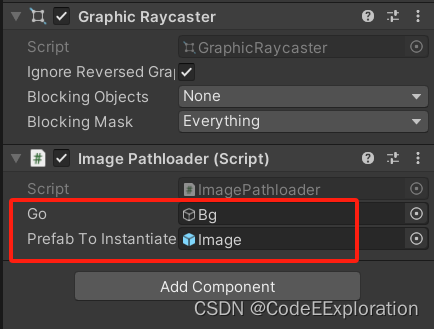
3.4 挂载脚本并运行
将脚本挂载在Canvas上,并拖入预制体和相应物体。
四、运行查看结果


 1528
1528


 被折叠的 条评论
为什么被折叠?
被折叠的 条评论
为什么被折叠?
 到【灌水乐园】发言


