


目录
3.3 输出区域、置信度 文字内容以及其他——image_to_data
1.介绍
Tesseract 的开发始于 2006 年,由惠普公司的 Mike J. Bradbury 带领团队进行。当时,他们希望开发一款能够识别印刷体和手写体的 OCR(Optical Character Recognition,光学字符识别) 引擎。2009 年,Tesseract 被移植到 C++,并成为 Google 的开源项目。随着时间的推移,Tesseract 逐渐成为最受欢迎的 OCR 引擎之一,被广泛应用于各种场景。它可以将图像中的文字提取出来,并将其转化为机器可读的文本。Tesseract 不仅支持多种语言,还可以进行多种格式的图像处理,包括常见的 PDF、JPG、PNG 等。
2. 准备工作
2.1 安装Tesseract
Tesseract下载地址为:
Tesseract User Manual | tessdocTesseract documentation![]() https://tesseract-ocr.github.io/tessdoc/
https://tesseract-ocr.github.io/tessdoc/
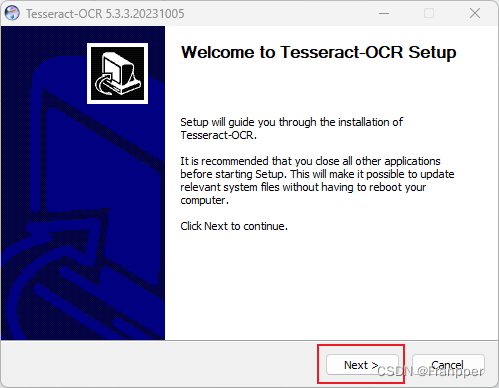
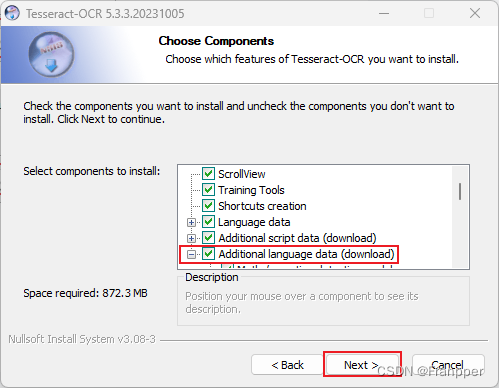
↓↓↓ 按照如下步骤进行安装


勾选下面的选项下载一些语言包,可以翻译中文和一些其他语言
下载不成功的朋友可以点击下面的链接进行下载
https://github.com/tesseract-ocr/tessdata![]() https://github.com/tesseract-ocr/tessdata
https://github.com/tesseract-ocr/tessdata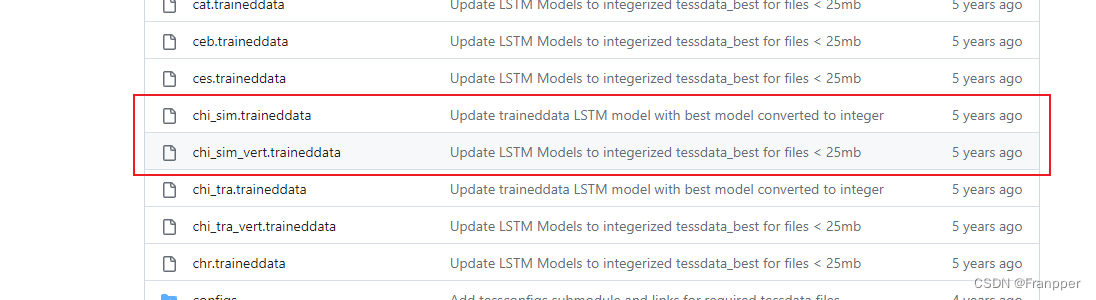
选择下载路径
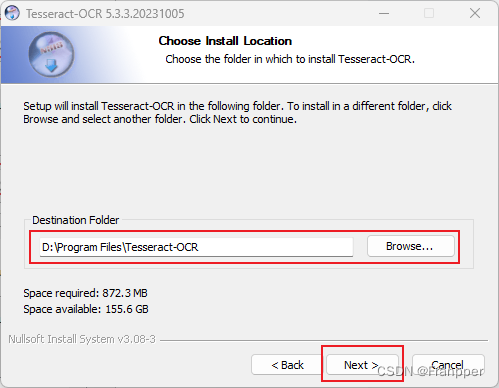
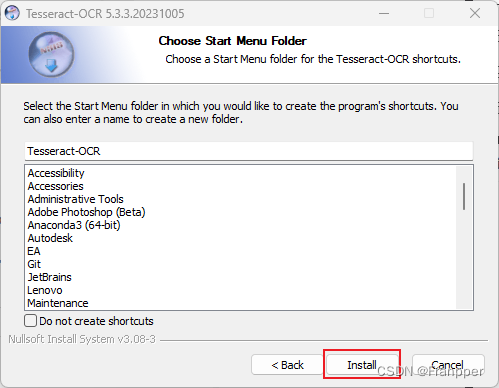
点击Finish下载完毕

2.2 安装pytesseract
执行命令安装pytesseract库
pip install pytesseract3. Tesseract的基础应用
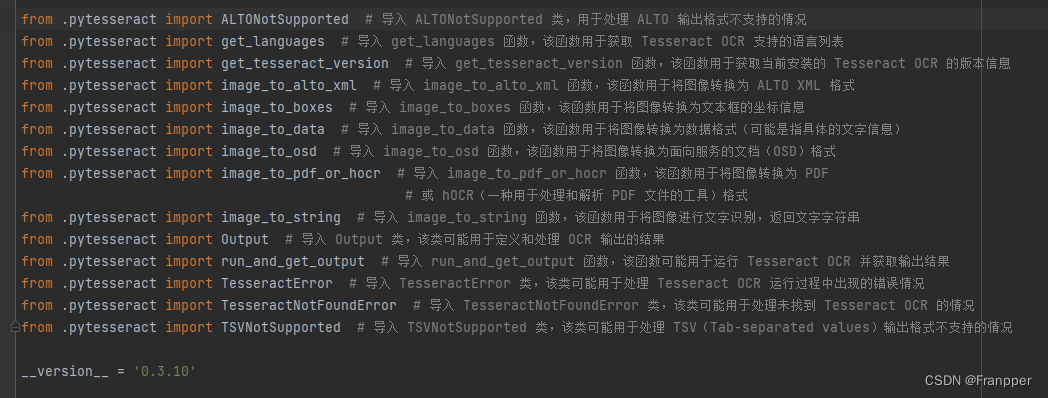
如果你想先了解一下pytesseract都有什么功能的话可以先Ctrl + 鼠标左键 点进去大致浏览一下
这里Franpper帮大家把pytesseract的功能先列出来
下面正式开始
首先进行一些基础操作:导入相关包、设置 Tesseract OCR 引擎的路径、加载图片等
# 导入一些需要的包
import cv2
import pytesseract

# 设置Tesseract OCR引擎路径
pytesseract.pytesseract.tesseract_cmd = r'D:\Program Files\Tesseract-OCR\tesseract.exe'

# 加载一张图片
img = cv2.imread(r'E:\csdn\tesseract\Snipaste.jpg')
下面是Franpper读入的图片(就是本文的简介)
3.1 翻译图像文字——image_to_string
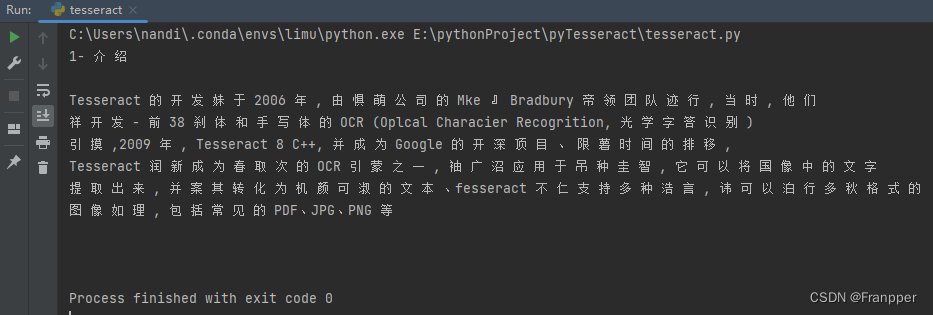
text = pytesseract.image_to_string(img, lang="chi_sim") # 指定语言

print(text)
输出如下(其实看结果翻译的情况并不好):
3.2 获取单个字符的外框——image_to_boxes
boxes = pytesseract.image_to_boxes(img, lang="chi_sim") # 使用
image_h, image_w, _ = img.shape
def cv2ImgAddText(img, text, left, top, textColor=(0, 255, 0), textSize=20):
"""
:param img: 图像
:param text: 文字内容
:param left: 字体左边开始位置
:param top: 字体上面开始位置
:param textColor: 字体颜色
:param textSize: 字体大小
:return: 绘制后的图片
"""
import numpy as np
from PIL import Image, ImageDraw, ImageFont
if isinstance(img, np.ndarray): # 判断是否OpenCV图片类型
img = Image.fromarray(cv2.cvtColor(img, cv2.COLOR_BGR2RGB))
# 创建一个可以在给定图像上绘图的对象
draw = ImageDraw.Draw(img)
# 字体的格式
fontStyle = ImageFont.truetype(
"STSONG.TTF", textSize, encoding="utf-8")
# 绘制文本
draw.text((left, top), text, textColor, font=fontStyle)
# 转换回OpenCV格式
return cv2.cvtColor(np.asarray(img), cv2.COLOR_RGB2BGR)
for box in boxes.splitlines():
box = box.split(' ')
print(box)
"""
opencv中坐标系是基于左上点的
但是tesseract检测出的框是基于左下点的
输出的数据分别是:字符, 左下角横坐标, 左下角纵坐标, 右上角横坐标, 右上角纵坐标(均是基于左下点原点)
所以在绘制的时候要进行坐标转换
"""
x1, y1, x2, y2 = int(box[1]), int(box[2]), int(box[3]), int(box[4])
cv2.rectangle(img, (x1, image_h - y1), (x2, image_h - y2), (0, 255, 0), 1)
# cv2.putText函数无法添加中文字符,所以使用PIL库(RGB)添加中文字符后转为opencv格式(BGR)
img = cv2ImgAddText(img, box[0], x1, image_h - y1 - 30, (255, 0, 0), 15)
cv2.imshow("img", img)
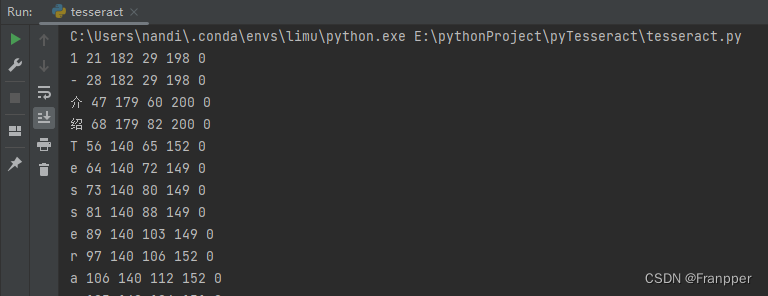
cv2.waitKey(0)输出如下,可以获取单个文字外框的左下角横坐标、左下角纵坐标、右上角横坐标、右上角纵坐标(基于左下点原点坐标系)
3.3 输出区域、置信度 文字内容以及其他——image_to_data
data = pytesseract.image_to_data(img, output_type=pytesseract.Output.STRING, lang="chi_sim")

for level, infor in enumerate(data.splitlines()):
    if level != 0:
        infor = infor.split()
        # 每一行的输出为:level、page_num、block_num、par_num、line_num、word_num、left、top、width、height、conf、text
        print(infor)
        if len(infor) == 12:
            x, y, w, h = int(infor[6]), int(infor[7]), int(infor[8]), int(infor[9])  # 这里的坐标邮与opencv相同了,即左上加宽高
            cv2.rectangle(img, (x, y), (x + w, y + h), (0, 255, 0), 1)
            img = cv2ImgAddText(img, infor[11], x, y - 20, (255, 0, 0), 15)

cv2.imshow("img", img)
cv2.waitKey(0)
执行结果如下:可以看到把一些字母合并成单词整体进行输出了

3.4 设定配置实现过滤功能
在编辑配置时有两个重要的参数,分别是OEM与PSM,下面Franpper给大家介绍一下
3.4.1 OEM
即 OCR Engine Mode(引擎模式),共有四种,如下图:

- 0 — Legacy engine only
- 1 — Neural nets LSTM engine only
- 2 — Legacy + LSTM engines
- 3 — Default, based on what is available
3.4.2 PEM
即Page Segmentation Mode(图片分割模式),共有13种, 如下图:
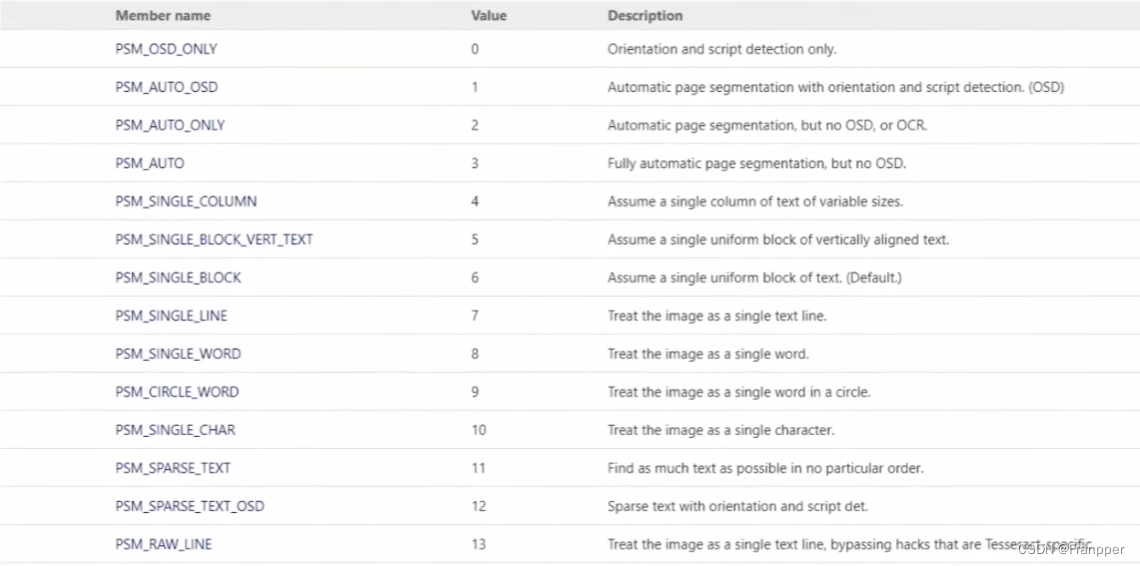
- 0 — Orientation and script detection (OSD) only. 方向及语言检测(Orientation and script detection,OSD)
- 1 — Automatic page segmentation with OSD. 自动图片分割
- 2 — Automatic page segmentation, but no OSD, or OCR. 自动图片分割,没有OSD和OCR
- 3 — Fully automatic page segmentation, but no OSD. (Default) 完全的自动图片分割,没有OSD
- 4 — Assume a single column of text of variable sizes. 假设有一列不同大小的文本
- 5 — Assume a single uniform block of vertically aligned text. 假设有一个垂直对齐的文本块
- 6 — Assume a single uniform block of text. 假设有一个对齐的文本块
- 7 — Treat the image as a single text line. 图片为单行文本
- 8 — Treat the image as a single word. 图片为单词
- 9 — Treat the image as a single word in a circle. 图片为圆形的单词
- 10 — Treat the image as a single character. 图片为单个字符
- 11 — Sparse text. Find as much text as possible in no particular order. 稀疏文本。查找尽可能多的文本,没有特定的顺序
- 12 — Sparse text with OSD. OSD稀疏文本
- 13 — Raw line. Treat the image as a single text line, bypassing hacks that are Tesseract-specific. 原始行。将图像视为单个文本行
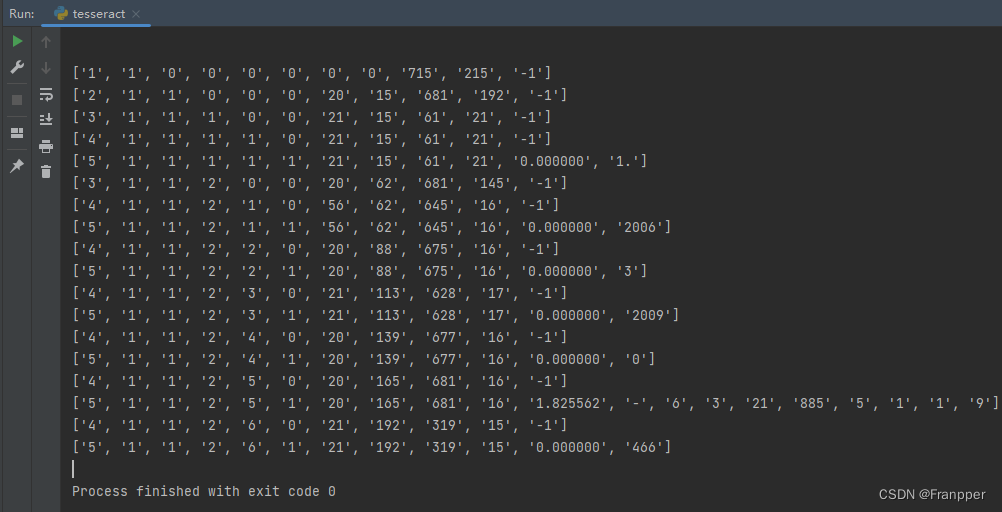
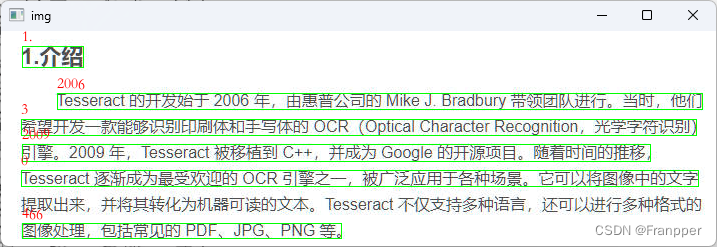
3.4.3 示例:只检测数字
config = r'--oem 3 --psm 6 outputbase digits'  # 添加配置
data = pytesseract.image_to_data(img, output_type=pytesseract.Output.STRING, lang="chi_sim", config=config)

for level, infor in enumerate(data.splitlines()):
    if level != 0:
        infor = infor.split()
        # 每一行的输出为:level、page_num、block_num、par_num、line_num、word_num、left、top、width、height、conf、text
        print(infor)
        if len(infor) == 12:
            x, y, w, h = int(infor[6]), int(infor[7]), int(infor[8]), int(infor[9])  # 这里的坐标邮与opencv相同了,即左上加宽高
            cv2.rectangle(img, (x, y), (x + w, y + h), (0, 255, 0), 1)
            img = cv2ImgAddText(img, infor[11], x, y - 20, (255, 0, 0), 15)

cv2.imshow("img", img)
cv2.waitKey(0)
运行结果如下,可以看到只有数字被提取了出来
4. 结语
Tesseract不仅仅是一个OCR工具,它代表了人工智能和机器学习在文本识别领域的突破性技术。它不仅为我们提供了从图像中提取文字的强大能力,而且通过持续的研发和优化,Tesseract的能力还将进一步提升。然而,Tesseract并非万能的。虽然它对于一些常规的文本识别任务有着出色的表现,但在处理一些复杂或特定的任务时,我们可能还需要进行更多的预处理或者后处理工作。尽管如此,Tesseract仍然是一个非常强大且灵活的工具,值得我们深入学习和探索。


 5146
5146


 被折叠的 条评论
为什么被折叠?
被折叠的 条评论
为什么被折叠?
 到【灌水乐园】发言


