


一、vue 实现鼠标写签名(电子签名vue2)
1、安装
npm install vue-esign --save2、使用:
01.在main.js中引入
import vueEsign from 'vue-esign'
Vue.use(vueEsign)
02.在页面中引用
<vue-esign id='canvas' ref="esign" :width='1000' :height="500" style="border: 1px dashed #c2c1c1;" :isCrop="isCrop" :lineWidth="lineWidth" :lineColor="lineColor" :bgColor.sync="bgColor" />
<div style="text-align:center;line-height:50px; ">
     <el-button style="margin: 0px 20px;" @click="handleReset" size="small">清空</el-button>
     <el-button style=" margin: 0px 20px;" type="primary" @click="handleGenerate" size="small">保存</el-button>
</div>


引入地址
 import {baseUrl} from '@/utils/env.js';


data () {
  return {
    lineWidth: 6,
    lineColor: '#000000',
    bgColor: '',
    resultImg: '',
    isCrop: false
  }
},
03.说明
| 属性 | 类型 | 默认值 | 说明 |
|---|---|---|---|
| width | Number | 800 | 画布宽度,即导出图片的宽度 |
| height | Number | 300 | 画布高度,即导出图片的高度 |
| lineWidth | 4 | Number | 画笔粗细 |
| lineColor | String | #000000 | 画笔颜色 |
| bgColor | String | 空 | 画布背景色,为空时画布背景透明, 支持多种格式 '#ccc','#E5A1A1','rgb(229, 161, 161)','rgba(0,0,0,.6)','red' |
| isCrop | Boolean | false | 是否裁剪,在画布设定尺寸基础上裁掉四周空白部分 |
04.返回数据为base64 具体看你返回的数据
            handleGenerate() { // 获取base64
                var _this = this
                _this.$refs.esign.generate().then(res => {
                    // 转成文件
                    var blob = _this.dataURLtoBlob(res)
                    var tofile = _this.blobToFile(blob, '签名.jpg')
                    setTimeout(async () => {
                        const formData = new FormData()
                        formData.append('file', tofile, tofile.name)
                        formData.append('fileType', 9)
                        // axios 请求
                    })
                }).catch(err => {
                     // 画布没有签字时提示
                     this.$notify({
                        title: '提示',
                        message: '失败',
                        type: 'warning'
                    });
                })
            },
            // 将base64转换为blob
            dataURLtoBlob(dataurl) {
                var arr = dataurl.split(',')
                var mime = arr[0].match(/:(.*?);/)[1]
                var bstr = atob(arr[1])
                var n = bstr.length
                var u8arr = new Uint8Array(n)
                while (n--) {
                    u8arr[n] = bstr.charCodeAt(n)
                }
                return new Blob([u8arr], { type: mime })
            },
            // 将blob转换为file
            blobToFile(theBlob, fileName) {
                theBlob.lastModifiedDate = new Date()
                theBlob.name = fileName
                return theBlob
            },
05.清除
 handleReset() { // 清除
                if (this.$refs.esign) {
                    this.$refs.esign.reset();
                }
                var obj = document.getElementById("canvas");
                obj.style.backgroundColor = "#fff";  保存时背景
            },
二、vue实现手写签名并生成图片(vue2)
详细出处 vue 使用 canvas 实现手写电子签名 - 简书
主要功能:实现PC端,用鼠标签名,并生成图片。
1、安装
npm install vue-esign --save2、使用:
01.在main.js中引入
import vueEsign from 'vue-esign'
Vue.use(vueEsign)
02.在页面中引用
<vue-esign ref="esign" :width="800" :height="300" :isCrop="isCrop" :lineWidth="lineWidth" :lineColor="lineColor" :bgColor.sync="bgColor" />
<button @click="handleReset">清空画板</button>
<button @click="handleGenerate">生成图片</button>
data () {
return {
lineWidth: 6,
lineColor: '#000000',
bgColor: '',
resultImg: '',
isCrop: false
}
},
methods: {
handleReset () {
this.$refs['esign'].reset() //清空画布
},
handleGenerate () {
this.$refs['esign'].generate().then(res => {
this.resultImg = res // 得到了签字生成的base64图片
}).catch(err => { // 没有签名,点击生成图片时调用
this.$message({
message: err + ' 未签名!',
type: 'warning'
})
alert(err) // 画布没有签字时会执行这里 'Not Signned'
})
}
}03.说明
| 属性 | 类型 | 默认值 | 说明 |
|---|---|---|---|
| width | Number | 800 | 画布宽度,即导出图片的宽度 |
| height | Number | 300 | 画布高度,即导出图片的高度 |
| lineWidth | 4 | Number | 画笔粗细 |
| lineColor | String | #000000 | 画笔颜色 |
| bgColor | String | 空 | 画布背景色,为空时画布背景透明, 支持多种格式 '#ccc','#E5A1A1','rgb(229, 161, 161)','rgba(0,0,0,.6)','red' |
| isCrop | Boolean | false | 是否裁剪,在画布设定尺寸基础上裁掉四周空白部分 |
原作者的仓库地址:https://github.com/JaimeCheng/vue-esign
附:将base64转化成图片方法:
// 将base64,转换成图片
base64ImgtoFile(dataurl, filename = 'file') {
   const arr = dataurl.split(',')
   const mime = arr[0].match(/:(.*?);/)[1]
   const suffix = mime.split('/')[1]
   const bstr = atob(arr[1])
   let n = bstr.length
   const u8arr = new Uint8Array(n)
   while (n--) {
     u8arr[n] = bstr.charCodeAt(n)
   }
   return new File([u8arr], `${filename}.${suffix}`, {
     type: mime
   })
},二、Vue Signature Pad 实现手写签名(vue2)
1、安装
$ yarn add vue-signature-pad2、 使用
01.在main.js中引入
import Vue from 'vue';
import VueSignaturePad from 'vue-signature-pad';

Vue.use(VueSignaturePad);
02.在页面上使用
<template>
<div id="app">
<div class="container">
<div class="container">
<VueSignaturePad
id="signature"
width="100%"
height="500px"
ref="signaturePad"
:options="options"
/>
</div>
<div class="buttons">
<button @click="undo">Undo</button>
<button @click="save">Save</button>
<button @click="change">Change Color</button>
<button @click="resume">Resume Color</button>
</div>
</div>
</div>
</template>
<script>
export default {
name: "App",
data: () => ({
options: {
penColor: "#c0f",
},
}),
methods: {
undo() {
this.$refs.signaturePad.undoSignature();
},
save() {
const { isEmpty, data } = this.$refs.signaturePad.saveSignature();
alert("Open DevTools see the save data.");
console.log(isEmpty);
console.log(data);
},
change() {
this.options = {
penColor: "#00f",
};
},
resume() {
this.options = {
penColor: "#c0f",
};
},
},
};
</script>
<style>
#signature {
border: double 3px transparent;
border-radius: 5px;
background-image: linear-gradient(white, white),
radial-gradient(circle at top left, #4bc5e8, #9f6274);
background-origin: border-box;
background-clip: content-box, border-box;
}
.container {
width: "100%";
padding: 8px 16px;
}
.buttons {
display: flex;
gap: 8px;
justify-content: center;
margin-top: 8px;
}
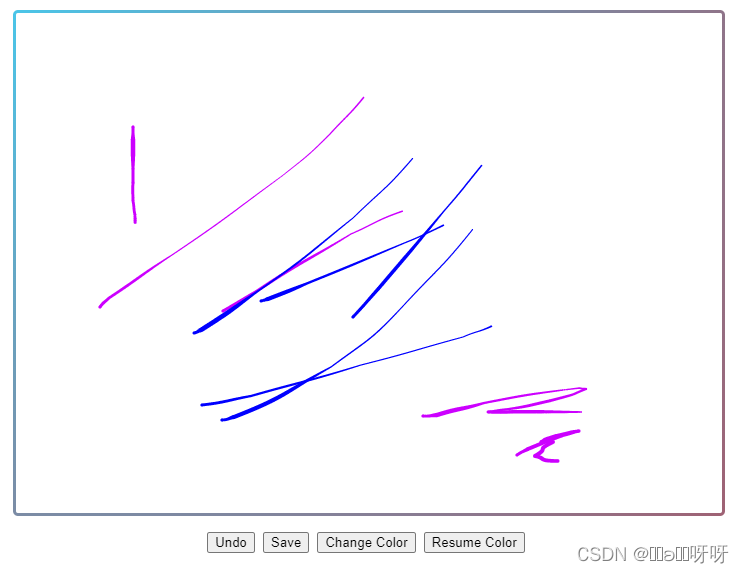
</style>3.效果(清空、保存、换色、恢复默认颜色)
npm地址及参考demo以及属性和方法介绍:


 3476
3476


 被折叠的 条评论
为什么被折叠?
被折叠的 条评论
为什么被折叠?
 到【灌水乐园】发言


