


1.安装js-audio-recorder插件并引入
npm i js-audio-recorder
import Recorder from "js-audio-recorder";   // 录音插件
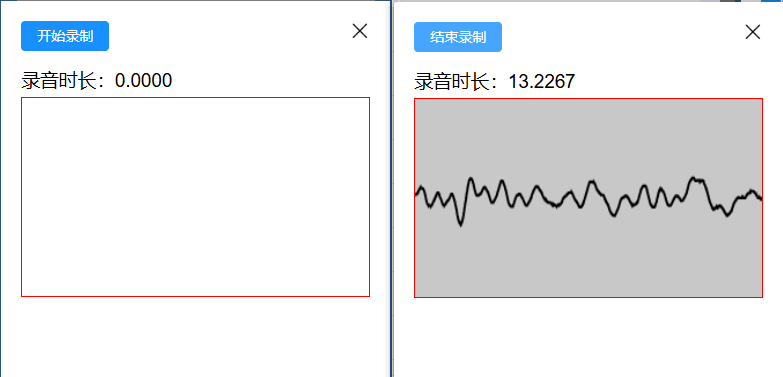
2.页面录音弹窗
<div class="voiceCss" v-if='voiceShow'>
  <div class="voiceButton">
     <el-button class="buttonCss" type="primary">
        <span v-if="voiceObj.type" @click="voiceType('start')">开始录制</span>
        <span v-else @click="voiceType('end')">结束录制</span>
     </el-button>
  </div>
  <div class="voiceCanvas">
     <h3>录音时长:{{ recorder.duration.toFixed(4) }}</h3>
     <div style="width:100%;height:200px;border:1px solid red;margin-top: 5px;">
        <canvas id="canvas" style="width: 100%;height: 100%;"></canvas>
     </div>
  </div>
</div>
3.变量
data() {
    return {
      voiceShow: false,  // 录音弹窗是否显示
      voiceObj:{
        type:true,   // true-开始录音  false-结束录音
        state:true,  // true-恢复录音  false-暂停录音
      },
      recorder: new Recorder({
        sampleBits: 16,    // 采样位数,支持 8 或 16,默认是16
        sampleRate: 16000, // 采样率,支持 11025、16000、22050、24000、44100、48000,根据浏览器默认值,我的chrome是48000
        numChannels: 1,   // 声道,支持 1 或 2, 默认是1
        // compiling: false,(0.x版本中生效,1.x增加中)  // 是否边录边转换,默认是false
     }),
     //波浪图-录音
     drawRecordId:null,
     oCanvas : null,
     ctx : null,
  }
}
4.打开录音面板
voiceFun(){
  // 打开录音弹窗
  this.voiceShow = true;
  // 初始化按钮状态(开始录制/结束录制)
  this.voiceObj = {
    type:true,
    state:true,
  };
  setTimeout(()=>{
  	// 录音波浪元素
    this.oCanvas = document.getElementById('canvas');
    this.ctx = this.oCanvas.getContext("2d");
  },100)
},
5.开始结束录音
voiceType(index){
  if(index=='start'){  // 开始录音
    let that = this;
    Recorder.getPermission().then(
      () => {
        // console.log("开始录音");
        that.recorder.start(); // 开始录音
        that.drawRecord();  //开始绘制图片
        that.voiceObj.type = false;
      },
      (error) => {
        that.$message({
          message: "请先允许该网页使用麦克风",
          type: "info",
        });
        console.log(`${error.name} : ${error.message}`);
      }
    );
  }else if(index=='end') {  // 结束录音
     this.recorder.stop();
     this.voiceObj.type = true;
     // 获取录音文件
     // this.getVoiceWAV();
     // 上传录音文件
     this.uploadvoiceWAV();
  }
},
6.绘制波浪图
drawRecord () {
  // 用requestAnimationFrame稳定60fps绘制
  this.drawRecordId = requestAnimationFrame(this.drawRecord);
  // 实时获取音频大小数据
  let dataArray = this.recorder.getRecordAnalyseData(),
      bufferLength = dataArray.length;
  // 填充背景色
  this.ctx.fillStyle = 'rgb(200, 200, 200)';
  this.ctx.fillRect(0, 0, this.oCanvas.width, this.oCanvas.height);
  // 设定波形绘制颜色
  this.ctx.lineWidth = 2;
  this.ctx.strokeStyle = 'rgb(0, 0, 0)';
  this.ctx.beginPath();
  var sliceWidth = this.oCanvas.width * 1.0 / bufferLength, // 一个点占多少位置,共有bufferLength个点要绘制
  x = 0;          // 绘制点的x轴位置
  for (var i = 0; i < bufferLength; i++) {
    var v = dataArray[i] / 128.0;
    var y = v * this.oCanvas.height / 2;
    if (i === 0) {
      // 第一个点
      this.ctx.moveTo(x, y);
    } else {
      // 剩余的点
      this.ctx.lineTo(x, y);
    }
    // 依次平移,绘制所有点
    x += sliceWidth;
  }
  this.ctx.lineTo(this.oCanvas.width, this.oCanvas.height / 2);
  this.ctx.stroke();
},
7.上传录音文件
uploadvoiceWAV(){
  let dom = document.querySelector(".voiceBox")
  const loading = this.$loading({
    lock: true,
    target: dom,
    text: '请稍等,正在语音转文字',
    spinner: 'el-icon-loading',
    background: 'rgba(0, 0, 0, 0.7)'
  });
  let wavBlob = this.recorder.getWAVBlob();
  // 创建一个formData对象
  var formData = new FormData()
  // 此处获取到blob对象后需要设置fileName满足当前项目上传需求,其它项目可直接传把blob作为file塞入formData
  const newbolb = new Blob([wavBlob], { type: 'audio/wav' })
  //获取当时时间戳作为文件名
  const fileOfBlob = new File([newbolb], new Date().getTime() + '.wav')
  formData.append('file', fileOfBlob)
  uploadWavData(formData).then((response) => {  // uploadWavData替换成自己的接口引入
    loading.close();
    if(response.code==200){
       this.voiceShow = false;
       // 上传成功,并转文字
    }else if(response.code==500){
      this.$message({
        message: response.msg+"请重试",
        type: "error",
      });
    }
  });
},
8.获取录音文件(WAV)
getVoiceWAV(){
  let wavBlob = this.recorder.getWAVBlob();
  console.log(wavBlob);
},


 5651
5651

 被折叠的 条评论
为什么被折叠?
被折叠的 条评论
为什么被折叠?
 到【灌水乐园】发言


