


一、安装Node.js,如果已有则不必安装
二、初始化 vue-cli的核心步骤:
在终端中输入以下命令进行全局安装:
npm install -g @vue/cli
三、创建Vue项目
在你要创建项目的目录下打开终端输入vue create 【你的项目名称】
vue create vue-demo 自定义配置
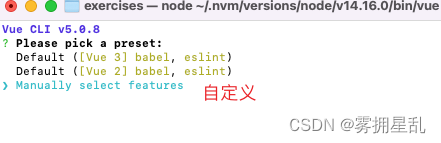
选择需要的配置:
- Manually select features
- (*) Choose Vue version ==> vue版本
- (*) Babel ==> 将高版本js转换成低版本js兼容处理
- ( ) TypeScript
- ( ) Progressive Web App (PWA) Support
- (*) Router ==> 路由
- (*) Vuex ==> vuex状态管理
- (*) CSS Pre-processors ==>css预处理
- (*) Linter / Formatter ==> eslint规范
- ( ) Unit Testing
- ( ) E2E Testing
- Choose a version of Vue.js that you want to start the project with (Use arrow keys) —语言版本选择
- 2.x
- 3.x
- Use history mode for router? (Requires proper server setup for index fallback in production) (Y/n) —是否使用history路由模式 ,选no
- n
- Pick a CSS pre-processor (PostCSS, Autoprefixer and CSS Modules are supported by default): (Use arrow keys) —选css预处理语言
- Sass/SCSS (with dart-sass)
- Sass/SCSS (with node-sass)
- Less
- Stylus
- Pick a linter / formatter config: (Use arrow keys)
- ESLint + Airbnb config
- ESLint + Standard config —选eslint语法规范
- ESLint + Prettier
- Pick additional lint features: (Press <space> to select, <a> to toggle all, <i> to invert selection)
- (*) Lint on save —保存时进行eslint处理
- ( ) Lint and fix on commit
- Where do you prefer placing config for Babel, ESLint, etc.? (Use arrow keys)
- In dedicated config files —配置文件单独放置
- In package.json
- Save this as a preset for future projects? (y/N) —刚刚配置选择的不保存,选no
- N


 2993
2993


 被折叠的 条评论
为什么被折叠?
被折叠的 条评论
为什么被折叠?
 到【灌水乐园】发言


