


详细介绍你对安卓开发中各种布局的理解。这包括线性布局、约束布局、表格布局、帧布局、相对布局。你需要解释每种布局的特点、适用场景以及如何在实际项目中应用这些布局。展示你对布局使用的熟练程度,并提供具体的示例代码来支持你的论述。
在安卓开发中,布局管理器用于定义和管理UI组件的排列和显示方式。不同的布局管理器有各自的特点和适用场景,以下是对几种常见布局的详细介绍:
1. 线性布局(LinearLayout)
特点:
- 线性布局按照垂直或水平方向排列子视图。
- 线性布局主要以水平或垂直方式来显示界面中的控件。当控件水平排列时,显示顺序依次为从左到右,当控件垂直排列时,显示顺序依次为从上到下。
适用场景:
- 适用于简单的垂直或水平排列的场景,比如按钮排列、表单等。
示例代码:
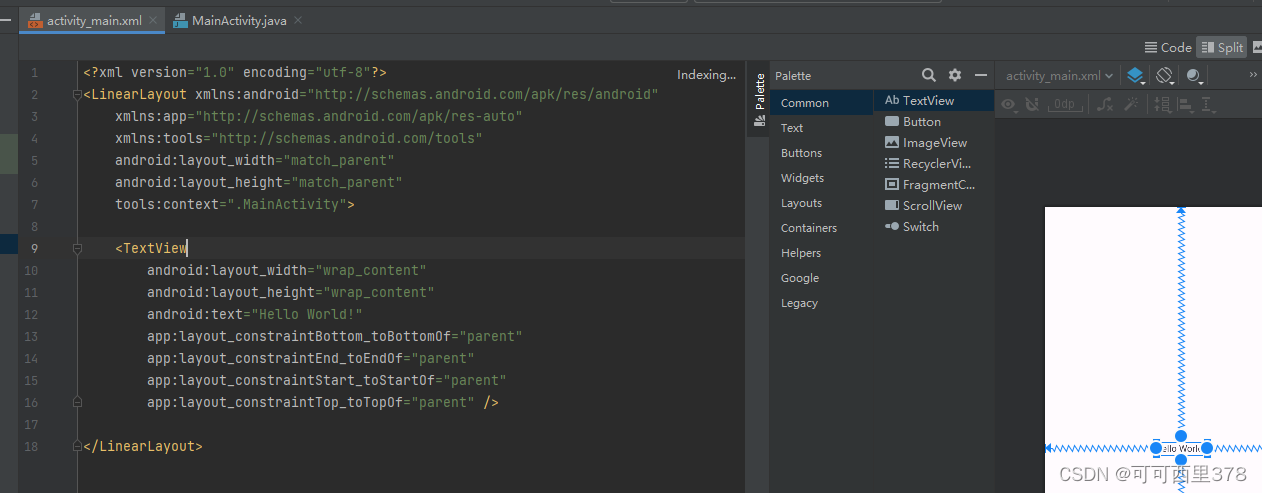
<?xml version="1.0" encoding="utf-8"?>
<LinearLayout xmlns:android="http://schemas.android.com/apk/res/android"
xmlns:app="http://schemas.android.com/apk/res-auto"
xmlns:tools="http://schemas.android.com/tools"
android:layout_width="match_parent"
android:layout_height="match_parent"
tools:context=".MainActivity">
<TextView
android:layout_width="wrap_content"
android:layout_height="wrap_content"
android:text="Hello World!"
app:layout_constraintBottom_toBottomOf="parent"
app:layout_constraintEnd_toEndOf="parent"
app:layout_constraintStart_toStartOf="parent"
app:layout_constraintTop_toTopOf="parent" />
</LinearLayout>
2. 约束布局(ConstraintLayout)
特点:
- 约束布局是一种灵活且强大的布局方式,通过为视图添加水平和垂直方向上的约束来定位视图。。ConstraintLayout布局中的控件可以在横向和纵向上以添加约束关系的方式进行相对定位,其中,横向边包括Left、Start、Right、End,纵向边包括Top、Bottom、Baseline(文本底部的基准线)。
- 可以实现复杂的布局结构,同时保持较高的性能。
适用场景:
- 适用于复杂的布局需求,比如多列、多行的布局,组件之间有复杂关系的场景。
示例代码:
<androidx.constraintlayout.widget.ConstraintLayout xmlns:android="http://schemas.android.com/apk/res/android"
xmlns:app="http://schemas.android.com/apk/res-auto"
xmlns:tools="http://schemas.android.com/tools"
android:layout_width="match_parent"
android:layout_height="match_parent"
tools:context=".MainActivity">
<TextView
android:layout_width="wrap_content"
android:layout_height="wrap_content"
android:text="Hello World!"
app:layout_constraintBottom_toBottomOf="parent"
app:layout_constraintEnd_toEndOf="parent"
app:layout_constraintStart_toStartOf="parent"
app:layout_constraintTop_toTopOf="parent" />
</androidx.constraintlayout.widget.ConstraintLayout>
3. 表格布局(TableLayout)
特点:
表格布局继承了线性布局,用行、列的方式来管理容器内的控件。
它不需要制定行列数量,布局内每添加一行TableRow代码即表示添加一行表格,然后再在TableRow添加子控件,容器的列数由包含列数最多的行决定。
适用场景:
- 适用于需要表格样式布局的场景,比如日历、数据表等。
示例代码:
<?xml version="1.0" encoding="utf-8"?>
<TableLayout xmlns:android="http://schemas.android.com/apk/res/android"
xmlns:app="http://schemas.android.com/apk/res-auto"
xmlns:tools="http://schemas.android.com/tools"
android:layout_width="match_parent"
android:layout_height="match_parent"
tools:context=".MainActivity">
<TableRow>
<TextView
android:layout_width="wrap_content"
android:layout_height="wrap_content"
android:text="1行,1列" />
<TextView
android:layout_width="wrap_content"
android:layout_height="wrap_content"
android:text="1行,2列" />
</TableRow>
<TableRow>
<TextView
android:layout_width="wrap_content"
android:layout_height="wrap_content"
android:text="2行,1列" />
<TextView
android:layout_width="wrap_content"
android:layout_height="wrap_content"
android:text="2行,2列" />
</TableRow>
</TableLayout>
4. 帧布局(FrameLayout)
特点:
- 帧布局可以说是六大布局中最为简单的一个布局,这个布局直接在屏幕上开辟出一块空白的区域,当我们往里面添加控件的时候,会默认把他们放到这块区域的左上角,而这种布局方式却没有任何的定位方式,所以它应用的场景并不多;帧布局的大小由控件中最大的子控件决定,如果控件的大小一样大的话,那么同一时刻就只能看到最上面的那个组件!后续添加的控件会覆盖前一个!虽然默认会将控件放置在左上角,但是我们也可以通过layout_gravity属性,指定到其他的位置!
- 通常用于显示单个子视图,或需要简单堆叠的场景。
适用场景:
- 适用于需要动态替换视图的场景,比如显示一个图片或视频播放器。
示例代码:
<?xml version="1.0" encoding="utf-8"?>
<FrameLayout xmlns:android="http://schemas.android.com/apk/res/android"
xmlns:app="http://schemas.android.com/apk/res-auto"
xmlns:tools="http://schemas.android.com/tools"
android:layout_width="match_parent"
android:layout_height="match_parent"
tools:context=".MainActivity">
<ImageView
android:layout_width="match_parent"
android:layout_height="match_parent"
android:src="@color/black" />
<Button
android:layout_width="wrap_content"
android:layout_height="wrap_content"
android:text="点击"
android:layout_gravity="center" />
</FrameLayout>
5. 相对布局(RelativeLayout)
特点:
- 相对布局通过指定子视图之间或与父视图之间的相对位置来排列子视图。
- 适合需要视图相互依赖位置的布局。
适用场景:
当需要根据其他视图的位置动态调整布局时,例如按钮在文本下方或者图像居中显示。
示例代码:
<?xml version="1.0" encoding="utf-8"?>
<RelativeLayout xmlns:android="http://schemas.android.com/apk/res/android"
xmlns:app="http://schemas.android.com/apk/res-auto"
xmlns:tools="http://schemas.android.com/tools"
android:layout_width="match_parent"
android:layout_height="match_parent"
tools:context=".MainActivity">
<TextView
android:id="@+id/textView"
android:layout_width="wrap_content"
android:layout_height="wrap_content"
android:text="Hello, World!"
android:layout_centerHorizontal="true"
android:layout_marginTop="50dp" />
<Button
android:id="@+id/button"
android:layout_width="wrap_content"
android:layout_height="wrap_content"
android:text="Click Me"
android:layout_below="@id/textView"
android:layout_centerHorizontal="true"
android:layout_marginTop="20dp" />
</RelativeLayout>
实际项目中的应用:
在实际项目中,选择合适的布局对于UI开发至关重要。以下是一些应用场景和布局选择的示例:
- 简单表单页面:可以使用线性布局(LinearLayout),配合垂直方向排列和适当的margin/padding。
- 复杂的用户界面:可以使用约束布局(ConstraintLayout),通过约束实现复杂的界面设计和动态调整。
- 表格数据展示:使用表格布局(TableLayout)能清晰地展示数据,但需要小心处理性能问题。
- 多媒体内容:可以使用帧布局(FrameLayout),方便地叠加多个视图元素,比如视频播放时覆盖的控制按钮。
- 相对定位需求:使用相对布局(RelativeLayout),可以方便地实现视图间的相对定位。
通过理解这些布局的特点和适用场景,可以在开发中更加灵活地设计和实现界面,提高用户体验和应用的易用性。
总结你在课程中学习到的UI界面交互功能的实现方法。包括但不限于按钮点击事件、列表项点击事件、滑动操作、菜单项和对话框等。你需要列举实际案例,说明你是如何实现这些功能的,并对学习过程进行反思。此外,你还需要描述你采取的持续改进措施,例如通过查阅文档、参与讨论等方式,来提高你的技能水平。
在安卓开发课程中,我学习并掌握了多种UI界面交互功能的实现方法,包括按钮点击事件、列表项点击事件、滑动操作、菜单项和对话框等。以下是对这些功能的具体实现方法、实际案例以及学习反思和持续改进措施的总结。
1. 按钮点击事件
实现方法:
按钮点击事件可以通过设置按钮的OnClickListener来实现。
示例代码:
<Button
android:id="@+id/login"
android:layout_width="wrap_content"
android:layout_height="wrap_content"
android:text="登录"
app:layout_constraintLeft_toLeftOf="parent"
app:layout_constraintTop_toTopOf="@+id/password"
app:layout_constraintBottom_toBottomOf="parent"
app:layout_constraintVertical_bias="0.3"/>
findViewById(R.id.login).setOnClickListener(new View.OnClickListener() {
@Override
public void onClick(View v) {
Intent intent = new Intent(MainActivity.this, MainActivity2.class);
startActivity(intent);
}
});
实际案例:
在一个登录页面中,实现了点击“登录”按钮后,登陆后转跳到另一个页面。
学习反思:
通过实际操作,理解了Android事件处理机制,以及如何通过匿名内部类。
2. 列表项点击事件
实现方法:
列表项点击事件通过为ListView或RecyclerView设置相应的点击监听器实现。
示例代码:
ListView myListView = findViewById(R.id.my_list_view);
myListView.setOnItemClickListener(new AdapterView.OnItemClickListener() {
@Override
public void onItemClick(AdapterView<?> parent, View view, int position, long id) {
// 执行点击后的操作
String item = (String) parent.getItemAtPosition(position);
Toast.makeText(MainActivity.this, "Item Clicked: " + item, Toast.LENGTH_SHORT).show();
}
});
实际案例:
在一个联系人列表中,点击联系人项后,显示详细信息或者进行编辑操作。
学习反思:
我在处理列表项点击事件的时候遇到了如何去传递数据的问题,然后我通过查阅文档和示例代码,学会使用接口回调的方法来实现更加灵活和解耦的设计。
3. 滑动操作
实现方法:
滑动操作可以通过滚动视图ScorllView或HorizontaScorllView来实现。
示例代码:
<HorizontalScrollView
android:layout_width="match_parent"
android:layout_height="wrap_content">
<LinearLayout
android:layout_width="wrap_content"
android:layout_height="wrap_content"
android:orientation="horizontal">
<ImageView
android:layout_width="match_parent"
android:layout_height="wrap_content"
android:id="@+id/doc1Image"
android:src="@drawable/docin1"/>
<ImageView
android:layout_width="match_parent"
android:layout_height="wrap_content"
android:id="@+id/doc2Image"
android:src="@drawable/docin2"/>
<ImageView
android:layout_width="match_parent"
android:layout_height="wrap_content"
android:id="@+id/doc3Image"
android:src="@drawable/docin3"/>
</LinearLayout>
</HorizontalScrollView>
实际案例:
在一个图片浏览应用中,实现了左右滑动图片的功能。
4. 菜单项
实现方法:
菜单项通过在res/menu目录下创建菜单资源文件,并在活动中进行加载和处理。
示例代码:
<?xml version="1.0" encoding="utf-8"?>
<menu xmlns:android="http://schemas.android.com/apk/res/android"
xmlns:app="http://schemas.android.com/apk/res-auto">
<item android:id="@+id/share" android:title="转跳科室">
<menu>
<item android:id="@+id/in"
android:title="内科"/>
<item android:id="@+id/out"
android:title="外科"/>
</menu>
</item>
<item android:id="@+id/quit" app:showAsAction="always" android:title="退出"/>
</menu>
实际案例:
在一个设置页面中,实现了点击菜单项进入设置界面的功能。
学习反思:
熟悉了Android菜单系统,理解了如何通过XML和Java代码结合实现菜单功能。
5. 对话框
实现方法:
对话框可以通过AlertDialog.Builder来创建和显示。
示例代码:
Button btdoc1 = findViewById(R.id.btdoc1);
btdoc1.setOnClickListener(new View.OnClickListener() {
@Override
public void onClick(View v) {
AlertDialog.Builder builder = new AlertDialog.Builder(MainActivity2.this);
builder.setTitle("挂号时间");
builder.setSingleChoiceItems(choseTime, 0, new DialogInterface.OnClickListener() {
@Override
public void onClick(DialogInterface dialog, int which) {
Log.i("MyTag",choseTime[which]);
}
});
builder.setPositiveButton("确认",null);
builder.setNegativeButton("取消",null);
builder.create().show();
}
});
实际案例:
在一个按键操作中,弹出单选确认对话框,确保用户确认。
学习反思:
掌握了如何创建和使用各种对话框,理解了对话框的生命周期和用户交互。
6. 上下文菜单
实现方法:
对话框可以通过item来创建和显示。
示例代码:
<item android:id="@+id/share" android:title="转跳科室">
<menu>
<item android:id="@+id/in"
android:title="内科"/>
<item android:id="@+id/out"
android:title="外科"/>
</menu>
</item>
<item android:id="@+id/quit" app:showAsAction="always" android:title="退出"/>
实际案例:
在一个menu中,显示上下文菜单,点击时可以弹出内容,退出选项一直显示。
学习反思:
理解了如何处理菜单项的点击事件,并执行相应的操作。
持续改进措施
- 查阅官方文档:经常查阅Android官方文档,获取最新的API信息和最佳实践,确保代码的规范性和兼容性。
- 参与社区讨论:加入Android开发者社区,如GitHub,参与讨论和项目,获取不同的解决方案和优化方法。
- 实际项目练习:通过参与实际项目,不断练习和应用所学知识,解决实际问题,提高开发技能。
- 观看教学视频:通过Bilibili、CSDN、Github等平台,观看高级开发教程和案例分析,学习不同的开发思路和技巧。
- 代码审查:与周围朋友进行代码审查,相互学习和借鉴,提升代码质量和团队协作能力。
通过这些措施,持续提升自己在Android开发中的技能水平,更加高效地实现和优化各种UI交互功能。


 722
722

 被折叠的 条评论
为什么被折叠?
被折叠的 条评论
为什么被折叠?
 到【灌水乐园】发言


