


介绍:
在日常工作中,我们经常需要处理文档,其中包括删除或修改页眉和页脚。本文将介绍如何使用Python编程语言和wxPython模块创建一个简单的GUI应用程序,帮助我们删除docx文档中的页眉和页脚。
C:\pythoncode\new\deleteyemeiyejiao.py
全部代码:
import wx
import docx
import os
class MainFrame(wx.Frame):
def __init__(self):
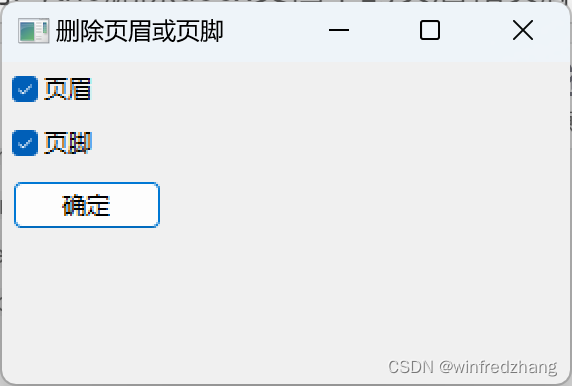
wx.Frame.__init__(self, None, title="删除页眉或页脚", size=(300, 200))
panel = wx.Panel(self)
# 创建复选框和按钮
self.header_checkbox = wx.CheckBox(panel, label="页眉")
self.footer_checkbox = wx.CheckBox(panel, label="页脚")
self.delete_button = wx.Button(panel, label="确定")
# 绑定按钮点击事件
self.delete_button.Bind(wx.EVT_BUTTON, self.on_delete)
# 创建布局
sizer = wx.BoxSizer(wx.VERTICAL)
sizer.Add(self.header_checkbox, 0, wx.ALL, 5)
sizer.Add(self.footer_checkbox, 0, wx.ALL, 5)
sizer.Add(self.delete_button, 0, wx.ALL, 5)
panel.SetSizer(sizer)
def on_delete(self, event):
# 打开选择文件对话框
dlg = wx.FileDialog(self, "选择要打开的文档", style=wx.FD_OPEN | wx.FD_FILE_MUST_EXIST, wildcard="Word文档 (*.docx)|*.docx")
if dlg.ShowModal() == wx.ID_OK:
# 获取用户选择的文件路径
filepath = dlg.GetPath()
dlg.Destroy()
# 打开文档
doc = docx.Document(filepath)
# 删除页眉
if self.header_checkbox.GetValue():
for section in doc.sections:
header = section.header
for paragraph in header.paragraphs:
paragraph.text = ""
# 删除页脚
if self.footer_checkbox.GetValue():
for section in doc.sections:
footer = section.footer
for paragraph in footer.paragraphs:
paragraph.text = ""
# 保存修改后的文档到新文件
dirname = os.path.dirname(filepath)
filename = os.path.basename(filepath)
new_filename = "modified_" + filename
new_filepath = os.path.join(dirname, new_filename)
doc.save(new_filepath)
wx.MessageBox("页眉或页脚删除成功!新文件保存在:" + new_filepath, "提示", wx.OK | wx.ICON_INFORMATION)
else:
dlg.Destroy()
# 创建应用程序对象
app = wx.App()
frame = MainFrame()
frame.Show()
# 运行应用程序
app.MainLoop()
步骤:
-
安装依赖库
首先,我们需要安装两个Python库:wxPython和python-docx。可以使用以下命令进行安装:
pip install wxPython pip install python-docx -
创建GUI应用程序
我们将使用wxPython模块创建一个简单的GUI应用程序,用于选择要处理的docx文档、选择要删除的页眉和页脚,并提供一个"确定"按钮来触发处理操作。
在应用程序中,我们将使用
wx.Frame类创建一个窗口,包含两个复选框(“页眉"和"页脚”)和一个按钮(“确定”)。当用户选择了要删除的页眉或页脚并点击"确定"按钮后,程序将打开文档并删除相应的内容。# 创建复选框和按钮 self.header_checkbox = wx.CheckBox(panel, label="页眉") self.footer_checkbox = wx.CheckBox(panel, label="页脚") self.delete_button = wx.Button(panel, label="确定") # 绑定按钮点击事件 self.delete_button.Bind(wx.EVT_BUTTON, self.on_delete) -
处理文档
在点击"确定"按钮后,我们将使用python-docx库打开选择的docx文档,并根据用户的选择删除页眉和/或页脚。
对于每个文档节(section),我们可以通过
section.header和section.footer属性访问页眉和页脚。我们可以遍历每个段落(paragraph)并将其内容设置为空字符串,从而删除页眉和页脚的内容。# 删除页眉 if self.header_checkbox.GetValue(): for section in doc.sections: header = section.header for paragraph in header.paragraphs: paragraph.text = "" # 删除页脚 if self.footer_checkbox.GetValue(): for section in doc.sections: footer = section.footer for paragraph in footer.paragraphs: paragraph.text = "" -
保存处理后的文档
为了保存处理后的文档,我们将在原始文件的路径下创建一个新的文件,并在文件名前添加"modified_"前缀。这样可以避免覆盖原始文件。我们使用
os.path模块来获取原始文件的路径和文件名,并构造新的文件路径。最后,我们使用
doc.save()方法将修改后的文档保存到新文件中。# 保存修改后的文档到新文件 dirname = os.path.dirname(filepath) filename = os.path.basename(filepath) new_filename = "modified_" + filename new_filepath = os.path.join(dirname, new_filename) doc.save(new_filepath)
结果:
总结:
本文介绍了如何使用Python和wxPython模块创建一个简单的GUI应用程序,帮助我们删除docx文档中的页眉和页脚。通过选择要删除的内容并点击"确定"按钮,我们可以轻松地处理文档,而无需手动编辑每个文档。


 567
567

 被折叠的 条评论
为什么被折叠?
被折叠的 条评论
为什么被折叠?
 到【灌水乐园】发言


