


1. GDAL简介
GDAL 是读写大量的栅格空间数据格式的广泛应用的开源库。该库起源于 1998年,已经大幅进化。 它支持他自己的数据模型和应用程序接口(API)。 从最初的单一发展的起源,GDAL已发展成为一个分布式的项目,开发人员的数量相对比较大。
GDAL官网下载以及安装教程。
2. 提示
要构建 GDAL 3 或更高版本,至少需要一个 C++11 兼容编译器,以及 PROJ 6 或更高版本。如果是在C++11编译器上构建老版本GDAL会提示namespace std错误。新版本需要安装PROJ依赖库,PROJ又依赖sqlite3和libtiff4,依次安装即可。具体情况可能不同,不过可以从GDAL开始安装,根据提示逐渐安装相应的包即可。
3. 如何在 Ubuntu 中安装具体指定的软件包版本
3.1通过apt安装
在 Ubuntu 中想安装一个软件包的一个特别指定的版本?你可以通过下面的方式来轻松地完成:
sudo apt install package_name=package_version
如何知道某个软件包有哪些可用的版本?可以使用这个命令:
apt list --all-versions package_name
3.1通过源码编译安装
下载安装包,Linux版本的压缩包后缀为.tar.gz,Windows版本压缩包后缀zip。
安装步骤依次执行下面代码。
cd '/home/Downloads/gdal-3.5.1' 			#源码包解压后的位置
./configure --prefix='/home/Softwares' 		#指定安装路径
make										#生成makefile文件
make install								#编译安装
4. 安装
安装GDAL,根据提示在补充安装所需包。缺什么安装什么就行。
4.1 安装GDAL
4.1.1 下载GDAL
参考gdal-3.1.2 linux(Ubuntu) 编译 附SQLite3 PROJ6编译 、Linux系统编译安装GDAL库,官网下载最新的gdal-3.5.1.tar.gz版本的
http://download.osgeo.org/gdal/CURRENT/
4.1.2 安装GDAL
依次执行命令
cd '/home/Downloads/gdal-3.5.1' 			#源码包解压后的位置
./configure --prefix='/home/Softwares' 		#指定安装路径
make										#生成makefile文件
make install								#编译安装

ldconfig
gdalinfo --version
如果直接安装GDAL 3.5.1版本,会提示
configure: error: PROJ 6 symbols not found
可以跳到4.2节安装PROJ后再继续4.1节GDAL安装。
如果出现错误
..
/usr/bin/ld: /home/Downloads/gdal-3.5.1/.libs/libgdal.so: undefined reference to `TIFFReadScanline@LIBTIFF_4.0'
/usr/bin/ld: /home/Downloads/gdal-3.5.1/.libs/libgdal.so: undefined reference to `TIFFClose@LIBTIFF_4.0'
/usr/bin/ld: /home/Downloads/gdal-3.5.1/.libs/libgdal.so: undefined reference to `TIFFNumberOfTiles@LIBTIFF_4.0'
/usr/bin/ld: /home/Downloads/gdal-3.5.1/.libs/libgdal.so: undefined reference to `TIFFRGBAImageOK@LIBTIFF_4.0'
/usr/bin/ld: /home/Downloads/gdal-3.5.1/.libs/libgdal.so: undefined reference to `TIFFClientOpen@LIBTIFF_4.0'
/usr/bin/ld: /home/Downloads/gdal-3.5.1/.libs/libgdal.so: undefined reference to `TIFFFlush@LIBTIFF_4.0'
collect2: error: ld returned 1 exit status
make[1]: *** [GNUmakefile:82: gdalinfo] Error 1
make: *** [GNUmakefile:112: apps-target] Error 2
说明安装的libtiff库有问题,重新安装libtiff。
4.2 安装PROJ
4.2.1 下载PROJ
PROJ的安装与使用,PROJ官网连接https://proj.org/download.html。
下载的是proj-8.0.0.tar.gz,最新版的解压后没有configure文件,就挑选了proj-8.0.0.tar.gz。
4.2.2 安装PROJ
依次输入PROJ安装命令
cd '/home/Downloads/PROJ源码文件'
./configure
make
make install
如果出现错误提示:
checking for SQLITE3.. configure: error: in `/home/Downloads/proj-8.0.0':
configure: error: The pkg-config script could not be found or is too old.  Make sure it
则跳到4.3节,安装SQLITE3
如果出现如下错误,需要安装pkg-config:
configure: error: The pkg-config script could not be found or is too old.  Make sure it
is in your PATH or set the PKG_CONFIG environment variable to the full
path to pkg-config.
sudo apt-get install pkg-config
重复PROJ安装命令步骤,如果出现错误
checking for TIFF.. configure: error: Package requirements (libtiff-4) were not met:
No package 'libtiff-4' found
见4.4节安装libtiff-4
4.3 安装SQLITE3
4.3.1 SQLITE3源码安装方法
从源码安装:SQLITE3的安装与使用,SQLITE3官网连接https://www.sqlite.org/download.html。
4.3.2 通过apt安装
在Ubuntu可以不用源码编译,直接用命令安装
sudo apt-get install sqlite3
对于Ubuntu >= 20.04,需要使用命令
sudo apt install libsqlite3-dev
我采用的是直接命令安装,安装后,输入命令sqlite3 -version查看版本
sqlite3 -version
3.37.2 2022-01-06 13:25:41 872ba256cbf61d9290b571c0e6d82a20c224ca3ad82971edc46b29818d5dalt1
4.4 安装libtiff-4
源码下载:libtiff-4.4.0,安装教程。
依次执行命令安装
cd '/home/Downloads/PROJ源码文件'
./configure
make
make install
sudo ldconfig #创建连接
或者
sudo apt-get install libtiff-tools
或者
sudo apt-get install libtiff-dev
试试看,直到libtiff安装成功。终端输入:tiffinfo
tiffinfo
LIBTIFF, Version 4.4.0
Copyright (c) 1988-1996 Sam Leffler
Copyright (c) 1991-1996 Silicon Graphics, Inc.

Display information about TIFF files

usage: tiffinfo [options] input..
where options are:
 -D		read data
 -i		ignore read errors
 -c		display data for grey/color response curve or colormap
 -d		display raw/decoded image data
 -f lsb2msb	force lsb-to-msb FillOrder for input
 -f msb2lsb	force msb-to-lsb FillOrder for input
 -j		show JPEG tables
 -o offset	set initial directory offset
 -r		read/display raw image data instead of decoded data
 -s		display strip offsets and byte counts
 -w		display raw data in words rather than bytes
 -z		enable strip chopping
 -M size	set the memory allocation limit in MiB. 0 to disable limit
 -#		set initial directory (first directory is # 0)
继续安装PROJ,可能提示
..
checking for SQLITE3.. yes
checking for sqlite3.. yes
checking for TIFF.. yes
checking for curl-config.. not-found
configure: error: curl not found. If wanting to do a build without curl support (and thus without built-in networking capability), explictly disable it with --without-curl
重新安装,忽略curl
./configure --without-curl
成功
继续安装GDAL
..
checking for proj_create_from_wkt in -lproj.. no
checking for proj_create_from_wkt in -lproj.. no
checking for internal_proj_create_from_wkt in -lproj.. no
checking for internal_proj_create_from_wkt in -lproj.. no
checking for internal_proj_create_from_wkt in -linternalproj.. no
checking for internal_proj_create_from_wkt in -linternalproj.. (cached) no
configure: error: PROJ 6 symbols not found
sudo apt install libproj-dev
4.5 测试GDAL
按照默认位置安装成功后,会在/usr/local/include文件夹中产生一系列.h文件(cpl_config.h、gdal.h……),在/usr/local/lib文件夹中产生5个库文件,其中libgdal.a和libgdal.la为静态链接库,libgdal.so等为动态链接库。
4.5.1 配置环境变量
sudo gedit /etc/profile
在文件尾输入:
export PATH=$PATH:/usr/local/bin
export LD_LIBRARY_PATH=$LD_LIBRARY_PATH:/usr/local/lib
保存并退出后,执行source /etc/profile更新变量
4.5.2 代码测试
Qt配置GDAL库可以看Ubuntu 安装 HDF5 C++库中的配置方法。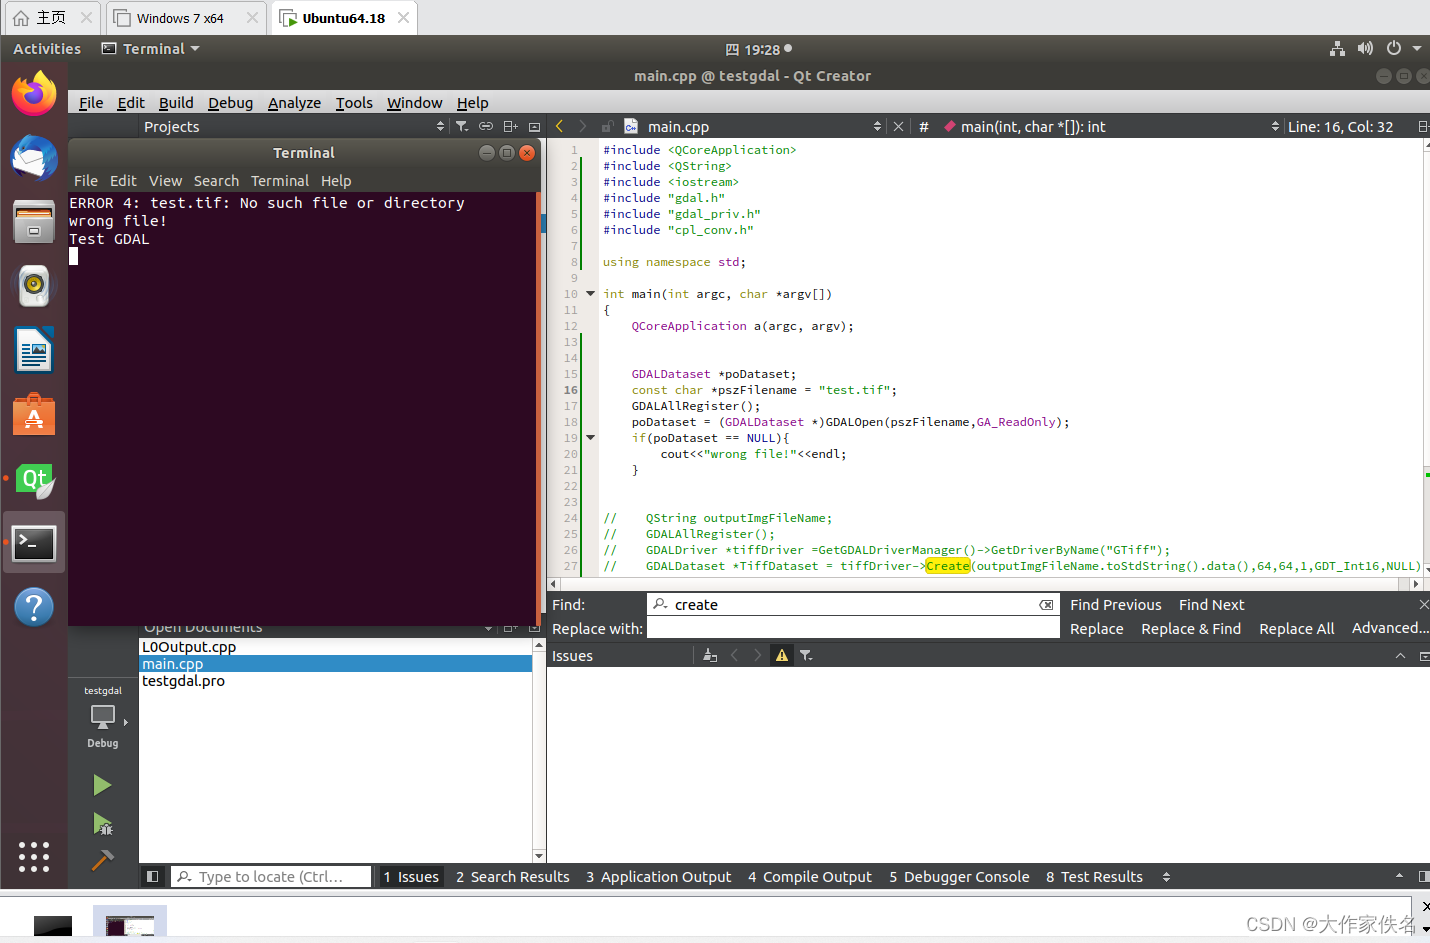
新建一个文件:
include"gdal.h"
include"gdal_priv.h"
include"cpl_conv.h"
using namespace std;
int main()
{
    GDALDataset  *poDataset;
    const char *pszFilename = "test.tif";
    GDALAllRegister();
    poDataset = (GDALDataset *) GDALOpen( pszFilename, GA_ReadOnly );
    if( poDataset == NULL )
    {
        cout << "wrong file ";
    }
	return 0;
}
成功


 1689
1689

 被折叠的 条评论
为什么被折叠?
被折叠的 条评论
为什么被折叠?
 到【灌水乐园】发言


