


首先你得创建几个控制器,并把它们交给NavgationController管理
 _homeVC = [[HomeViewController alloc] init];
    _centerVC = [[CenterViewController alloc] init];
    _settingVC = [[SettingViewController alloc] init];

    _tabBarController.selectedIndex = 0;
    _navHome = [[BaseNavigationController alloc] initWithRootViewController:_homeVC];
    _navCenter = [[BaseNavigationController alloc] initWithRootViewController:_centerVC];
    _navSetting = [[BaseNavigationController alloc] initWithRootViewController:_settingVC];
    _tabBarController = [[TabBarController  alloc] init];
    _tabBarController.viewControllers = @[_navHome,_navCenter,_navSetting];

    [UIApplication sharedApplication].delegate.window.rootViewController = _tabBarController;
然后设将这些导航控制器添加到tabBarController的viewControllers中。
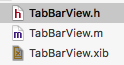
这时候创建一个xib文件和与之对应的class文件
回到tabBarController,创建tabBarView
- (void)initTabBarView {
    _tabBarView = [[TabBarView alloc] initWithFrame:CGRectMake(0, 0, TABBAR_WIDTH, TABBAR_HEIGHT)];

    [self.tabBar addSubview:_tabBarView];
    self.tabBar.backgroundColor = [UIColor clearColor];
    self.tabBar.translucent = NO;

}
在tabBarView中加载xib
- (instancetype)initWithFrame:(CGRect)frame {

    self = [super initWithFrame:frame];

    TabBarView *tabBarView = [[[NSBundle mainBundle] loadNibNamed:NSStringFromClass([self class]) owner:self options:nil] firstObject];
    tabBarView.frame = frame;
    self = tabBarView;
    if (self) {


    }
    return self;
}
其实到这一步已经完成了控制器的切换等等,签订 UITabBarControllerDelegate
协议,只是为了在协议方法中方便切换,设置按钮状态等。
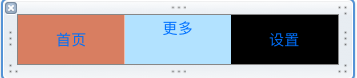
接下来看看效果:


 4098
4098

 被折叠的 条评论
为什么被折叠?
被折叠的 条评论
为什么被折叠?
 到【灌水乐园】发言


