


 本文介绍如何使用 ATMEGA32U4 Breakout 板及 LUFA 库进行 USB 编程。内容涵盖硬件安装、软件配置、驱动设置等关键步骤,并提供了实际操作指南。
源码地址:
https://github.com/sparkfun/32U4_Breakout_Board
下载之后,得到文件:32U4_Breakout_Board-master.zip
解压之后,得到文件夹:

首先看一下:
README.md
ATMEGA32U4 Breakout Board
=========================
[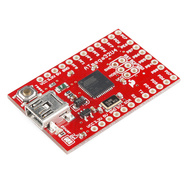
*ATMEGA32U4 Breakout Board (DEV-11117)*](https://www.sparkfun.com/products/11117)
This breakout board is designed for folks who would like to program outside of the Arduino IDE. THe board
comes preloaded with the LUFA CDC bootloader, allowing code to be built in WinAVR and program the board over USB
using AVRDUDE.
Repository Contents
-------------------
* **/Bootloaders** - CDC bootloader and instructions for installation
* **/Examples** - Example code for the board
* **/Hardware** - All Eagle design files (.brd, .sch)
* **/LUFA** - Instructions for setting up the LUFA bootloader
License Information
-------------------
The hardware is released under [Creative Commons Share-alike 3.0](http://creativecommons.org/licenses/by-sa/3.0/).
All other code is open source so please feel free to do anything you want with it; you buy me a beer if you use this and we meet someday ([Beerware license](http://en.wikipedia.org/wiki/Beerware)).
Notes for Installation
----------------------
This directory contains the bootloader and example source files for
Sparkfun's 32u4 Breakout board. Both were built on WinXP sp3 with
WinAVR-20100110 and AVRDUDE 5.10.
The bootloader is a modified LUFA-130303 CDC bootloader.
The bootloader directory contains the source and hex file for the bootloader
that ships with this board. When you first plug in the board to a Windows
machine, it will ask you for a driver. Point it to the following directory:
\SFE_32U4_Breakout_Board\Bootloaders\CDC
It will find the driver file (LUFA CDC Bootloader.inf) there.
Once your machine recognizes the Virtual COM port, you're ready to take a
look at the examples and try uploading them to your board. See the readme in
the examples directory for more information.
Before you can build any projects, you'll need to download and install
WinAVR if you're using Windows. It can be found [here](http://sourceforge.net/projects/winavr/files/).
Linux Users
-----------
You will need to install the following packages:
* **avr-gcc** - A port of the GNU C compiler to the AVR Architecture
* **avr-binutils** - Converts the object code into AVR-readable hex files
* **avr-libc** - AVR Library for stuff like accessing and manipulating registers
* **avrdude** - The software that actually drives the physical programming其中的重点是:
32U4_Breakout_Board-master\LUFA\目录下面只有一个readme.txt文件
文件内容为:
                   _   _ _ ___ _
                  | | | | | __/ \
                  | |_| U | _| o | - The Lightweight USB
                  |___|___|_||_n_|    Framework for AVRs
                =========================================
                          Written by Dean Camera
                  dean [at] fourwalledcubicle [dot] com

                         http://www.lufa-lib.org
                =========================================

               LUFA is donation supported. To support LUFA,
             please donate at http://www.lufa-lib.org/donate

                For Commercial Licensing information, see
                     http://www.lufa-lib.org/license

Notes from SparkFun:

In order to compile the modified LUFA bootloader, or the Virtual Serial
example for your Sparkfun 32u4 Breakout Board, follow these instructions:

1. Download the LUFA Project, version 130303,  version 120219 for VirtualSerial

Visit http://www.lufa-lib.org, then download LUFA-130303.zip

Alternatively, use the following official link to the file:
lufa-lib.googlecode.com/files/LUFA-130303.zip

2. Extract the zip file somewhere on your computer.

3. Copy the contents of the 'LUFA' folder from the zip to this folder.

The folder should be in the main directory:
\LUFA-130303\LUFA

Copy everything in that folder to this one where this readme resides:
\SFE_32U4_Breakout_Board\LUFA

4. ???

5. Profit!

You can now compile the Sparkfun modified LUFA bootloader and the Virtual
Serial demo found in the following locations respectively:
\SFE_32U4_Breakout_Board\Bootloaders\CDC
\SFE_32U4_Breakout_Board\Examples\Sparkfun-VirtualSerial

Enjoy!!


Also, a note about other examples included with the LUFA download:

LUFA includes all sorts of other examples too but they need their makefiles
to be customized to work for the 32u4 processor and their driver files
(.inf files and Descriptors.c) to be customized for Sparkfun's 32u4 Breakout
Board. More specifically, you will have to change the VID and PID in those
files for them to work with this specific board, so just a heads up.
按照两个文件的指示:
需要从:
http://www.fourwalledcubicle.com/LUFA.php
下载两个版本的LUFA:
lufa-LUFA-130303.zip 和lufa-LUFA-120219.zip
分别解压这两个压缩包,每个压缩包中有一个LUFA文件夹
内容如下所示:

编译:Bootloaders\CDC
32U4_Breakout_Board-master\Bootloaders\CDC的时候,
删除
32U4_Breakout_Board-master\LUFA
目录下所有内容,
将lufa-LUFA-130303\LUFA 中的所有文件拷贝到:
32U4_Breakout_Board-master\LUFA目录下
然后DOS CMD模式进入 32U4_Breakout_Board-master\Bootloaders\CDC 目录下,执行
make make clean
编译:Examples\Sparkfun-VirtualSerial
32U4_Breakout_Board-master\Examples\Sparkfun-VirtualSerial
删除
32U4_Breakout_Board-master\LUFA
目录下所有内容
将lufa-LUFA-120219\LUFA 中的所有文件拷贝到:
32U4_Breakout_Board-master\LUFA目录下
然后DOS CMD模式进入32U4_Breakout_Board-master\Examples\Sparkfun-VirtualSerial目录下,执行
make make clean


 5050
5050

 被折叠的 条评论
为什么被折叠?
被折叠的 条评论
为什么被折叠?
 到【灌水乐园】发言


