


 本文详细介绍了如何使用pip和conda命令分别生成requirements.txt和environment.yaml文件,用于记录和管理Python项目的第三方库依赖,以及如何通过这两个文件进行安装,确保项目的环境一致性。
目
用pip自动生成requirement.txt(导出第三方库的信息)
用pip一命令安装requirement.txt(所需的第三方库)
用conda命令自动生成environment.yaml (导出第三方库的信息)(保存环境的yaml文件)
用conda命令一命令安装environment.yaml (安装第三方库)(完成环境配置)
1 pip命令:
用pip自动生成requirement.txt(导出第三方库的信息)
pip freeze > requirements.txt用pip一命令安装requirement.txt(所需的第三方库)
pip install -r requirements.txt2 conda命令:
用conda命令自动生成environment.yaml (导出第三方库的信息)(保存环境的yaml文件)
conda env export > environment.yaml 用conda命令一命令安装environment.yaml (安装第三方库)(完成环境配置)
conda env create -f environment.yaml
例子environment.yaml
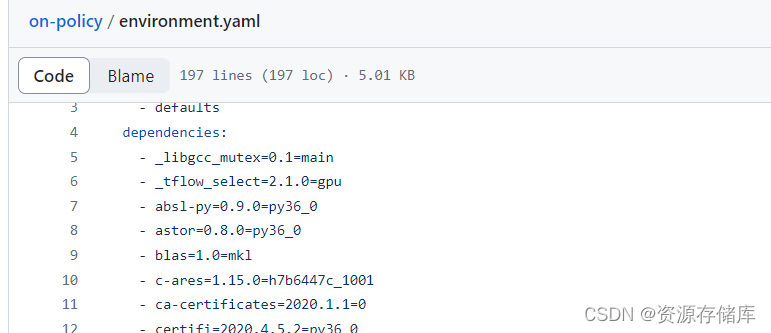
name: marl
channels:
  - defaults
dependencies:
  - _libgcc_mutex=0.1=main
  - _tflow_select=2.1.0=gpu
  - absl-py=0.9.0=py36_0
  - astor=0.8.0=py36_0
  - blas=1.0=mkl
  - c-ares=1.15.0=h7b6447c_1001
  - ca-certificates=2020.1.1=0
  - certifi=2020.4.5.2=py36_0
  - cudatoolkit=10.0.130=0
  - cudnn=7.6.5=cuda10.0_0
  - cupti=10.0.130=0
  - gast=0.2.2=py36_0
  - google-pasta=0.2.0=py_0
  - grpcio=1.14.1=py36h9ba97e2_0
  - h5py=2.10.0=py36h7918eee_0
  - hdf5=1.10.4=hb1b8bf9_0
  - intel-openmp=2020.1=217
  - keras-applications=1.0.8=py_0
  - keras-preprocessing=1.1.0=py_1
  - libedit=3.1=heed3624_0
  - libffi=3.2.1=hd88cf55_4
  - libgcc-ng=9.1.0=hdf63c60_0
  - libgfortran-ng=7.3.0=hdf63c60_0
  - libprotobuf=3.12.3=hd408876_0
  - libstdcxx-ng=9.1.0=hdf63c60_0
  - markdown=3.1.1=py36_0
  - mkl=2020.1=217
  - mkl-service=2.3.0=py36he904b0f_0
  - mkl_fft=1.1.0=py36h23d657b_0
  - mkl_random=1.1.1=py36h0573a6f_0
  - ncurses=6.0=h9df7e31_2
  - numpy=1.18.1=py36h4f9e942_0
  - numpy-base=1.18.1=py36hde5b4d6_1
  - openssl=1.0.2u=h7b6447c_0
  - opt_einsum=3.1.0=py_0
  - pip=20.1.1=py36_1
  - protobuf=3.12.3=py36he6710b0_0
  - python=3.6.2=hca45abc_19
  - readline=7.0=ha6073c6_4
  - scipy=1.4.1=py36h0b6359f_0
  - setuptools=47.3.0=py36_0
  - six=1.15.0=py_0
  - sqlite=3.23.1=he433501_0
  - tensorboard=2.0.0=pyhb38c66f_1
  - tensorflow=2.0.0=gpu_py36h6b29c10_0
  - tensorflow-base=2.0.0=gpu_py36h0ec5d1f_0
  - tensorflow-estimator=2.0.0=pyh2649769_0
  - tensorflow-gpu=2.0.0=h0d30ee6_0
  - termcolor=1.1.0=py36_1
  - tk=8.6.8=hbc83047_0
  - werkzeug=0.16.1=py_0
  - wheel=0.34.2=py36_0
  - wrapt=1.12.1=py36h7b6447c_1
  - xz=5.2.5=h7b6447c_0
  - zlib=1.2.11=h7b6447c_3
  - pip:
      - aiohttp==3.6.2
      - aioredis==1.3.1
      - astunparse==1.6.3
      - async-timeout==3.0.1
      - atari-py==0.2.6
      - atomicwrites==1.2.1
      - attrs==18.2.0
      - beautifulsoup4==4.9.1
      - blessings==1.7
      - cachetools==4.1.1
      - cffi==1.14.1
      - chardet==3.0.4
      - click==7.1.2
      - cloudpickle==1.3.0
      - colorama==0.4.3
      - colorful==0.5.4
      - configparser==5.0.1
      - contextvars==2.4
      - cycler==0.10.0
      - cython==0.29.21
      - deepdiff==4.3.2
      - dill==0.3.2
      - docker-pycreds==0.4.0
      - docopt==0.6.2
      - fasteners==0.15
      - filelock==3.0.12
      - funcsigs==1.0.2
      - future==0.16.0
      - gin==0.1.6
      - gin-config==0.3.0
      - gitdb==4.0.5
      - gitpython==3.1.9
      - glfw==1.12.0
      - google==3.0.0
      - google-api-core==1.22.1
      - google-auth==1.21.0
      - google-auth-oauthlib==0.4.1
      - googleapis-common-protos==1.52.0
      - gpustat==0.6.0
      - gql==0.2.0
      - graphql-core==1.1
      - gym==0.17.2
      - hiredis==1.1.0
      - idna==2.7
      - idna-ssl==1.1.0
      - imageio==2.4.1
      - immutables==0.14
      - importlib-metadata==1.7.0
      - joblib==0.16.0
      - jsonnet==0.16.0
      - jsonpickle==0.9.6
      - jsonschema==3.2.0
      - kiwisolver==1.0.1
      - lockfile==0.12.2
      - mappo==0.0.1
      - matplotlib==3.0.0
      - mock==2.0.0
      - monotonic==1.5
      - more-itertools==4.3.0
      - mpi4py==3.0.3
      - mpyq==0.2.5
      - msgpack==1.0.0
      - mujoco-py==2.0.2.13
      - mujoco-worldgen==0.0.0
      - multidict==4.7.6
      - munch==2.3.2
      - nvidia-ml-py3==7.352.0
      - oauthlib==3.1.0
      - opencensus==0.7.10
      - opencensus-context==0.1.1
      - opencv-python==4.2.0.34
      - ordered-set==4.0.2
      - packaging==20.4
      - pandas==1.1.1
      - pathlib2==2.3.2
      - pathtools==0.1.2
      - pbr==4.3.0
      - pillow==5.3.0
      - pluggy==0.7.1
      - portpicker==1.2.0
      - probscale==0.2.3
      - progressbar2==3.53.1
      - prometheus-client==0.8.0
      - promise==2.3
      - psutil==5.7.2
      - py==1.6.0
      - py-spy==0.3.3
      - pyasn1==0.4.8
      - pyasn1-modules==0.2.8
      - pycparser==2.20
      - pygame==1.9.4
      - pyglet==1.5.0
      - pyopengl==3.1.5
      - pyopengl-accelerate==3.1.5
      - pyparsing==2.2.2
      - pyrsistent==0.16.0
      - pysc2==3.0.0
      - pytest==3.8.2
      - python-dateutil==2.7.3
      - python-utils==2.4.0
      - pytz==2020.1
      - pyyaml==3.13
      - pyzmq==19.0.2
      - ray==0.8.0
      - redis==3.4.1
      - requests==2.24.0
      - requests-oauthlib==1.3.0
      - rsa==4.6
      - s2clientprotocol==4.10.1.75800.0
      - s2protocol==4.11.4.78285.0
      - sacred==0.7.2
      - seaborn==0.10.1
      - sentry-sdk==0.18.0
      - shortuuid==1.0.1
      - sk-video==1.1.10
      - smmap==3.0.4
      - snakeviz==1.0.0
      - soupsieve==2.0.1
      - subprocess32==3.5.4
      - tabulate==0.8.7
      - tensorboard-logger==0.1.0
      - tensorboard-plugin-wit==1.7.0
      - tensorboardx==2.0
      - torch==1.5.1+cu101
      - torchvision==0.6.1+cu101
      - tornado==5.1.1
      - tqdm==4.48.2
      - typing-extensions==3.7.4.3
      - urllib3==1.23
      - wandb==0.10.5
      - watchdog==0.10.3
      - websocket-client==0.53.0
      - whichcraft==0.5.2
      - xmltodict==0.12.0
      - yarl==1.5.1
      - zipp==3.1.0
      - zmq==0.0.0


 228
228


 被折叠的 条评论
为什么被折叠?
被折叠的 条评论
为什么被折叠?
 到【灌水乐园】发言


