NextJS用法笔记
页面渲染的三种方式
客户端渲染(CSR)
React、Vue等主流前端框架采用的渲染方式;
const usePosts = () => {
  const [posts, set_posts] = useState<Acticle[]>();
  useEffect(() => {
    axios.get("/api/v1/posts").then((res) => {
      set_posts(res.data);
    });
  }, []);
  return { posts };
};

const posts = () => {
  const { posts } = usePosts();
  return (
    <div>
      <h1>文章列表</h1>
      {posts?.map((item) => {
        return <div key={item.id}>{item.title}</div>;
      })}
    </div>
  );
};
缺点:白屏、SEO不友好
静态文件生成(SSG)
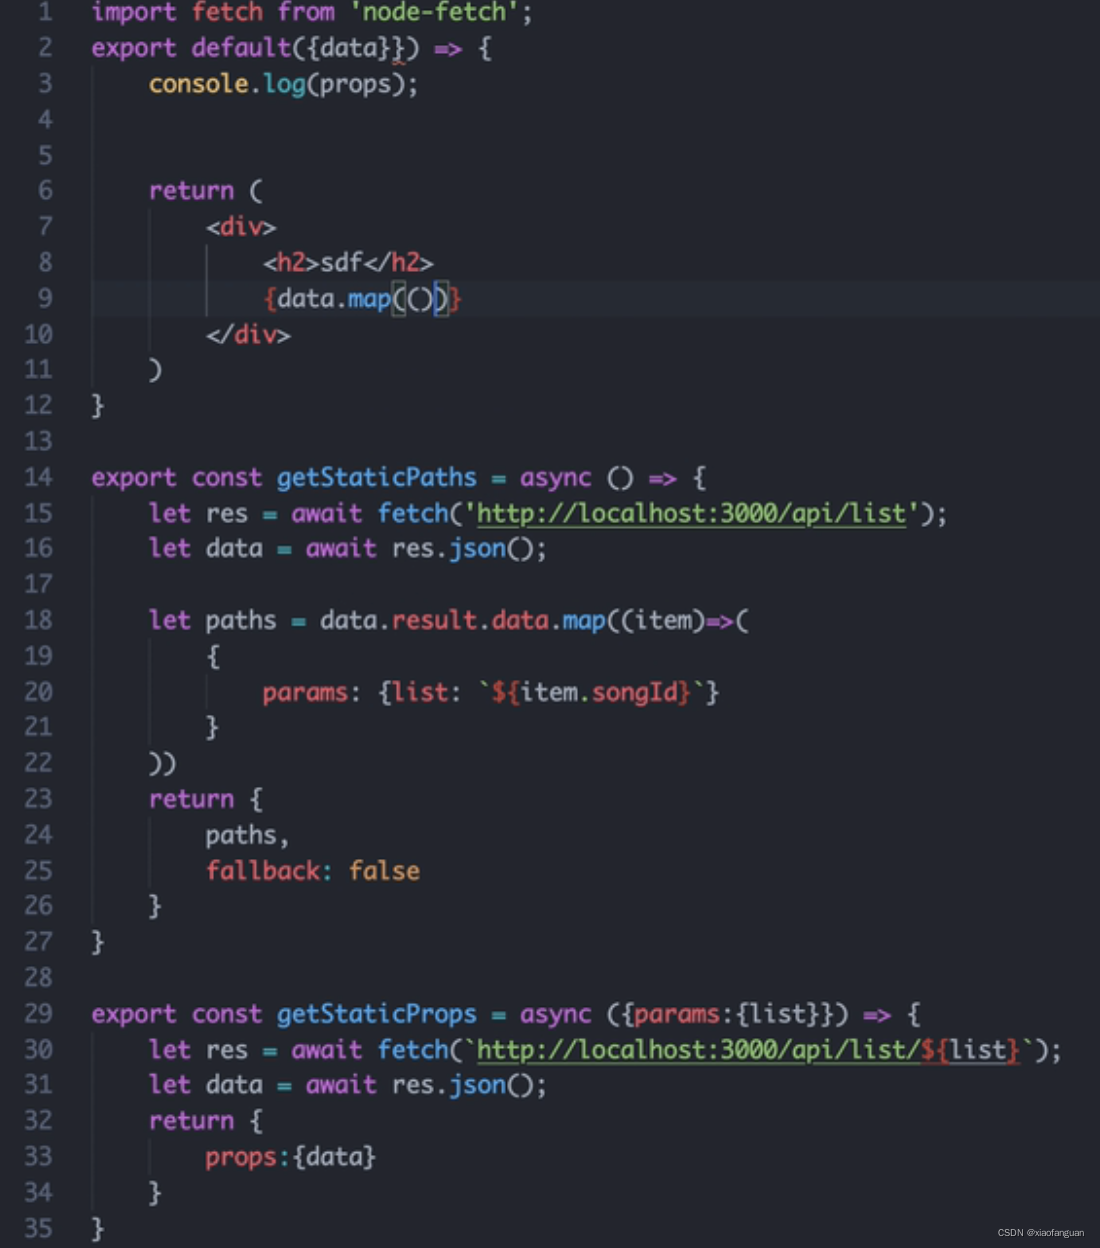
Next.js 提供 getStaticProps 这个 API,就可以直接通过 Props 传入:
- 数据来自无头 CMS
- 页面必须预先渲染(用于 SEO)并且速度非常快——getStaticProps生成HTML和JSON文件,这两者都可以被 CDN 缓存以提高性能
- 数据可以公开缓存(不是特定于用户的)。
- 由于getStaticProps只在服务器端运行,它永远不会在客户端运行。它甚至不会包含在浏览器的 JS 包中,因此您可以编写进行数据库查询
const posts: NextPage<Props> = (props) => {
  const { posts } = props;
  return (
    <div className="content">
      <h1>文章列表</h1>
      <ul>
        {posts?.map((item) => {
          return (
            <Link href={`/posts/${item.title}`} key={item.title}>
              <a>
                <li key={item.title}>
                  {item.id}.{item.title}
                </li>
              </a>
            </Link>
          );
        })}
      </ul>
    </div>
  );
};

export default posts;

export const getStaticProps = async () => {
  const posts = await getPosts();
  return {
    props: { posts: posts },
  };
};
优点:我们不用 AJAX 也能拿到内容,不会白屏,而且我们查看源代码也能看到数据内容,SEO友好
缺点:构建时已经把页面静态化了,如果不配合增量渲染(ISR),则页面就再不可变
build & export
next build && next export -o dist
服务端渲染(SSR)
如果动态内容与用户强关联,较难提前静态化,这个时候我们可以使用服务端渲染。 Next.js 提供 getServerSideProps 这个 API,就可以直接通过 Props 传入
const Index: NextPage<Props> = (props) => {
const { browser } = props;
return (
  <ul>
    {posts?.map((item) => {
      return (
        <Link href={`/posts/${item.title}`} key={item.title}>
          <a>
            <li key={item.title}>
              {item.id}.{item.title}
            </li>
          </a>
        </Link>
      );
    })}
  </ul>
);
};
export default Index;

export const getServerSideProps: GetServerSideProps = async () => {
  const posts = await getPosts();
  return {
    props: { posts: posts },
  };
};
【补充】
增量渲染(ISR)
Next.js 允许您在构建站点后创建或更新静态页面。增量静态重新生成 (ISR) 使您能够在每页的基础上使用静态生成,而无需重建整个站点。使用 ISR,您可以在扩展到数百万页的同时保留静态的优势
获取数据
| 获取数据方法 | 静态化 | 异步 | 只能在pages文件夹下 | 作用 | 服务端请求 |
|---|---|---|---|---|---|
| getStaticProps | 是 | 是 | 是 | 请求数据 | 是http(非XMLHttpRequest) |
| getStaticPaths | 是 | 是 | 是 | 生成动态路由 | 是 |
| getServerSideProps | 否 | 是 | 是 | 请求数据 | 是 |
getServerSideProps() - 非静态化 - 异步async
- getServerSideProps(context);
params:接收getStaticPaths()返回的动态路径,方便请求动态数据:/api/***
req:HTTP 请求对象
res:HTTP响应对象
query:查询字符串 - getServerSideProps()的返回值是一个对象,其中对象必有一个key值为props,并且这个props作为该组件的props
getStaticProps() - 静态化 - 异步async
3. getStaticProps({params,previrew,previewData})
4. 在动态路由文件 [***].js 里面用
5. params: 接收getStaticProps返回的动态路径,方便请求动态数据
6. getStaticProps的返回值是一个对象,其中对象必有一个key值为props,并且这个props作为该组件的props
别名配置
{
  "compilerOptions": {
    "baseUrl": ".",
    "paths": {
      "@/*": ["src/*"]
    }
  }
}
如果你使用的是 TS,那么对应修改的就是 tsconfig.json, 如果你使用的是 JS,那么对应修改的就是 jsconfig.json

redirects【路由重写/proxy】
// next.config.js

module.exports = {
  async redirects() {
    return [
      {
        source: '/home',
        destination: '/',
        permanent: true,
      },
      {
		source: '/apiUser/:path*',
		destination: `http://localhost:9527/:path*`
	  },
    ]
  },
}
搭建无头CMS
npx create-strapi-app next-shop-backend --quickstart
工具库
- Octokit
- useSWR
500
import Error from 'next/error'

export async function getServerSideProps() {
  const res = await fetch('https://api.github.com/repos/vercel/next.js')
  const errorCode = res.ok ? false : res.statusCode
  const json = await res.json()

  return {
    props: { errorCode, stars: json.stargazers_count },
  }
}

export default function Page({ errorCode, stars }) {
  if (errorCode) {
    return <Error statusCode={errorCode} />
  }

  return <div>Next stars: {stars}</div>
}
notFound
export async function getServerSideProps (context) {
  // this will be called server-side only
  const pid = context.params.pid;

  // connect to your db to check if it exists, make a webservice call...
  if (!checkIfExists(pid)) {
    return { notFound: true };
    // this will display your /pages/404.js error page,
    // in the current page, with the 404 http status code.
  }
  return {
    props: {
      pid,
      // you may also add here the webservice content
      // to generate your page and avoid a client-side webservice call
    }
  };
};
fetcher use axios
export default function SearchBar() {
  const [query, setQuery] = useState("");
  const [address, setAddress] = useState("");
  const fetcher = async (url) => await axios.get(url).then((res) => res.data);
  const { data, error } = useSWR(address, fetcher);

  const handleSubmit = (e) => {
    setAddress(`https://jsonplaceholder.typicode.com/todos/${query}`);
    e.preventDefault();
  };

  if (error) return <div>ERROR</div>;

  return (
    <>
      <Form onSubmit={handleSubmit}>
        <Input
          type="text"
          onChange={(e) => setQuery(e.target.value)}
          value={query}
        />
        <SearchButton type="submit">Search</SearchButton>
      </Form>
    </>
  );
}
设置state-useSWR时重新渲染过多
React.useEffect(() => {
  const fetcher = url =>
    axios
      .get(url, {
        headers: { Authorization: "Bearer " + session.user.servertoken },
      })
      .then(res => {
        const adults = data.map(a => a.adults);
        const reducer = (accumlator, item) => {
          return accumlator + item;
        };
        const totalAdults = adults.reduce(reducer, 0);
        setAdults(totalAdults);
      });

  useSWR(`http://localhost:8000/api/admin/general/${id}`, fetcher);
}, []);
获取路由参数
const router = useRouter();
const { project: projectId, application: applicationId } = router.query;
本地开发dev环境
- next.config.js文件 重写地址(实现跨域)
module.exports = {

  async rewrites() {
    return [
     //接口请求 前缀带上/api-text/
      { source: '/api-text/:path*', destination: `http://127.0.0.1:8080/:path*` },

    ]
  },
  }
- express
// server.js
const express = require('express')
const next = require('next')
const proxyMiddleware = require('http-proxy-middleware')

const devProxy = {
    '/api': {
        target: 'http://localhost:3333/api/', // 端口自己配置合适的
        pathRewrite: {
            '^/api': '/'
        },
        changeOrigin: true
    }
}

const port = parseInt(process.env.PORT, 10) || 3000
const dev = process.env.NODE_ENV !== 'production'
const app = next({
    dev
})
const handle = app.getRequestHandler()

app.prepare()
    .then(() => {
        const server = express()

        if (dev && devProxy) {
            Object.keys(devProxy).forEach(function(context) {
                server.use(proxyMiddleware(context, devProxy[context]))
            })
        }

        server.all('*', (req, res) => {
            handle(req, res)
        })

        server.listen(port, err => {
            if (err) {
                throw err
            }
            console.log(`> Ready on http://localhost:${port}`)
        })
    })
    .catch(err => {
        console.log('An error occurred, unable to start the server')
        console.log(err)
    })
Redux Toolkit: extraReducers
将逻辑定义为独立的 reducer 函数,并在两种情况下重复使用
function addItem(state, action) {
  state.push(action.payload);
}

const slice = createSlice({
  name: 'data',
  initialState: [],
  reducers: {
    setData: addItem
  },
  extraReducers: (builder: any) => {
    builder.addCase(getData.pending, (state) => {
      //...
    })
    builder.addCase(getData.rejected, (state) => {
      //...
    })
    builder.addCase(getData.fulfilled, addItem)
  },
})
将函数定义为 reducers 的一部分,然后在 extraReducers 处理程序中引用它
const slice = createSlice({
  name: 'data',
  initialState: [],
  reducers: {
    setData: (state, { payload }) => {
       state.push(payload);
    })
  },
  extraReducers: (builder: any) => {
    builder.addCase(getData.pending, (state) => {
      //...
    })
    builder.addCase(getData.rejected, (state) => {
      //...
    })
    builder.addCase(getData.fulfilled, (state, action) => {
      slice.caseReducers.setData(state, action);
    })
  },
})
typescript axios config.headers 未定义
if (!config.headers) {
	config.headers = {}
}
config.headers['Authorization'] = 'token'
next-iron-session
- 云社区重定向方案
import { withIronSession } from "next-iron-session";

const user_home = (props) => {

  // ...some other layout stuff
};
export const getServerSideProps = withIronSession(
  async ({ req, res }) => {
    const user = req.session.get("user");
    if (!user) {
      redirect: {
        permanent: false,
        destination: "/login",
      },
    }
    return {
      props: { user: user },
    };
  },
  {
    cookieName: "NEXT_EXAMPLE",
    cookieOptions: {
      secure: true,
    },
    password: process.env.APPLICATION_SECRET,
  }
);

export default user_home;
- 官方例子
export const getServerSideProps = withIronSessionSsr(async function ({
  req,
  res,
}) {
  const user = req.session.user

  if (user === undefined) {
    res.setHeader('location', '/login')
    res.statusCode = 302
    res.end()
    return {
      props: {
        user: { isLoggedIn: false, login: '', avatarUrl: '' } as User,
      },
    }
  }

  return {
    props: { user: req.session.user },
  }
},
sessionOptions)
getStaticProps \ getServerSideProps

partialType省去定义interface


 877
877


 被折叠的 条评论
为什么被折叠?


