


本文简介:
最近看了一些文章,看到大部分关于Android jni的配置都还是ndkBuild模式的;有的则是说怎么引用已经编译好的os文件。本文主要以一个小dome为列,记录Android jni cmake模式下的配置。
一、环境配置
Android 开发的环境配置网上已经很多了,这里就不重复。我们做jni开发的,需要用到snk,所以我们第一步,在Android studio 上引入ndk

这里我们主要需要勾选NDK、CMake。为啥要勾选CMake因为我们自己常常用传统方法生成,配置太过于麻烦,所以我们这里用CMake,直接生成一个标准的例子,进行修改。这样就会减少很多问题的产生,节省我们的时间。
二、项目创建
(一)首先创建新项目,选择创建NativityC++项目
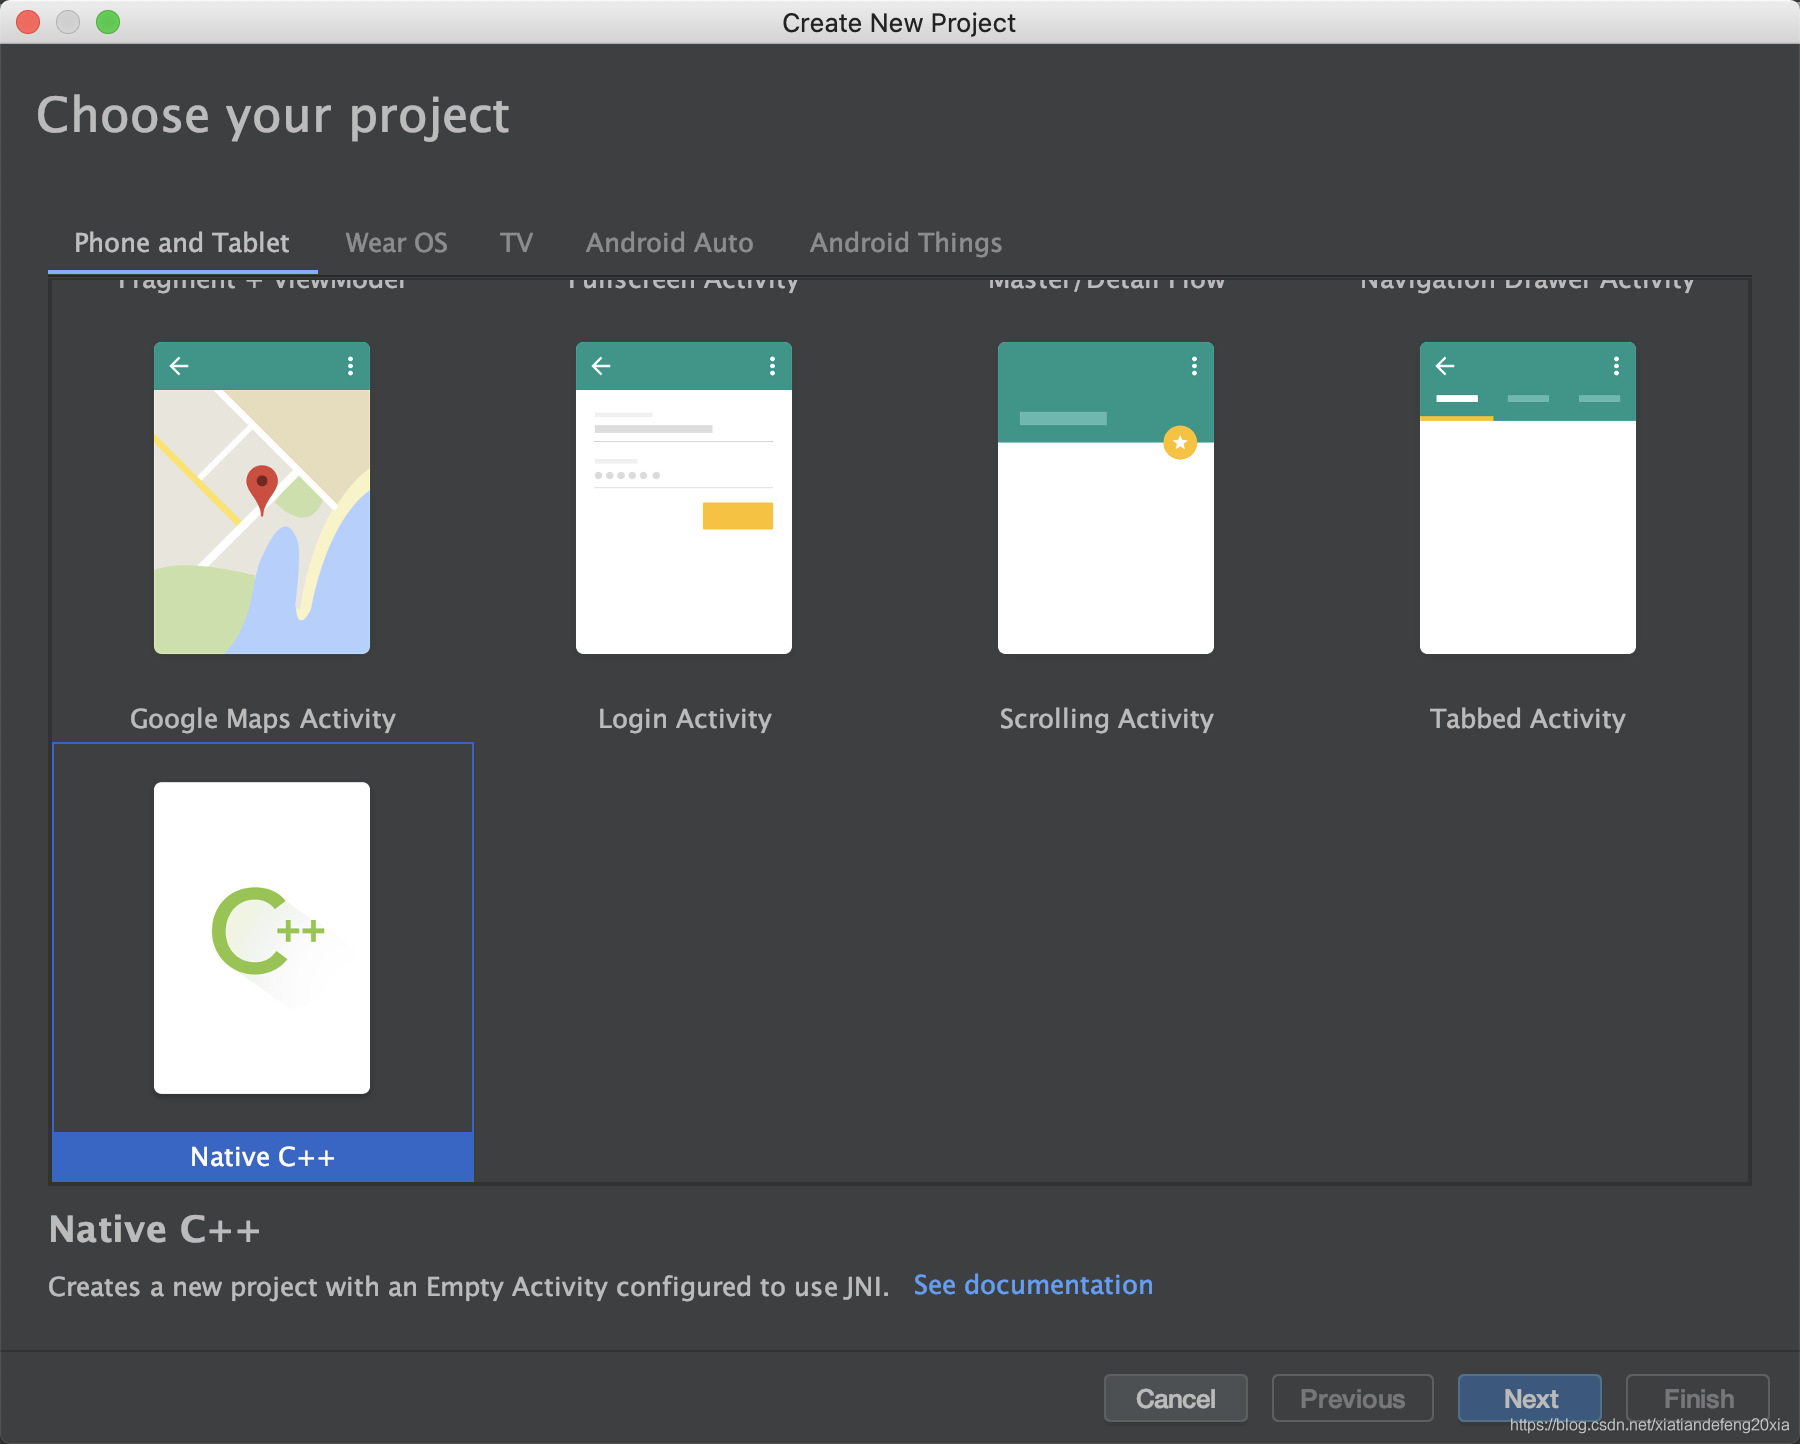
(二)填写项目信息。

选择对c++标准,这里选择的默认。

(三)创建成功后项目架构是如下图

三、与Android项目有些差别及说明
(一)app下的build.gradle

这里多了些关于编译ndk的入口配置数据
externalNativeBuild {
    cmake {
        cppFlags ""
    }
}
这里的cppFlags 值为引用的其他类库比如:
cppFlags "-fexceptions"编译snk异常捕获的
externalNativeBuild {
    cmake {
        path "src/main/cpp/CMakeLists.txt"
        version "3.10.2"
    }
}
path :指定编译的目标配置文件地址
version:编译版本的
(二)结构上:
main下面多了cpp的包,里面有多了一个CMakeLists.txt和native-lib.cpp
这两个文件,CMakeLists.txt是关于cmake的一些基础配置和编译ndk的文件关联配置
native-lib.cpp则是C++将要编译的代码文件
1、首先看CMakeLists.txt的内容:
# For more information about using CMake with Android Studio, read the
# documentation: https://d.android.com/studio/projects/add-native-code.html

# Sets the minimum version of CMake required to build the native library.

cmake_minimum_required(VERSION 3.4.1)

# Creates and names a library, sets it as either STATIC
# or SHARED, and provides the relative paths to its source code.
# You can define multiple libraries, and CMake builds them for you.
# Gradle automatically packages shared libraries with your APK.

add_library( # Sets the name of the library.
        native-lib

        # Sets the library as a shared library.
        SHARED

        # Provides a relative path to your source file(s).
        native-lib.cpp)

# Searches for a specified prebuilt library and stores the path as a
# variable. Because CMake includes system libraries in the search path by
# default, you only need to specify the name of the public NDK library
# you want to add. CMake verifies that the library exists before
# completing its build.

find_library( # Sets the name of the path variable.
        log-lib

        # Specifies the name of the NDK library that
        # you want CMake to locate.
        log)

# Specifies libraries CMake should link to your target library. You
# can link multiple libraries, such as libraries you define in this
# build script, prebuilt third-party libraries, or system libraries.

target_link_libraries( # Specifies the target library.
        native-lib

        # Links the target library to the log library
        # included in the NDK.
        ${log-lib})
add_library 下面配置的os类库对应类。native-lib为类库名,是生成os文件的名称,也是我们java加载java的名称。
native-lib.cpp 则是对应java方法生成的对C/C++的目录地址。该文件地址与CMakeLists.txt文件位置相对
2、native-lib.cpp 查看其内容:
#include <jni.h>
#include <string>

extern "C" JNIEXPORT jstring JNICALL
Java_com_toy_key_cjni_MainActivity_stringFromJNI(
        JNIEnv *env,
        jobject /* this */) {
    std::string hello = "Hello from C++";
    return env->NewStringUTF(hello.c_str());
}
这是一个C/C++的代码方法,起作用就是调用stringFromJNI该方法,返回"Hello form C++"的字符串
(三)java中MainActivity
public class MainActivity extends AppCompatActivity {

    // Used to load the 'native-lib' library on application startup.
    static {
        System.loadLibrary("native-lib");
    }

    @Override
    protected void onCreate(Bundle savedInstanceState) {
        super.onCreate(savedInstanceState);
        setContentView(R.layout.activity_main);

        // Example of a call to a native method
        TextView tv = findViewById(R.id.sample_text);
        tv.setText(stringFromJNI());
    }

    /**
     * A native method that is implemented by the 'native-lib' native library,
     * which is packaged with this application.
     */
    public native String stringFromJNI();
}
代码中多了 static { System.loadLibrary("native-lib"); } 静态代码块,作用将native-lib库加载到系统库中,这里native-lib对应的就是CMakeLists.txt配置文件中设置的库名。
public native String stringFromJNI();代码声明了native映射C/C++的方法。在native-lib.cpp中实现
(四)、os库编译
选AndroidStudio的build-Rebuild Project,进行编译。
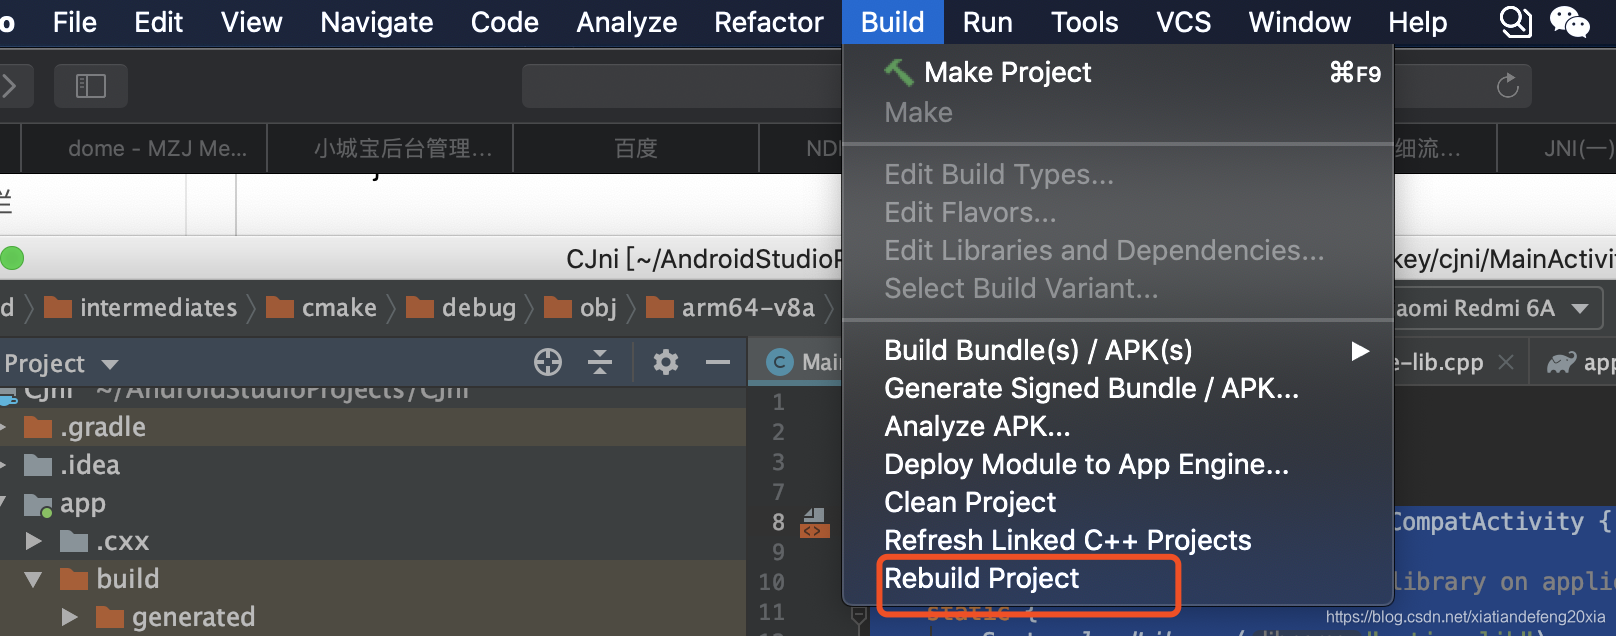
编译成功后可以从项目app/build/intermediates/cmake/debug/obj/下面查看到对应不同处理器的C库了

(五)项目运行效果
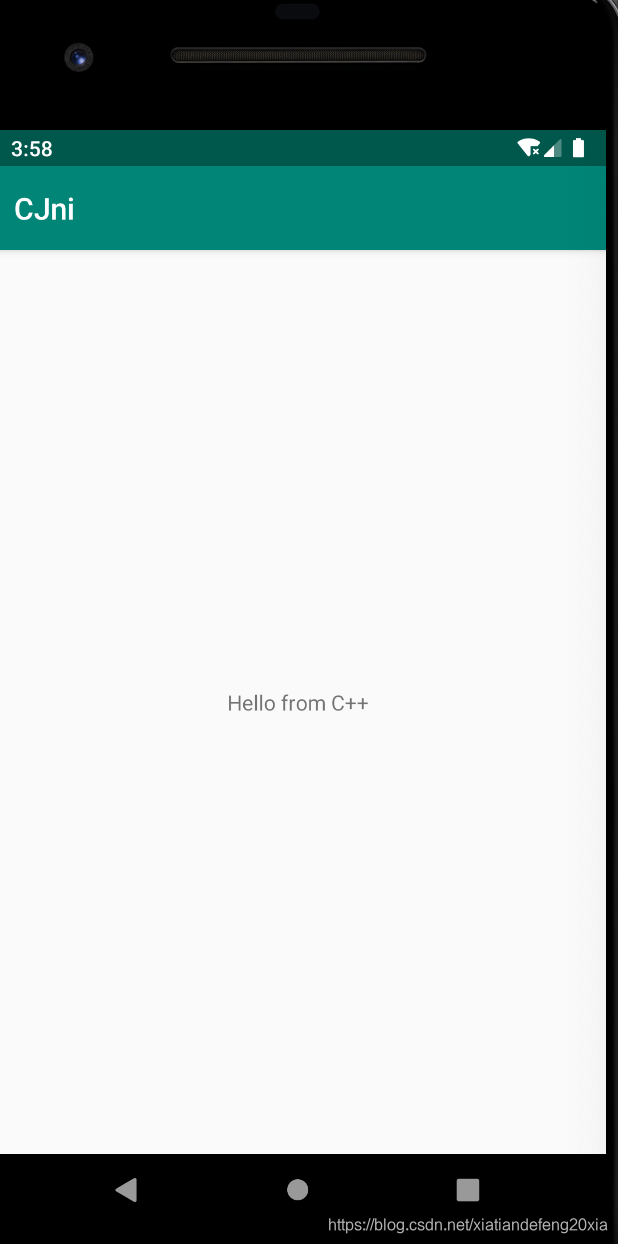
这里已经基本讲述完整个项目的关键地方,不过这些都是项目自己生成的,不自己动手不容易变成自己的知识,接下来我们尝试去修改,从而掌握理解
四、修改项目
1、创建一个JNIHelper类来声明管理接口,将MainActivity中关于调用C库的代码移动到该类,
public class JNIHelper {
    // Used to load the 'native-lib' library on application startup.
    //加载到系统 自定义的JNILibrary 库
    static {
        System.loadLibrary("JNILibrary");
    }

    /**
     * A native method that is implemented by the 'native-lib' native library,
     * which is packaged with this application.
     * 声明JNILibrary库中获取String的方法
     */
    public static native String stringFromJNI();
}
2、MainActivity代码内容是:
public class MainActivity extends AppCompatActivity {


    @Override
    protected void onCreate(Bundle savedInstanceState) {
        super.onCreate(savedInstanceState);
        setContentView(R.layout.activity_main);

        // Example of a call to a native method
        TextView tv = findViewById(R.id.sample_text);
        tv.setText(JNIHelper.stringFromJNI());
    }

}
这样移动后项目会报错,会让你重新编译,暂时不去理会他,当修改完全后从新编译就不会出问题
3、CMakeLists.txt的修改后
# For more information about using CMake with Android Studio, read the
# documentation: https://d.android.com/studio/projects/add-native-code.html

# Sets the minimum version of CMake required to build the native library.

cmake_minimum_required(VERSION 3.4.1)

# Creates and names a library, sets it as either STATIC
# or SHARED, and provides the relative paths to its source code.
# You can define multiple libraries, and CMake builds them for you.
# Gradle automatically packages shared libraries with your APK.

aux_source_directory(./ DIR_SRCS)
add_library( # Sets the name of the library.
        JNILibrary

        # Sets the library as a shared library.
        SHARED

        # Provides a relative path to your source file(s).
        ${DIR_SRCS})

# Searches for a specified prebuilt library and stores the path as a
# variable. Because CMake includes system libraries in the search path by
# default, you only need to specify the name of the public NDK library
# you want to add. CMake verifies that the library exists before
# completing its build.

find_library( # Sets the name of the path variable.
        log-lib

        # Specifies the name of the NDK library that
        # you want CMake to locate.
        log)

# Specifies libraries CMake should link to your target library. You
# can link multiple libraries, such as libraries you define in this
# build script, prebuilt third-party libraries, or system libraries.

target_link_libraries( # Specifies the target library.
        JNILibrary

        # Links the target library to the log library
        # included in the NDK.
        ${log-lib})
这里将add_library 方法和target_link_libraries方法中的 native-lib 修改为了自定义JNILibrary库名,这里库名任意改动但是要与JNIHelper中的引用库名对应一致。
此外这里我将指定的C/C++库文件做了调整。在上面声明了一个字典变量 aux_source_directory(./ DIR_SRCS)
其中./是对于CMakeLists.txt 路径的C/C++源码文件的相对路径。DIR_SRCS 则是引用库名文件对应的C/C++源文件名
比如这里的${DIR_SRCS} = JNILibrary.cpp
修改完CMakeLists.txt后我们去修改C/C++源文件
在对应的cpp目录下创建一个NILibrary.cpp的文件(注意创建的文件名与自己定义库名保持一致,不然无法编译通过)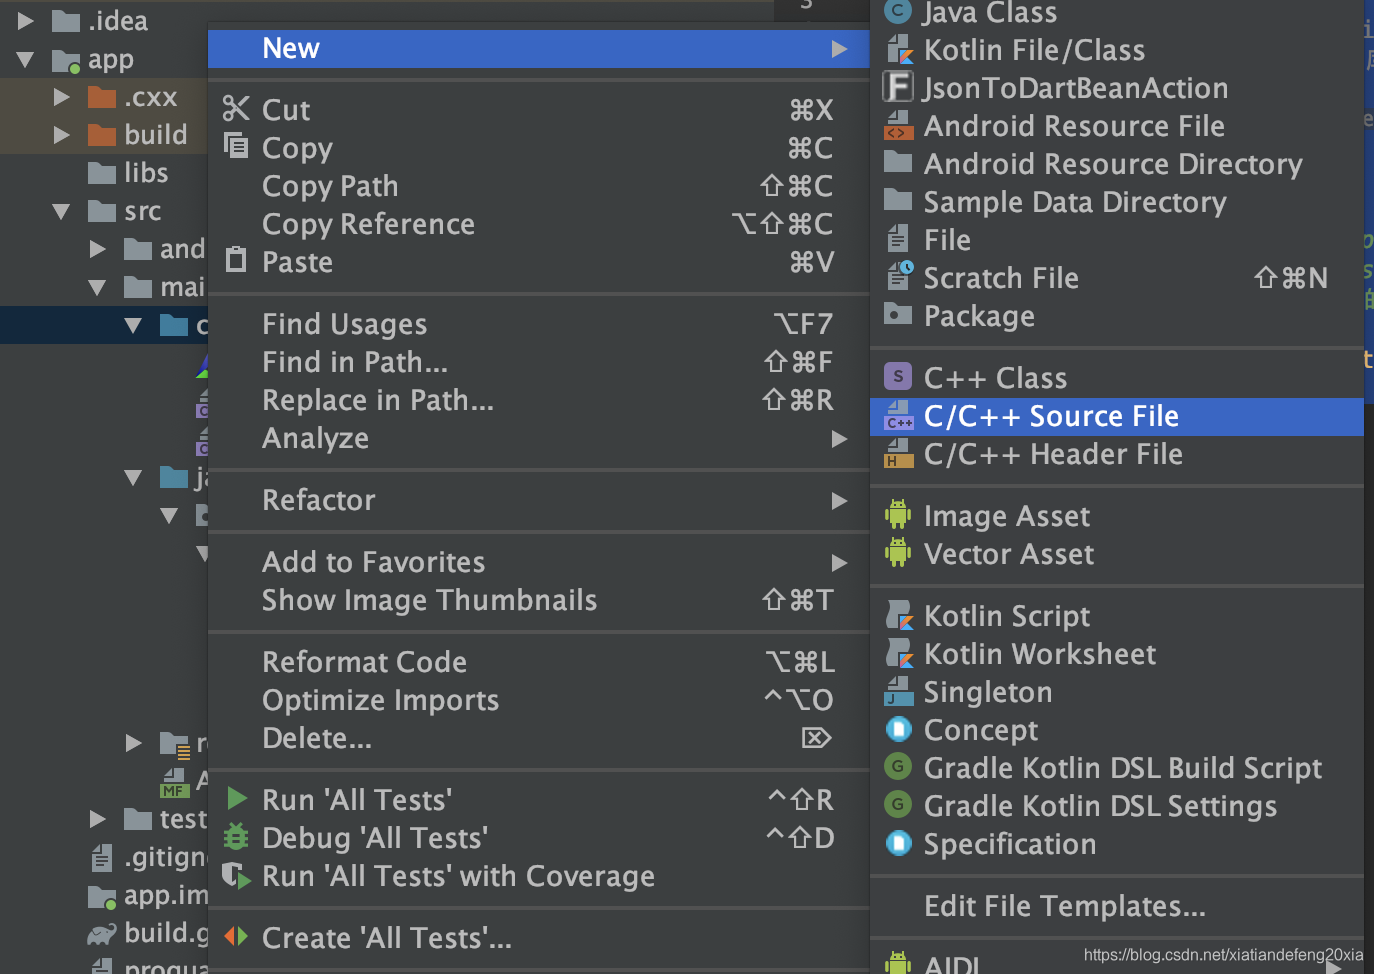

创建成功后可以看到cpp目录下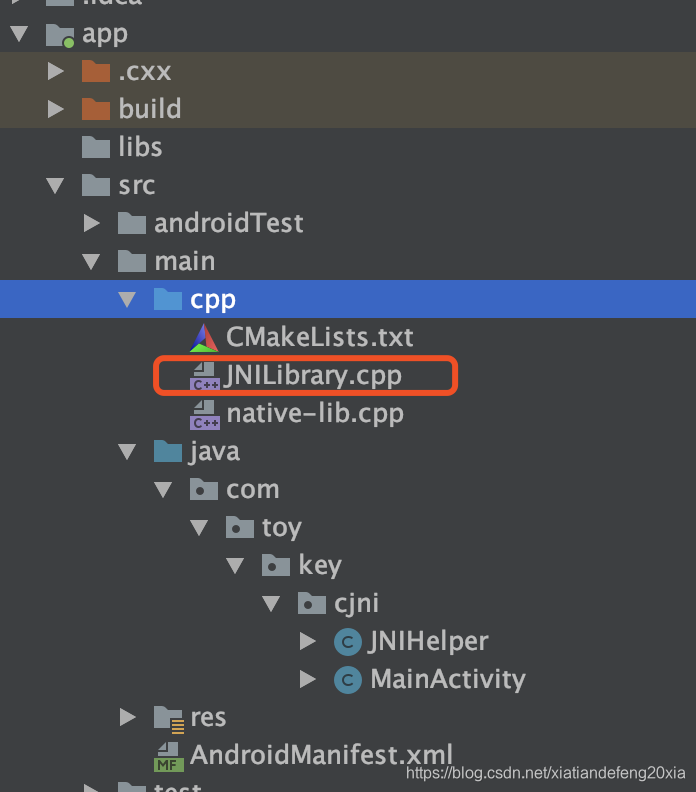
然后往JNILibrary.cpp 实现对应JNIHelper类声明的方法,
//
// Created by MZJ on 2020-04-22.
//
#include <jni.h>
#include <string>


extern "C"
JNIEXPORT jstring JNICALL
Java_com_toy_key_cjni_JNIHelper_stringFromJNI(JNIEnv *env, jobject thiz) {
        std::string hello = "Hello from C++";
        return env->NewStringUTF(hello.c_str());
}
这里要注意的是实现的方法和你的JNIHelper有关联,可以看到方法名 Java_com_toy_key_cjni_JNIHelper_stringFromJNI
及规则为Java+包名+方法名 以_隔开。
当然自己写比较麻烦你也可以让Android Studio自动帮你生成。
创建完JNILibrary.cpp 不去写C/C++代码,然后进行build project。这是我们可以看到java的JNIHelper中未实现的方法名为红色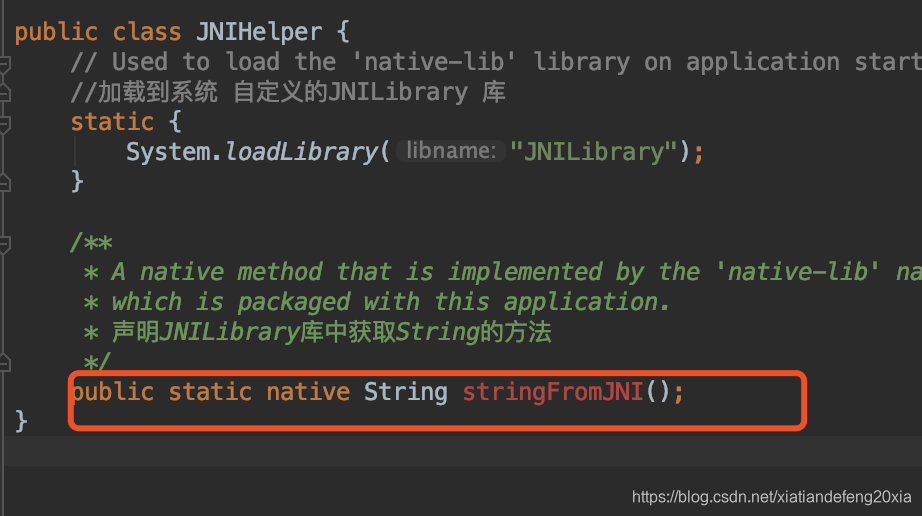
选中方法按 option+回车键提示,选择创建jni对应方法

创建成功后是这样
方法的实现需要自己进行代码完善,添加返回想要返回的字符。
注意:这里通过提示生成的可能会生成是.c文件这是默认生成C语言的文件,这个时候实现的第一个方法只能自己手工打对应方法了。后面的再有其他方法才会映射到这个JNILibrary.cpp文件自动生成。
然后再在方法里实现对应的逻辑。我上面的则是直接按照dome的返回字符写的
好这里算是修改完成了,运行后如上面的运行的结果一样则说明修改成功了。我再举一反三。修改一个回调方法出来。
五、修改一个回调方法
1、在java里创建一个NativeListener接口类里面有个修改Text的方法
public interface NativeListener {
    void changeText(String msg);
}
2、在JNIHelper里声明一个绑定NativeListener的方法
package com.toy.key.cjni;

public class JNIHelper {
    // Used to load the 'native-lib' library on application startup.
    //加载到系统 自定义的JNILibrary 库
    static {
        System.loadLibrary("JNILibrary");
    }

    /**
     * A native method that is implemented by the 'native-lib' native library,
     * which is packaged with this application.
     * 声明JNILibrary库中获取String的方法
     */
    public static native String stringFromJNI();
    /**
     * 注册NativeListener监听
     */
    public static native void registerListener(NativeListener listener);
}
按option+回车键提示,并创建 jni 方法,然后在JNILibrary.cpp 会生成对应方法
//
// Created by MZJ on 2020-04-22.
//
#include <jni.h>
#include <string>


extern "C"
JNIEXPORT jstring JNICALL
Java_com_toy_key_cjni_JNIHelper_stringFromJNI(JNIEnv *env, jobject thiz) {
        std::string hello = "Hello from C++";
        return env->NewStringUTF(hello.c_str());
}


extern "C"
JNIEXPORT void JNICALL
Java_com_toy_key_cjni_JNIHelper_registerListener(JNIEnv *env, jclass clazz, jobject listener) {
        // TODO: implement registerListener()
}
3、编辑JNILibrary.cpp的逻辑
//
// Created by MZJ on 2020-04-22.
//
#include <jni.h>
#include <string>

//声明变量
jobject _listener;//
JNIEnv* _env;
jmethodID  _changeTextMethodID;
jclass _class;
extern "C"
JNIEXPORT jstring JNICALL
Java_com_toy_key_cjni_JNIHelper_stringFromJNI(JNIEnv *env, jobject thiz) {
        //当调用stringFromJNI时调用registerListener中NativeListener的changeText回调函数
        _env->CallVoidMethod(_listener, _changeTextMethodID,  _env->NewStringUTF("你猜我说啥了"));
        //创建变量std并赋值为Hello from C++
        std::string hello = "Hello from C++";
        //返回数据
        return env->NewStringUTF(hello.c_str());
}


extern "C"
JNIEXPORT void JNICALL
Java_com_toy_key_cjni_JNIHelper_registerListener(JNIEnv *env, jclass clazz, jobject listener) {
        // TODO: implement registerListener()
        //将对应的类和方法存放临时变量
        _listener = env->NewGlobalRef(listener);//获取对象类
        _env = env;
        _class = _env->GetObjectClass(_listener);//获取实体类
        _changeTextMethodID = _env->GetMethodID(_class, "changeText", "(Ljava/lang/String;)V");//获取方法
}
4、编辑MainActivity
//实现接口NativeListener
public class MainActivity extends AppCompatActivity implements NativeListener {


    TextView tv;
    @Override
    protected void onCreate(Bundle savedInstanceState) {
        super.onCreate(savedInstanceState);
        setContentView(R.layout.activity_main);
        tv = findViewById(R.id.sample_text);
        //绑定监听
        registerListener(this);
    }

    public void onViewClick(View view) {
        //调用c库的stringFromJNI方法获取返回值并从Toast中显示
        String str = stringFromJNI();
        Toast.makeText(this,str,Toast.LENGTH_SHORT).show();
    }

    @Override
    public void changeText(String msg) {//实现接口NativeListener 的chaneText方法。修改文字
        tv.setText(msg);
    }

}
5、activity_main.xml
<?xml version="1.0" encoding="utf-8"?>
<androidx.constraintlayout.widget.ConstraintLayout xmlns:android="http://schemas.android.com/apk/res/android"
    xmlns:app="http://schemas.android.com/apk/res-auto"
    xmlns:tools="http://schemas.android.com/tools"
    android:layout_width="match_parent"
    android:layout_height="match_parent"
    tools:context=".MainActivity">

    <TextView
        android:id="@+id/tv_content"
        android:layout_width="wrap_content"
        android:layout_height="wrap_content"
        android:padding="10dp"
        android:text="Hello World!"
        android:onClick="onViewClick"
        app:layout_constraintBottom_toBottomOf="parent"
        app:layout_constraintLeft_toLeftOf="parent"
        app:layout_constraintRight_toRightOf="parent"
        app:layout_constraintTop_toTopOf="parent" />

</androidx.constraintlayout.widget.ConstraintLayout>

六、运行结果

点击后的效果

注意:若是之前编译运行过的,可能会出现库引用错误的冲突,所以在新编译运行时记得清理一下
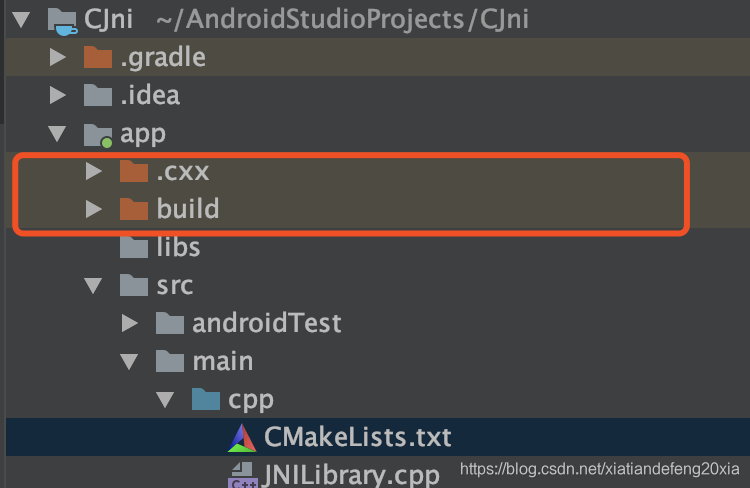
先删除这框起来的两个文件,然后在clean 项目,再运行就可以。
七、C/C++内容延展
1、在jni方法中,有几个参数,JNIEnv 、jobject如:
Java_com_toy_key_cjni_JNIHelper_stringFromJNI(JNIEnv *env, jobject thiz)
其中JNIEnv代表的是java环境,通过该环境可以调用java函数方法,其中的声明在jni.h文件能查询到。特别注意:JNIEnv仅在当前线程有效。
jobject 是代表jni的函数的java类或java对象。特别注意:当申明native 方法为静态方法时,jobject的参数就是java类的class引用对象。非静态则是java类的引用对象。
2、在写逻辑是有个方获取,这里用的是反射思想获取的,其中涉及到了参数类型
_changeTextMethodID = _env->GetMethodID(_class, "changeText", "(Ljava/lang/String;)V");//获取方法
这里的惨(Ljava/lang/String;)表示String参数,V表示的void方法
对应表NDK中的规则如下:
| 字符签名 | jni中类型 | java中类型 |
|---|---|---|
| V | void | void |
| Z | jboolean | boolean |
| I | jint | int |
| J | jlong | long |
| D | jdouble | double |
| F | jfloat | float |
| B | jbyte | byte |
| C | jchar | char |
| S | jshort | short |
对于数组而言,需要以"["开始,组合以上规则即可,具体对应关系表如下:
| 字符签名 | jni中类型 | java中类型 |
|---|---|---|
| [Z | jbooleanArray | boolean[] |
| [I | jintArray | int[] |
| [J | jlongArray | long[] |
| [D | jdoubleArray | double[] |
| [F | jfloatArray | float[] |
| [B | jbyteArray | byte[] |
| [C | jcharArray | char[] |
| [S | jshortArray | short[] |
其中要注意的对象类型数据以L开头,以“;”结尾,中间是包名+对象类,比如上面的“String”
其写法为 Ljava/long/String;
内部类,写法稍有不同,最后连接内部类的方式$。
暂时就写这么多吧,作为一个简单记录,以后有机会再深入写。
dome地址:https://github.com/ch-toy/CJni


 3112
3112


 被折叠的 条评论
为什么被折叠?
被折叠的 条评论
为什么被折叠?
 到【灌水乐园】发言


