了解 Blazor 中的 CRUD 操作

在本文中,您将获得以下问题的答案。

  • 如何使用查询创建表?
  • 如何设置数据库连接并获取操作?
  • 需要哪些 NuGet 包?
  • 什么是服务?
  • 如何在 Program.cs 中注册服务?
  • 如何在 Blazor 中实现 CRUD 操作?
  • 如何重定向到其他组件?

如何使用查询创建表?

SET ANSI_NULLS ON
GO

SET QUOTED_IDENTIFIER ON
GO

CREATE TABLE [dbo].[tblEmployees](
    [EmployeeID] [int] IDENTITY(1,1) NOT NULL,
      NULL,
      NULL,
      NULL,
      NULL,
      NULL,
      NULL,
      NULL
) ON [PRIMARY]
GO

首先,在数据库中创建一个名为“tblEmployees”的表。

插入查询

GO

SET IDENTITY_INSERT [dbo].[tblEmployees] ON

INSERT [dbo].[tblEmployees] ([EmployeeID], [FullName], [Address], [City], [State], [Country], [Mobile], [EmailID])
VALUES (1, N'Rajesh Vyas', N'101, Riddhi Apartment, S. V. Road,', N'Mumbai', N'Maharashtra', N'India', N'56464654565', N'rajeshv9292@ygmail.com')

INSERT [dbo].[tblEmployees] ([EmployeeID], [FullName], [Address], [City], [State], [Country], [Mobile], [EmailID])
VALUES (2, N'Kamlesh Purnia', N'202, Prolab Building, Near Mall Cinema, Goregoan-East', N'Mumbai', N'Maharashtra', N'India', N'998787875541', N'kamleshpurnia233@yind.com')

INSERT [dbo].[tblEmployees] ([EmployeeID], [FullName], [Address], [City], [State], [Country], [Mobile], [EmailID])
VALUES (3, N'Ashish Kalla', N'2001, Oberoi Towerr, Near Oberoi Mall, Goregoan-East', N'Mumbai', N'Maharashtra', N'India', N'745564654522', N'ashishkalla@kpmgail.com')

INSERT [dbo].[tblEmployees] ([EmployeeID], [FullName], [Address], [City], [State], [Country], [Mobile], [EmailID])
VALUES (4, N'Suhana Kalla', N'2501, Kankia Tower, Near Tipco, Malad-East,', N'Mumbai', N'Maharashtra', N'India', N'8978787877', N'suhanakalla@podar2.com')

SET IDENTITY_INSERT [dbo].[tblEmployees] OFF

GO

如何设置数据库连接并获取操作?

切换到解决方案资源管理器并在项目文件夹的根目录中选择文件“appsettings.json”,这是应用程序的设置文件。

更新 AllowedHosts 标题下方的连接字符串。

AppSettings.json 文件代码

{
  "Logging": {
    "LogLevel": {
      "Default": "Information",
      "Microsoft.AspNetCore": "Warning"
    }
  },
  "AllowedHosts": "*",
  "ConnectionStrings": {
    "DefaultConnection": "Data Source=172.16.0.30;Initial Catalog=dbEmployee;User Id=dbdeveloper;Password=maha@123;TrustServerCertificate=true;MultipleActiveResultSets=true"
  }
}

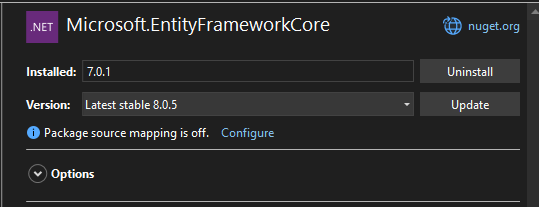
在继续创建实体框架的上下文类之前,请安装以下 NuGet 包。

Microsoft.EntityFrameworkCore

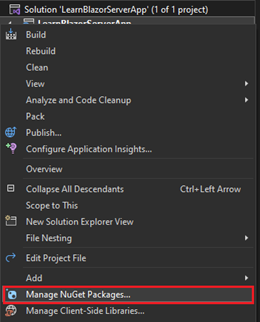
右键单击项目并选择管理 NuGet 包选项。
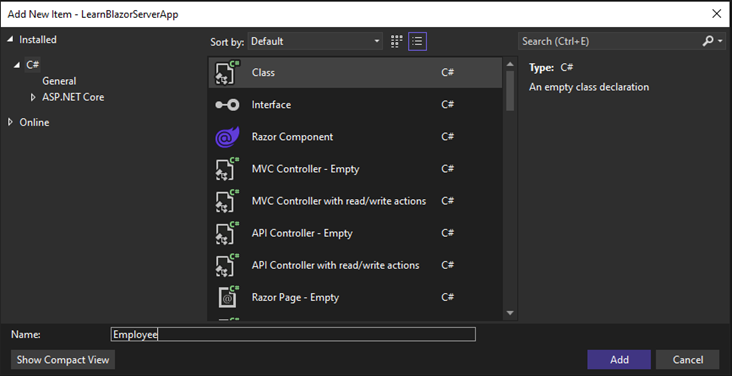
创建员工模型

右键单击项目,然后单击添加à新项目。

Employee.cs文件代码

using System.ComponentModel.DataAnnotations;

namespace LearnBlazorServerApp
{
    public class Employee
    {
        [Key]
        public int EmployeeID { get; set; }

        public string FullName { get; set; }
        public string Address { get; set; }
        public string City { get; set; }
        public string State { get; set; }
        public string Country { get; set; }
        public string Mobile { get; set; }
        public string EmailID { get; set; }
    }
}

创建上下文类

右键单击解决方案资源管理器并选择添加à新项。

添加CLASS文件并指定名称:EmployeeContext.cs。

EmployeeContext.cs 文件代码

using Microsoft.EntityFrameworkCore;

namespace LearnBlazorServerApp
{
    public class EmployeeContext : DbContext
    {
        public EmployeeContext(DbContextOptions<EmployeeContext> options) : base(options)
        {
        }

        public DbSet<Employee> tblEmployees { get; set; } = null!;
    }
}

现在我们要更新数据库上下文类服务的 Program.cs 文件。

首先,添加对 EntityFrameworkCore 的引用。

using Microsoft.EntityFrameworkCore;

builder.Services.AddDbContext<EmployeeContext>(options =>
    options.UseSqlServer(builder.Configuration.GetConnectionString("DefaultConnection")));

Program.cs文件代码

using LearnBlazorServerApp;
using LearnBlazorServerApp.Data;
using Microsoft.AspNetCore.Components;
using Microsoft.AspNetCore.Components.Web;
using Microsoft.AspNetCore.Identity;
using Microsoft.EntityFrameworkCore;
using System.Collections.Generic;

var builder = WebApplication.CreateBuilder(args);

// Add services to the container.
builder.Services.AddRazorPages();
builder.Services.AddServerSideBlazor();
builder.Services.AddSingleton<WeatherForecastService>();

builder.Services.AddDbContext<EmployeeContext>(options =>
    options.UseSqlServer(builder.Configuration.GetConnectionString("DefaultConnection")));

var app = builder.Build();

// Configure the HTTP request pipeline.
if (!app.Environment.IsDevelopment())
{
    app.UseExceptionHandler("/Error");
    // The default HSTS value is 30 days. You may want to change this for production scenarios, see https://aka.ms/aspnetcore-hsts.
    app.UseHsts();
}

app.UseHttpsRedirection();
app.UseStaticFiles();
app.UseRouting();

app.MapBlazorHub();
app.MapFallbackToPage("/_Host");

app.Run();

**索引组件:**员工索引页。

现在我们要创建员工列表 Razor 组件文件 EmployeeList.Razor,右键单击 PAGES 文件夹,单击 ADDàRazor 组件。

@page "/Employees"
@using LearnBlazorServerApp
@inject EmployeeContext context

<div class="container-fluid">
    <div class="card">
        <h3 class="card-title" style="margin-left:15px;">Manage Employee</h3>
        <a class="card-subtitle" style="margin-left:15px;" href="newemployee">New Employee</a>

        <div class="card-body">
            <table class="table table-bordered table-responsive table-striped">
                <thead>
                    <tr>
                        <td>ID</td>
                        <td>Fullname</td>
                        <td>City</td>
                        <td>State</td>
                        <td>Mobile</td>
                        <td>Email</td>
                        <td>Actions</td>
                    </tr>
                </thead>
                <tbody>
                    @foreach (var eitem in EmpList)
                    {
                        <tr>
                            <td>@eitem.EmployeeID</td>
                            <td>@eitem.FullName</td>
                            <td>@eitem.City</td>
                            <td>@eitem.State</td>
                            <td>@eitem.Mobile</td>
                            <td>@eitem.EmailID</td>
                            <td>
                                <a class="btn btn-primary" href="EditEmployee/@eitem.EmployeeID">Edit</a>
                                <a class="btn btn-danger" href="DeleteEmployee/@eitem.EmployeeID">Delete</a>
                            </td>
                        </tr>
                    }
                </tbody>
            </table>
        </div>
    </div>
</div>
@code {
    List<LearnBlazorServerApp.Employee> EmpList;

    protected override void OnInitialized()
    {
        EmpList = context.tblEmployees.ToList();
    }
}

输出


在索引页面视图中的州列后添加国家列。

<thead>
    <tr>
        <td>ID</td>
        <td>Fullname</td>
        <td>City</td>
        <td>State</td>
        <td>Country</td>
        <td>Mobile</td>
        <td>Email</td>
        <td>Actions</td>
    </tr>
</thead>
<tbody>
    @foreach (var eitem in EmpList)
    {
        <tr>
            <td>@eitem.EmployeeID</td>
            <td>@eitem.FullName</td>
            <td>@eitem.City</td>
            <td>@eitem.State</td>
            <td>@eitem.Country</td>
            <td>@eitem.Mobile</td>
            <td>@eitem.EmailID</td>
            <td>
                <a class="btn btn-primary" href="EditEmployee/@eitem.EmployeeID">Edit</a>
                <a class="btn btn-danger" href="DeleteEmployee/@eitem.EmployeeID">Delete</a>
            </td>
        </tr>
    }
</tbody>

**新员工:**创建一个员工。

现在我们要为 NEW EMPLOYEE 创建一个组件,右键单击 PAGES 文件夹并选择 ADDàRazor Component。

@page "/newemployee"
@using LearnBlazorServerApp
@inject EmployeeContext context
@inject NavigationManager _NavigationManager

<div class="container-fluid">
    <div class="card">
        <h3 class="card-title" style="margin-left:15px;">New Employee</h3>

        <div class="card-body">
            <EditForm Model="@employee" OnValidSubmit="SubmitData" OnInvalidSubmit="CheckData">
                <DataAnnotationsValidator />
                <ValidationSummary />

                <div class="row">
                    <div class="col">
                        <label>Fullname</label>
                        <InputText class="form-control" @bind-Value="employee.FullName" />
                    </div>
                </div>

                <div class="row">
                    <div class="col">
                        <label>Address</label>
                        <InputText class="form-control" @bind-Value="employee.Address" />
                    </div>
                    <div class="col">
                        <label>City</label>
                        <InputText class="form-control" @bind-Value="employee.City" />
                    </div>
                </div>

                <div class="row">
                    <div class="col">
                        <label>State</label>
                        <InputText class="form-control" @bind-Value="employee.State" />
                    </div>
                    <div class="col">
                        <label>Country</label>
                        <InputText class="form-control" @bind-Value="employee.Country" />
                    </div>
                </div>

                <div class="row">
                    <div class="col">
                        <label>Mobile</label>
                        <InputText class="form-control" @bind-Value="employee.Mobile" />
                    </div>
                    <div class="col">
                        <label>Email ID</label>
                        <InputText class="form-control" @bind-Value="employee.EmailID" />
                    </div>
                </div>

                <div class="form-group mt-3">
                    <button type="submit" class="btn btn-primary">Submit</button>
                    <a class="btn btn-info" href="employees">Back to List</a>
                </div>
            </EditForm>
        </div>
    </div>
</div>

@code {
    protected Employee employee = new();

    public void SubmitData()
    {
        context.tblEmployees.Add(employee);
        context.SaveChanges();
        _NavigationManager.NavigateTo("/employees");
    }

    public void CheckData()
    {
        // Optional: Implement validation or checks if needed
    }
}

输出


提交重定向到索引页(Razor 组件)后。


重定向到其他组件。

在标题部分将以下行添加到 INJECT NavigationManager。

@inject NavigationManager _NavigationManager

@code {
    // Example of navigating or redirecting to another component
    private void NavigateToEmployees()
    {
        _NavigationManager.NavigateTo("/employees");
    }
}

编辑/更新员工数据组件。

现在我们将创建一个用于编辑/修改/更新员工详细信息的新组件。

右键单击 PAGES 文件夹并选择 ADDàRazor Component 选项。

EditEmployee.razor 文件代码

@* To receive the parameter in INT datatype property name is id *@
@page "/editemployee/{id:int}"
@using LearnBlazorServerApp
@inject EmployeeContext context
@inject NavigationManager _NavigationManager

<div class="container-fluid">
    <div class="card">
        <h3 class="card-title" style="margin-left:15px;">Edit Employee</h3>

        <div class="card-body">
            <EditForm Model="@employee" OnValidSubmit="SubmitData" OnInvalidSubmit="CheckData">
                <DataAnnotationsValidator />
                <ValidationSummary />

                <div class="row">
                    <div class="col">
                        <label>Fullname</label>
                        <InputText class="form-control" @bind-Value="employee.FullName" />
                    </div>
                </div>

                <div class="row">
                    <div class="col">
                        <label>Address</label>
                        <InputText class="form-control" @bind-Value="employee.Address" />
                    </div>
                    <div class="col">
                        <label>City</label>
                        <InputText class="form-control" @bind-Value="employee.City" />
                    </div>
                </div>

                <div class="row">
                    <div class="col">
                        <label>State</label>
                        <InputText class="form-control" @bind-Value="employee.State" />
                    </div>
                    <div class="col">
                        <label>Country</label>
                        <InputText class="form-control" @bind-Value="employee.Country" />
                    </div>
                </div>

                <div class="row">
                    <div class="col">
                        <label>Mobile</label>
                        <InputText class="form-control" @bind-Value="employee.Mobile" />
                    </div>
                    <div class="col">
                        <label>Email ID</label>
                        <InputText class="form-control" @bind-Value="employee.EmailID" />
                    </div>
                </div>

                <div class="form-group mt-3">
                    <button type="submit" class="btn btn-primary">Submit</button>
                    <a class="btn btn-info" href="employees">Back to List</a>
                </div>
            </EditForm>
        </div>
    </div>
</div>

@code {
    [Parameter]
    public int id { get; set; }

    protected Employee employee = new();

    protected override void OnParametersSet()
    {
        employee = context.tblEmployees.FirstOrDefault(a => a.EmployeeID == id);
    }

    public void SubmitData()
    {
        context.SaveChanges();
        _NavigationManager.NavigateTo("/employees");
    }

    public void CheckData()
    {
        // Optional: Implement validation or checks if needed
    }
}

现在运行员工组件。

员工索引页


从 INDEX 页面选择第一个要编辑的项目后。


改变了三件事。

  1. 全名
  2. 地址
  3. 电子邮件ID


提交后重定向到索引页并检查您的更改是否已实施。

删除/移除员工数据组件

现在我们将创建一个用于删除/移除员工详细信息的新组件。

右键单击 PAGES 文件夹并选择 ADDàRazor Component 选项。

DeleteEmployee.razor 文件代码

@* To receive the parameter in INT datatype property name is id *@
@page "/deleteemployee/{id:int}"
@using LearnBlazorServerApp
@inject EmployeeContext context
@inject NavigationManager _NavigationManager

<div class="container-fluid">
    <div class="card">
        <h3 class="card-title" style="margin-left:15px;">Delete Employee</h3>

        <div class="card-body">
            <EditForm Model="@employee" OnValidSubmit="SubmitData">
                <DataAnnotationsValidator />
                <ValidationSummary />

                <div class="row">
                    <div class="col">
                        <label>Fullname</label>
                        <InputText class="form-control" @bind-Value="employee.FullName" disabled="disabled" />
                    </div>
                </div>

                <div class="row">
                    <div class="col">
                        <label>Address</label>
                        <InputText class="form-control" @bind-Value="employee.Address" disabled="disabled" />
                    </div>
                    <div class="col">
                        <label>City</label>
                        <InputText class="form-control" @bind-Value="employee.City" disabled="disabled" />
                    </div>
                </div>

                <div class="row">
                    <div class="col">
                        <label>State</label>
                        <InputText class="form-control" @bind-Value="employee.State" disabled="disabled" />
                    </div>
                    <div class="col">
                        <label>Country</label>
                        <InputText class="form-control" @bind-Value="employee.Country" disabled="disabled" />
                    </div>
                </div>

                <div class="row">
                    <div class="col">
                        <label>Mobile</label>
                        <InputText class="form-control" @bind-Value="employee.Mobile" disabled="disabled" />
                    </div>
                    <div class="col">
                        <label>Email ID</label>
                        <InputText class="form-control" @bind-Value="employee.EmailID" disabled="disabled" />
                    </div>
                </div>

                <div class="form-group mt-3">
                    <button type="submit" class="btn btn-danger">Submit</button>
                    <a class="btn btn-info" href="employees">Back to List</a>
                </div>
            </EditForm>
        </div>
    </div>
</div>

@code {
    [Parameter]
    public int id { get; set; }

    protected Employee employee = new();

    protected override void OnParametersSet()
    {
        employee = context.tblEmployees.FirstOrDefault(a => a.EmployeeID == id);
    }

    public void SubmitData()
    {
        context.tblEmployees.Remove(employee);
        context.SaveChanges();
        _NavigationManager.NavigateTo("/employees");
    }

    public void CheckData()
    {
        // Optional: Implement validation or checks if needed
    }
}

现在运行员工组件。

员工索引页


从 INDEX 页面中选择第一个要编辑的项目后。

删除查看所有已禁用的文本框控件。

点击提交按钮后,您可以在以下屏幕中看到第一条记录“Manoharlal”已成功删除。

现在,我们已使用“员工”选项更新了左侧菜单。

切换到 SHARED 文件夹并选择 NAVMENU.RAZOR 文件。

在 FETCH DATA div 标签下方添加以下代码。

<div class="nav-item px-3">
    <NavLink class="nav-link" href="employees">
        <span class="oi oi-list-rich" aria-hidden="true"></span> Employee
    </NavLink>
</div>

请逐步实现本文,以便您可以轻松实现 CRUD 活动。

  • 35
    点赞
  • 23
    收藏
    觉得还不错? 一键收藏
  • 打赏
    打赏
  • 0
    评论

“相关推荐”对你有帮助么?

  • 非常没帮助
  • 没帮助
  • 一般
  • 有帮助
  • 非常有帮助
提交
评论
添加红包

请填写红包祝福语或标题

红包个数最小为10个

红包金额最低5元

当前余额3.43前往充值 >
需支付:10.00
成就一亿技术人!
领取后你会自动成为博主和红包主的粉丝 规则
hope_wisdom
发出的红包

打赏作者

谢.锋

你的鼓励将是我创作的最大动力

¥1 ¥2 ¥4 ¥6 ¥10 ¥20
扫码支付:¥1
获取中
扫码支付

您的余额不足,请更换扫码支付或充值

打赏作者

实付
使用余额支付
点击重新获取
扫码支付
钱包余额 0

抵扣说明:

1.余额是钱包充值的虚拟货币,按照1:1的比例进行支付金额的抵扣。
2.余额无法直接购买下载,可以购买VIP、付费专栏及课程。

余额充值