


作者的环境为windos 10,64位。
一、准备需要检测的图片
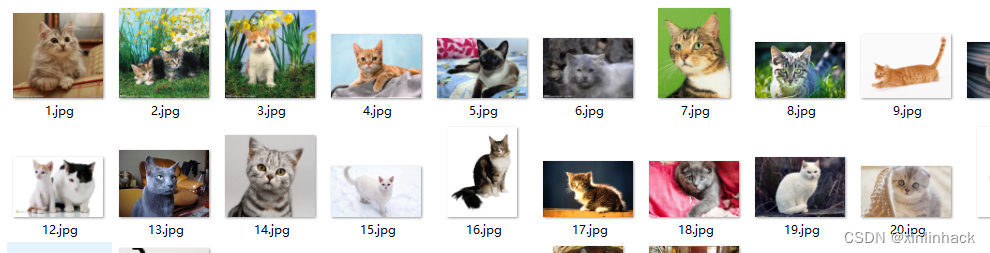
这个是在网络上下载。
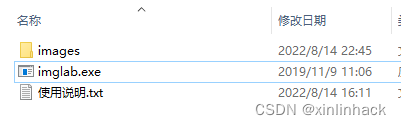
准备工具,imglab.exe,这个工具用于标记矩形框
1、创建images目录,把图片放到里面。
2、运行cmd命令行,imglab -c training_with_face_landmarks.xml images,创建相关文件。
3、运行cmd命令行,imglab training_with_face_landmarks.xml,打开制作数据集的软件。
工具的使用说明:
shirt+左键 长方形的框
先选中长方形的框,再shirt+左键 特征点标注
ctrl+滚动轴 放大或者缩小
键盘的up和down 上/下一张图片
alt+d 删除当前图片
选中框+del 删除框
最终生成文件training_with_face_landmarks.xml和image_metadata_stylesheet.xsl
一、在go-face库增加训练接口
如果没有安装go-face和dlib库,请参考go使用dlib人脸检测和人脸识别_xinlinhack的博客-CSDN博客_go 人脸识别
官方的源码路径:GitHub - Kagami/go-face: Face recognition with Go
需要增加两个接口:
1、修改头文件facerec.h,增加结构体,增加两个函数facerec_train_object_detector和facerec_test_object_detector声明。
typedef struct tagSimpleTestResults
{
	double precision;
	double recall;
	double average_precision;
}tagSimpleTestResults;

void facerec_train_object_detector(const char* dataset_filename, const char* detector_output_filename);
tagSimpleTestResults facerec_test_object_detector(const char* dataset_filename, const char* detector_filename);
2、修改文件facerec.cc。
增加头文件#include <dlib/image_processing/simple_object_detector.h>
增加两个函数facerec_train_object_detector和facerec_test_object_detector
#include <shared_mutex>
#include <dlib/dnn.h>
#include <dlib/image_loader/image_loader.h>
#include <dlib/image_processing/frontal_face_detector.h>
#include <dlib/image_processing/simple_object_detector.h>
#include <dlib/graph_utils.h>
#include "facerec.h"
#include "jpeg_mem_loader.h"
#include "classify.h"


void facerec_train_object_detector(const char* dataset_filename, const char* detector_output_filename) {

	// options用于设置训练的参数和模式
	simple_object_detector_training_options gsOptions;

	// 持向量机的C参数,通常默认取为5.自己适当更改参数以达到最好的效果
	gsOptions.C = 5;
	// 线程数,你电脑有4核的话就填4
	gsOptions.num_threads = 4;
	// 打印信息
	gsOptions.be_verbose = 1;

	gsOptions.add_left_right_image_flips  = 1;

	train_simple_object_detector(dataset_filename, detector_output_filename, gsOptions);
}

tagSimpleTestResults facerec_test_object_detector(const char* dataset_filename, const char* detector_filename) {

	struct simple_test_results t;
	tagSimpleTestResults res;

	t = test_simple_object_detector(dataset_filename, detector_filename, -1);

	res.precision = t.precision;
	res.recall = t.recall;
	res.average_precision = t.average_precision;

	return res;
}
3、在目录C:\msys64\mingw64\include\dlib\image_processing,添加三个头文件
simple_object_detector.h、simple_object_detector_py.h和serialize_object_detector.h
这三个文件原本是PYTHON的头文件,经过修改。
4、修改C:\msys64\mingw64\include\dlib\config.h头文件,把DLIB_GIF_SUPPORT屏蔽,否则编译不过。
5、face.go文件增加两接口
func TrainSimpleObjectDetector(dataset_filename, detector_output_filename string) {
	datasetFilePath := C.CString(dataset_filename)
	defer C.free(unsafe.Pointer(datasetFilePath))

	detectorOutFilePath := C.CString(detector_output_filename)
	defer C.free(unsafe.Pointer(detectorOutFilePath))

	C.facerec_train_object_detector(datasetFilePath, detectorOutFilePath)

	return
}


func TestSimpleObjectDetector(dataset_filename, detector_filename string) (precision, recall, average_precision float32) {

	datasetFilePath := C.CString(dataset_filename)
	defer C.free(unsafe.Pointer(datasetFilePath))

	detectorFilePath := C.CString(detector_filename)
	defer C.free(unsafe.Pointer(detectorFilePath))

	ret := C.facerec_test_object_detector(datasetFilePath, detectorFilePath)
	//defer C.free(unsafe.Pointer(ret))

	precision = float32(ret.precision)
	recall = float32(ret.recall)
	average_precision = float32(ret.average_precision)

	return
}
至此,人脸库可以使用了。
三、训练例子代码
package main

import (
	"fmt"
	"github.com/Kagami/go-face"
	"path/filepath"
)


// 训练
func trainSimple()   {

	fmt.Println("开始训练:")

	dataset_filename := filepath.Join("cat_face_train", "cat_face_train.xml")

	face.TrainSimpleObjectDetector(dataset_filename, "catDetector.svm")

	precision, recall, average_precision := face.TestSimpleObjectDetector("cat_face_train/cat_face_train.xml", "catDetector.svm")
	fmt.Println("训练图片的精确度: ", precision, recall, average_precision )

	precision, recall, average_precision = face.TestSimpleObjectDetector("cat_face_test/cat_face_test.xml", "catDetector.svm")
	fmt.Println("测试图片的精确度: ", precision, recall, average_precision )

}


func main()  {
	// 训练
	trainSimple()

}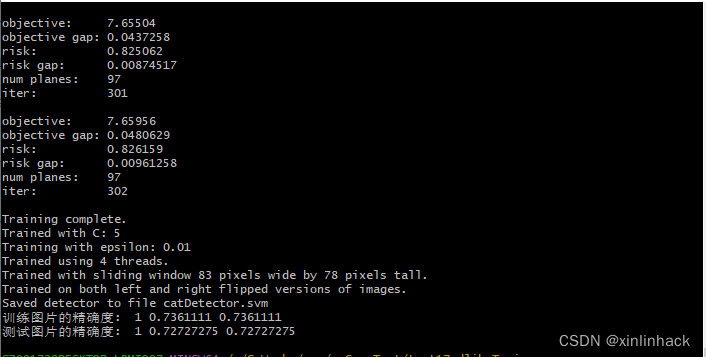
可以看到准确率差不多7成,模型保存到了catDetector.svm中。
四、测试模型
接口NewRecognizer3、SetSimpleDetector和DetectFromBufferSimple都是定制的,需要修改go-face的库,达到跟python的接口一致。
package main

import (
	"fmt"
	"github.com/Kagami/go-face"
	"gocv.io/x/gocv"
	"image"
	"image/color"
	"log"
	"path/filepath"
)


func testDetectorSimple()  {

	// open display window
	window := gocv.NewWindow("cat Detector")
	defer window.Close()

	// color for the rect when faces detected
	greenColor := color.RGBA{0, 255, 0, 255}
	//redColor   := color.RGBA{255, 0, 0, 255}

	// Init recognizer
	rec, err := face.NewRecognizer3()
	if nil != err {
		log.Fatal(err)
	}
	// close it
	defer rec.Close()

	// Load
	if err = rec.SetSimpleDetector("catDetector.svm"); nil != err {
		log.Fatal(err)
	}

	faceImagePath := "cat_face_test/6.jpg"

	//
	fmt.Println("正在读的人脸图像 = ", faceImagePath)

	img1 := gocv.IMRead(faceImagePath, gocv.IMReadColor)
	defer img1.Close()

	buff, err := gocv.IMEncode(".jpg", img1)

	//
	faces, err := rec.DetectFromBufferSimple(buff.GetBytes())

	if err != nil {
		log.Fatalf("无法识别: %v", err)
	}

	if 0 == len(faces){
		log.Fatal("图片中没找到人脸")
	}

	for _, f := range faces{

		gocv.Rectangle(&img1, f.Rectangle, greenColor, 3)

		pt := image.Pt(f.Rectangle.Min.X, f.Rectangle.Min.Y-10)
		gocv.PutText(&img1, "cat", pt, gocv.FontHersheyPlain, 1, greenColor, 1)

	}

	// show the image in the window, and wait 1 millisecond
	window.IMShow(img1)

	for{
		if window.WaitKey(1) >= 0 {
			break
		}
	}

}

func main()  {

	// 使用模型测试
	testDetectorSimple()

}


 2万+
2万+


 被折叠的 条评论
为什么被折叠?
被折叠的 条评论
为什么被折叠?
 到【灌水乐园】发言


