


Pygame精灵模块详解与应用
Pygame是一个开源的Python游戏开发库,它提供了许多用于创建游戏的功能和工具。其中,精灵(Sprite)是Pygame中一个重要的模块,用于表示游戏中的角色、敌人、子弹等游戏对象。本文档将详细介绍Pygame精灵模块的应用,包括精灵的创建、更新、绘制以及碰撞检测等方面的内容。
创建精灵
要使用Pygame的精灵模块,首先需要导入相应的模块并创建一个精灵对象。以下是一个创建精灵对象的示例代码:
python

<table><tbody style="-webkit-font-smoothing: antialiased;list-style: none;line-height: 24px;"><tr style="-webkit-font-smoothing: antialiased;list-style: none;line-height: 24px;"><td data-line-number="1" style="padding: 0px;-webkit-font-smoothing: antialiased;list-style: none;line-height: 24px;color: rgb(190, 191, 208);letter-spacing: 0px;max-width: 50px;overflow: hidden;text-align: justify;user-select: none;vertical-align: top;white-space-collapse: collapse;" width="30"><br></td><td data-line-number="1" style="padding: 0px;-webkit-font-smoothing: antialiased;list-style: none;line-height: 24px;"><span style="-webkit-font-smoothing: antialiased;list-style: none;color: rgb(121, 40, 161);line-height: 24px;">import</span> pygame</td></tr><tr style="-webkit-font-smoothing: antialiased;list-style: none;line-height: 24px;"><td data-line-number="2" style="padding: 0px;-webkit-font-smoothing: antialiased;list-style: none;line-height: 24px;color: rgb(190, 191, 208);letter-spacing: 0px;max-width: 50px;overflow: hidden;text-align: justify;user-select: none;vertical-align: top;white-space-collapse: collapse;" width="30"><br></td><td data-line-number="2" style="padding: 0px;-webkit-font-smoothing: antialiased;list-style: none;line-height: 24px;"><br></td></tr><tr style="-webkit-font-smoothing: antialiased;list-style: none;line-height: 24px;"><td data-line-number="3" style="padding: 0px;-webkit-font-smoothing: antialiased;list-style: none;line-height: 24px;color: rgb(190, 191, 208);letter-spacing: 0px;max-width: 50px;overflow: hidden;text-align: justify;user-select: none;vertical-align: top;white-space-collapse: collapse;" width="30"><br></td><td data-line-number="3" style="padding: 0px;-webkit-font-smoothing: antialiased;list-style: none;line-height: 24px;"><span style="-webkit-font-smoothing: antialiased;list-style: none;color: rgb(105, 105, 105);line-height: 24px;"># 创建精灵类  </span></td></tr><tr style="-webkit-font-smoothing: antialiased;list-style: none;line-height: 24px;"><td data-line-number="4" style="padding: 0px;-webkit-font-smoothing: antialiased;list-style: none;line-height: 24px;color: rgb(190, 191, 208);letter-spacing: 0px;max-width: 50px;overflow: hidden;text-align: justify;user-select: none;vertical-align: top;white-space-collapse: collapse;" width="30"><br></td><td data-line-number="4" style="padding: 0px;-webkit-font-smoothing: antialiased;list-style: none;line-height: 24px;"><span style="-webkit-font-smoothing: antialiased;list-style: none;color: rgb(121, 40, 161);line-height: 24px;">class</span> <span style="-webkit-font-smoothing: antialiased;list-style: none;color: rgb(0, 127, 170);line-height: 24px;">MySprite</span>(pygame.sprite.Sprite):</td></tr><tr style="-webkit-font-smoothing: antialiased;list-style: none;line-height: 24px;"><td data-line-number="5" style="padding: 0px;-webkit-font-smoothing: antialiased;list-style: none;line-height: 24px;color: rgb(190, 191, 208);letter-spacing: 0px;max-width: 50px;overflow: hidden;text-align: justify;user-select: none;vertical-align: top;white-space-collapse: collapse;" width="30"><br></td><td data-line-number="5" style="padding: 0px;-webkit-font-smoothing: antialiased;list-style: none;line-height: 24px;"><span style="-webkit-font-smoothing: antialiased;list-style: none;color: rgb(121, 40, 161);line-height: 24px;">def</span> <span style="-webkit-font-smoothing: antialiased;list-style: none;color: rgb(0, 127, 170);line-height: 24px;">__init__</span>(<span style="-webkit-font-smoothing: antialiased;list-style: none;color: rgb(170, 93, 0);line-height: 24px;">self, image, position</span>):</td></tr><tr style="-webkit-font-smoothing: antialiased;list-style: none;line-height: 24px;"><td data-line-number="6" style="padding: 0px;-webkit-font-smoothing: antialiased;list-style: none;line-height: 24px;color: rgb(190, 191, 208);letter-spacing: 0px;max-width: 50px;overflow: hidden;text-align: justify;user-select: none;vertical-align: top;white-space-collapse: collapse;" width="30"><br></td><td data-line-number="6" style="padding: 0px;-webkit-font-smoothing: antialiased;list-style: none;line-height: 24px;"><span style="-webkit-font-smoothing: antialiased;list-style: none;color: rgb(170, 93, 0);line-height: 24px;">super</span>().__init__()</td></tr><tr style="-webkit-font-smoothing: antialiased;list-style: none;line-height: 24px;"><td data-line-number="7" style="padding: 0px;-webkit-font-smoothing: antialiased;list-style: none;line-height: 24px;color: rgb(190, 191, 208);letter-spacing: 0px;max-width: 50px;overflow: hidden;text-align: justify;user-select: none;vertical-align: top;white-space-collapse: collapse;" width="30"><br></td><td data-line-number="7" style="padding: 0px;-webkit-font-smoothing: antialiased;list-style: none;line-height: 24px;">self.image = image</td></tr><tr style="-webkit-font-smoothing: antialiased;list-style: none;line-height: 24px;"><td data-line-number="8" style="padding: 0px;-webkit-font-smoothing: antialiased;list-style: none;line-height: 24px;color: rgb(190, 191, 208);letter-spacing: 0px;max-width: 50px;overflow: hidden;text-align: justify;user-select: none;vertical-align: top;white-space-collapse: collapse;" width="30"><br></td><td data-line-number="8" style="padding: 0px;-webkit-font-smoothing: antialiased;list-style: none;line-height: 24px;">self.rect = self.image.get_rect(center=position)</td></tr><tr style="-webkit-font-smoothing: antialiased;list-style: none;line-height: 24px;"><td data-line-number="9" style="padding: 0px;-webkit-font-smoothing: antialiased;list-style: none;line-height: 24px;color: rgb(190, 191, 208);letter-spacing: 0px;max-width: 50px;overflow: hidden;text-align: justify;user-select: none;vertical-align: top;white-space-collapse: collapse;" width="30"><br></td><td data-line-number="9" style="padding: 0px;-webkit-font-smoothing: antialiased;list-style: none;line-height: 24px;">self.speed = <span style="-webkit-font-smoothing: antialiased;list-style: none;color: rgb(170, 93, 0);line-height: 24px;">5</span>  </td></tr><tr style="-webkit-font-smoothing: antialiased;list-style: none;line-height: 24px;"><td data-line-number="10" style="padding: 0px;-webkit-font-smoothing: antialiased;list-style: none;line-height: 24px;color: rgb(190, 191, 208);letter-spacing: 0px;max-width: 50px;overflow: hidden;text-align: justify;user-select: none;vertical-align: top;white-space-collapse: collapse;" width="30"><br></td><td data-line-number="10" style="padding: 0px;-webkit-font-smoothing: antialiased;list-style: none;line-height: 24px;"><br></td></tr><tr style="-webkit-font-smoothing: antialiased;list-style: none;line-height: 24px;"><td data-line-number="11" style="padding: 0px;-webkit-font-smoothing: antialiased;list-style: none;line-height: 24px;color: rgb(190, 191, 208);letter-spacing: 0px;max-width: 50px;overflow: hidden;text-align: justify;user-select: none;vertical-align: top;white-space-collapse: collapse;" width="30"><br></td><td data-line-number="11" style="padding: 0px;-webkit-font-smoothing: antialiased;list-style: none;line-height: 24px;"><span style="-webkit-font-smoothing: antialiased;list-style: none;color: rgb(105, 105, 105);line-height: 24px;"># 创建精灵对象  </span></td></tr><tr style="-webkit-font-smoothing: antialiased;list-style: none;line-height: 24px;"><td data-line-number="12" style="padding: 0px;-webkit-font-smoothing: antialiased;list-style: none;line-height: 24px;color: rgb(190, 191, 208);letter-spacing: 0px;max-width: 50px;overflow: hidden;text-align: justify;user-select: none;vertical-align: top;white-space-collapse: collapse;" width="30"><br></td><td data-line-number="12" style="padding: 0px;-webkit-font-smoothing: antialiased;list-style: none;line-height: 24px;">my_sprite = MySprite(pygame.image.load(<span style="-webkit-font-smoothing: antialiased;list-style: none;color: green;line-height: 24px;">'image.png'</span>), (<span style="-webkit-font-smoothing: antialiased;list-style: none;color: rgb(170, 93, 0);line-height: 24px;">100</span>, <span style="-webkit-font-smoothing: antialiased;list-style: none;color: rgb(170, 93, 0);line-height: 24px;">100</span>))</td></tr></tbody></table>
在上面的代码中,我们首先创建了一个名为MySprite的精灵类,继承自pygame.sprite.Sprite。在类的构造函数中,我们通过self.image和self.rect属性设置精灵的图像和位置,并通过self.speed属性设置精灵的速度。然后,我们创建了一个名为my_sprite的精灵对象,并为其指定了图像和位置。
更新精灵
要更新精灵的属性,可以使用精灵类的update()方法。该方法会自动更新精灵的位置、大小等属性。以下是一个更新精灵的示例代码:
python

<table><tbody style="-webkit-font-smoothing: antialiased;list-style: none;line-height: 24px;"><tr style="-webkit-font-smoothing: antialiased;list-style: none;line-height: 24px;"><td data-line-number="1" style="padding: 0px;-webkit-font-smoothing: antialiased;list-style: none;line-height: 24px;color: rgb(190, 191, 208);letter-spacing: 0px;max-width: 50px;overflow: hidden;text-align: justify;user-select: none;vertical-align: top;white-space-collapse: collapse;" width="30"><br></td><td data-line-number="1" style="padding: 0px;-webkit-font-smoothing: antialiased;list-style: none;line-height: 24px;"><span style="-webkit-font-smoothing: antialiased;list-style: none;color: rgb(105, 105, 105);line-height: 24px;"># 更新精灵位置  </span></td></tr><tr style="-webkit-font-smoothing: antialiased;list-style: none;line-height: 24px;"><td data-line-number="2" style="padding: 0px;-webkit-font-smoothing: antialiased;list-style: none;line-height: 24px;color: rgb(190, 191, 208);letter-spacing: 0px;max-width: 50px;overflow: hidden;text-align: justify;user-select: none;vertical-align: top;white-space-collapse: collapse;" width="30"><br></td><td data-line-number="2" style="padding: 0px;-webkit-font-smoothing: antialiased;list-style: none;line-height: 24px;">my_sprite.rect.x += my_sprite.speed</td></tr></tbody></table>
在上面的代码中,我们通过修改my_sprite.rect.x属性来更新精灵的位置。my_sprite.speed属性表示精灵的速度,可以根据需要进行调整。
绘制精灵
要绘制精灵到屏幕上,可以使用Pygame的绘制函数。以下是一个绘制精灵的示例代码:
python

<table><tbody style="-webkit-font-smoothing: antialiased;list-style: none;line-height: 24px;"><tr style="-webkit-font-smoothing: antialiased;list-style: none;line-height: 24px;"><td data-line-number="1" style="padding: 0px;-webkit-font-smoothing: antialiased;list-style: none;line-height: 24px;color: rgb(190, 191, 208);letter-spacing: 0px;max-width: 50px;overflow: hidden;text-align: justify;user-select: none;vertical-align: top;white-space-collapse: collapse;" width="30"><br></td><td data-line-number="1" style="padding: 0px;-webkit-font-smoothing: antialiased;list-style: none;line-height: 24px;"><span style="-webkit-font-smoothing: antialiased;list-style: none;color: rgb(105, 105, 105);line-height: 24px;"># 绘制精灵到屏幕上  </span></td></tr><tr style="-webkit-font-smoothing: antialiased;list-style: none;line-height: 24px;"><td data-line-number="2" style="padding: 0px;-webkit-font-smoothing: antialiased;list-style: none;line-height: 24px;color: rgb(190, 191, 208);letter-spacing: 0px;max-width: 50px;overflow: hidden;text-align: justify;user-select: none;vertical-align: top;white-space-collapse: collapse;" width="30"><br></td><td data-line-number="2" style="padding: 0px;-webkit-font-smoothing: antialiased;list-style: none;line-height: 24px;">screen.blit(my_sprite.image, my_sprite.rect)</td></tr></tbody></table>
在上面的代码中,我们使用screen.blit()函数将精灵的图像绘制到屏幕上。my_sprite.image表示精灵的图像,my_sprite.rect表示精灵的位置和大小。
碰撞检测
在游戏中,碰撞检测是一个重要的功能。通过检测精灵之间的碰撞,我们可以实现各种游戏逻辑,例如角色死亡、敌人被击中等等。以下是一个碰撞检测的示例代码:
python

<table><tbody style="-webkit-font-smoothing: antialiased;list-style: none;line-height: 24px;"><tr style="-webkit-font-smoothing: antialiased;list-style: none;line-height: 24px;"><td data-line-number="1" style="padding: 0px;-webkit-font-smoothing: antialiased;list-style: none;line-height: 24px;color: rgb(190, 191, 208);letter-spacing: 0px;max-width: 50px;overflow: hidden;text-align: justify;user-select: none;vertical-align: top;white-space-collapse: collapse;" width="30"><br></td><td data-line-number="1" style="padding: 0px;-webkit-font-smoothing: antialiased;list-style: none;line-height: 24px;"><span style="-webkit-font-smoothing: antialiased;list-style: none;color: rgb(105, 105, 105);line-height: 24px;"># 检查碰撞  </span></td></tr><tr style="-webkit-font-smoothing: antialiased;list-style: none;line-height: 24px;"><td data-line-number="2" style="padding: 0px;-webkit-font-smoothing: antialiased;list-style: none;line-height: 24px;color: rgb(190, 191, 208);letter-spacing: 0px;max-width: 50px;overflow: hidden;text-align: justify;user-select: none;vertical-align: top;white-space-collapse: collapse;" width="30"><br></td><td data-line-number="2" style="padding: 0px;-webkit-font-smoothing: antialiased;list-style: none;line-height: 24px;">collide = pygame.sprite.spritecollide(my_sprite, other_sprites, <span style="-webkit-font-smoothing: antialiased;list-style: none;color: rgb(170, 93, 0);line-height: 24px;">False</span>)</td></tr><tr style="-webkit-font-smoothing: antialiased;list-style: none;line-height: 24px;"><td data-line-number="3" style="padding: 0px;-webkit-font-smoothing: antialiased;list-style: none;line-height: 24px;color: rgb(190, 191, 208);letter-spacing: 0px;max-width: 50px;overflow: hidden;text-align: justify;user-select: none;vertical-align: top;white-space-collapse: collapse;" width="30"><br></td><td data-line-number="3" style="padding: 0px;-webkit-font-smoothing: antialiased;list-style: none;line-height: 24px;"><span style="-webkit-font-smoothing: antialiased;list-style: none;color: rgb(121, 40, 161);line-height: 24px;">if</span> collide:</td></tr><tr style="-webkit-font-smoothing: antialiased;list-style: none;line-height: 24px;"><td data-line-number="4" style="padding: 0px;-webkit-font-smoothing: antialiased;list-style: none;line-height: 24px;color: rgb(190, 191, 208);letter-spacing: 0px;max-width: 50px;overflow: hidden;text-align: justify;user-select: none;vertical-align: top;white-space-collapse: collapse;" width="30"><br></td><td data-line-number="4" style="padding: 0px;-webkit-font-smoothing: antialiased;list-style: none;line-height: 24px;"><span style="-webkit-font-smoothing: antialiased;list-style: none;color: rgb(105, 105, 105);line-height: 24px;"># 处理碰撞的逻辑  </span></td></tr><tr style="-webkit-font-smoothing: antialiased;list-style: none;line-height: 24px;"><td data-line-number="5" style="padding: 0px;-webkit-font-smoothing: antialiased;list-style: none;line-height: 24px;color: rgb(190, 191, 208);letter-spacing: 0px;max-width: 50px;overflow: hidden;text-align: justify;user-select: none;vertical-align: top;white-space-collapse: collapse;" width="30"><br></td><td data-line-number="5" style="padding: 0px;-webkit-font-smoothing: antialiased;list-style: none;line-height: 24px;"><span style="-webkit-font-smoothing: antialiased;list-style: none;color: rgb(170, 93, 0);line-height: 24px;">print</span>(<span style="-webkit-font-smoothing: antialiased;list-style: none;color: green;line-height: 24px;">'碰撞发生!'</span>)</td></tr></tbody></table>
在上面的代码中,我们使用pygame.sprite.spritecollide()函数来检查两个精灵之间的碰撞。该函数返回一个碰撞列表,如果列表不为空,表示发生了碰撞。然后,我们可以在if collide:语句块中编写处理碰撞的逻辑。
点击下方安全链接前往获取
CSDN大礼包:《Python入门&进阶学习资源包》免费分享
👉Python实战案例👈
光学理论是没用的,要学会跟着一起敲,要动手实操,才能将自己的所学运用到实际当中去,这时候可以搞点实战案例来学习。
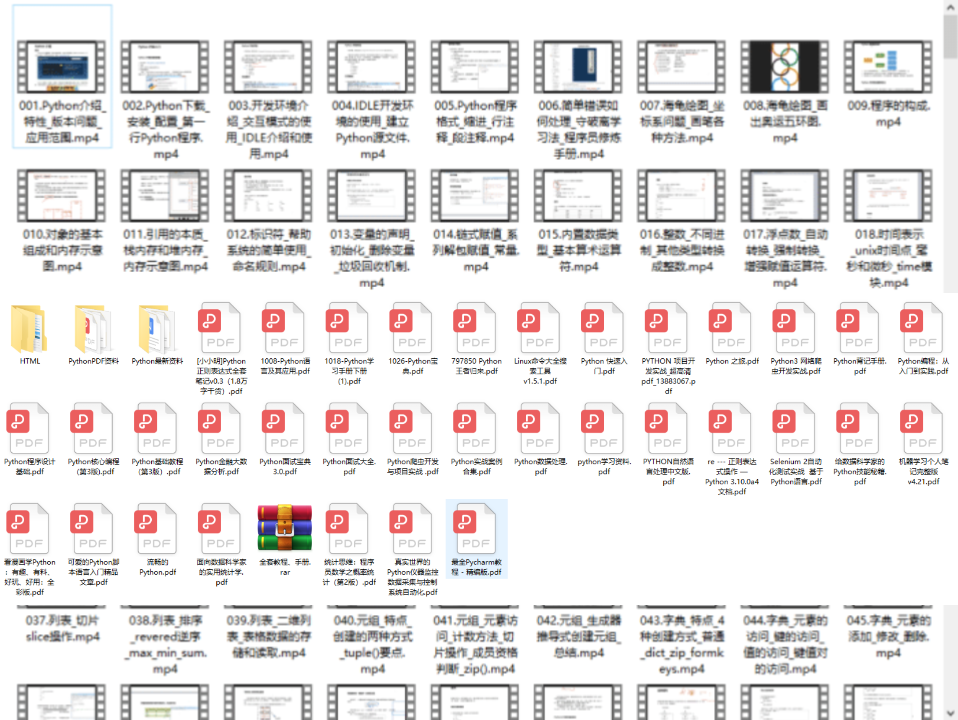
👉Python书籍和视频合集👈
观看零基础学习视频,看视频学习是最快捷也是最有效果的方式,跟着视频中老师的思路,从基础到深入,还是很容易入门的。
👉Python副业创收路线👈
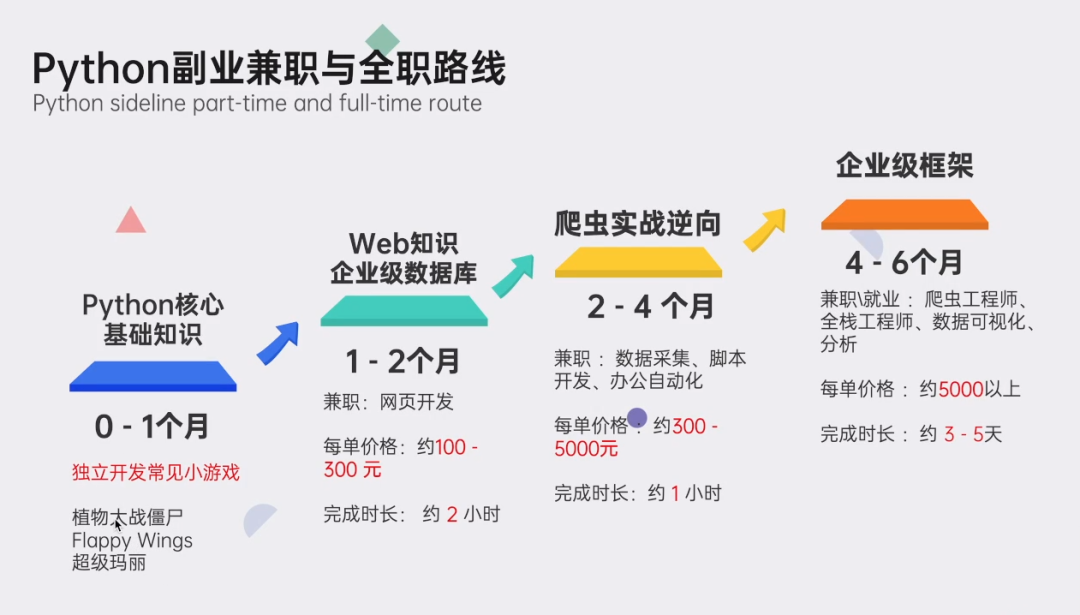
这些资料都是非常不错的,朋友们如果有需要《Python学习路线&学习资料》,点击下方安全链接前往获取
CSDN大礼包:《Python入门&进阶学习资源包》免费分享
本文转自网络,如有侵权,请联系删除。


 2216
2216


 被折叠的 条评论
为什么被折叠?
被折叠的 条评论
为什么被折叠?
 到【灌水乐园】发言


