


文章目录
preface
2021.9 我尝试了paltformIO IDE,您可以再上面直接安装库,而不再需要借助arduino的library manager.然而,platform太容易报错了,(稍微复杂一些的依赖关系就难以通过编译(并不是通过arduinoIDE)来编译的
- 该platform 和arduino插件似乎会有冲突.
- arduino插件则是通过调用ArduinoIDE 来编译代码,在编译体验上感觉不容以出现奇怪的错误;
- 可以较好的完成代码编辑任务(尤其是一些快捷键和补全,以及一些库源代码的跳转查看,代码折叠,代码函数/变量大纲)
- 但是还离不开ArduinoIDE来提供后台的编译服务
推荐您先看看arduino插件的官方介绍:
Arduino - Visual Studio Marketplace
官方arduino api文档(参考手册)
https://www.arduino.cc/reference/en/
查询api

下载arduino IDE
- 安装版/便携版(portable)都支持本过程的配置
https://www.arduino.cn/thread-5838-1-1.html
arduinoIDE 🎶 arduino extension for vscode
- arduinoIDE是必须的(对于arduino extension for vscode)
- 需要说明的是,Arduino IDE和Vscode 不要同时运行
如果同时运行,会导致vscode无法正确写入(upload)到开发板上 - 这样做,出现的错误如下(如果同时打开,可能导致如下错误)
[Starting] Uploading sketch 'arduinoCodes\blink.ino'
[Warning] Output path is not specified. Unable to reuse previously compiled files. Build will be slower. See README.
正在加载配置...
正在初始化包...
正在准备开发板...
正在验证...
上传...
上传项目出错
avrdude: ser_open(): can't open device "\\.\COM4": �ܾ����ʡ�
TRACE StatusLogger XmlConfiguration stopping remaining Appenders.
IntelliSense configuration already up to date. To manually rebuild your IntelliSense configuration run "Ctrl+Alt+I"
[Error] Uploading sketch 'arduinoCodes\blink.ino': Exit with code=1
如果关掉Arduino IDE,只用vscode来验证编译/上传,则是正常的
[Starting] Uploading sketch 'arduinoCodes\blink.ino'
[Warning] Output path is not specified. Unable to reuse previously compiled files. Build will be slower. See README.
正在加载配置...
正在初始化包...
正在准备开发板...
正在验证...
上传...
IntelliSense configuration already up to date. To manually rebuild your IntelliSense configuration run "Ctrl+Alt+I"
[Done] Uploading sketch 'arduinoCodes\blink.ino'
选择开发板及其型号
- 运行前,选择合适的开发板;以及对应指定的arduino代码源文件(注意,同一个目录下只能存放一个ino文件,否则会出现main函数的重复定义问题!!!)
- 在目录结构的要求上和原生的ArduinoIDE 是类似的,每个
.ino文件最好是放同名的文件夹中(或者单独一个文件夹,不包含其他ino文件,不过ino依赖的头文件等,是可以放在同一个目录下的),如果没有,那么请为它创建一个目录来存放它.


隔离暂时不用的文件,您可以单独创建一个文件夹,用来存放.
在编译的时候,指定需要编译的对应的文件即可

智能提示(IntelliSense)配置
c/c++ extension:
该插件提供了语法检查,代码补全,库源码查看等功能

- 由于
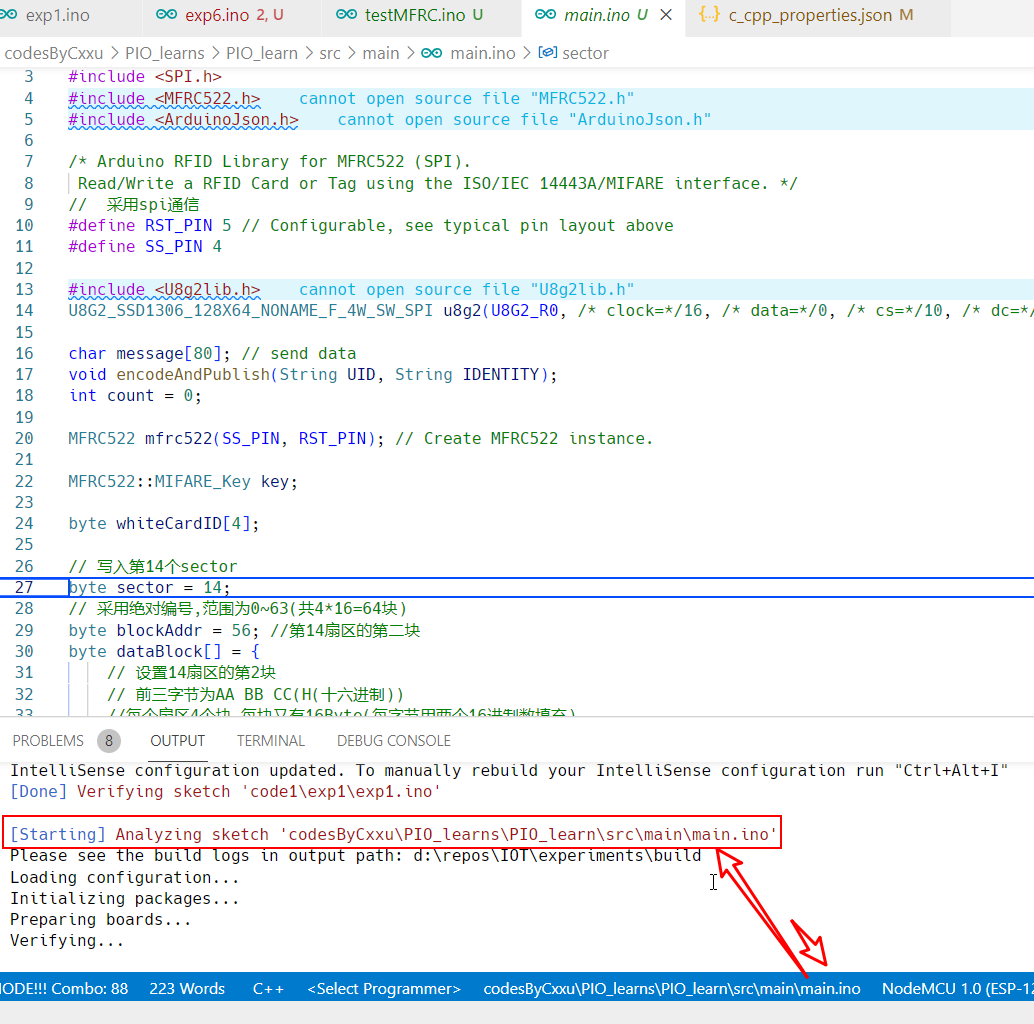
.ino文件的内容组织不完全和其他常规c++文件一致(比如没有main函数等),在某些库的导入和来自其他库的宏定义常量在引用的时候可能会由squiggle蚯蚓线报错; - 当然,您可以通过启用c++ extension 的
tag parser选项,来阻止arduino由于build滞后产生的不正确的报错;- 不过这样就不能够提示其他语法错误了
- 而根据arduino extension 官方介绍,我们可以通过手动重新编译来更新
intellisense配置(会引发重新build),这样原有的蚯蚓线就会消失(前提是你的代码是正确的,本地存在相关的依赖文件)
关闭自动编译Intellisense Configuration
- 有些时候,我们并不需要扩展为自动为我们更新intellisense的配置,我们(毕竟,更新配置需要verify,这需要消耗一定的时间)
- 但是手动analyze 不能自动更新intellisense configuration),即,目前看来,这种方式无法消除滞后的波浪线;

- 手动(analyzing):
- 快捷键触发
ctrl+alt+I  - verify
- 上载代码(upload)


- 快捷键触发
虽然关闭auto-gen不能够消除squiggle,但这就允许我们手动配置c_cpp_properties.json中的includePath
如果您的库安装的位置比较集中(一般都是的)(注意递归**)
"C:\\Users\\cxxu\\AppData\\Local\\Arduino15\\packages\\**", "C:\\Users\\cxxu\\Documents\\Arduino\\libraries\\**",
可以挡掉大部分情况下的squiggle
实际上比自动更新intellisense,来的更加高效
个人喜好配置(optional)
includePath💕和符号连接(optional)
    "includePath": [
        //我通过符号连接将以下两个目录的实体内容放置在了$env:arduinoLibs(@ D:\usersBycxxu\DocumentsAll\arduino\libraries 下,而下面的目录只留下一个相应的指针(符号连接)(系统上已经配置;)
       // "C:\\Users\\cxxu\\Documents\\Arduino\\libraries\\**",
        //"C:\\Users\\cxxu\\AppData\\Local\\Arduino15\\packages\\**"//实体文件在
        //总目录:通过符号连接已经将相关库实体文件定向存放到以下目录:
        "D:/usersBycxxu/DocumentsAll/arduino/libraries/**"

    ]
select sketch 快捷键配置(optional)

对应的UI(keymap)

快速手动创建intellisense configuration
可以通过有右下角的arduino extension 提供的按钮来生产/创建(有三种模式可选)

arduino extension
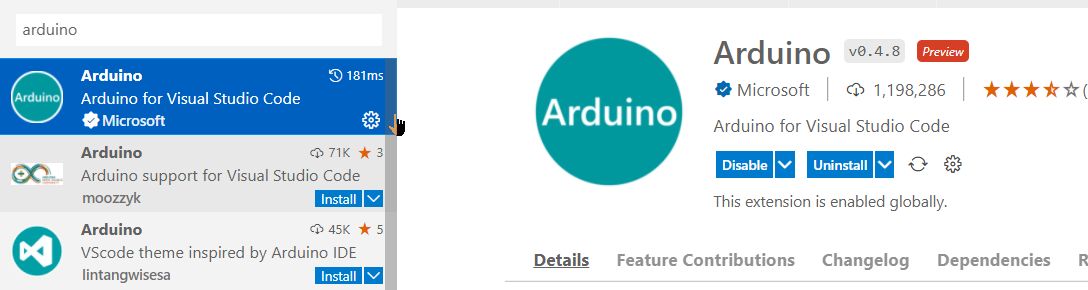
安装完后,在设置中搜索arduino,配置setting.json文件
arduino extension package
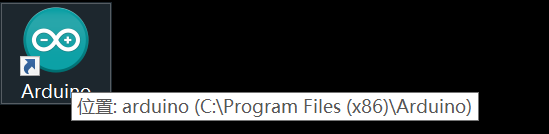
您需要配置arduino的安装路径arduino.path,具体可以看插件介绍页面
配置Arduino路径
将arduino 安装目录写上即可(如果是portable版,也是类似的)

IntelliSense for arduino 工作原理
- vscode-arduino auto-configures IntelliSense by default.
- vscode-arduino analyzes Arduino’s compiler output by running a separate build and generates the corresponding configuration file at
.vscode/c_cpp_properties.json. - vscode-arduino tries as hard as possible to keep things up to date, e.g. it runs the analysis when switching the board or the sketch.
在需要的时候analysis your code file
- It doesn’t makes sense though to run the analysis repeatedly.
- Therefore if the workspace reports problems (“squiggles”) - for instance after adding new includes from a new library - run the analysis manually:
-
需要注意的是,无论是编译某个文件还是analysis 某个文件,都需要实现选定对应的文件,如果编译的是其他文件,当前文件的某些滞后将无法更新。
- analyze 后,导入的头文件(如果是arduino自带的库)大概就不再报错;
- analyze(也就是verify编译验证一下)该操作会更新一些intellisense引擎需要的文件,防止不正确的多余的头文件导入的(宏定义引用)错误提示
Manual rebuild(analysis specified code)
Manual rebuild: Arduino: Rebuild IntelliSense Configuration, Keybindings: Alt + Cmd + I or Alt + Ctrl + I
When the analysis is invoked manually it ignores any global and project specific disable.
IntelliSense Configurations
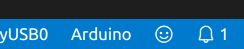
vscode-arduino’s analysis stores the result as a dedicated IntelliSense-configuration named Arduino. You have to select it from the far right of the status bar when you’re in one of your source files as shown here:
This system allows you to setup and use own IntelliSense configurations in parallel to the automatically generated configurations provided through vscode-arduino. Just add your configuration to c_cpp_properties.json and name it differently from the default configuration (Arduino), e.g. My awesome configuration and select it from the status bar or via the command palette command C/C++: Select a Configuration…
settings.json(optional)
    /* squiggle 配置,按需配置, */
    "C_Cpp.intelliSenseEngineFallback": "enable",
    //"C_Cpp.intelliSenseEngine": "Tag Parser",//但不建议使用tag parser,将导致无法语法检查!
加速编译:配置arduion.json
- The following Visual Studio Code settings are available for the Arduino extension. These can be set in global user preferences Ctrl + , or workspace settings (
.vscode/settings.json). The latter overrides the former.
{
    "arduino.path": "C:/Program Files (x86)/Arduino",
    "arduino.commandPath": "arduino_debug.exe",
    "arduino.logLevel": "info",
    "arduino.allowPDEFiletype": false,
    "arduino.enableUSBDetection": true,
    "arduino.disableTestingOpen": false,
    "arduino.skipHeaderProvider": false,
    "arduino.additionalUrls": [
        "https://raw.githubusercontent.com/VSChina/azureiotdevkit_tools/master/package_azureboard_index.json",
        "http://arduino.esp8266.com/stable/package_esp8266com_index.json"
    ],
    "arduino.defaultBaudRate": 115200
}
Note: You only need to set arduino.path in Visual Studio Code settings, other options are not required.
-
这里通过添加
additonalUrls来添加对其他开发板的支持(比如这里的esp8266系列开发板) -
The following settings are as per sketch settings of the Arduino extension.
-
You can find them in
.vscode/arduino.jsonunder the workspace.
{
    "sketch": "example.ino",
    "port": "COM5",
    "board": "adafruit:samd:adafruit_feather_m0",
    "output": "../build",
    "debugger": "jlink",
    "prebuild": "./prebuild.sh",
    "postbuild": "./postbuild.sh",
    "intelliSenseGen": "global"
}
-
sketch- The main sketch file name of Arduino. -
port- Name of the serial port connected to the device. Can be set by theArduino: Select Serial Portcommand. For Mac users could be “/dev/cu.wchusbserial1420”. -
board- Currently selected Arduino board alias. Can be set by theArduino: Change Board Typecommand. Also, you can find the board list there.
推荐配置output 来提高二次编译的速度
其实就是将编译过的文件保存起来,以便下次编译重用可用的部分来提速
-
output- Arduino build output path. If not set, Arduino will create a new temporary output folder each time, which means it cannot reuse the intermediate result of the previous build leading to long verify/upload time, -
so it is recommended to set the field.
-
Arduino requires that the output path should not be the workspace itself or in a subfolder of the workspace
-
otherwise, it may not work correctly. By default, this option is not set.
-
It’s worth noting that the contents of this file could be deleted during the build process, so pick (or create) a directory that will not store files you want to keep.
-
debugger- The short name of the debugger that will be used when the board itself does not have a debugger and there is more than one debugger available. You can find the list of debuggers here. By default, this option is not set. -
prebuild- External command which will be invoked before any sketch build (verify, upload, …). For details see the Pre- and Post-Build Commands section. -
postbuild- External command to be run after the sketch has been built successfully. See the afore mentioned section for more details. -
intelliSenseGen- Override the global setting for auto-generation of the IntelliSense configuration (i.e.
.vscode/c_cpp_properties.json). Three options are available:
"global": Use the global settings (default)"disable": Disable the auto-generation even if globally enabled"enable": Enable the auto-generation even if globally disabled
-
buildPreferences- Set Arduino preferences which then are used during any build (verify, upload, …). This allows for extra defines, compiler options or includes. The preference key-value pairs must be set as follows:
    "buildPreferences": [
        ["build.extra_flags", "-DMY_DEFINE=666 -DANOTHER_DEFINE=3.14 -Wall"],
        ["compiler.cpp.extra_flags", "-DYET_ANOTER=\"hello\""]
    ]
}
添加开发板
- 可以通过arduinoIDE 添加新的开发板(比如Esp8266系列/nodemcu),并且安装对应的开发板的管理工具:
例子:添加esp8266系列开发板(nodeMcu)
- 打开ArduinoIDE->file->Preference
- 添加开发板源(addtional Boards Manager URLs)
http://arduino.esp8266.com/stable/package_esp8266com_index.json 注意这里再去
 board manager去安装一个对应的开发板管理工具
查看示库例代码

配置settings.json(Optional)
位于c++插件管理的部分
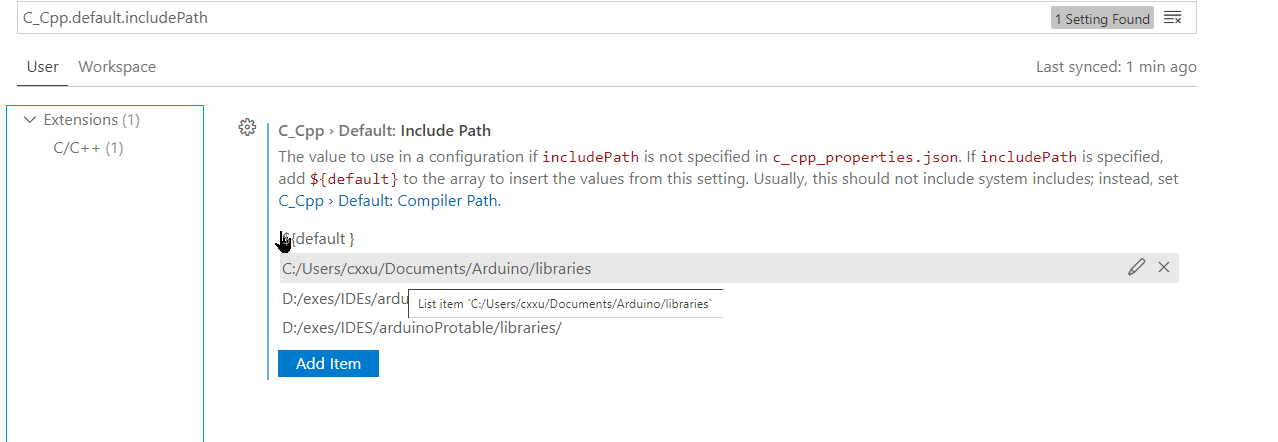
    /* 将Arduino的库代码添加到c/c++ 插件中,方面查看源代码 */
    "C_Cpp.default.includePath": [
        "${default }",//默认保留
        "C:\\Program Files (x86)\\Arduino"//arduino的安装目录
    ],
使用本环境的步骤:
为了保证使用体验
检查状态栏/Arudino console的编译信息

- 选择正确的文件进行编译
- 选择正确的波特率进行串口显示
- 选择正确的开发板
选择正确的文件编译(select sketch File)
推荐做法
- 可以配置一个快捷键(ctrl+p)
- 输入文件路径来选中
- 建议输入文件夹文件名,以免其他目录下存在同名文件而导致错选文件
- 看前面一部分即可

避免不合理的源代码文件结构安排
错误示例

可行示例

测试库例程
-
您可以先打开一个库例程来测试一下:
-
检查状态栏各个参数是否符合当前预设的值
-

-

-
点击
.ino文件,然后选择一个开发板(比如arduino UNO),选完之后可以对该文件进行编译),一般会自动analysis(verify),并且会生成对应地.vscode/c_cpp_properties.json -
里面会生成(引入该文件需要的,且本地arduinoIDE下载过的库的)一些includePath`值
-

-


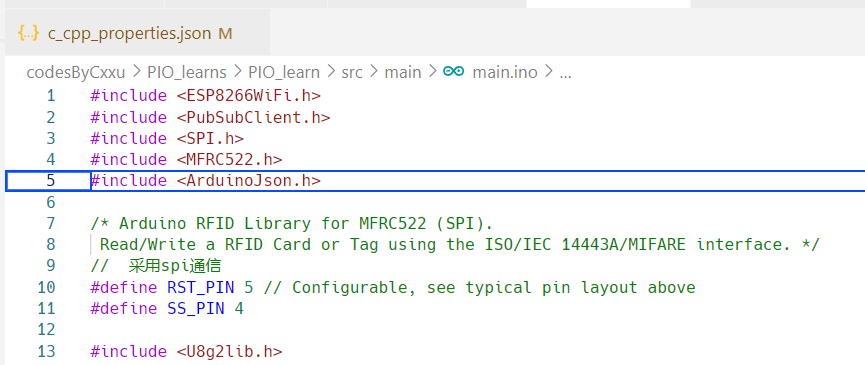
从0开始编写一个测试文件
- 在打开的目录下(工作空间)编写
.ino文件可能会报一些包导入的错误,可以选择继续编写,也可以根据c++ extension的提示临时性地配置一些库地路径(includePath),这将在工作空间内生成一个
.vscode文件夹,包含c_cpp_property.json等配置配置文件
- 对于最基本的
ino模板文件也是可以编译的(verify) - 也会生成
.vscode配置文件

- 指定要编译并上传到arduino的文件:
某些时候可能看不到下方的文件选择区域,那么可以通过ctrl+shift+P打开命令面板
输入select sketch,选中,来打开文件列表:

- 点击上载(此前可以verify)

如何导入已有的项目
- 如果直接打开项目所在文件夹中的源代码文件,很可能会看到导入头文件的地方提示你找不到头文件等问题(arduino extension 会在你选定选定开发板后analysis( verify);来产生一些配置文件
- 也可以手动编译一下(verify)(当然还是要选择对应的开发板和测试的arduino源代码文件,这样arduino extension 会为您生成
基础配置(.vscode)) - 该操作会尝试修复intellisens的滞后与偏差问题(如果您的程序本身是正确的,这些蚯蚓线将会再编译之后被修复)
- 其余配置参考前面的文档(比如配置build path,这写入.vscode/arduion.json中)

选择一个源文件来verify

和code runner 不同,不会根据当前打开的文件自动选择要编译的文件

- 编译结果可能会报错;(大概是库的问题缺失/版本不兼容),这时,需要打开ArduinoIDE 去安装/选择合适的版本库安装
(控制台的输出结果其实就是来自后台调用aruino运行结果的显示,因此,不必采用arduino再跑 - 多文件编译也和arduinoIDE类似,可以得到支持
-


intellisense includePath config(optional)
如果关闭掉·auto-gen·,那么可以手动配置
一般需要在intellisense include path 中配置arduino IDE中库的安装位置,并且以递归路径表示:例如
 "C:\\Users\\cxxu\\Documents\\Arduino\\libraries\\**",
 "C:\\Users\\cxxu\\AppData\\Local\\Arduino15\\**",

- auto-gen 如果开启的话,在执行analyzing时会生成一些
includePath,但是auto-gen有的时候还是挺碍事的,这个看个人需求是否打开auto-gen(intellisense configuration); - 关闭auto-gen,我们手动配置的includePath才不会被auto-gen覆盖编译后失效(这是不可以共存的)
- 如果开启auto-gen,这些includePath建议保留而不去动,不然在执行analysis(verify)时会出现arduino extension 不能配置intellisense configuration {}的问题.
端口问题:open deny
测试NodeMCU时出现
- 尝试重载(reload/restart)vscode
- 不过一般是另一个vscode窗口占用了对应端口,关闭即可

- 检查是否arduino和esp8266开发板的更换导致错误的framwork
- 尝试按下nodeMcu 的reset 按钮以重置nodeMcu
- 尝试重启计算机再试
后期处理(optional)
如果遇到乱码,请检查波特率设置是否匹配与代码(Serial.begin())
更多细节,参看
https://mp.weixin.qq.com/s/Se0-lMHXVj9oGXkakhQm9A
打开如下文件修改:

大概是:
C:\Users\userName.vscode\extensions\vsciot-vscode.vscode-arduino-0.4.0\out\src\common


 412
412


 被折叠的 条评论
为什么被折叠?
被折叠的 条评论
为什么被折叠?
 到【灌水乐园】发言


