


1、安装软件包管理器dnf
sudo apt-get install dnf
2、安装xilinx开发环境,详见:Getting Started with Certified Ubuntu 22.04 LTS for Xilinx Devices - Xilinx Wiki - Confluence
输入命令:
$ sudo snap install xlnx-config --classic --channel=2.x
一路选择Y和回车
输入命令:
$ xlnx-config.sysinit
一路选择Y和回车
3、在确保KV260能上互联网的情况下,在计算机的串口终端中执行以下命令升级KV260的Ubuntu系统,并安装KV260应用程序包( 详细步骤见:Booting your Starter Kit),安装时间大约半小时:
sudo add-apt-repository ppa:xilinx-apps --yes &&
sudo add-apt-repository ppa:ubuntu-xilinx/sdk --yes &&
sudo add-apt-repository ppa:xilinx-apps/xilinx-drivers --yes &&
sudo apt update --yes &&
sudo apt upgrade --yes
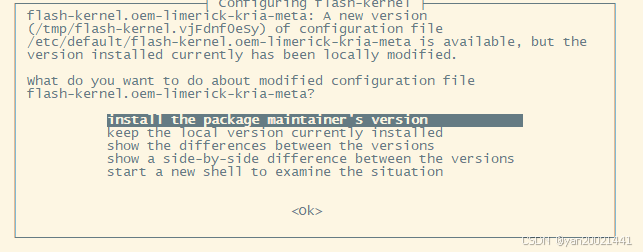
升级过程中,弹出的对话框作如下选择(即选择更新板卡中的程序),然后回车:
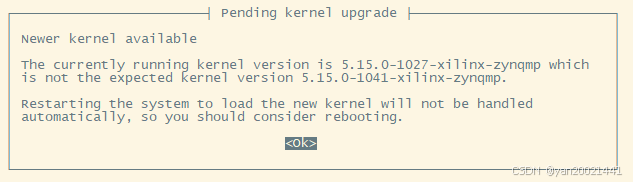
下面的两张图直接按回车:

板卡会将部分程序重启,待板卡系统启动就绪后,可以按下板卡上的复位按键对板卡硬复位,硬复位按键位置如下图:
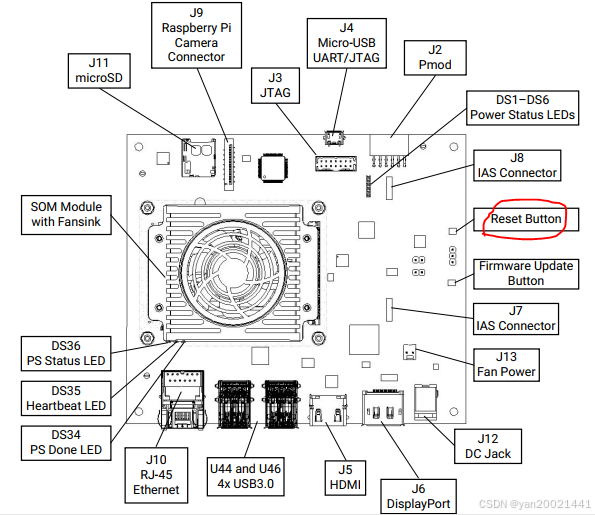
硬复位后,板卡将会重启,然后载入升级后的系统。


 2591
2591

 被折叠的 条评论
为什么被折叠?
被折叠的 条评论
为什么被折叠?
 到【灌水乐园】发言


