


 本文介绍了如何集成Facebook像素代码到网页中,包括前端在HTML中的配置和后端使用Python进行事件上报。同时提到了Facebook像素的官方资源链接,以及如何在BusinessManager中获取像素ID和访问令牌。文章还提供了错误返回示例和测试事件的方法。
title: js-Facebook像素代码
categories: Javascript
tags: [js, facebook, 像素, 转化]
date: 2023-05-31 17:58:07
comments: false
mathjax: true
toc: true
js-Facebook像素代码
相关资料
- 官方
- 接入 - https://developers.facebook.com/docs/meta-pixel/get-started
- 转化追踪 - https://developers.facebook.com/docs/meta-pixel/implementation/conversion-tracking
- 标准事件列表 - https://developers.facebook.com/docs/meta-pixel/reference/
- 服务器 api 接入 - https://business.facebook.com/events_manager2/implementation_instructions
前置物料
- Facebook 开发者
- Facebook bm, 与 开发者绑定好
获取像素 id 和 access token
-
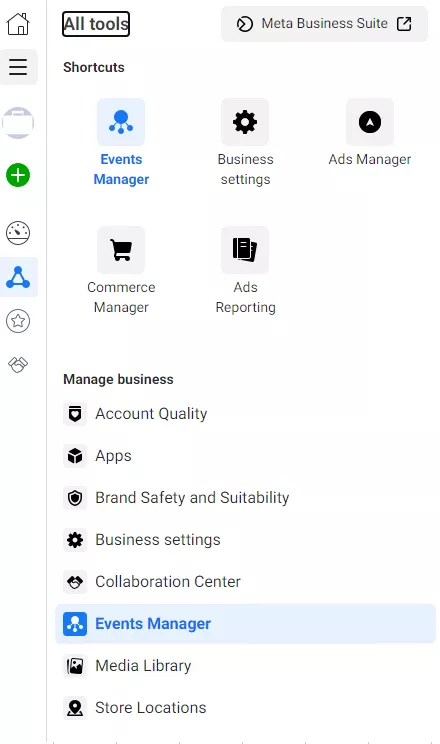
打开 bm 后台, 地址: https://business.facebook.com/events_manager2/list
打开 bm 事件管理
-
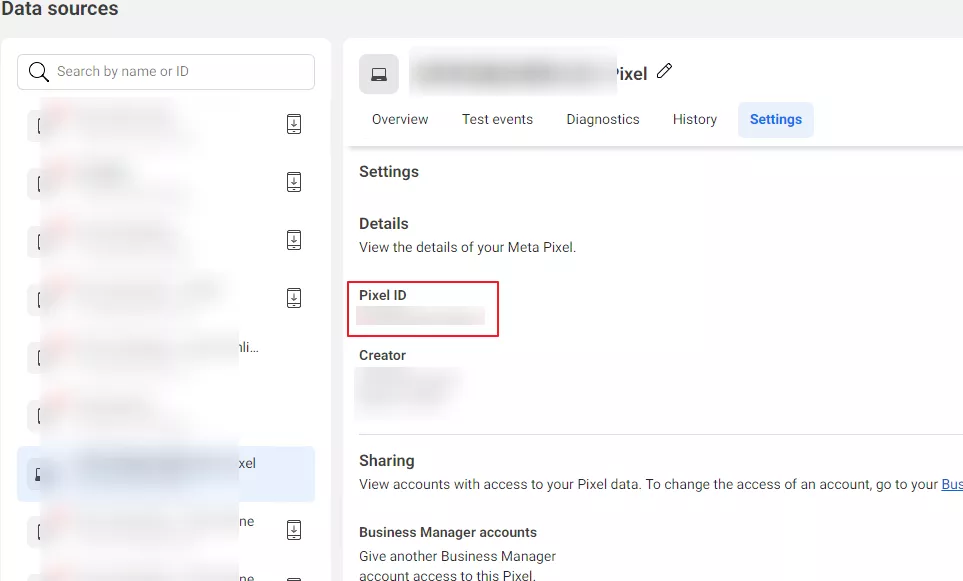
点击对应的 bm, 获取像素 id
-
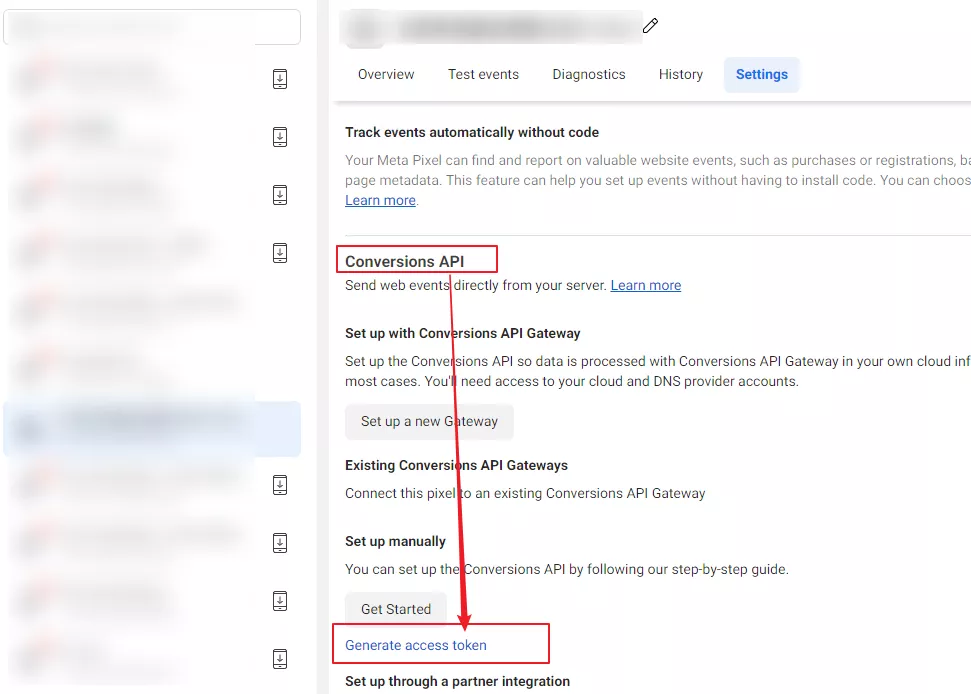
点击对应的 bm, 获取 access token
前端像素代码配置
-
直接在 html 中配置, 参考文档: https://developers.facebook.com/docs/meta-pixel/get-started
<!-- Meta Pixel Code --> <script> !function(f,b,e,v,n,t,s) {if(f.fbq)return;n=f.fbq=function(){n.callMethod? n.callMethod.apply(n,arguments):n.queue.push(arguments)}; if(!f._fbq)f._fbq=n;n.push=n;n.loaded=!0;n.version='2.0'; n.queue=[];t=b.createElement(e);t.async=!0; t.src=v;s=b.getElementsByTagName(e)[0]; s.parentNode.insertBefore(t,s)}(window, document,'script', 'https://connect.facebook.net/en_US/fbevents.js'); fbq('init', '123123123'); fbq('track', 'PageView'); </script> <noscript><img height="1" width="1" style="display:none" src="https://www.facebook.com/tr?id=123123123&ev=PageView&noscript=1" /></noscript> <!-- End Meta Pixel Code -->- 上面 123123123 就是像素 id
后端服务器上传事件
-
Python 代码, 参考
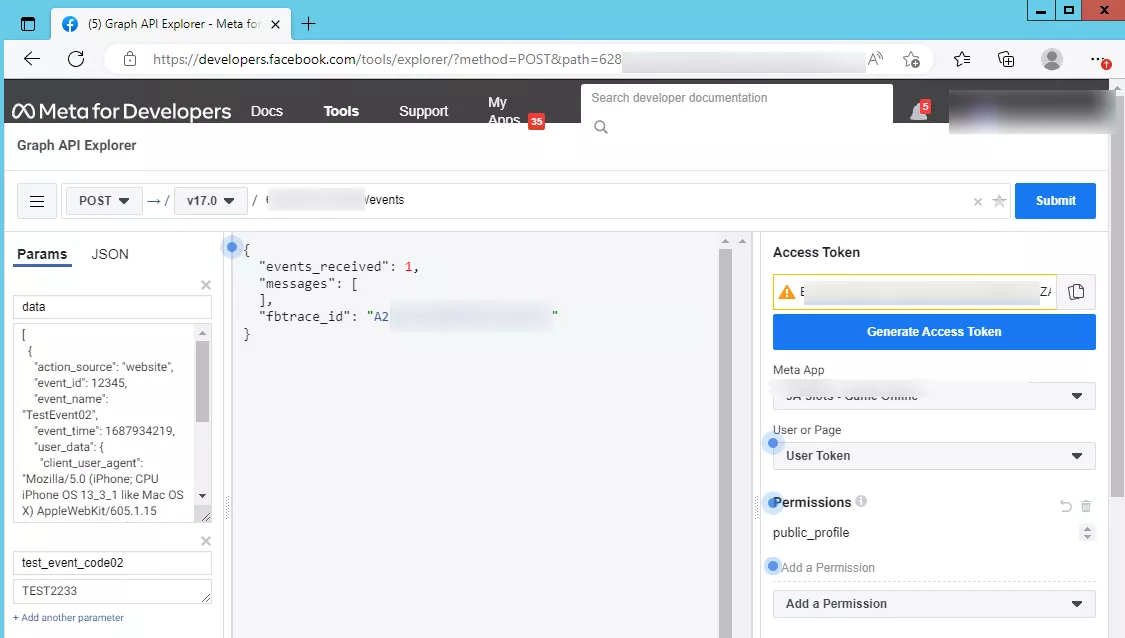
def test_fbEventApi(self): accessToken = "asdasdasd" # access token pixelAppId = "123123123" # 像素 id data = [ { "action_source": "website", "event_id": 12345, "event_name": "TestEvent03", "event_time": utils.nowTs(), "user_data": { "client_user_agent": "Mozilla/5.0 (iPhone; CPU iPhone OS 13_3_1 like Mac OS X) AppleWebKit/605.1.15 (KHTML, like Gecko) Version/13.0.5 Mobile/15E148 Safari/604.1", "em": "f660ab912ec121d1b1e928a0bb4bc61b15f5ad44d5efdc4e1c92a25e99b8eccc" }, "custom_data": { # 自定义其他事件 "currency": "USD", "value": "142.52" }, } ] txt = quote(utils.beautyJson(data, indent=None), 'utf-8') # encode url = "https://graph.facebook.com/v17.0/{}/events?data={}&test_event_code02=TEST2233&access_token={}".format(pixelAppId, txt, accessToken) print("--- url: ".format(url)) code, rspDct = utils.httpPost(url=url) assert code == 200, "--- 上报事件失败, code: {}, rspDct: {}".format(code, rspDct) utils.printJson(rspDct, tips="msg")-
正常返回
{ "events_received": 1, "messages": [ ], "fbtrace_id": "asdasd" } -
错误返回
{
  "error": {
    "message": "The access token could not be decrypted",
    "type": "OAuthException",
    "code": 190,
    "fbtrace_id": "asdasd"
  }
}
-
可视化测试事件
-
网页测试
查看事件
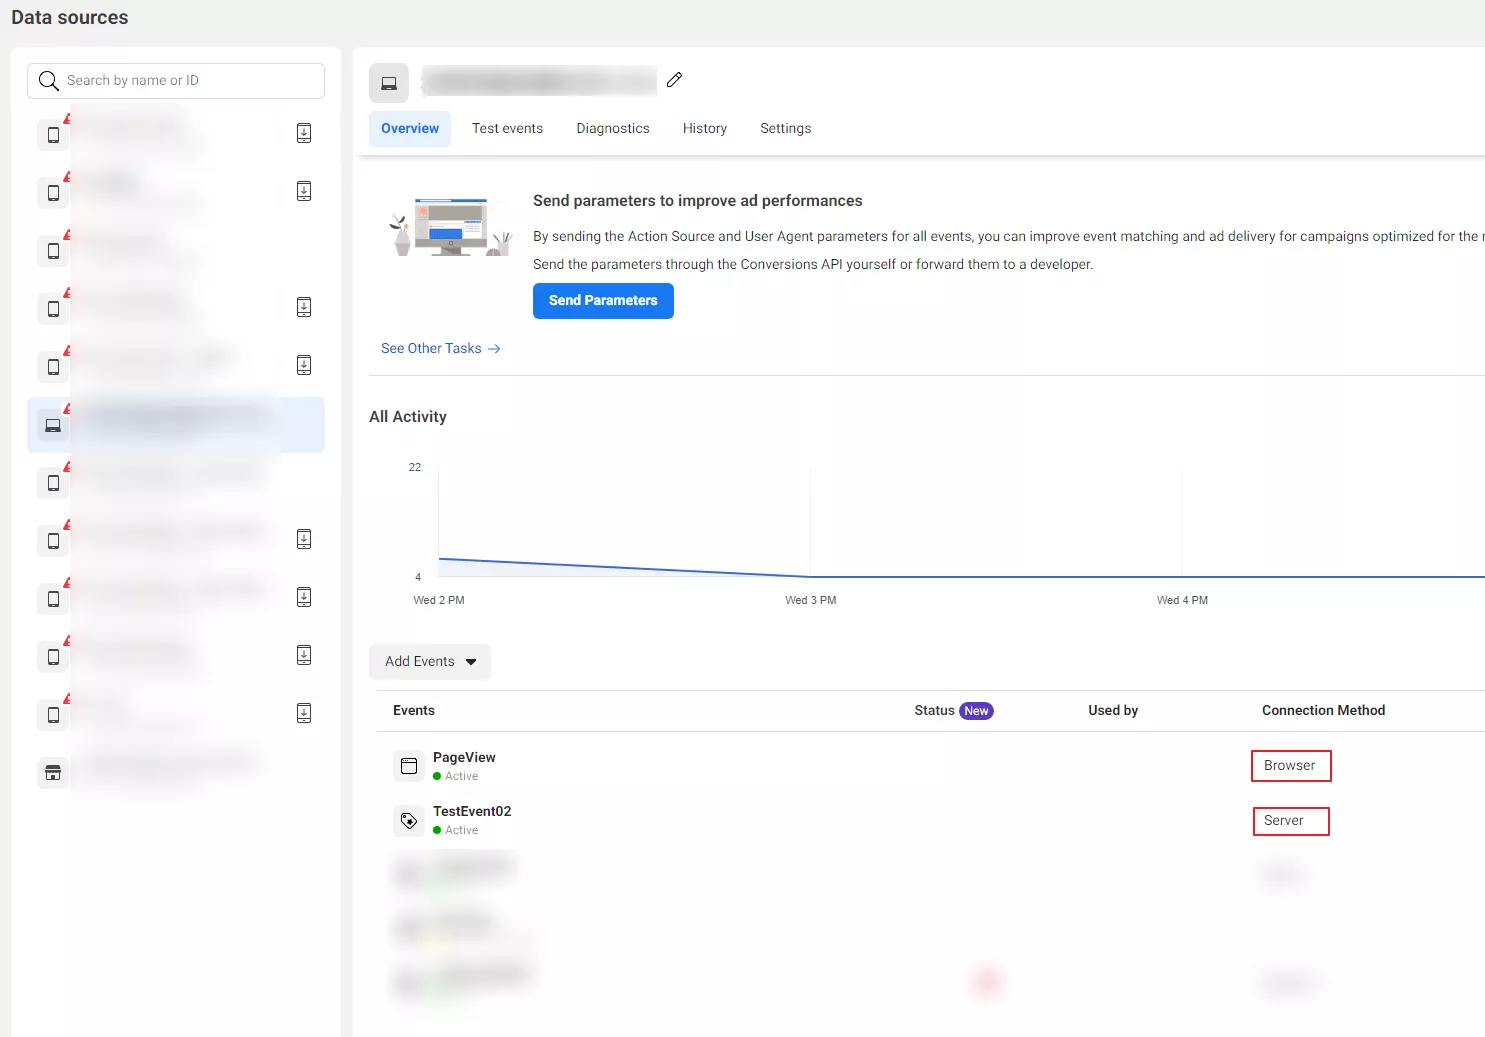
-
前后端接入成功后, 都会在 bm 后台可以看到数据


 被折叠的 条评论
为什么被折叠?
被折叠的 条评论
为什么被折叠?
 到【灌水乐园】发言


