DrawerLayout 抽屉布局
文章目录
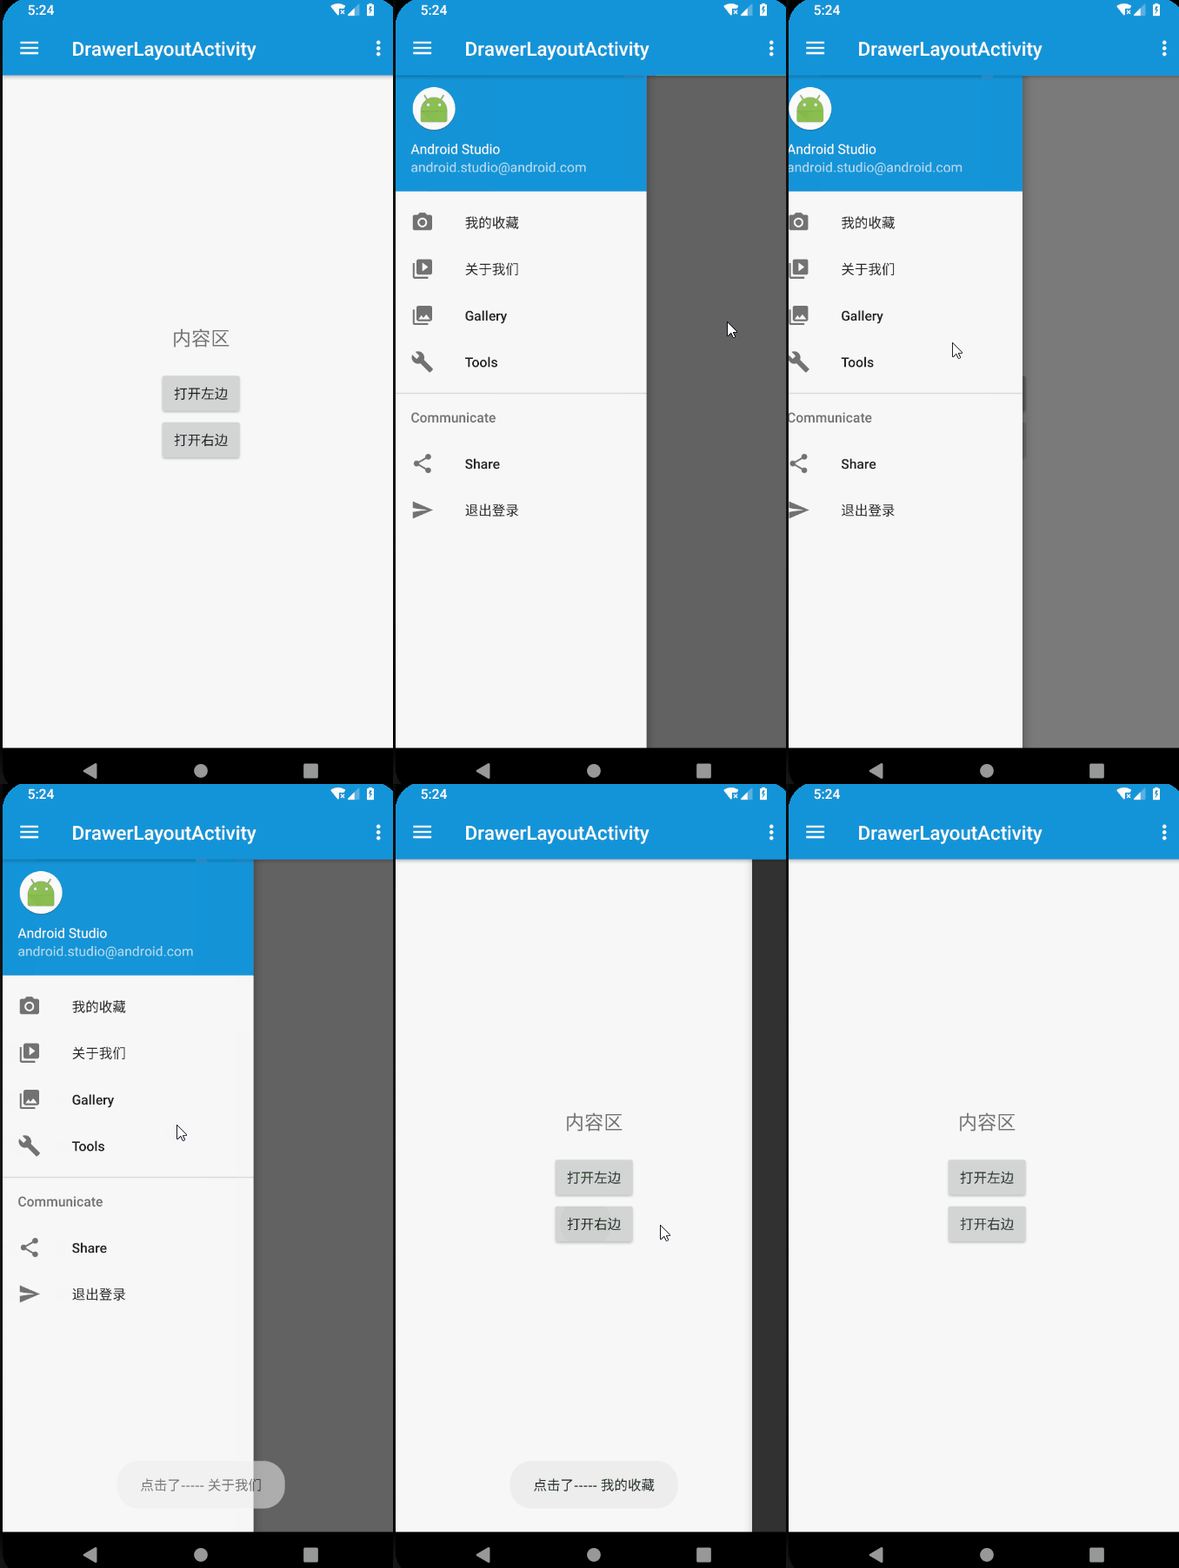
效果:

布局
<android.support.v4.widget.DrawerLayout
        android:id="@+id/drawer_layout"
        android:layout_width="match_parent"
        android:layout_height="match_parent">

        <!-- 内容区 -->
        <LinearLayout
            android:layout_width="match_parent"
            android:layout_height="wrap_content"
            android:gravity="center"
            android:orientation="vertical">

            <TextView
                android:layout_width="wrap_content"
                android:layout_height="wrap_content"
                android:padding="20dp"
                android:text="内容区"
                android:textSize="20sp"/>

            <Button
                android:id="@+id/btn_open_left"
                android:layout_width="wrap_content"
                android:layout_height="wrap_content"
                android:text="打开左边"/>

            <Button
                android:id="@+id/btn_open_right"
                android:layout_width="wrap_content"
                android:layout_height="wrap_content"
                android:text="打开右边"/>

        </LinearLayout>

        <!-- 左边菜单 -->
        <android.support.design.widget.NavigationView
            android:id="@+id/navigation_view"
            android:layout_width="260dp"
            android:layout_height="match_parent"
            android:layout_gravity="start"
            app:headerLayout="@layout/drawer_header"
            app:menu="@menu/menu_drawer_left"/>

        <!-- 右边菜单 -->
        <LinearLayout
            android:layout_width="match_parent"
            android:layout_height="match_parent"
            android:layout_gravity="end"
            android:background="@color/black"
            android:gravity="center"
            android:orientation="vertical">

            <TextView
                android:layout_width="wrap_content"
                android:layout_height="wrap_content"
                android:padding="20dp"
                android:text="右边菜单"
                android:textColor="@color/white"
                android:textSize="20sp"
                android:textStyle="bold"/>

            <Button
                android:id="@+id/btn_close_right"
                android:layout_width="wrap_content"
                android:layout_height="wrap_content"
                android:text="关闭"/>

        </LinearLayout>

    </android.support.v4.widget.DrawerLayout>
- 外层是DrawerLayout,第一个子view是内容区,侧滑内容紧跟其后。
- 侧滑内容可以有好几个
android:layout_gravity="end"标识从左边还是右边滑出
以上就可以简单的实现抽屉布局了。
关联Toolbar
比如上图中的toolbar左边有三道杠,点击即可弹出DrawerLayout
        //mDrawerLayout与mToolbar关联起来
        ActionBarDrawerToggle actionBarDrawerToggle = new ActionBarDrawerToggle(this, mDrawerLayout, mToolbar, R.string.open, R.string.close);
        //初始化状态
        actionBarDrawerToggle.syncState();
手动打开关闭
手动打开关闭DrawerLayout
- 打开左边
mDrawerLayout.openDrawer(Gravity.START);
- 打开右边
mDrawerLayout.openDrawer(Gravity.END);
- 关闭一边
mDrawerLayout.closeDrawer(Gravity.START);
- 关闭所有
mDrawerLayout.closeDrawers();
Gravity.START指定打开哪一个,关闭同理。
监听
       //监听
        mDrawerLayout.addDrawerListener(new DrawerLayout.DrawerListener() {
            @Override
            public void onDrawerSlide(@NonNull View view, float v) {
                Log.i("---", "滑动中");
            }

            @Override
            public void onDrawerOpened(@NonNull View view) {
                Log.i("---", "打开");
            }

            @Override
            public void onDrawerClosed(@NonNull View view) {
                Log.i("---", "关闭");
            }

            @Override
            public void onDrawerStateChanged(int i) {
                Log.i("---", "状态改变");
            }
        });
github:https://github.com/yechaoa/MaterialDesign
文档:https://developer.android.google.cn/reference/android/support/v4/widget/DrawerLayout


 本文详细介绍如何使用DrawerLayout实现抽屉布局,并关联Toolbar。包括布局代码、手动开关方法及监听事件,提供GitHub示例。


 4万+
4万+

 被折叠的 条评论
为什么被折叠?


