


准备
cxf框架和Spring框架所用的jar包需要准备好。
步骤
创建一个接口,接口上必须要加上Web远程调用的注解——@WebService
@WebService
public interface ServerInterface {

    public [参数类型] MethodName([参数类型] [参数名],...);
    ...

}
创建一个实现接口的类
public class ServerInterfaceImpl implements ServerInterface {

    @Override
    public [参数类型] MethodName([参数类型] [参数名],...) {
        ...
    }
    ...

}
配置web.xml文件
<!-- 配置cxf的servlet的映射路径 -->
  <servlet>
    <servlet-name>cxf</servlet-name>
    <servlet-class>org.apache.cxf.transport.servlet.CXFServlet</servlet-class>
  </servlet>
  <servlet-mapping>
    <servlet-name>cxf</servlet-name>
    <url-pattern>/ws/*</url-pattern>
  </servlet-mapping>
  <!-- 配置spring监听 -->
  <context-param>
    <param-name>contextConfigLocation</param-name>
    <param-value>classpath:applicationContext.xml</param-value>
  </context-param>
  <listener>
    <listener-class>org.springframework.web.context.ContextLoaderListener</listener-class>
  </listener>
配置Spring配置文件,该文件放置在资源文件下
<beans xmlns="http://www.springframework.org/schema/beans"
    xmlns:xsi="http://www.w3.org/2001/XMLSchema-instance"
    xmlns:context="http://www.springframework.org/schema/context"
    xmlns:aop="http://www.springframework.org/schema/aop"
    xmlns:tx="http://www.springframework.org/schema/tx"
    xmlns:jaxws="http://cxf.apache.org/jaxws"
    xmlns:soap="http://cxf.apache.org/bindings/soap"
    xsi:schemaLocation="
        http://www.springframework.org/schema/beans http://www.springframework.org/schema/beans/spring-beans.xsd
        http://www.springframework.org/schema/context http://www.springframework.org/schema/context/spring-context.xsd
        http://www.springframework.org/schema/aop http://www.springframework.org/schema/aop/spring-aop.xsd
        http://www.springframework.org/schema/tx http://www.springframework.org/schema/tx/spring-tx.xsd
        http://cxf.apache.org/bindings/soap http://cxf.apache.org/schemas/configuration/soap.xsd
        http://cxf.apache.org/jaxws http://cxf.apache.org/schemas/jaxws.xsd">

    <!-- 配置server端
        address:服务的名称,前面的服务地址由Tomcat提供
        serviceClass:服务的接口全路径 -->
    <jaxws:server address="/server" serviceClass="com.gwx.ws.ServerInterface">
        <jaxws:serviceBean>
            <!-- 引入实体bean -->
            <ref bean="serverInterface"/>
        </jaxws:serviceBean>
    </jaxws:server>

    <!-- 配置实现接口的实体bean -->
    <bean id="serverInterface" class="com.gwx.ws.ServerInterfaceImpl"></bean>
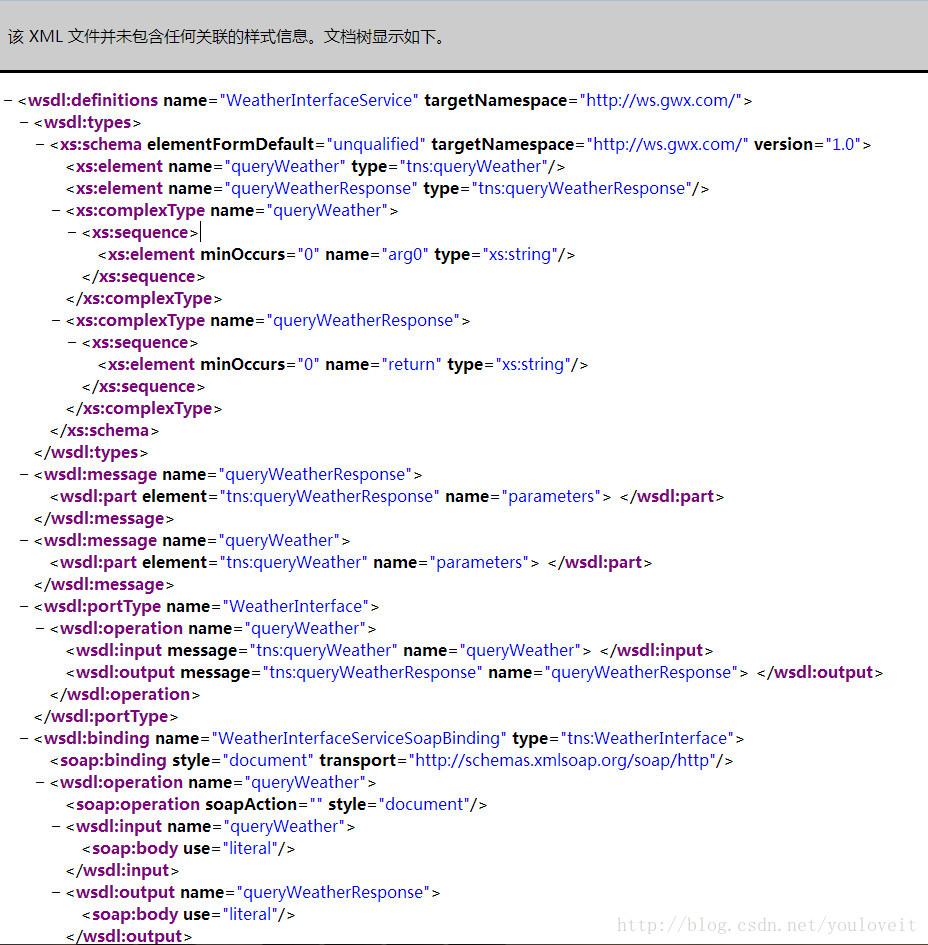
</beans>测试是否配置成功,在浏览器地址栏输入http://ip:端口号/项目名/servlet的映射路径/服务名称?wsdl。
如果浏览器弹类似这样的界面,说明搭建成功。


 1018
1018

 被折叠的 条评论
为什么被折叠?
被折叠的 条评论
为什么被折叠?
 到【灌水乐园】发言


