


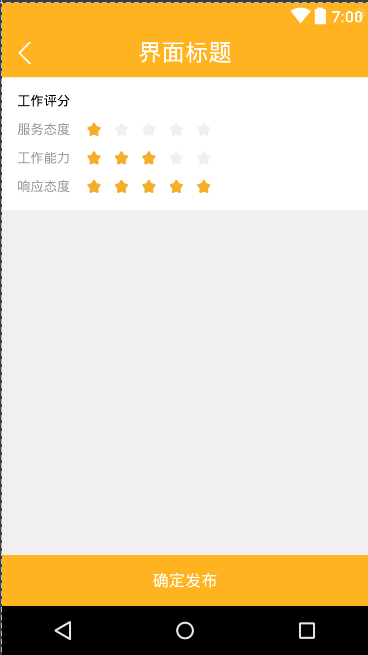
效果如下图:
使用:
1)引用库:
compile 'com.xingliuhua:xlhratingbar_lib:1.0.1'
2)在drawable文件夹下自定义星星选中与未选中的状态:
<item android:drawable="@drawable/ic_report_lightstart"
      android:state_checked="true"></item>
<item android:drawable="@drawable/ic_report_darkstart"
      android:state_checked="false"></item>
3)在XML布局文件中使用:
<com.example.xlhratingbar_lib.XLHRatingBar
    xmlns:xlhRatingBar="http://schemas.android.com/apk/res-auto"
    android:id="@+id/ratingBar"
    android:layout_width="wrap_content"
    android:layout_height="wrap_content"
    xlhRatingBar:canEdit="true"
    xlhRatingBar:differentSize="false"
    xlhRatingBar:dividerWidth="7dp"
    xlhRatingBar:countSelected="1"
    xlhRatingBar:starCount="5"
    xlhRatingBar:stateResId="@drawable/selector_star_appraise"
    xlhRatingBar:widthAndHeight="13dp" />
-
属性解释:
- canEdit: true 可以点击选择不同的星星,默认false
- differentSize : true 星星的大小可以不同(中间的最大,两端的依次变小且星星总数为奇数时才有效)
- dividerWidth :单个星星之间的间隔
- starCount :星星的总个数
- widthAndHeight :星星的大小
- countSelected :已经选择的星星的个数
-
stateResId:单个星星的不同状态(Android默认的drawable是comment_ratingbar_selector)
-
4)在代码中使用:
XLHRatingBar ratingBar = (XLHRatingBar) findViewById(R.id.ratingBar);
       ratingBar.setCountNum(5);
       ratingBar.setCountSelected(1);
       ratingBar.setOnRatingChangeListener(new XLHRatingBar.OnRatingChangeListener() {
           @Override
           public void onChange(int countSelected) {
               tvResult.setText(countSelected + "");
           }
       });
5)与Android系统RatingBar对比:
1.更方便指定每个星星的图标、大小及各个星星的间距
2.支持监听选中状态的变化
6)原文:https://github.com/xingliuhua/XLHRatingBar


 286
286

 被折叠的 条评论
为什么被折叠?
被折叠的 条评论
为什么被折叠?
 到【灌水乐园】发言


