


一. 背景知识
在上一篇博文: 使用JavaMail发送邮件和接受邮件, 我们学习了原生的JavaApi发送邮件, 我们会发现代码比较多, 特别是当邮件内容很丰富的时候, 我们需要在Java中拼装Html, 是不是觉得非常麻烦.
下面我们使用一种比较简单的方法: spring + javaMail + freemarker, 使用freemarker模板引擎后, 我们就不用再在Java中拼装html.
二. 环境准备
废话不多说了, 下面我们准备下开发环境:
1. 所需Jar包:
spring.jar(2.5), commons-logging.jar, mail.jar, freemarker.jar, spring-webmvc.jar, activation.jar
2. 安装易邮邮件服务器, 这个我们在上一篇博文中有讲过, 这里就不再赘述.
3. D盘中放一张图片 "welcome.gif" 和一个word文件 "欢迎注册.docx" 以填充邮件内容.
三. 代码实现
1. 代码结构图如下:

2. 实体Bean:
/**
 * 用户对象
 */
public class User {
	private String username;
	private String password;

	public String getUsername() {
		return username;
	}

	public void setUsername(String username) {
		this.username = username;
	}

	public String getPassword() {
		return password;
	}

	public void setPassword(String password) {
		this.password = password;
	}
}
public interface EmailService {
	public void sendEmail(User user);
}
public class EmailServiceImpl implements EmailService {

	private JavaMailSender mailSender;
	private FreeMarkerConfigurer freeMarkerConfigurer;
	private static final String ENCODING = "utf-8";

	public void setMailSender(JavaMailSender mailSender) {
        this.mailSender = mailSender;
    }

	public void setFreeMarkerConfigurer(FreeMarkerConfigurer freeMarkerConfigurer) {
		this.freeMarkerConfigurer = freeMarkerConfigurer;
	}


	/**
	 * 发送带附件的html格式邮件
	 */
	public void sendEmail(User user) {
		MimeMessage msg = null;
		try {
			msg = mailSender.createMimeMessage();
			MimeMessageHelper helper = new MimeMessageHelper(msg, true, ENCODING);
			helper.setFrom("service@estore.com");
			helper.setTo("zhangsan@estore.com");
			helper.setSubject(MimeUtility.encodeText("estore注册成功提示邮件", ENCODING, "B"));
			helper.setText(getMailText(user), true); // true表示text的内容为html

			// 添加内嵌文件,第1个参数为cid标识这个文件,第2个参数为资源
			helper.addInline("welcomePic", new File("d:/welcome.gif")); // 附件内容

			// 这里的方法调用和插入图片是不同的,解决附件名称的中文问题
			File file = new File("d:/欢迎注册.docx");
			helper.addAttachment(MimeUtility.encodeWord(file.getName()), file);
		} catch (Exception e) {
			throw new RuntimeException("error happens", e);
		}
		mailSender.send(msg);
		System.out.println("邮件发送成功...");
	}

	/**
	 * 通过模板构造邮件内容,参数content将替换模板文件中的${content}标签。
	 */
	private String getMailText(User user) throws Exception {
		// 通过指定模板名获取FreeMarker模板实例
		Template template = freeMarkerConfigurer.getConfiguration().getTemplate("registe.html");

		// FreeMarker通过Map传递动态数据
		Map<String, String> map = new HashMap<String, String>();
		map.put("username", user.getUsername()); // 注意动态数据的key和模板标签中指定的属性相匹配
		map.put("password", user.getPassword());

		// 解析模板并替换动态数据,最终content将替换模板文件中的${content}标签。
		String htmlText = FreeMarkerTemplateUtils.processTemplateIntoString(template, map);
		return htmlText;
	}
}
解决名字乱码问题使用:MimeUtility.encodeText(name, "UTF-8", "B")
因为Email的规范,在smtp传输中不可使用中文字符。所以可以使用内置类的MimeUtility方法encodeText将收件人、发件人名字编码即可。
编码方式有两种:"B"代表Base64、"Q"代表QP(quoted-printable)方式。
注意:
1. 不能将名字和email地址一起编码,如直接编码 "Name " 后当做收件人就会出错。
2. Mail的Subject和Content不需要我们显式的编码,在Set的时候这两项会被javax.mail自动编码。
4. spring核心配置
<?xml version="1.0" encoding="UTF-8"?>
<beans xmlns="http://www.springframework.org/schema/beans"
	xmlns:xsi="http://www.w3.org/2001/XMLSchema-instance" xmlns:aop="http://www.springframework.org/schema/aop"
	xmlns:tx="http://www.springframework.org/schema/tx"
	xsi:schemaLocation="http://www.springframework.org/schema/beans
	http://www.springframework.org/schema/beans/spring-beans-2.5.xsd
	http://www.springframework.org/schema/aop
	http://www.springframework.org/schema/aop/spring-aop-2.5.xsd
	http://www.springframework.org/schema/tx
	http://www.springframework.org/schema/tx/spring-tx-2.5.xsd">

	<bean id="freeMarker" class="org.springframework.web.servlet.view.freemarker.FreeMarkerConfigurer">
		<property name="templateLoaderPath" value="classpath:" /> <!-- 指定模板文件目录  -->
		<property name="freemarkerSettings"><!-- 设置FreeMarker环境属性 -->
			<props>
				<prop key="template_update_delay">1800</prop> <!--刷新模板的周期,单位为秒 -->
				<prop key="default_encoding">UTF-8</prop> <!--模板的编码格式 -->
				<prop key="locale">zh_CN</prop> <!--本地化设置-->
			</props>
		</property>
	</bean>

	<!-- 注意:这里的参数(如用户名、密码)都是针对邮件发送者的 -->
	<bean id="mailSender" class="org.springframework.mail.javamail.JavaMailSenderImpl">
		<property name="host">
            <value>localhost</value>
        </property>
        <property name="javaMailProperties">
            <props>
                <prop key="mail.smtp.auth">true</prop>
                <prop key="mail.smtp.timeout">25000</prop>
            </props>
        </property>
        <property name="username">
            <value>service</value> <!-- 发送者用户名 -->
        </property>
        <property name="password">
            <value>123</value> <!-- 发送者密码 -->
        </property>
	</bean>

	<bean id="emailService" class="com.zdp.service.impl.EmailServiceImpl">
		<property name="mailSender" ref="mailSender"></property>
		<property name="freeMarkerConfigurer" ref="freeMarker"></property>
	</bean>
</beans>
<!DOCTYPE HTML PUBLIC "-//W3C//DTD HTML 4.01 Transitional//EN">
<html>
<head>
<meta http-equiv="content-type" content="text/html;charset=utf8">
</head>
<body>
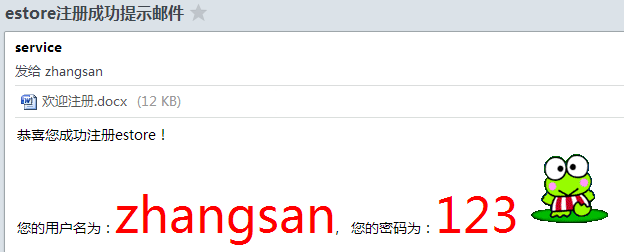
恭喜您成功注册estore!<br/>
您的用户名为:<font color='red' size='20'>${username}</font>,
您的密码为:<font color='red' size='20'>${password}</font> <img src='cid:welcomePic'/>
</body>
</html>
public class EmailServiceImplTest {
	@Test
	public void testSendEmail() {
		ApplicationContext context = new ClassPathXmlApplicationContext("applicationContext.xml");
		EmailService emailService = (EmailService) context.getBean("emailService");
		User user = new User();
		user.setUsername("zhangsan");
		user.setPassword("123");
		emailService.sendEmail(user);
	}
}


 3219
3219

 被折叠的 条评论
为什么被折叠?
被折叠的 条评论
为什么被折叠?
 到【灌水乐园】发言


