


Python环境配置与数据处理
一.numpy的基础练习
首先我们使用最简单的程序查看 numpy 版本和配置:
import numpy as np
print(np.__version__)
np.show_config()
1. 创建一个8*8矩阵,并用棋盘图案填充
import numpy as np
z = np.zeros((8,8),dtype=int)
z[1::2,::2] = 1   # 从第 2 行开始,每隔一行,第 0 列开始,每隔一列赋值为 1
z[::2,1::2] = 1   # 从第 0 行开始,每隔一行,第 1 列开始,每隔一列赋值为 1
print(z)
[[0 1 0 1 0 1 0 1]
 [1 0 1 0 1 0 1 0]
 [0 1 0 1 0 1 0 1]
 [1 0 1 0 1 0 1 0]
 [0 1 0 1 0 1 0 1]
 [1 0 1 0 1 0 1 0]
 [0 1 0 1 0 1 0 1]
 [1 0 1 0 1 0 1 0]]
2.创建一个5*5矩阵,对角线下方值为 0,1,2,3,4
z = np.diag(np.arange(5),k=0)
print(z)
[[0 0 0 0 0]
 [0 1 0 0 0]
 [0 0 2 0 0]
 [0 0 0 3 0]
 [0 0 0 0 4]]
3. 如何对数组进行四舍五入操作?
z = np.random.uniform(-10,+10,10)
print(z)
print (np.copysign(np.rint(np.abs(z)), z))
[ 0.89937035 -0.98406144 -3.80507026 -5.0442204   5.51955803 -9.95763718
 -3.11885069  7.76527336  1.32929065  2.82158813]
[  1.  -1.  -4.  -5.   6. -10.  -3.   8.   1.   3.]
4. 给定一个一维数组,将第3~8个元素取反
import numpy as np
z = np.arange(11)
print(z)
z[(3 < z) & (z <= 8)] *= -1
print(z)
[ 0  1  2  3  4  5  6  7  8  9 10]
[ 0  1  2  3 -4 -5 -6 -7 -8  9 10]
5. 提取随机数列整数部分的五种方法
z = np.random.uniform(0,10,10)
print (z - z%1)
print (np.floor(z))
print (np.ceil(z)-1)
print (z.astype(int))
print (np.trunc(z))
[8. 0. 7. 8. 4. 9. 9. 1. 7. 4.]
[8. 0. 7. 8. 4. 9. 9. 1. 7. 4.]
[8. 0. 7. 8. 4. 9. 9. 1. 7. 4.]
[8 0 7 8 4 9 9 1 7 4]
[8. 0. 7. 8. 4. 9. 9. 1. 7. 4.]
6. 创建一个5*5的矩阵,每一行值为0~4
z = np.zeros((5,5))
z += np.arange(5)
print(z)
[[0. 1. 2. 3. 4.]
 [0. 1. 2. 3. 4.]
 [0. 1. 2. 3. 4.]
 [0. 1. 2. 3. 4.]
 [0. 1. 2. 3. 4.]]
7. 创建一个长度为10的随机矩阵,并将最大值替换为0
z = np.random.random(10)
z[z.argmax()] = 0
print(z)
[0.9052845  0.30446842 0.08144894 0.0508552  0.         0.72241404
 0.19015853 0.99036283 0.50018852 0.95928962]
8. 打印每种numpy标量类型的最小和最大可表示值
for dtype in [np.int8, np.int32, np.int64]:
   print(np.iinfo(dtype).min)
   print(np.iinfo(dtype).max)
for dtype in [np.float32, np.float64]:
   print(np.finfo(dtype).min)
   print(np.finfo(dtype).max)
   print(np.finfo(dtype).eps)
-128
127
-2147483648
2147483647
-9223372036854775808
9223372036854775807
-3.4028235e+38
3.4028235e+38
1.1920929e-07
-1.7976931348623157e+308
1.7976931348623157e+308
2.220446049250313e-16
9. 创建一个元素为从10到49的ndarray对象,并将所有元素位置反转
a=np.arange(10,50)
print(a)
down=a[::-1]
print(down)
[10 11 12 13 14 15 16 17 18 19 20 21 22 23 24 25 26 27 28 29 30 31 32 33
 34 35 36 37 38 39 40 41 42 43 44 45 46 47 48 49]
[49 48 47 46 45 44 43 42 41 40 39 38 37 36 35 34 33 32 31 30 29 28 27 26
 25 24 23 22 21 20 19 18 17 16 15 14 13 12 11 10]
10. 创建一个10*10的ndarray对象,且矩阵边界全为1,里面全为0
nd4=np.zeros((10,10))
nd4[0, :] = nd4[9, :] = nd4[:, 0] = nd4[:, 9] = 1
print(nd4)
[[1. 1. 1. 1. 1. 1. 1. 1. 1. 1.]
 [1. 0. 0. 0. 0. 0. 0. 0. 0. 1.]
 [1. 0. 0. 0. 0. 0. 0. 0. 0. 1.]
 [1. 0. 0. 0. 0. 0. 0. 0. 0. 1.]
 [1. 0. 0. 0. 0. 0. 0. 0. 0. 1.]
 [1. 0. 0. 0. 0. 0. 0. 0. 0. 1.]
 [1. 0. 0. 0. 0. 0. 0. 0. 0. 1.]
 [1. 0. 0. 0. 0. 0. 0. 0. 0. 1.]
 [1. 0. 0. 0. 0. 0. 0. 0. 0. 1.]
 [1. 1. 1. 1. 1. 1. 1. 1. 1. 1.]]
二.《python机器学习原理、算法及案例实战》第二章例题
1 天天学习,天天向上
import random

def fib_loop(n):
    listNum=[]
    a,b=0,1
    for i in range(n):
        a,b=b,a+b
        listNum.append(a)
        print(i,listNum)
    return listNum
listPlan=['吃零食','学习','学习','学习','睡觉','吃饭','玩手机','学习','睡觉']
listNum=fib_loop(6)
varIdx=random.randint(0,5)
varRandom=listNum[varIdx]
print('今日计划:',listPlan[varRandom])
0 [1]
1 [1, 1]
2 [1, 1, 2]
3 [1, 1, 2, 3]
4 [1, 1, 2, 3, 5]
5 [1, 1, 2, 3, 5, 8]
今日计划: 睡觉
2 字符串
str='Python String'
print(str[1:3])
print(str[-3:-1])
print(str[3:-1])
print(str[-6:12])
print(str[2:])
print(str*2)
yt
in
hon Strin
Strin
thon String
Python StringPython String
list = ['a',56,112,1.366,'hello',[7,8,9]]
print(list)
print(list[4])
print(list[-2:6])
print(list[2:])
list.append('add')
print(list)
list[2]=0
print(list)
list[:3]=[255,142,'c']
print(list)
list.pop(1)
print(list)
['a', 56, 112, 1.366, 'hello', [7, 8, 9]]
hello
['hello', [7, 8, 9]]
[112, 1.366, 'hello', [7, 8, 9]]
['a', 56, 112, 1.366, 'hello', [7, 8, 9], 'add']
['a', 56, 0, 1.366, 'hello', [7, 8, 9], 'add']
[255, 142, 'c', 1.366, 'hello', [7, 8, 9], 'add']
[255, 'c', 1.366, 'hello', [7, 8, 9], 'add']
3 列表
lis=['兔子','老鼠','老鹰','熊猫','猫']
for item in lis:
    print(item)
for i in enumerate(lis):
    print(i)
for i in range(len(lis)):
    print(lis[i])
兔子
老鼠
老鹰
熊猫
猫
(0, '兔子')
(1, '老鼠')
(2, '老鹰')
(3, '熊猫')
(4, '猫')
兔子
老鼠
老鹰
熊猫
猫
4 元组
tup=('windows',2022,3.1415,[22,63,'july'])
tup2=(56,'KKK')
print(tup)
print(tup[0])
print(tup[3:4])
print(tup+tup2)
print(tup[3])
tup[3][0]=0
tup[3][1]='kitty'
print(tup)
('windows', 2022, 3.1415, [22, 63, 'july'])
windows
([22, 63, 'july'],)
('windows', 2022, 3.1415, [22, 63, 'july'], 56, 'KKK')
[22, 63, 'july']
('windows', 2022, 3.1415, [0, 'kitty', 'july'])
5 字典
dict={'name':['July','Mary','Tom'],'age':18,'class':2001}
print('name:',dict['name'])
dict['Sex']='Man'
dict.update({'No':'001'})
print(dict)
del dict['No']
print(dict)
name: ['July', 'Mary', 'Tom']
{'name': ['July', 'Mary', 'Tom'], 'age': 18, 'class': 2001, 'Sex': 'Man', 'No': '001'}
{'name': ['July', 'Mary', 'Tom'], 'age': 18, 'class': 2001, 'Sex': 'Man'}
三.第三章例题
1.numpy库
a=np.array([1,2,3,4,5],ndmin=2)
print(a)
b=np.array([1,2,3],dtype=complex)
print(b)
[[1 2 3 4 5]]
[1.+0.j 2.+0.j 3.+0.j]
x=np.float32(5)
print('x为:',x)
print('x对象的data属性:',x.data)
print('x对象的size属性:',x.size)
print('x对象的维度:',x.ndim)
y=np.bool_(x)
print('转换为bool类型的x为:',y)
z=np.float16(y)
print('True值转换为float16类型为:',z)
x为: 5.0
x对象的data属性: <memory at 0x000001A10F900860>
x对象的size属性: 1
x对象的维度: 0
转换为bool类型的x为: True
True值转换为float16类型为: 1.0
#使用astype()转换DataFrame
df=pd.DataFrame([{'qty':'3','num':'50'},{'qty':'7','num':'20'}])
print(df.dtypes)
print('-----------------')
df['qty']=df['qty'].astype('int')
df['num']=df['num'].astype('int')
print(df.dtypes)
qty    object
num    object
dtype: object
-----------------
qty    int32
num    int32
dtype: object
#使用axis参数设置当前轴
arr=np.array([[0,1,2],[3,4,5]])
print(arr)
print(arr.sum(axis=0))
print(arr.sum(axis=1))
[[0 1 2]
 [3 4 5]]
[3 5 7]
[ 3 12]
#使用reshape()函数调整数组形状
arr=np.array([0,1,2,3,4,5,6,7])
print('秩为:',arr.ndim)
arr3D=arr.reshape(2,2,2)
print(arr3D)
print('秩为:',arr3D.ndim)
#显示数组维度
s=np.array([[1,2,3],[4,5,6]])
print(s.shape)
s.shape=(3,2)
print(s)
秩为: 1
[[[0 1]
  [2 3]]

 [[4 5]
  [6 7]]]
秩为: 3
(2, 3)
[[1 2]
 [3 4]
 [5 6]]
2 Pandas库
2.1 Series
s1=pd.Series([1,1,1,1,1])
print(s1)
print('------ 字典创建--------')
s2=pd.Series({'Longitude':39,'latitude':116,'Temperature':23})
print('First value in s2:',s2['Longitude'])
print('------ 序列作索引------')
s3=pd.Series([3.4,0.8,2.1,0.3,1.5],range(5,10))
print('First value in s3:',s3[5])
0    1
1    1
2    1
3    1
4    1
dtype: int64
------ 字典创建--------
First value in s2: 39
------ 序列作索引------
First value in s3: 3.4
s2=pd.Series({'Longitude':39,'latitude':116,'Temperature':23})
s2['City']='Beijing'
s2['Temperature']+=2
print(s2)
Longitude           39
latitude           116
Temperature         25
City           Beijing
dtype: object
s3=pd.Series([3.4,0.8,2.1,0.3,1.5],range(5,10))
s3[s3>2]
5    3.4
7    2.1
dtype: float64
2.2 DataFrame
dict1={'col1':[1,2,8,9],'col2':['a','b','c','d']}
df=pd.DataFrame(dict1)
df
| col1 | col2 | |
|---|---|---|
| 0 | 1 | a |
| 1 | 2 | b |
| 2 | 8 | c |
| 3 | 9 | d |
lista=[1,2,3,9]
listb=['a','b','v','h']
df=pd.DataFrame({'col1':lista,'col2':listb})
df
| col1 | col2 | |
|---|---|---|
| 0 | 1 | a |
| 1 | 2 | b |
| 2 | 3 | v |
| 3 | 9 | h |
data=pd.DataFrame(np.arange(16).reshape(4,4),index=['BJ','SH','GZ','SZ'],columns=['q','r','s','t'])
data['q']['BJ']=8
data['t']=8
data
| q | r | s | t | |
|---|---|---|---|---|
| BJ | 8 | 1 | 2 | 8 |
| SH | 4 | 5 | 6 | 8 |
| GZ | 8 | 9 | 10 | 8 |
| SZ | 9 | 13 | 14 | 8 |
data['u']=9
data.drop('SZ',axis=0)
| q | r | s | t | u | |
|---|---|---|---|---|---|
| BJ | 8 | 1 | 2 | 8 | 9 |
| SH | 4 | 5 | 6 | 8 | 9 |
| GZ | 8 | 9 | 10 | 8 | 9 |
df=pd.DataFrame(np.arange(16).reshape(4,4),index=['BJ','SH','GZ','SZ'],columns=['q','r','s','t'])
df.sum(axis=0)
q    24
r    28
s    32
t    36
dtype: int64
df.sum(axis=1)
BJ     6
SH    22
GZ    38
SZ    54
dtype: int64
df.mean(axis=1)
BJ     1.5
SH     5.5
GZ     9.5
SZ    13.5
dtype: float64
a=np.arange(0,60,5)
a=a.reshape(3,4)
df=pd.DataFrame(a)
print(df)
print('------------------------')
print(df.std())
    0   1   2   3
0   0   5  10  15
1  20  25  30  35
2  40  45  50  55
------------------------
0    20.0
1    20.0
2    20.0
3    20.0
dtype: float64
3 Matplotlib
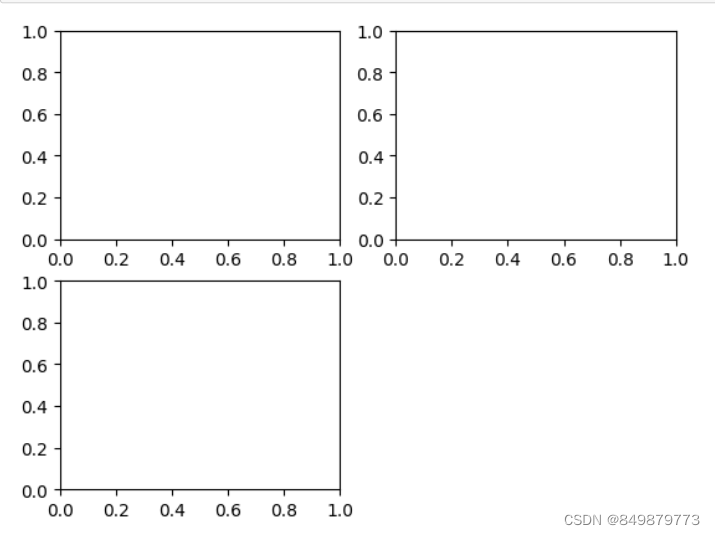
fig=plt.figure()
ax1=fig.add_subplot(2,2,1)
ax1=fig.add_subplot(2,2,2)
ax2=fig.add_subplot(2,2,3)
fig.savefig('./kb.jpg')
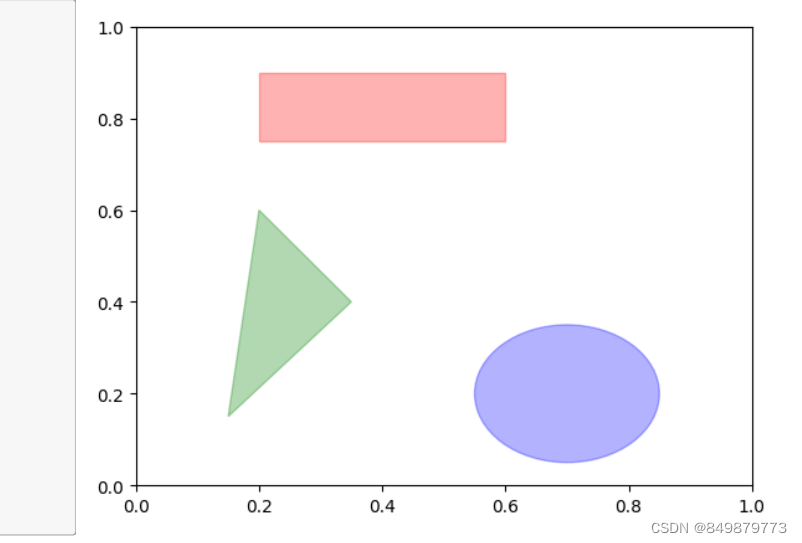
fig=plt.figure()
ax=fig.add_subplot(1,1,1)
rect=plt.Rectangle((0.2,0.75),0.4,0.15,color='r',alpha=0.3)
circ=plt.Circle((0.7,0.2),0.15,color='b',alpha=0.3)
pgon=plt.Polygon([[0.15,0.15],[0.35,0.4],[0.2,0.6]],color='g',alpha=0.3)
ax.add_patch(rect)
ax.add_patch(circ)
ax.add_patch(pgon)
plt.show()
fig.savefig('./fang.jpg')
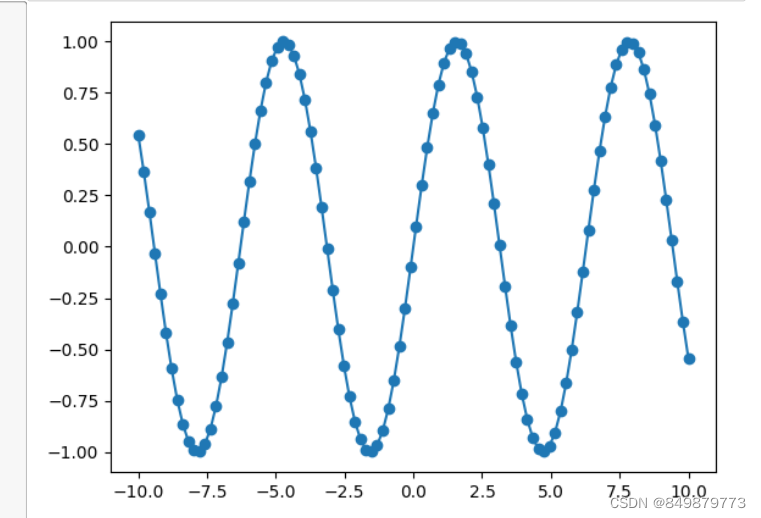
x=np.linspace(-10,10,100)
y=np.sin(x)
plt.plot(x,y,marker='o')
plt.savefig('./sin.jpg')
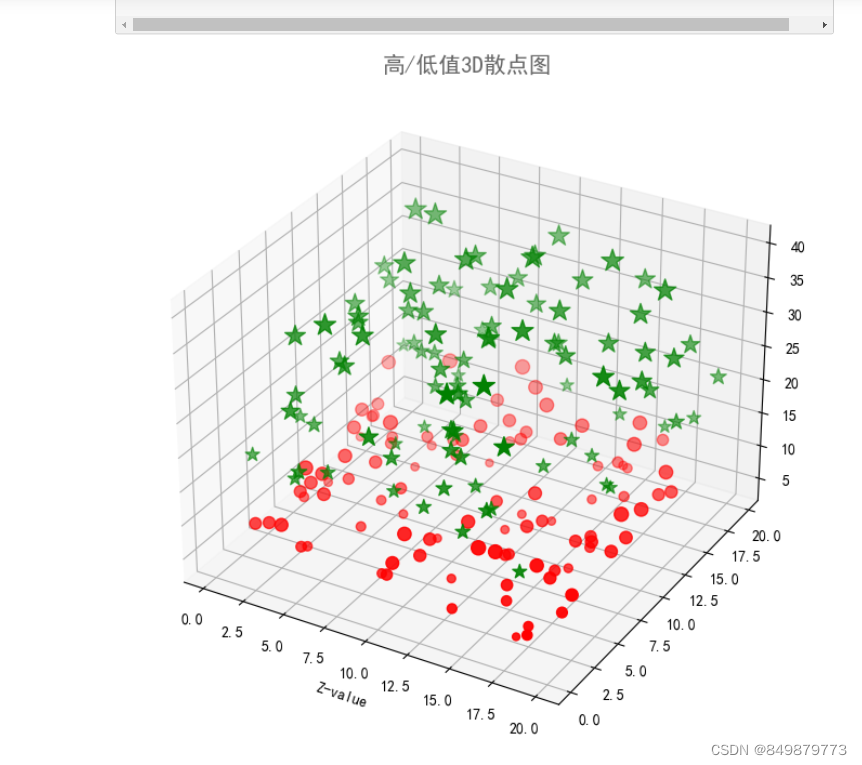
def randrange(n, randFloor, randCeil):
    rnd=np.random.rand(n)
    return (randCeil-randFloor)*rnd + randFloor

plt.rcParams['font.sans-serif']=['SimHei']
fig = plt.figure(figsize=(10,8))
ax=fig.add_subplot(111,projection='3d')
n = 100
for zmin,zmax,c,m,l in [(4,15,'r','o','低值'),(13,40,'g','*','高值')]:
    x=randrange(n,0,20)
    y=randrange(n,0,20)
    z=randrange(n,zmin,zmax)
    ax.scatter(x,y,z,c=c,marker=m,label=l,s=z*6)
ax.set_xlabel('X-value')
ax.set_xlabel('Y-value')
ax.set_xlabel('Z-value')
ax.set_title("高/低值3D散点图",alpha=0.6,size=15,weight='bold')
plt.show()
fig.savefig('./散点图.jpg')
四.什么是图灵测试
图灵测试最早出现在1950年图灵发表的一篇名为《计算机械和智能》(Computing Machinery and Intelligence)的论文中,是判断机器是否具有人工智能的一套方法。而图灵测试是人工智能最初的概念,它甚至早于“人工智能”这个词本身,人工智能一词是在1956年才被提出的。图灵测试的方法很简单,就是让测试者与被测试者(一个人和一台机器)隔开,通过一些装置(如键盘)向被测试者随意提问。进行多次测试后,如果有超过30%的测试者不能确定出被测试者是人还是机器,那么这台机器就通过了测试,并被认为具有人工智能。 它的发明者图灵被誉为计算机科学之父、人工智能之父。


 825
825


 被折叠的 条评论
为什么被折叠?
被折叠的 条评论
为什么被折叠?
 到【灌水乐园】发言


