


1、检索和拉取fastDFS镜像
# 检索fastdfs
docker search fastdfs

# 拉取fastdfs
docker pull delron/fastdfs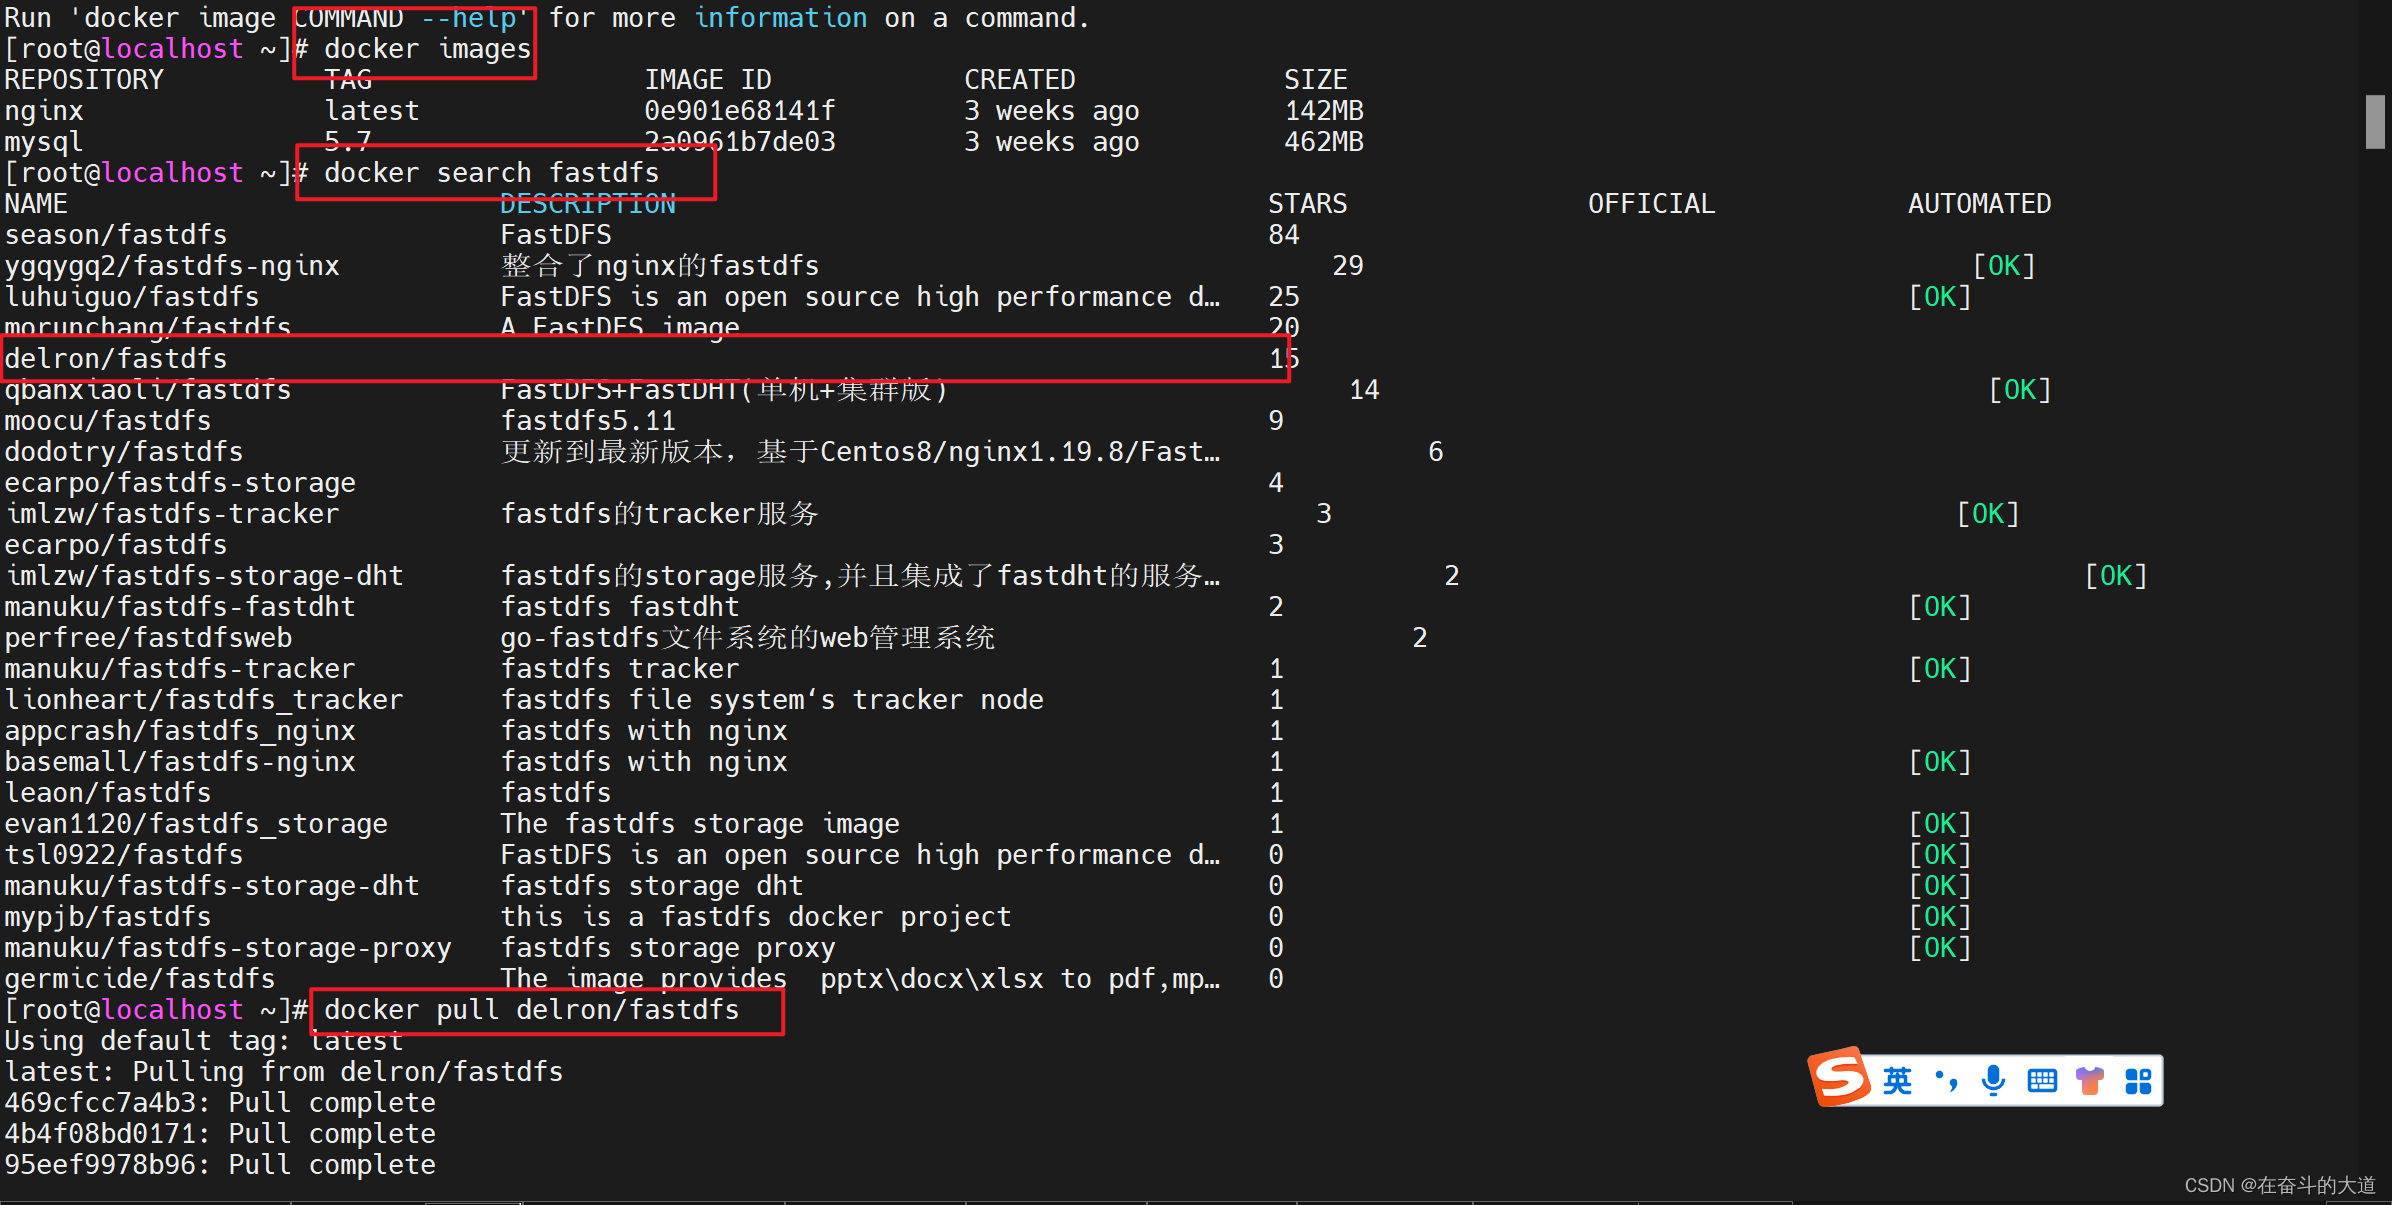
2、使用docker镜像构建tracker容器
跟踪服务器,起到调度的作用
# 创建tracker 挂载文件目录
mkdir -p /usr/local/fdfs/tracker
# 创建fastdfs 跟踪服务器tracker
docker run -d --network=host --name tracker -v
[root@localhost ~]# mkdir -p /usr/local/fdfs/tracker
[root@localhost ~]# docker run -d --network=host --name tracker -v /usr/local/fdfs/tracker:/var/fdfs delron/fastdfs tracker
77cf76bd57a63a98b6bcff52d4edc34d2f02f558a6b17f9d048a303f4660d0ae
3、使用docker镜像构建storage容器
存储服务器,提供容量和备份服务
TRACKER_SERVER=本机的ip地址:22122 本机ip地址不要使用127.0.0.1
# 创建storage 挂载目录
mkdir -p /usr/local/fdfs/storage

# 创建fastdfs 存储服务器storage
docker run -d --network=host --name storage -e TRACKER_SERVER=192.168.43.10:22122 -v /usr/local/fdfs/storage:/var/fdfs -e GROUP_NAME=group1 delron/fastdfs storage
[root@localhost ~]# mkdir -p /usr/local/fdfs/storage
[root@localhost ~]# docker run -d --network=host --name storage -e TRACKER_SERVER=192.168.43.10:22122 -v /usr/local/fdfs/storage:/var/fdfs -e GROUP_NAME=group1 delron/fastdfs storage
- 说明1
x.x.x.x这里要说明一下:这个地址必须使用服务器的的外网地址,否则上传的时候连不上服务器。 - 说明2
group1这个不要随便修改,因为默认的nginx的配置中使用的是0到9的数字,如果想修改这个名字,得进入到storage容器中修改nginx的配置文件
此时两个服务都以启动,进行fastdfs服务的相关配置。
4、storage容器配置
4.1 storage 配置文件
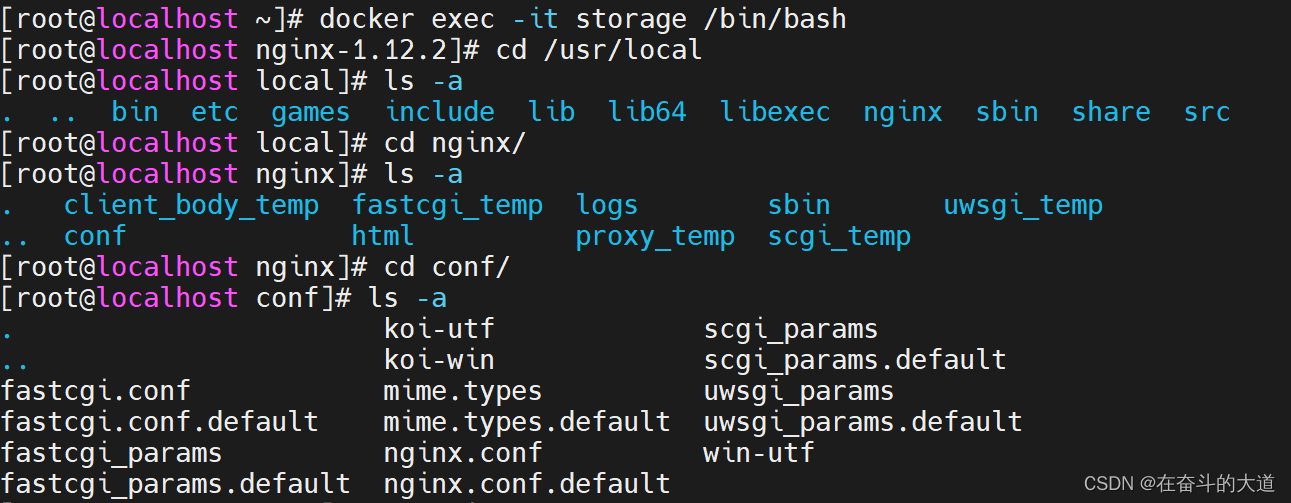
进入storage容器,到storage的配置文件中配置http访问的端口,配置文件在/etc/fdfs目录下的storage.conf。
#进入storage 容器后台服务
[root@localhost ~]# docker exec -it storage /bin/bash
# 切换至storage.cnf 文件所在目录/etc/fdfs
[root@localhost nginx-1.12.2]# cd /etc/fdfs
[root@localhost fdfs]# ls -a
.                   mime.types           storage_ids.conf.sample
..                  mod_fastdfs.conf     tracker.conf
client.conf         storage.conf         tracker.conf.sample
client.conf.sample  storage.conf.sample
http.conf           storage_ids.conf
[root@localhost fdfs]# vi storage.conf
# 查看storage.cnf 文件相关配置
[root@localhost fdfs]# cat storage.conf.sample
# is this config file disabled
# false for enabled
# true for disabled
disabled=false

# the name of the group this storage server belongs to
#
# comment or remove this item for fetching from tracker server,
# in this case, use_storage_id must set to true in tracker.conf,
# and storage_ids.conf must be configed correctly.
group_name=group1

# bind an address of this host
# empty for bind all addresses of this host
bind_addr=

# if bind an address of this host when connect to other servers
# (this storage server as a client)
# true for binding the address configed by above parameter: "bind_addr"
# false for binding any address of this host
client_bind=true

# the storage server port
port=23000

# connect timeout in seconds
# default value is 30s
connect_timeout=30

# network timeout in seconds
# default value is 30s
network_timeout=60

# heart beat interval in seconds
heart_beat_interval=30

# disk usage report interval in seconds
stat_report_interval=60

# the base path to store data and log files
base_path=/home/yuqing/fastdfs

# max concurrent connections the server supported
# default value is 256
# more max_connections means more memory will be used
max_connections=256

# the buff size to recv / send data
# this parameter must more than 8KB
# default value is 64KB
# since V2.00
buff_size = 256KB

# accept thread count
# default value is 1
# since V4.07
accept_threads=1

# work thread count, should <= max_connections
# work thread deal network io
# default value is 4
# since V2.00
work_threads=4

# if disk read / write separated
##  false for mixed read and write
##  true for separated read and write
# default value is true
# since V2.00
disk_rw_separated = true

# disk reader thread count per store base path
# for mixed read / write, this parameter can be 0
# default value is 1
# since V2.00
disk_reader_threads = 1

# disk writer thread count per store base path
# for mixed read / write, this parameter can be 0
# default value is 1
# since V2.00
disk_writer_threads = 1

# when no entry to sync, try read binlog again after X milliseconds
# must > 0, default value is 200ms
sync_wait_msec=50

# after sync a file, usleep milliseconds
# 0 for sync successively (never call usleep)
sync_interval=0

# storage sync start time of a day, time format: Hour:Minute
# Hour from 0 to 23, Minute from 0 to 59
sync_start_time=00:00

# storage sync end time of a day, time format: Hour:Minute
# Hour from 0 to 23, Minute from 0 to 59
sync_end_time=23:59

# write to the mark file after sync N files
# default value is 500
write_mark_file_freq=500

# path(disk or mount point) count, default value is 1
store_path_count=1

# store_path#, based 0, if store_path0 not exists, it's value is base_path
# the paths must be exist
store_path0=/home/yuqing/fastdfs
#store_path1=/home/yuqing/fastdfs2

# subdir_count  * subdir_count directories will be auto created under each
# store_path (disk), value can be 1 to 256, default value is 256
subdir_count_per_path=256

# tracker_server can ocur more than once, and tracker_server format is
#  "host:port", host can be hostname or ip address
tracker_server=192.168.209.121:22122

#standard log level as syslog, case insensitive, value list:
### emerg for emergency
### alert
### crit for critical
### error
### warn for warning
### notice
### info
### debug
log_level=info

#unix group name to run this program,
#not set (empty) means run by the group of current user
run_by_group=

#unix username to run this program,
#not set (empty) means run by current user
run_by_user=

# allow_hosts can ocur more than once, host can be hostname or ip address,
# "*" (only one asterisk) means match all ip addresses
# we can use CIDR ips like 192.168.5.64/26
# and also use range like these: 10.0.1.[0-254] and host[01-08,20-25].domain.com
# for example:
# allow_hosts=10.0.1.[1-15,20]
# allow_hosts=host[01-08,20-25].domain.com
# allow_hosts=192.168.5.64/26
allow_hosts=*

# the mode of the files distributed to the data path
# 0: round robin(default)
# 1: random, distributted by hash code
file_distribute_path_mode=0

# valid when file_distribute_to_path is set to 0 (round robin),
# when the written file count reaches this number, then rotate to next path
# default value is 100
file_distribute_rotate_count=100

# call fsync to disk when write big file
# 0: never call fsync
# other: call fsync when written bytes >= this bytes
# default value is 0 (never call fsync)
fsync_after_written_bytes=0

# sync log buff to disk every interval seconds
# must > 0, default value is 10 seconds
sync_log_buff_interval=10

# sync binlog buff / cache to disk every interval seconds
# default value is 60 seconds
sync_binlog_buff_interval=10

# sync storage stat info to disk every interval seconds
# default value is 300 seconds
sync_stat_file_interval=300

# thread stack size, should >= 512KB
# default value is 512KB
thread_stack_size=512KB

# the priority as a source server for uploading file.
# the lower this value, the higher its uploading priority.
# default value is 10
upload_priority=10

# the NIC alias prefix, such as eth in Linux, you can see it by ifconfig -a
# multi aliases split by comma. empty value means auto set by OS type
# default values is empty
if_alias_prefix=

# if check file duplicate, when set to true, use FastDHT to store file indexes
# 1 or yes: need check
# 0 or no: do not check
# default value is 0
check_file_duplicate=0

# file signature method for check file duplicate
## hash: four 32 bits hash code
## md5: MD5 signature
# default value is hash
# since V4.01
file_signature_method=hash

# namespace for storing file indexes (key-value pairs)
# this item must be set when check_file_duplicate is true / on
key_namespace=FastDFS

# set keep_alive to 1 to enable persistent connection with FastDHT servers
# default value is 0 (short connection)
keep_alive=0

# you can use "#include filename" (not include double quotes) directive to
# load FastDHT server list, when the filename is a relative path such as
# pure filename, the base path is the base path of current/this config file.
# must set FastDHT server list when check_file_duplicate is true / on
# please see INSTALL of FastDHT for detail
##include /home/yuqing/fastdht/conf/fdht_servers.conf

# if log to access log
# default value is false
# since V4.00
use_access_log = false

# if rotate the access log every day
# default value is false
# since V4.00
rotate_access_log = false

# rotate access log time base, time format: Hour:Minute
# Hour from 0 to 23, Minute from 0 to 59
# default value is 00:00
# since V4.00
access_log_rotate_time=00:00

# if rotate the error log every day
# default value is false
# since V4.02
rotate_error_log = false

# rotate error log time base, time format: Hour:Minute
# Hour from 0 to 23, Minute from 0 to 59
# default value is 00:00
# since V4.02
error_log_rotate_time=00:00

# rotate access log when the log file exceeds this size
# 0 means never rotates log file by log file size
# default value is 0
# since V4.02
rotate_access_log_size = 0

# rotate error log when the log file exceeds this size
# 0 means never rotates log file by log file size
# default value is 0
# since V4.02
rotate_error_log_size = 0

# keep days of the log files
# 0 means do not delete old log files
# default value is 0
log_file_keep_days = 0

# if skip the invalid record when sync file
# default value is false
# since V4.02
file_sync_skip_invalid_record=false

# if use connection pool
# default value is false
# since V4.05
use_connection_pool = false

# connections whose the idle time exceeds this time will be closed
# unit: second
# default value is 3600
# since V4.05
connection_pool_max_idle_time = 3600

# use the ip address of this storage server if domain_name is empty,
# else this domain name will ocur in the url redirected by the tracker server
http.domain_name=

# the port of the web server on this storage server
http.server_port=8888
默认端口是8888,可以进行修改也可以不进行修改(建议不进行修改)。
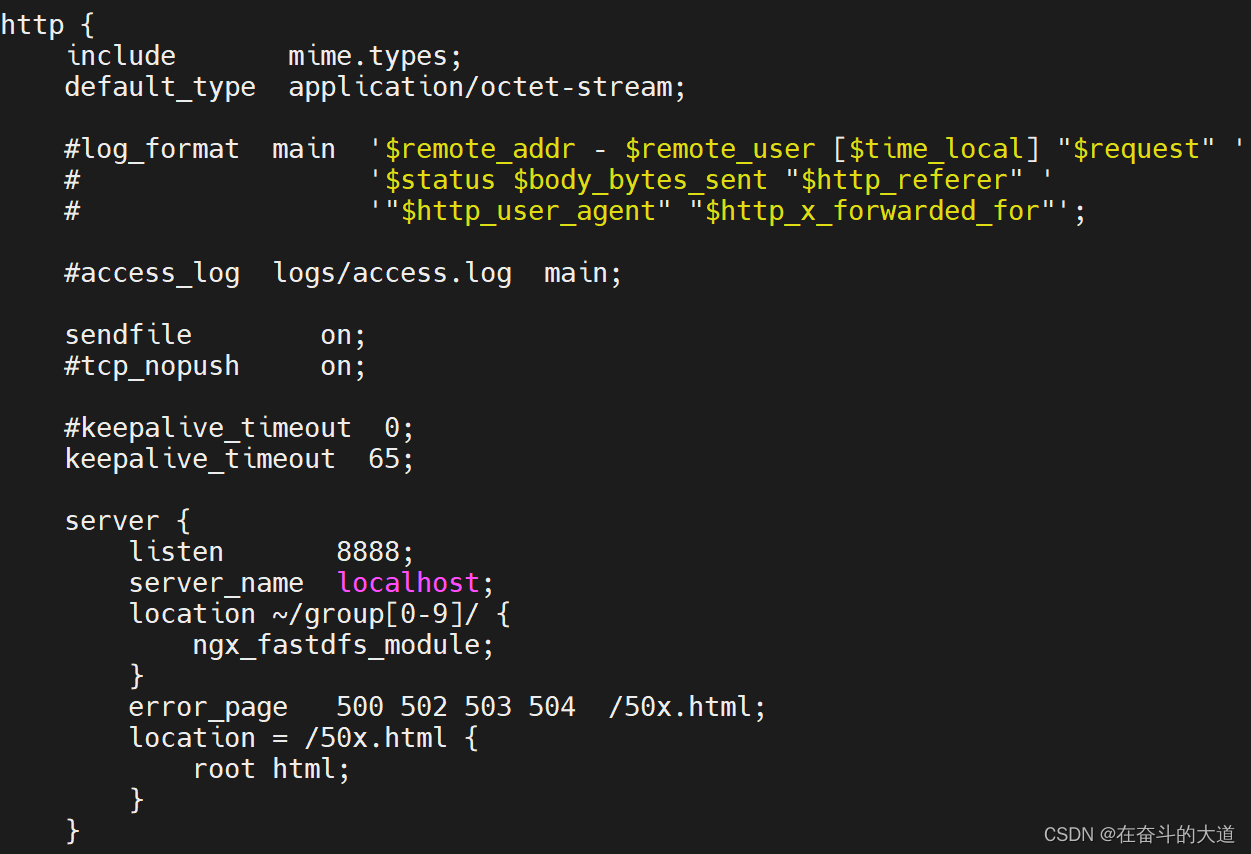
4.2 nginx 配置
进入storage容器配置nginx,在/usr/local/nginx目录下,修改nginx.conf文件
默认配置如下:
 可以修改为如下
# 路径地址
location /group1/M00 {

        alias  /var/fdfs;  #storage 实现存储文件目录

    }
也可以不做任何修改。(建议不做修改)
5、Tracker容器配置
进入到tracker服务器,配置一下tracker_server的服务器地址。
# 进入tracker 服务配置
docker exec -it tracker /bin/bash
# 编辑storage 服务地址
vi /etc/fdfs/client.conf
[root@localhost ~]# docker exec -it tracker /bin/bash
[root@localhost nginx-1.12.2]# cat /etc/fdfs/client.conf
# connect timeout in seconds
# default value is 30s
connect_timeout=30
# network timeout in seconds
# default value is 30s
network_timeout=60
# the base path to store log files
base_path=/var/fdfs
# tracker_server can ocur more than once, and tracker_server format is
# "host:port", host can be hostname or ip address
tracker_server=192.168.0.197:22122
将配置 tracker_server=x.x.x.x:22122
到这其实fastDFS就配好了
这里的x.x.x.x也建议设置为服务器的内网ip。
6、文件上传测试
进入storage容器,进入/var/fdfs目录
# 进入storage 容器后台服务
docker exec -it storage bash
# 切换至storage 上传文件实际存储目录地址
cd /var/fdfs
# 在当前目录新建a.txt 文件,并且写入hello, world 内容
echo hello,world>a.txt
# 执行a.txt 文本上传
/usr/bin/fdfs_upload_file /etc/fdfs/client.conf a.txt
[root@localhost ~]# docker exec -it storage bash
[root@localhost nginx-1.12.2]# cd /var/fdfs
[root@localhost fdfs]# echo hello,world>a.txt
[root@localhost fdfs]# /usr/bin/fdfs_upload_file /etc/fdfs/client.conf a.txt
group1/M00/00/00/wKgrCmKuo9GAX5N6AAAADLMSuiI034.txt
浏览器访问 http://ip:8888group1/M00/00/00/wKgrCmKuo9GAX5N6AAAADLMSuiI034.txt
端口根据你在starage里面设置的要保持一致,访问之前关闭防火墙 或者自己单独开放端口命令如下:

7、开放端口(我个人是关闭CentOS 宿主主机的防火墙)
firewall-cmd --zone=public --permanent --add-port=8888/tcp

firewall-cmd --zone=public --permanent --add-port=22122/tcp

firewall-cmd --zone=public --permanent --add-port=23000/tcp

# 重启防火墙
systemctl restart firewalld
8、开机启动容器(一般是运维执行指令,对于普通开发建议使用)
docker update --restart=always tracker

docker update --restart=always storage


 121
121

 被折叠的 条评论
为什么被折叠?
被折叠的 条评论
为什么被折叠?
 到【灌水乐园】发言


