首先,前三行是导入头文件, 紧接着的就是你使用的WIFI名称和密码,mqtt服务器地址(我使用的是这个地址,也是一个公共服务器,你可以跟我用一样的)。第7行是ESP8266的发布主题,8行是ESP8266的订阅主题。 发布主题的名字和订阅主题的名字你可以设置为任意的,只要记得如何区分就行。
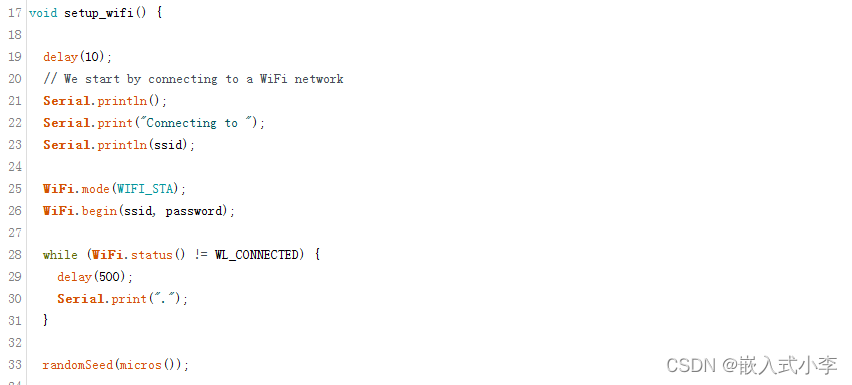
接下来是WIFI设置,不用改
下面是回调函数,当服务器给ESP8266发数据时,8266就执行这里面的函数。这里面使用了json解析的库函数,所以要安装json第三方库。
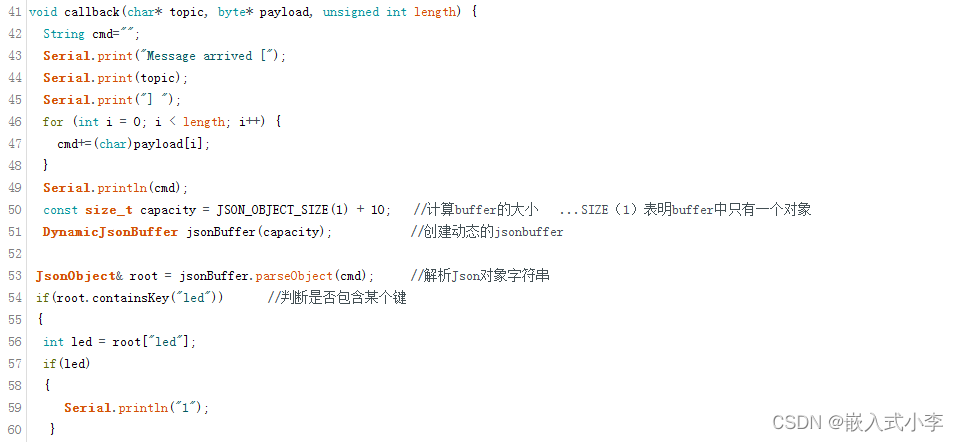
这函数里面,我实现的功能是:
发送“led”: 1 时,打印1,发送 “led”: 0 时,打印2.
实现了这个功能以后,稍加修改,就可以实现通过手机APP控制单片机上任意设备的功能!
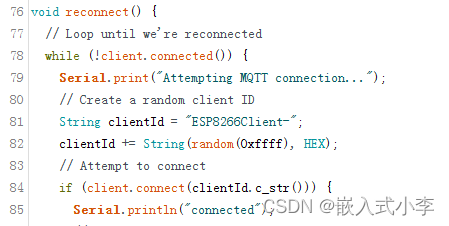
WIFI重连函数
代码的主题部分:
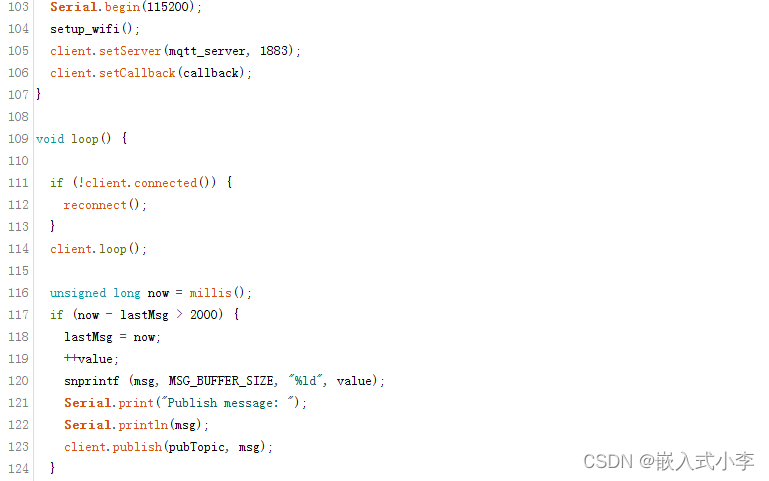
串口波特率设置的为115200,服务器端口号设置为1883. 这里实现的功能是,每隔两秒钟,就给服务器发送自增的数字。
完整代码如下:
#include <ESP8266WiFi.h>
#include <PubSubClient.h>
#include <ArduinoJson.h>
const char* ssid = "lig";          //WIFI名称
const char* password = "1521";      //WIFI密码   这里改成你自己的WIFI名称和密码
const char* mqtt_server = "broker-cn.emqx.io";    //mqtt服务器地址 (IP/域名)这里可以不改
const char *pubTopic="my_pubtopic";
const char *subTopic="my_subtopic";        //订阅的主题

WiFiClient espClient;
PubSubClient client(espClient);
unsigned long lastMsg = 0;
#define MSG_BUFFER_SIZE  (50)
char msg[MSG_BUFFER_SIZE];
int value = 0;

void setup_wifi() {

  delay(10);
  // We start by connecting to a WiFi network
  Serial.println();
  Serial.print("Connecting to ");
  Serial.println(ssid);

  WiFi.mode(WIFI_STA);
  WiFi.begin(ssid, password);

  while (WiFi.status() != WL_CONNECTED) {
    delay(500);
    Serial.print(".");
  }

  randomSeed(micros());

  Serial.println("");
  Serial.println("WiFi connected");
  Serial.println("IP address: ");
  Serial.println(WiFi.localIP());
}

void callback(char* topic, byte* payload, unsigned int length) {
  String cmd="";
  Serial.print("Message arrived [");
  Serial.print(topic);
  Serial.print("] ");
  for (int i = 0; i < length; i++) {
    cmd+=(char)payload[i];
  }
  Serial.println(cmd);
  const size_t capacity = JSON_OBJECT_SIZE(1) + 10;   //计算buffer的大小   ...SIZE(1)表明buffer中只有一个对象
  DynamicJsonBuffer jsonBuffer(capacity);           //创建动态的jsonbuffer

 JsonObject& root = jsonBuffer.parseObject(cmd);     //解析Json对象字符串
 if(root.containsKey("led"))      //判断是否包含某个键
 {
  int led = root["led"];
  if(led)
  {
     Serial.println("1");
   }
  else
    Serial.println("2");
 }
 if(root.containsKey("beep"))      //判断是否包含某个键
 {
  int beep = root["beep"];
  if(beep)
  {
     Serial.println("3");
   }
  else
    Serial.println("4");
 }
}

void reconnect() {
  // Loop until we're reconnected
  while (!client.connected()) {
    Serial.print("Attempting MQTT connection...");
    // Create a random client ID
    String clientId = "ESP8266Client-";
    clientId += String(random(0xffff), HEX);
    // Attempt to connect
    if (client.connect(clientId.c_str())) {
      Serial.println("connected");
      // Once connected, publish an announcement...
      client.publish(pubTopic, "hello world");    //发布的主题
      // ... and resubscribe
      client.subscribe(subTopic);        //设置订阅的主题
    } else {
      Serial.print("failed, rc=");
      Serial.print(client.state());
      Serial.println(" try again in 5 seconds");
      // Wait 5 seconds before retrying
      delay(5000);
    }
  }
}


void setup() {
  Serial.begin(115200);
  setup_wifi();
  client.setServer(mqtt_server, 1883);
  client.setCallback(callback);
}

void loop() {

  if (!client.connected()) {
    reconnect();
  }
  client.loop();

  unsigned long now = millis();
  if (now - lastMsg > 2000) {
    lastMsg = now;
    ++value;
    snprintf (msg, MSG_BUFFER_SIZE, "%ld", value);
    Serial.print("Publish message: ");
    Serial.println(msg);
    client.publish(pubTopic, msg);
  }
}
4.功能验证
打开MQTT调试助手,进入设置界面
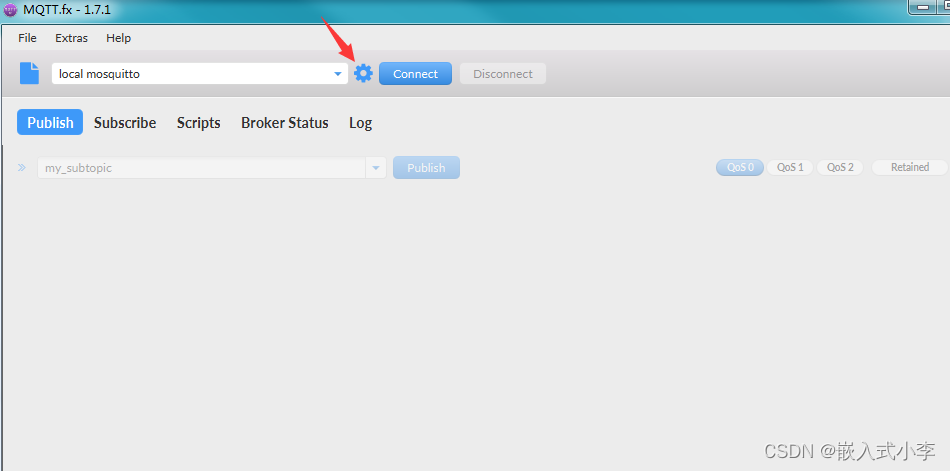
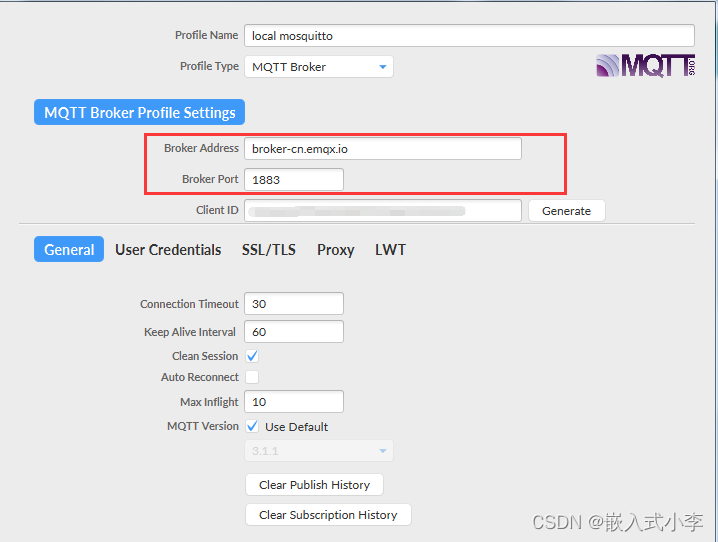
服务器地址和端口号很重要,设置为和你8266代码里面一样的
设置成功后点击连接

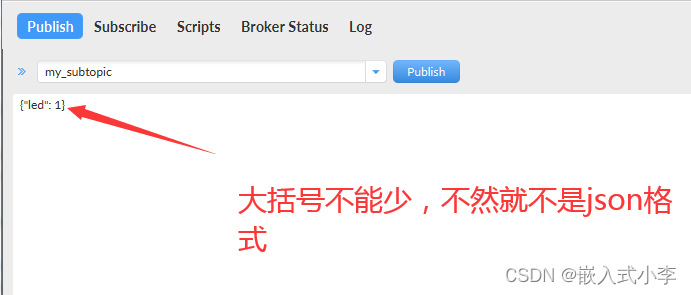
将服务器的发布主题设置为8266上的订阅主题,这样,只要你一发布内容,服务器就会自动推送给8266,8266就可以接收数据了。

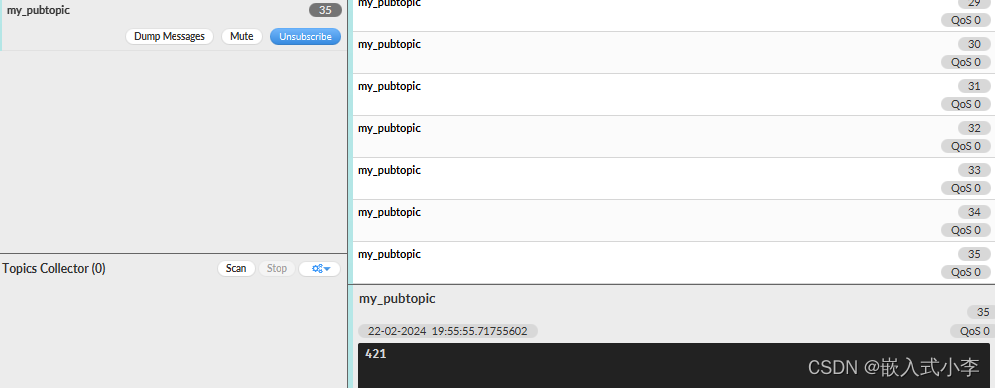
同理,将服务器的订阅主题设置为8266的发布主题,这样服务器就能接收到8266上发的数据。

服务器接收的数据如下:
通过服务器发布消息: (必须为json格式)


 6817
6817

 被折叠的 条评论
为什么被折叠?


