labelview连续打印设置方法

本文介绍了如何使用LabelView按SN号连续打印二维码贴纸,详细解析了数据准备、ODBC设置和条码编辑三个阶段,包括Excel数据录入、ODBC数据源配置以及标签编辑中的关键步骤,帮助用户高效完成批量打印任务。
摘要由CSDN通过智能技术生成

      工程部有一沓图纸,需要将PN和SN做成二维码贴纸。可是没有人懂得怎么使用labelview按SN号连续打印,如果按单个SN号制作一个标签贴纸,工作量巨大,便找我来帮忙。其实我对labelview也是完全没了解的呀,条码打印这个东西平时并不接触,好奇心还是害死了我这只猫,我花了四个小时总算琢磨出来了。

      要做到使用labelview总共分为三个阶段:数据准备阶段、ODBC设置阶段、条码编辑阶段

    1、数据准备阶段

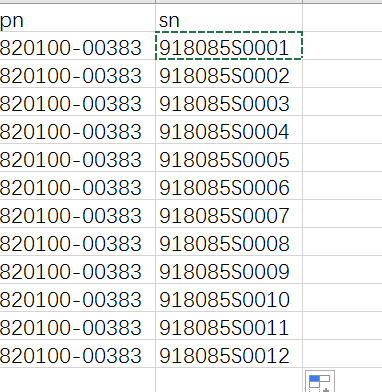
        我们将所有的数据按列录入到excl表之中,由于PN相同,SN又是顺序排列的,所以在excl中很快就录入完毕了。首行的是要有字段名的。


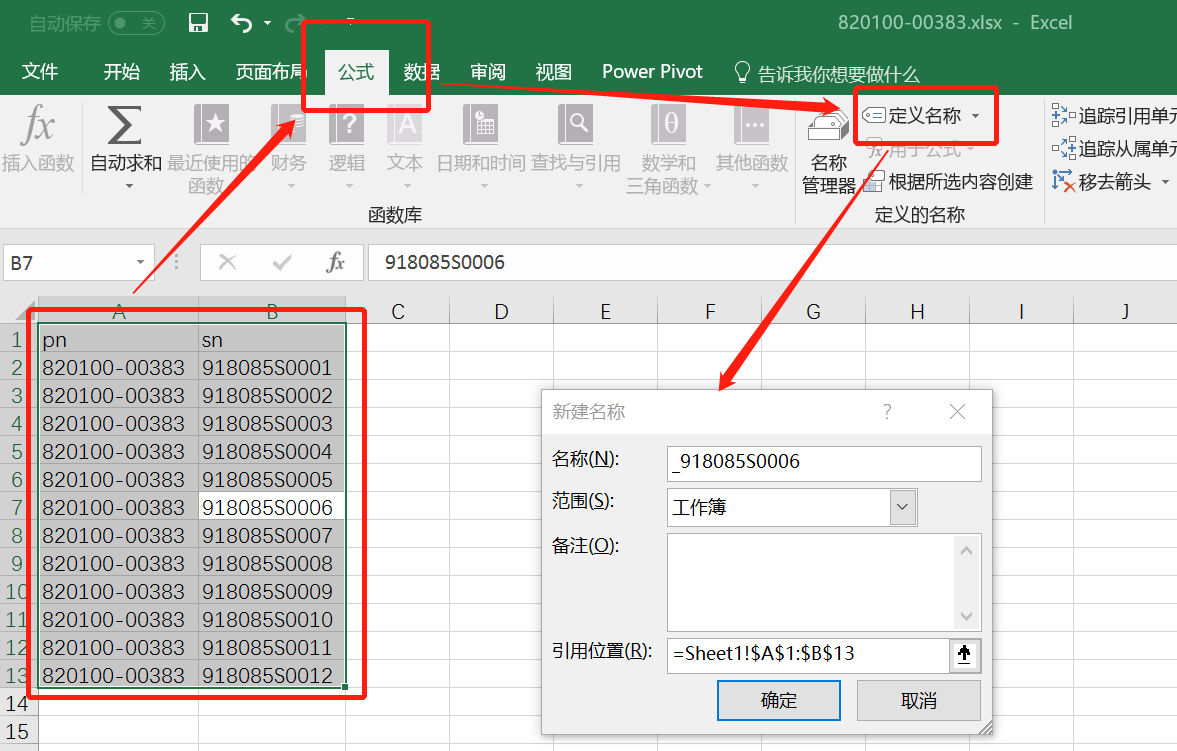
      全选数据,在“公式|定义名称”中添加数据的定义,这步直接关系到第三阶段标签编辑中的数据选择


        保存为“.xls”格式后退出,格式的选择关系到第二阶段ODBC驱动的选择。

2、ODBC设置阶段

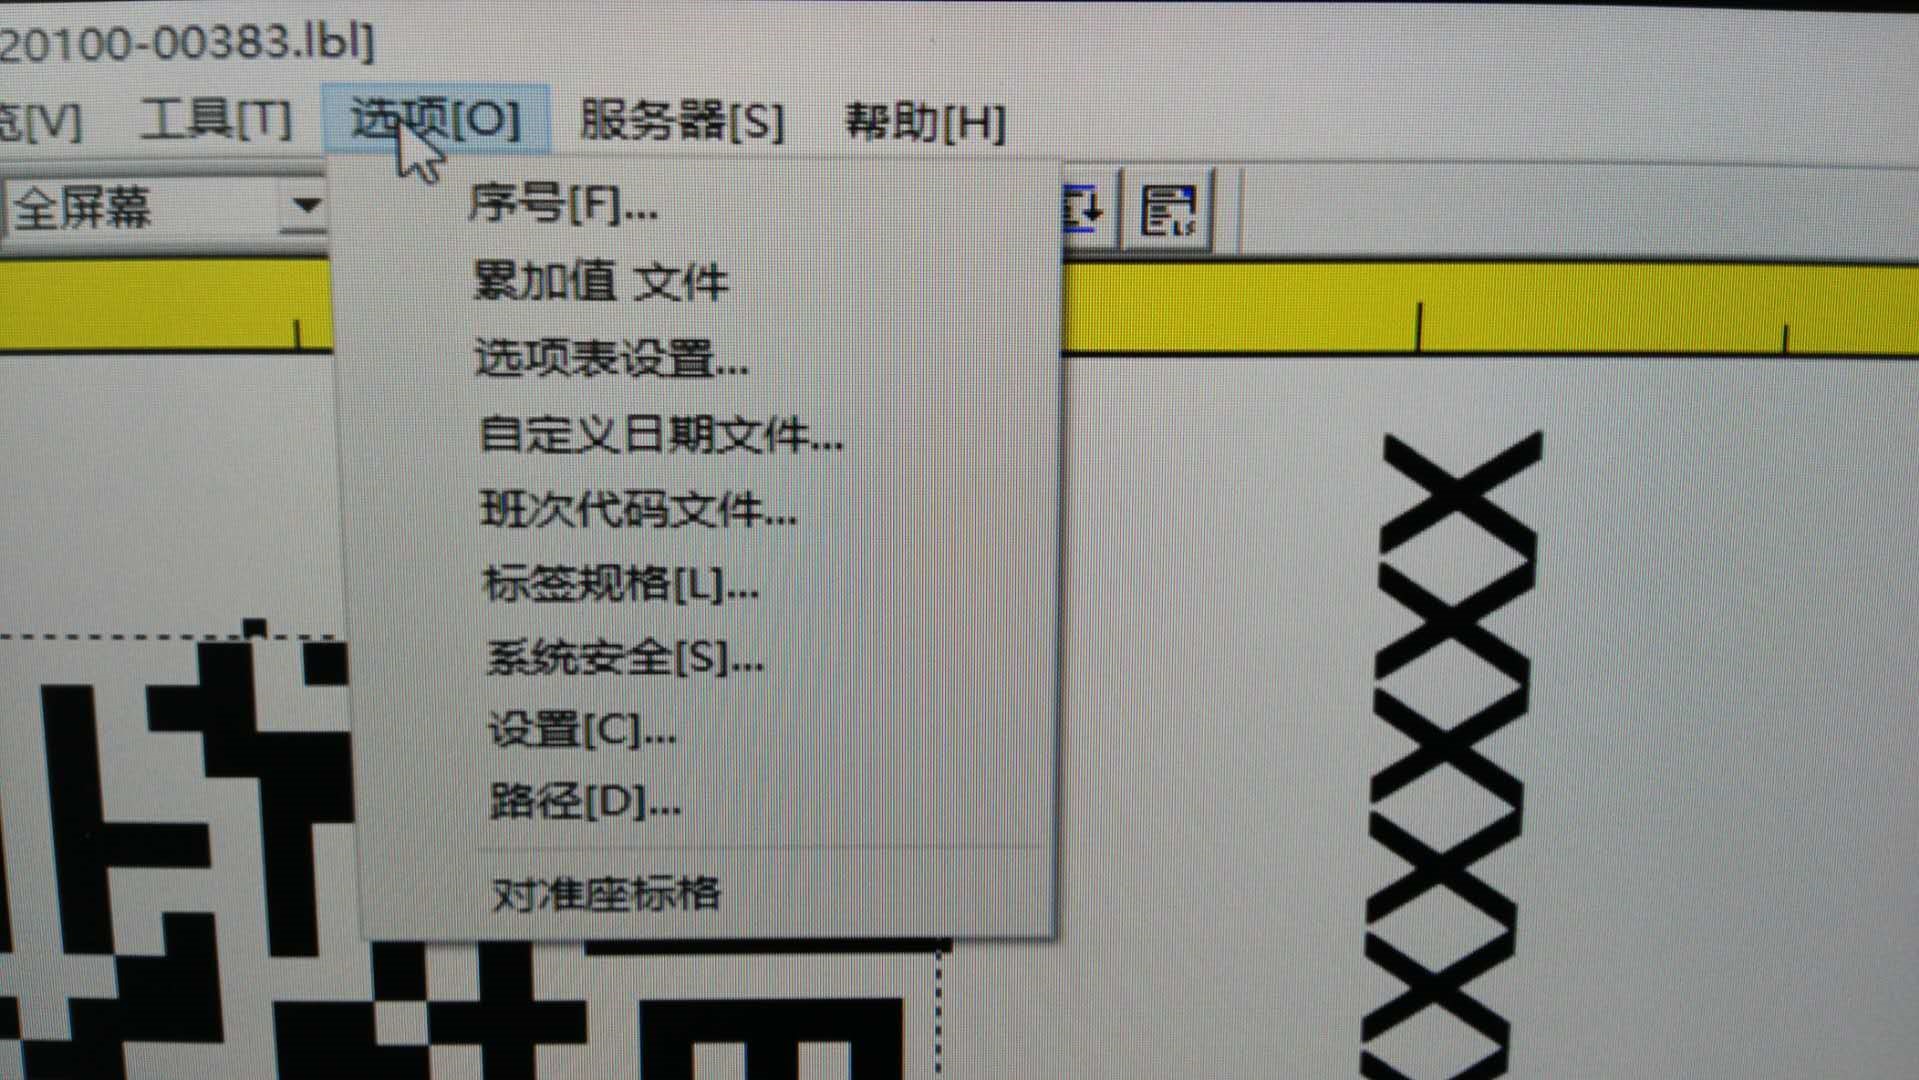
        打开labelview7.0 在菜单栏“选项|路径”中,选择“ODBC Administrator...”


  • 0
    点赞
  • 0
    收藏
    觉得还不错? 一键收藏
  • 0
    评论
以下是一个 LabelView 的示例代码,可以在 Android 平台上使用: ```xml <com.example.myapp.LabelView android:id="@+id/label_view" android:layout_width="wrap_content" android:layout_height="wrap_content" android:text="Hello World!" app:labelBackgroundColor="@color/colorPrimary" app:labelTextColor="@android:color/white" app:labelPadding="8dp" app:labelCornerRadius="4dp" /> ``` 其中,`LabelView` 是自定义的 View 类,继承自 `TextView`,并添加了一些额外的属性,如 `labelBackgroundColor`、`labelTextColor`、`labelPadding` 和 `labelCornerRadius`。这些属性可以通过在 XML 中设置来改变 LabelView 的样式。 下面是 `LabelView` 类的代码: ```java public class LabelView extends AppCompatTextView { private int backgroundColor; private int textColor; private int padding; private int cornerRadius; public LabelView(Context context) { super(context); init(context, null); } public LabelView(Context context, AttributeSet attrs) { super(context, attrs); init(context, attrs); } public LabelView(Context context, AttributeSet attrs, int defStyleAttr) { super(context, attrs, defStyleAttr); init(context, attrs); } private void init(Context context, AttributeSet attrs) { TypedArray typedArray = context.obtainStyledAttributes(attrs, R.styleable.LabelView); backgroundColor = typedArray.getColor(R.styleable.LabelView_labelBackgroundColor, Color.TRANSPARENT); textColor = typedArray.getColor(R.styleable.LabelView_labelTextColor, Color.BLACK); padding = typedArray.getDimensionPixelSize(R.styleable.LabelView_labelPadding, 0); cornerRadius = typedArray.getDimensionPixelSize(R.styleable.LabelView_labelCornerRadius, 0); typedArray.recycle(); setBackgroundColor(backgroundColor); setTextColor(textColor); setPadding(padding, padding, padding, padding); if (cornerRadius > 0) { setBackground(createBackgroundDrawable()); } } private Drawable createBackgroundDrawable() { GradientDrawable drawable = new GradientDrawable(); drawable.setColor(backgroundColor); drawable.setCornerRadius(cornerRadius); return drawable; } public void setBackgroundColor(int backgroundColor) { this.backgroundColor = backgroundColor; if (cornerRadius > 0) { setBackground(createBackgroundDrawable()); } else { super.setBackgroundColor(backgroundColor); } } public void setLabelTextColor(int textColor) { this.textColor = textColor; setTextColor(textColor); } public void setLabelPadding(int padding) { this.padding = padding; setPadding(padding, padding, padding, padding); } public void setLabelCornerRadius(int cornerRadius) { this.cornerRadius = cornerRadius; if (cornerRadius > 0) { setBackground(createBackgroundDrawable()); } else { super.setBackgroundColor(backgroundColor); } } } ``` 在 `init()` 方法中,我们通过获取 XML 中设置的属性值来初始化 LabelView 的样式。如果设置了圆角半径 `cornerRadius`,则创建一个 `GradientDrawable` 并设置LabelView 的背景。否则,直接调用 `super.setBackgroundColor()` 方法设置背景色。同时,我们还提供了一些公开方法,使得使用者可以在代码中动态地改变 LabelView 的样式。
评论
添加红包

请填写红包祝福语或标题

红包个数最小为10个

红包金额最低5元

当前余额3.43前往充值 >
需支付:10.00
成就一亿技术人!
领取后你会自动成为博主和红包主的粉丝 规则
hope_wisdom
发出的红包
实付
使用余额支付
点击重新获取
扫码支付
钱包余额 0

抵扣说明:

1.余额是钱包充值的虚拟货币,按照1:1的比例进行支付金额的抵扣。
2.余额无法直接购买下载,可以购买VIP、付费专栏及课程。

余额充值