


参考:https://github.com/ageitgey/face_recognition
公司项目需求,要出一个人脸检测与识别的demo,查看网上比较成熟的是face_recognition方案,因此在电脑上按照推荐步骤进行调试。face_recognition使用dlib最先进的面部识别功能构建而成,并且该模型在LFW数据集中有99.38%的准确率。
LFW人脸数据库是由美国马萨诸塞州立大学阿默斯特分校计算机视觉实验室整理完成的数据库,主要用来研究非受限情况下的人脸识别问题。LFW数据库主要是从互联网上搜集图像,一共含有13000多张人脸图像,每张图像都被标识出对应的人的名字,其中有1680人对应不只一张照片。
1 安装dlib
首先复制代码
git clone https://github.com/davisking/dlib.git然后build
cd dlib
mkdir build
cd build
cmake ..
cmake --build .
编译安装
cd ..
python3 setup.py install
安装完之后运行python3,然后倒入 import dlib,如果没有报错则安装成功
2 下载face_recognition模块
pip3 install face_recognition安装完之后,就可以导入该模块使用
3 视频中检测人脸
在本地放一个测试视频,放入两张带名字标签的图片,下边代码即可实现检测
#!/usr/bin/python

import face_recognition
import cv2

# This is a demo of running face recognition on live video from your webcam. It's a little more complicated than the
# other example, but it includes some basic performance tweaks to make things run a lot faster:
#   1. Process each video frame at 1/4 resolution (though still display it at full resolution)
#   2. Only detect faces in every other frame of video.

# PLEASE NOTE: This example requires OpenCV (the `cv2` library) to be installed only to read from your webcam.
# OpenCV is *not* required to use the face_recognition library. It's only required if you want to run this
# specific demo. If you have trouble installing it, try any of the other demos that don't require it instead.

# Get a reference to webcam #0 (the default one)
video_capture = cv2.VideoCapture("test.mp4")

# Load a sample picture and learn how to recognize it.
obama_image = face_recognition.load_image_file("obama.jpg")
obama_face_encoding = face_recognition.face_encodings(obama_image)[0]

# Load a second sample picture and learn how to recognize it.
biden_image = face_recognition.load_image_file("biden.jpg")
biden_face_encoding = face_recognition.face_encodings(biden_image)[0]

# Create arrays of known face encodings and their names
known_face_encodings = [
    obama_face_encoding,
    biden_face_encoding
]
known_face_names = [
    "zongxp",
    "Joe Biden"
]

# Initialize some variables
face_locations = []
face_encodings = []
face_names = []
process_this_frame = True

while True:
    # Grab a single frame of video
    ret, frame = video_capture.read()

    # Resize frame of video to 1/4 size for faster face recognition processing
    small_frame = cv2.resize(frame, (0, 0), fx=0.25, fy=0.25)

    # Convert the image from BGR color (which OpenCV uses) to RGB color (which face_recognition uses)
    rgb_small_frame = small_frame[:, :, ::-1]

    # Only process every other frame of video to save time
    if process_this_frame:
        # Find all the faces and face encodings in the current frame of video
        face_locations = face_recognition.face_locations(rgb_small_frame)
        face_encodings = face_recognition.face_encodings(rgb_small_frame, face_locations)

        face_names = []
        for face_encoding in face_encodings:
            # See if the face is a match for the known face(s)
            matches = face_recognition.compare_faces(known_face_encodings, face_encoding)
            name = "Unknown"

            # If a match was found in known_face_encodings, just use the first one.
            if True in matches:
                first_match_index = matches.index(True)
                name = known_face_names[first_match_index]

            face_names.append(name)

    process_this_frame = not process_this_frame


    # Display the results
    for (top, right, bottom, left), name in zip(face_locations, face_names):
        # Scale back up face locations since the frame we detected in was scaled to 1/4 size
        top *= 4
        right *= 4
        bottom *= 4
        left *= 4

        # Draw a box around the face
        cv2.rectangle(frame, (left, top), (right, bottom), (0, 0, 255), 2)

        # Draw a label with a name below the face
        cv2.rectangle(frame, (left, bottom - 35), (right, bottom), (0, 0, 255), cv2.FILLED)
        font = cv2.FONT_HERSHEY_DUPLEX
        cv2.putText(frame, name, (left + 6, bottom - 6), font, 1.0, (255, 255, 255), 1)

    # Display the resulting image
    cv2.imshow('Video', frame)

    # Hit 'q' on the keyboard to quit!
    if cv2.waitKey(1) & 0xFF == ord('q'):
        break

# Release handle to the webcam
video_capture.release()
cv2.destroyAllWindows()
运行上述脚本既可以实现在视频中实时检测人脸
4 输出检测结果
如果在服务器上运行相关代码,没有可视化的界面时,可以将检测结果输出,主要用到两个命令:
face_recognition- Recognize faces in a photograph or folder full for photographs.face_detection- Find faces in a photograph or folder full for photographs.
4.1 face_recognition
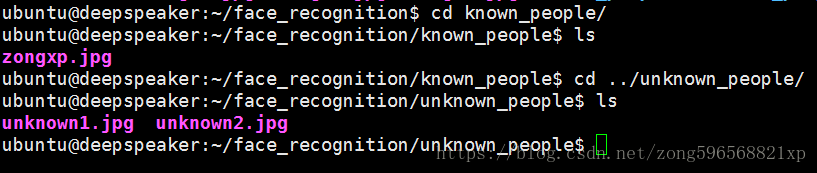
首先创建一个文件夹,如known_people,用来保存所有知道名字的人的图片,并且用名字来命名图片,如obama.jpg、jobs.jpg等;然后再创建另一个文件夹,如unknown_people,用来保存待识别的图片。如图所示,我在known_people文件夹中放入一张zongxp.jpg,在unknown_people中放入unknown1.jpg和unknown2.jpg
运行以下指令
face_recognition known_people/ unknown_people/输出如下
unknown_people/unknown2.jpg,unknown_person
unknown_people/unknown1.jpg,zongxp
4.2 face_detection
运行该指令,传入图片名称或图片路径,即可输出每张图片中人脸的位置,如
face_detection known_people输出如下
known_people/zongxp.jpg,370,474,680,1644.3 调整容忍度
如果一张图片中由于相似性,多个人得到了相同的结果输出,即将多个人判断为同一个人,则需要用较低的容忍度来使区分更加严格。只需要在指令中添加--tolerance参数即可,默认值为0.6,值越低表示越严格,比如
face_recognition --tolerance 0.5 known_people/ unknown_people/4.4 显示距离
使用--show-distance true参数可实现计算过程中的距离值输出,比如
face_recognition --show-distance true known_people/ unknown_people/输出如下
unknown_people/unknown2.jpg,unknown_person,None
unknown_people/unknown1.jpg,zongxp,0.3190091574234111
4.5 选择性输出
运行指令后,会输出文件的详细信息,有时候我们只关心一部分,比如只关心输出的名字,则可以使用以下指令进行输出
face_recognition known_people unknown_people | cut -d ',' -f2输出如下
unknown_person
zongxp
4.6 选择CPU核数
可以使用--cpus参数来选择计算过程中使用的核数,如
face_recognition --cpus 4 known_people/ unknown_people/如果想要使用全部的CPU,可直接使用--cpus -1参数


 2936
2936


 被折叠的 条评论
为什么被折叠?
被折叠的 条评论
为什么被折叠?
 到【灌水乐园】发言


