


 该文介绍了一个项目,通过Python的pyautogui库抓取屏幕图像,Mediapipe进行人脸识别,获取鼻子位置变化,进而控制舵机上下移动。项目使用CPU版TensorFlow和ArduinoESP32S,通过串口通信实现硬件交互。虽然算法简单且存在漂移,但整体效果满意,适合娱乐性质的尝试。
有一个想法, 就是把一些电影中的镜头, 拿出来, 作为某些自动设备输入源, 这样就可以使用广阔的资源, 来做硬件的内容提供者了…
先说一下环境, py37, media pipe, tf是cpu的版本, 因为我实在不知道怎么平衡torch跟tf, 因为media pipe是google的东西, 所以暂时只能用cpu做推理了, 好在速度也挺快, 30fps.
第一步, 通过pyautogui, 拿到屏幕的截图.

随便找个电影, 通过下面的一段话即可以截图图片.
img = pyautogui.screenshot(region=[0, 0, window_width, window_height])
0,0, 即截图开始的范围, 后面是宽高, 可以尽量大点, 比如占你桌面的左半部分.
截到图可以看看截图是否能行.
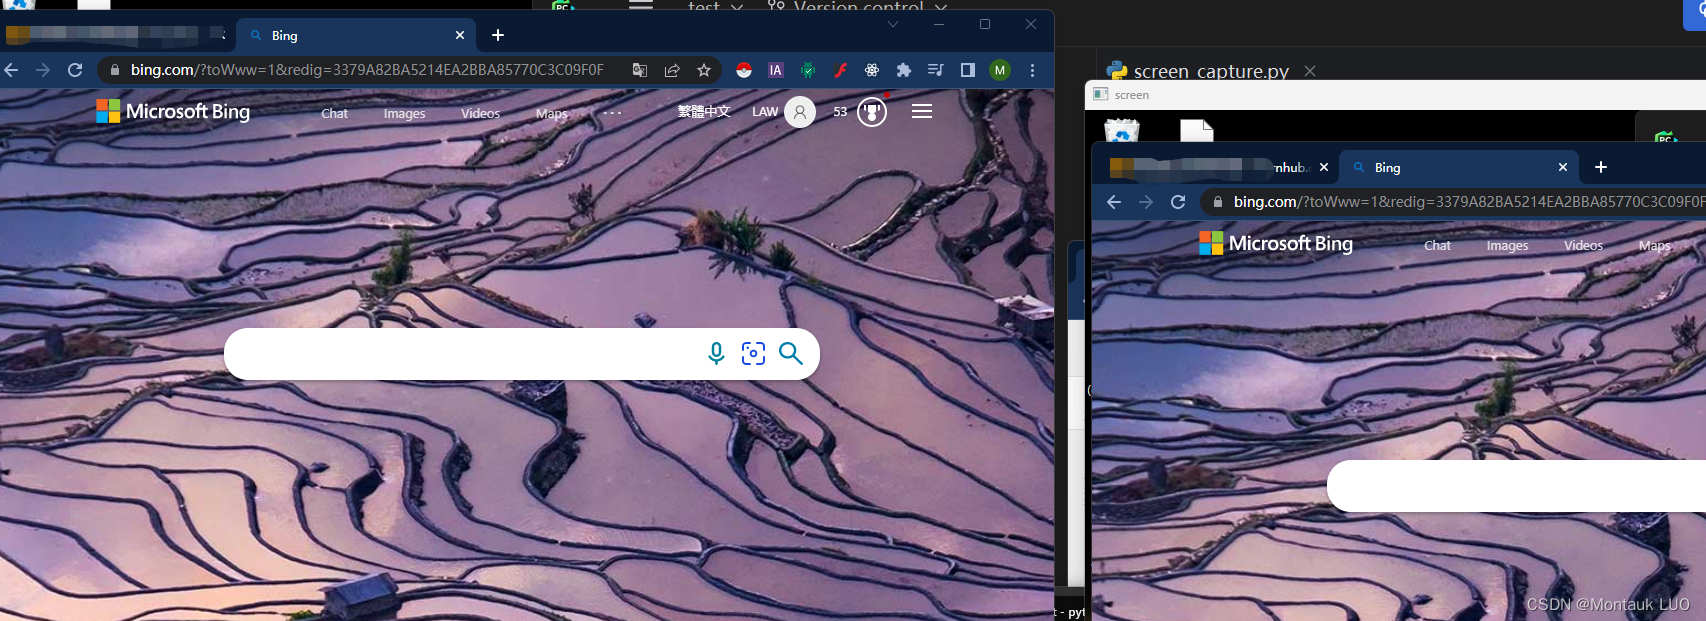
左边是原桌面, 后边是截图显示的cv2的imshow窗口.
media pipe是个好东西, 使用media pipe的face_detection, 可以很轻松拿到人脸上的关键点, 比如耳朵, 眼睛, 鼻子, 嘴巴的位置:
results = face_detection.process(image)
只需要一行, 就能推理出图片中的人脸信息.
我这里只需要鼻子的位置, 就是relative_keypoints[2], 为了显示方便, 我画了个点, 方便看到定位的效果如何
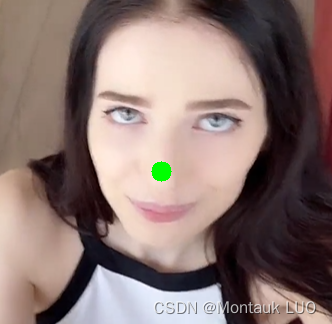
还是很准的, 当然也有很大的漂移, 但是最终我们只考虑它在一个维度, 就是纵向维度上的移动, 所以也没太大问题.
拿到鼻子的位置之后, 我们只需要简单做个减法, 拿这次的位置跟上次的位置做个相减, 就知道鼻子是向下移动还是向上移动了.
            if y > last_y:
                if (y - last_y) * 100 > min_y:
                    print("down: " + str((y - last_y) * 100))
                    serialFd.write((bytearray('s','ascii')))

            else:
                if (last_y - y) * 100 > min_y:
                    print("up: " + str((last_y - y) * 100))
                    serialFd.write((bytearray('w','ascii')))

            last_y = y
乘了一下方便观察, 不然小数点后面太多位.
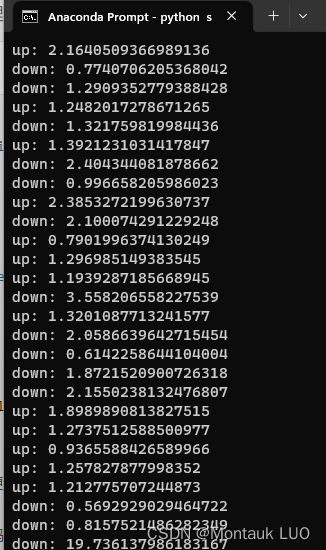
可以看到, 你已经完全捕捉到了, 她在垂直方向上的移动, 经过观察, 大差不差吧…
这个时候, 需要开动硬件了.
首先我们需要一个舵机, 一个舵机驱动, 一个arduino的开发板, 我直接用了esp32s, 本来打算用mqtt接网络的, 后来发现python可以直接串口, 省了好多功夫, 这里用uno啊, stm32啥都是可以的, arduino搞起来速度更快(你看, 我都不好意思用开发这个词, 因为arduino的东西, 压根我觉得都不能算是开发…)
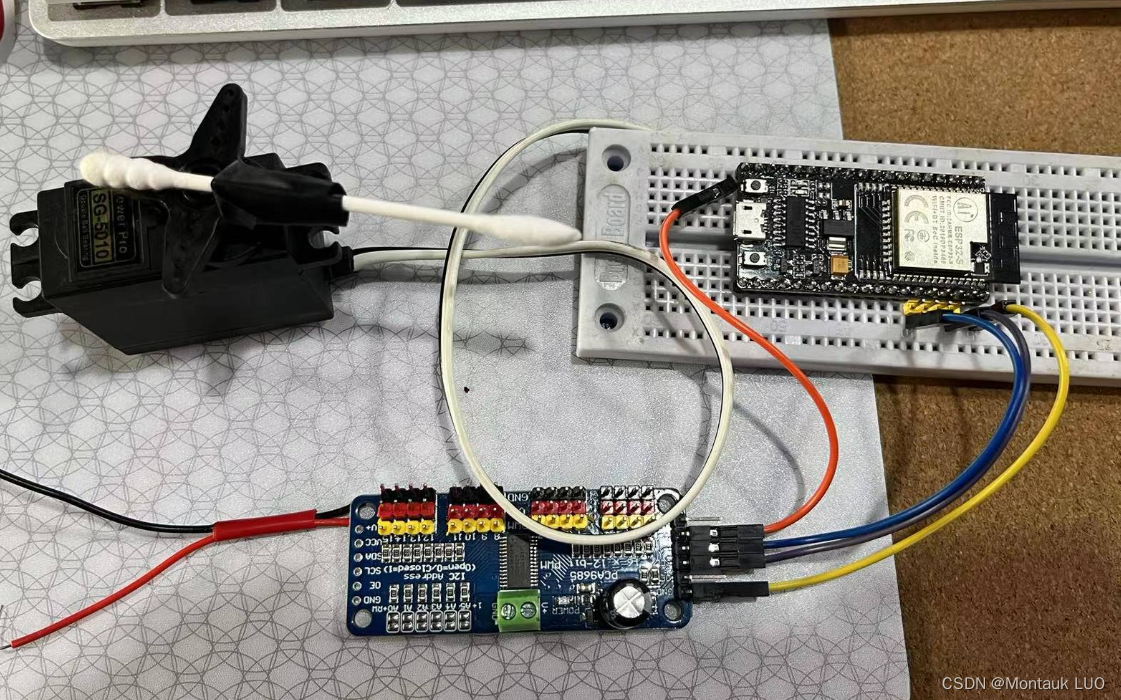
这个狗屎舵机驱动还有点问题, 你接电源的VCC竟然是没用的, 接上去舵机的电源输出只有0.5伏特, 只能直接把电源焊接到舵机的VCC了.
arduino的部分就简单了, 这个舵机驱动板是用I2C通讯的, 只需要用Wire, 就是arduino的I2C写pwm的占空比就行, 一头接串口发过来的字符, 一边控制舵机的位置(注意, 舵机是用pwm 占空比控制位置的, 这个跟普通电机还不太一样)
然后买板子的时候提供的资料, 或者说这个板子就是Adafruit的pwm驱动板的山寨, 所以有使用到他们的库.
/***************************************************
  This is an example for our Adafruit 16-channel PWM & Servo driver
  Servo test - this will drive 16 servos, one after the other

  Pick one up today in the adafruit shop!
  ------> http://www.adafruit.com/products/815

  These displays use I2C to communicate, 2 pins are required to
  interface. For Arduino UNOs, thats SCL -> Analog 5, SDA -> Analog 4

  Adafruit invests time and resources providing this open source code,
  please support Adafruit and open-source hardware by purchasing
  products from Adafruit!

  Written by Limor Fried/Ladyada for Adafruit Industries.
  BSD license, all text above must be included in any redistribution
 ****************************************************/

#include <Wire.h>
#include <Adafruit_PWMServoDriver.h>

// called this way, it uses the default address 0x40
Adafruit_PWMServoDriver pwm = Adafruit_PWMServoDriver();
// you can also call it with a different address you want
//Adafruit_PWMServoDriver pwm = Adafruit_PWMServoDriver(0x41);

// Depending on your servo make, the pulse width min and max may vary, you
// want these to be as small/large as possible without hitting the hard stop
// for max range. You'll have to tweak them as necessary to match the servos you
// have!
#define SERVOMIN 150  // this is the 'minimum' pulse length count (out of 4096)
#define SERVOMAX 600  // this is the 'maximum' pulse length count (out of 4096)

// our servo # counter
//uint8_t servonum = 0;

void setup() {
  Serial.begin(9600);
  Serial.println("16 channel Servo test!");

  pwm.begin();

  // pwm.setPWMFreq(60);  // Analog servos run at ~60 Hz updates
  pwm.setPWMFreq(60);  // Analog servos run at ~60 Hz updates

  pwm.setPWM(4, 0, 350);
}

// you can use this function if you'd like to set the pulse length in seconds
// e.g. setServoPulse(0, 0.001) is a ~1 millisecond pulse width. its not precise!
void setServoPulse(uint8_t n, double pulse) {
  double pulselength;

  pulselength = 1000000;  // 1,000,000 us per second
  pulselength /= 60;      // 60 Hz
  Serial.print(pulselength);
  Serial.println(" us per period");
  pulselength /= 4096;  // 12 bits of resolution
  Serial.print(pulselength);
  Serial.println(" us per bit");
  pulse *= 1000;
  pulse /= pulselength;
  Serial.println(pulse);
  pwm.setPWM(n, 0, pulse);
}

int incomingByte = 0;
uint16_t pos = 300;
uint16_t step = 20;
void chang_pos(bool upOrDown) {

  // going up
  if (upOrDown) {

    if (pos < (SERVOMAX - step)) {
      pos = pos + step;
    }

  } else {

    if (pos > (SERVOMIN + step)) {
      pos = pos - step;
    }
  }

  pwm.setPWM(4, 0, pos);
}
void loop() {
  // 逐个读取串口的数据
  incomingByte = Serial.read();

  if (incomingByte > 0) {
    // 在串口中显示输入的数据
    switch (incomingByte) {
      case 115:
        Serial.println("down");
        chang_pos(false);
        break;
      case 119:
        Serial.println("up");
        chang_pos(true);
        break;
    }
    // Serial.print("I received: ");
    // Serial.println(incomingByte, DEC);
  }
}

void _loop() {
  Serial.println("running");

  for (uint16_t pulselen = SERVOMIN; pulselen < SERVOMAX; pulselen++) {
    pwm.setPWM(4, 0, pulselen);
    delay(4);
  }
  delay(500);

  for (uint16_t pulselen = SERVOMAX; pulselen > SERVOMIN; pulselen--) {
    pwm.setPWM(4, 0, pulselen);
    delay(4);
  }

  delay(500);
}
值得一提的是, 这个简单的算法相当于对位置做了个微分的控制, 每次加减一点点…
最终的效果出奇的好, 最重要的是, 一共只花了我一晚上跟一上午几个小时时间, 能有这个效果, 我还是满意的…
py的全部代码我也就直接贴下面了, 没多少.
import pyautogui
import cv2
import numpy as np
import mediapipe as mp
import serial
import serial.tools.list_ports

plist = list(serial.tools.list_ports.comports())
plist_0 = list(plist[0])
# print(plist_0[0])

serialName = plist_0[0]
serialFd = serial.Serial(serialName, 9600, timeout=60)
print("check which port was really used >", serialFd.name)

window_width = 1200
window_height = 1300

mp_face_detection = mp.solutions.face_detection
mp_drawing = mp.solutions.drawing_utils

last_y = 0
min_y = 0.5

with mp_face_detection.FaceDetection(model_selection=0, min_detection_confidence=0.5) as face_detection:
    while 1:

        img = pyautogui.screenshot(region=[0, 0, window_width, window_height])
        # 分别代表:左上角坐标,宽高
        # 对获取的图片转换成二维矩阵形式,后再将RGB转成BGR
        # 因为imshow,默认通道顺序是BGR,而pyautogui默认是RGB所以要转换一下,不然会有点问题
        img = cv2.cvtColor(np.asarray(img), cv2.COLOR_RGB2BGR)
        image = img
        # image = cv2.cvtColor(img, cv2.COLOR_BGR2RGB)
        results = face_detection.process(image)

        if results.detections:
            detection = results.detections[0]
            # results.detections[0].location_data.relative_bounding_box[2]
            # print(results.detections[0].location_data.relative_keypoints[2])
            x = results.detections[0].location_data.relative_keypoints[2].x
            y = results.detections[0].location_data.relative_keypoints[2].y
            cv2.circle(image, (int(x * window_width), int(y * window_height)), 10, (0, 255, 0), -1)

            if y > last_y:
                if (y - last_y) * 100 > min_y:
                    print("down: " + str((y - last_y) * 100))
                    serialFd.write((bytearray('s','ascii')))

            else:
                if (last_y - y) * 100 > min_y:
                    print("up: " + str((last_y - y) * 100))
                    serialFd.write((bytearray('w','ascii')))

            last_y = y

            # mp_drawing.draw_detection(image, detection)
            # for detection in results.detections:
            # mp_drawing.draw_detection(image, detection)

        cv2.imshow("screen", image)
        if cv2.waitKey(5) & 0xFF == 27:
            break
遗留的问题:
- 这个纯粹是娱乐性质, 一方面算法都很粗糙, 一方面舵机控制肉灵芝, 是有点难为舵机了, 但是玩一下挺好
- mediapipe要移植到3588s或者nano上, 不知道效果如何
- 拍了视频了, 有兴趣的站内信索取, 这里实在没法放视频


 2881
2881

 被折叠的 条评论
为什么被折叠?
被折叠的 条评论
为什么被折叠?
 到【灌水乐园】发言


