


基于VSCode和CMake实现C/C++开发 | Linux篇
文章目录
开发环境搭建
安装软件之前,先执行
sudo apt update 更新软件安装包=
sudo apt install build-essential dbg一起打包安装gcc g++ gbd
查看安装结果:


安装CMake
sudo apt install cmake

GCC编译器

编译过程
-
预处理- Pre-Processing // .i文件.

-
编译- Compliling // .s文件

-
汇编- Assembling // .o文件

-
链接- Linking // bin文件.

一步代替四步:

g++重要的参数
-g 编译带调试信息的可执行文件

-O【n】优化源代码

-l 和 -L 指定库文件 | 指定库文件路径

-I 指定头文件搜索目录

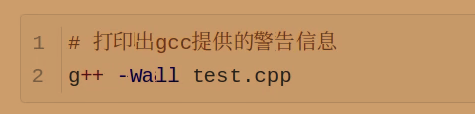
-Wall 打印警告信息
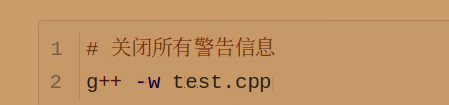
-w 关闭警告信息
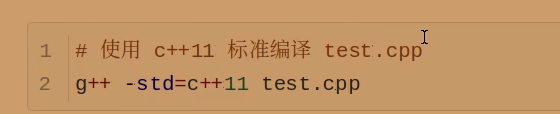
-std=c++11
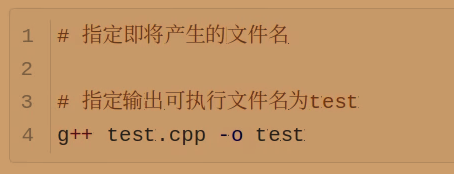
-o 指定输出文件名
-D 定义宏


g++命令行编译
文件结构:

)
直接编译会出错,没有包含头文件

加入-Iinlcude 把头文件目录加上去
简单编译,并运行:

增加参数:

生成库文件并编译
静态库链接

动态库链接

GDB调试

常用调试命令参数
调试开始 gdb【exefilename】,进入gdb调试程序,其中exefilename为要调试的可执行文件名


注意:
1.编译程序时需要加上-g,之后才能用gdb进行调试:gcc -g main.c -o main
2.回车键:重复上一个命令


IDE-VSCode
安装
依次执行:
sudo apt update
sudo apt install software-properties-common apt-transport-https wget
wget -q https://packages.microsoft.com/keys/microsoft.asc -O- | sudo apt-key add -
sudo add-apt-repository "deb [arch=amd64] https://packages.microsoft.com/repos/vscode stable main"
sudo apt install code
界面

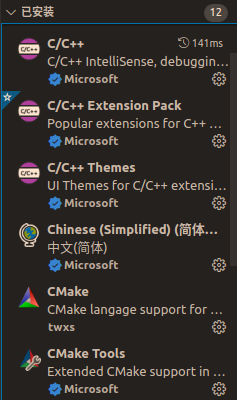
插件安装
快捷键


实战编译运行
高频技巧

hello world

swap

CMake
CMake是一个跨平台的安装编译工具,可以用简单语句描述所有平台的安装(编译过程)。
CMake可以说是已经成为大部分C++开源项目标配
Cross-Platform Devilopment


CMake:


语法特性介绍

重要指令
cmake_minimum_required -指定CMake的最小版本要求
cmake_minimum_required(VERSION versionNumber[FATAL_ERROR])

project -定义工程名称,并且可以指定工程语言
project(projectName [CXX][C][JAVA]

set -显式的定义变量
set(VAR [VALUE][CACHE TYPE DOCSTRING ][FORVE])

include_directories -向工程中添加多个特定的头文件搜索路径 -->相当于G++指定的-I
include_directories([AFTER | BEFORE][SYSTEM] dir1 dir2 …)

link_directories -向工程中添加多个特定的库文件搜索路径 -->相当于是G++指定的-L
ink_directories(dir1 dir2)

add_library -生成库文件
add_library(libname [SHARED | STATIC | MODULE][EXCLUDE_FEOM_ALL] source1 source2…)

add_compile_options -添加编译参数
add_compile_options(< option >…)

add_executable -生成可执行文件
add_executable(exename source1 source2…)

target_link_libraries -为target添加需要链接的共享库


常用变量


CMake编译工程


实战
内部构建


外部构建

swap项目


完整项目开发


文件结构
include目录放入h文件
src目录放入cpp文件
main.cpp放入当前目录
代码
Gun.h
#pragma once
#include <string>
class Gun
{
public:
    Gun(std::string type){
        this->_bullet_count=0;
        this->_type=type;
    }
	void addBullet(int bullet_num);
	bool shoot();

private:
    int _bullet_count;
    std::string  _type;
};
Gun.cpp
#include "Gun.h"
#include "iostream"
void Gun::addBullet(int bullet_num){
    this->_bullet_count += bullet_num;
}

bool Gun::shoot(){
    if(this->_bullet_count > 0){
        --this->_bullet_count;
        std::cout << "Shoot successfully" << std::endl;
        return true;
    }
    else{
        std::cout << "There is no bullet" << std::endl;
        return false;
    }
}
Soldier.h
#pragma once
#include <string>
#include "Gun.h"
class Soldier
{
private:
    std::string _name;
    Gun *_ptr_gun;
    /* data */
public:
    Soldier(std::string name);
    ~Soldier();
    void addBulletToGun(int num);
    bool fire();
    void addGun(Gun* ptr_gun);
};
Soldier.cpp
#include "Soldier.h"
#include <iostream>
Soldier::Soldier(std::string name)
{
    this->_name = name;
    this->_ptr_gun = nullptr;
}

void Soldier::addGun(Gun *ptr_gun)
{
    this->_ptr_gun = ptr_gun;
}

void Soldier::addBulletToGun(int num)
{
    this->_ptr_gun->addBullet(num);
}

bool Soldier::fire()
{
    return this->_ptr_gun->shoot();
}

Soldier::~Soldier()
{
    if (this->_ptr_gun == nullptr)
    {
        return;
    }
    delete this->_ptr_gun;
    this->_ptr_gun = nullptr;
}
main.cpp
#include "Gun.h"
#include "Soldier.h"
#include <iostream>

void test()
{
    Solider sanduo("xusanduo");
    sanduo.addGun(new Gun("AK47"));
    sanduo.addBulletToGun(20);
    sanduo.fire();
}

int main()
{
    test();
    return 0;
}
使用g++编译

使用CMake编译
cmake_minimum_required(VERSION 3.0)

project(SOLIDERFIRE)

set(CMAKE_CXX_FLAGS "${CMAKE_CXX_FLAGS} -Wall")

set(CMAKE_BUILD_TYPE Debug)

include_directories(${CMAKE_SOURCE_DIR}/include)

add_executable(my_cmake_exe main.cpp src/Gun.cpp src/Solider.cpp)
配置json文件并调试

program:可执行文件路径
preLaunchTask:配合使用可以实现自编译
task.json
{
    "version": "2.0.0",
    "options": {
        "cwd": "${workspaceFolder}/build"
    },
    "tasks": [
        {
            "type": "shell",
            "label": "cmake",
            "command": "cmake",
            "args": [
                ".."
            ]
        },
        {
            "label": "make",
            "group": {
                "kind": "build",
                "isDefault": true
            },
            "command": "make",
            "args": [

            ]
        },
        {
            "label": "Build",
			"dependsOrder": "sequence", // 按列出的顺序执行任务依赖项
            "dependsOn":[
                "cmake",
                "make"
            ]
        }
    ]

}


 2363
2363


 被折叠的 条评论
为什么被折叠?
被折叠的 条评论
为什么被折叠?
 到【灌水乐园】发言


