


线程的几个方法:
join():等待此线程死亡后再继续,可使异步线程变为同步线程,join方法是不会释放锁
interrupt():中断线程,被中断线程会抛InterruptedException
wait():等待获取锁:表示等待获取某个锁执行了该方法的线程释放对象的锁,JVM会把该线程放到对象的等待池中。该线程等待其它线程唤醒
notify():执行该方法的线程唤醒在对象的等待池中等待的一个线程,JVM从对象的等待池中随机选择一个线程,把它转到对象的锁池中。使线程由阻塞队列进入就绪状态
sleep():让当前正在执行的线程休眠,有一个用法可以代替yield函数——sleep(0)
yield():暂停当前正在执行的线程对象,并执行其他线程。也就是交出CPU一段时间(其他同样的优先级或者更高优先级的线程可以获取到运行的机会)
sleep和yield区别:
1、sleep()方法会给其他线程运行的机会,而不考虑其他线程的优先级,因此会给较低线程一个运行的机会;yield()方法只会给相同优先级或者更高优先级的线程一个运行的机会。
2、当线程执行了sleep(long millis)方法后,将转到阻塞状态,参数millis指定睡眠时间;当线程执行了yield()方法后,将转到就绪状态。
3、sleep()方法声明抛出InterruptedException异常,而yield()方法没有声明抛出任何异常
4、sleep()方法比yield()方法具有更好的移植性
设计模式:静态代理
<span style="font-family:SimSun;font-size:14px;">/**
 * 静态代理 设计模式
 * 1、真实角色
 * 2、代理角色: 持有真实角色的引用
 * 3、二者 实现相同的接口
 *
 * @author Administrator
 *
 */
public class StaticProxy {

	/**
	 * @param args
	 */
	public static void main(String[] args) {
		//创建真实角色
		Marry you =new You();
		//创建代理角色 +真实角色的引用
		WeddingCompany company =new WeddingCompany(you);
		//执行任务
		company.marry();
	}

}
//接口
interface Marry{
	public abstract void marry();
}
//真实角色
class You implements Marry{

	@Override
	public void marry() {
		System.out.println("you and  嫦娥结婚了....");
	}

}
//代理角色
class WeddingCompany implements Marry{
	private Marry you;
	public WeddingCompany() {
	}

	public WeddingCompany(Marry you) {
		this.you = you;
	}
	private void before(){
		System.out.println("布置窝....");

	}
	private void after(){
		System.out.println("闹玉兔....");
	}
	@Override
	public void marry() {
		before();
		you.marry();
		after();
	}

}</span>
通过继承Thread实现多线程
<span style="font-family:SimSun;font-size:14px;">public class RabbitApp {

	/**
	 * @param args
	 * @throws InterruptedException
	 */
	public static void main(String[] args) throws InterruptedException {
		//创建子类对象
		Rabbit rab = new Rabbit();
		Tortoise tor =new Tortoise();


		//调用start 方法
		rab.start(); //不要调用run方法
		tor.start();

		for(int i=0;i<10000;i++){
			System.out.println("main==>"+i);
			Thread.sleep(1000);
		}
	}

}
public  Rabbit extends Thread {

	@Override
	public void run() {
		//线程体
		for(int i=0;i<10000;i++){
			System.out.println("兔子跑了"+i+"步");
			try {
				Thread.sleep(1000);
			} catch (InterruptedException e) {
				// TODO Auto-generated catch block
				e.printStackTrace();
			}
		}


	}

}
class Tortoise extends Thread {

	@Override
	public void run() {
		//线程体
		for(int i=0;i<10000;i++){
			System.out.println("乌龟跑了"+i+"步");
			try {
				Thread.sleep(1000);
			} catch (InterruptedException e) {
				// TODO Auto-generated catch block
				e.printStackTrace();
			}
		}


	}

}</span>
实现Runnable接口 重写run方法 通过thread类 代理模式实现多线程
<span style="font-family:SimSun;font-size:14px;">/**
推荐  Runnable 创建线程
1)、避免单继承的局限性
2)、便于共享资源


 使用 Runnable 创建线程
 1、类 实现 Runnable接口 +重写 run()   -->真实角色类
 2、启动多线程  使用静态代理
   1)、创建真实角色
   2)、创建代理角色 +真实角色引用
   3)、调用 .start() 启动线程


* @author Administrator
*
*/
class Programmer implements Runnable {

	@Override
	public void run() {
		for(int i=0;i<1000;i++){
			System.out.println("一边敲helloworld....");
		}
	}

}

public class ProgrammerApp {

	/**
	 * @param args
	 */
	public static void main(String[] args) {
		 //1)、创建真实角色
		Programmer pro =new Programmer();
		  //2)、创建代理角色 +真实角色引用
		Thread proxy =new Thread(pro);
		  //3)、调用 .start() 启动线程
		proxy.start();

		for(int i=0;i<1000;i++){
			System.out.println("一边聊qq....");
		}
	}

}</span>
thread共享同一个web12306资源 注意 这里的资源只有一份
<span style="font-family:SimSun;font-size:14px;">public class Web12306 implements Runnable {
	private int num =50;

	@Override
	public void run() {
		while(true){
			if(num<=0){
				break; //跳出循环
			}
			System.out.println(Thread.currentThread().getName()+"抢到了"+num--);
		}
	}

	public static void main(String[] args) {
		//真实角色
		Web12306 web = new Web12306();
		//代理
		Thread t1 =new Thread(web,"路人甲");
		Thread t2 =new Thread(web,"黄牛已");
		Thread t3 =new Thread(web,"攻城师");
		//启动线程
		t1.start();
		t2.start();
		t3.start();
	}
}</span>
使用Callable创建线程(补充点)
<span style="font-family:SimSun;font-size:14px;">import java.util.concurrent.Callable;
import java.util.concurrent.ExecutionException;
import java.util.concurrent.ExecutorService;
import java.util.concurrent.Executors;
import java.util.concurrent.Future;
/**
 * 使用Callable创建线程
 * @author Administrator
 *
 */
public class Call {
	public static void main(String[] args) throws InterruptedException, ExecutionException {
		//创建线程
		ExecutorService  ser=Executors.newFixedThreadPool(2);
		Race tortoise = new Race("老不死",1000);
		Race rabbit = new Race("小兔子",500);
		//获取值
		Future<Integer> result1 =ser.submit(tortoise) ;
		Future<Integer> result2 =ser.submit(rabbit) ;

		Thread.sleep(2000); //2秒
		tortoise.setFlag(false); //停止线程体循环
		rabbit.setFlag(false);

		int num1 =result1.get();
		int num2 =result2.get();
		System.out.println("乌龟跑了-->"+num1+"步");
		System.out.println("小兔子跑了-->"+num2+"步");
		//停止服务
		ser.shutdownNow();

	}
}

class Race implements Callable<Integer>{
	private String name ; //名称
	private long time; //延时时间
	private boolean flag =true;
	private int step =0; //步
	public Race() {
	}

	public Race(String name) {
		super();
		this.name = name;
	}
	public Race(String name,long time) {
		super();
		this.name = name;
		this.time =time;
	}

	@Override
	public Integer call() throws Exception {
		while(flag){
			Thread.sleep(time); //延时
			step++;
		}
		return step;
	}

	public String getName() {
		return name;
	}

	public void setName(String name) {
		this.name = name;
	}


	public long getTime() {
		return time;
	}

	public void setTime(long time) {
		this.time = time;
	}

	public boolean isFlag() {
		return flag;
	}

	public void setFlag(boolean flag) {
		this.flag = flag;
	}

	public int getStep() {
		return step;
	}

	public void setStep(int step) {
		this.step = step;
	}

}</span>
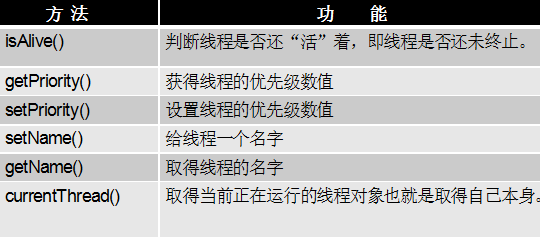
线程信息:
<span style="font-family:SimSun;font-size:14px;">/**
 *
  Thread.currentThread()	 :当前线程
  setName():设置名称
  getName():获取名称
  isAlive():判断状态

 * @author Administrator
 *
 */
class MyThread implements Runnable {
	private boolean flag =true;
	private int num =0;
	@Override
	public void run() {
		while(flag){
			System.out.println(Thread.currentThread().getName()+"-->"+num++);
		}
	}
	public void stop(){
		this.flag=!this.flag;
	}
}


public class InfoDemo01 {

	/**
	 * @param args
	 * @throws InterruptedException
	 */
	public static void main(String[] args) throws InterruptedException {
		MyThread it =new MyThread();
		Thread proxy =new Thread(it,"挨踢");
		//proxy.setName("test");
		System.out.println(proxy.getName());
		System.out.println(Thread.currentThread().getName()); //main

		//proxy.setPriority(Thread.MIN_PRIORITY); //设置优先级
		//proxy.setPriority(Thread.MAX_PRIORITY);//设置优先级

		proxy.start();
		System.out.println("启动后的状态:"+proxy.isAlive());
		Thread.sleep(20);
		it.stop();
		Thread.sleep(10);
		System.out.println("停止后的状态:"+proxy.isAlive());
	}

}</span>
定时
<span style="font-family:SimSun;font-size:14px;">import java.util.Date;
import java.util.Timer;
import java.util.TimerTask;
/**
    了解
  Timer()
  schedule(TimerTask task, Date time)
  schedule(TimerTask task, Date firstTime, long period)
  自学 quartz
 * @author Administrator
 *
 */
public class TimeDemo01 {

	/**
	 * @param args
	 */
	public static void main(String[] args) {
		Timer timer =new Timer();
		timer.schedule(new TimerTask(){

			@Override
			public void run() {
				System.out.println("so easy....");
			}}, new Date(System.currentTimeMillis()+1000), 200);
	}

}</span>
线程停止:一般用外部干涉的方法
<span style="font-family:SimSun;font-size:14px;">public class StopDemo01 {

	/**
	 * @param args
	 */
	public static void main(String[] args) {
		Study s =new Study();
		new Thread(s).start();

		//外部干涉
		for(int i=0;i<100;i++){
			if(50==i){ //外部干涉
				s.stop();
			}
			System.out.println("main.....-->"+i);
		}
	}

}
class Study implements Runnable{
	 //1)、线程类中 定义 线程体使用的标识
	private boolean flag =true;
	@Override
	public void run() {
		//2)、线程体使用该标识
		while(flag){
			System.out.println("study thread....");
		}
	}
	//3)、对外提供方法改变标识
	public void stop(){
		this.flag =false;
	}

}</span>
Java Thread中, join() 方法主要是让调用改方法的thread完成run方法里面的东西后, 在执行join()方法后面的代码
<span style="font-family:SimSun;font-size:14px;">public class JoinDemo01 extends Thread {

	/**
	 * @param args
	 * @throws InterruptedException
	 */
	public static void main(String[] args) throws InterruptedException {
		JoinDemo01 demo = new JoinDemo01();
		Thread t = new Thread(demo); //新生
		t.start();//就绪
		//cpu调度 运行


		for(int i=0;i<1000;i++){
			if(50==i){
				t.join(); //main阻塞...
			}
			System.out.println("main...."+i);
		}
	}

	@Override
	public void run() {
		for(int i=0;i<1000;i++){
			System.out.println("join...."+i);
			try {
				Thread.sleep(1000);
			} catch (InterruptedException e) {
				// TODO Auto-generated catch block
				e.printStackTrace();
			}
		}
	}

}</span>
<span style="font-family:SimSun;font-size:14px;"></span>
yield:暂停当前正在执行的线程对象,并执行其他线程。也就是交出CPU一段时间(其他同样的优先级或者更高优先级的线程可以获取到运行的机会)
public class YieldDemo01 extends Thread {
	/**
	 * @param args
	 */
	public static void main(String[] args) {
		YieldDemo01 demo = new YieldDemo01();
		Thread t = new Thread(demo); //新生
		t.start();//就绪
		//cpu调度 运行


		for(int i=0;i<1000;i++){
			if(i%20==0){
				//暂停本线程 main
				Thread.yield();
			}
			System.out.println("main...."+i);
		}
	}

	@Override
	public void run() {
		for(int i=0;i<1000;i++){
			System.out.println("yield...."+i);
		}
	}

}
单例:
/**
 * 单例创建的方式
 * 1、懒汉式
 * 1)、构造器私有化
 * 2)、声明私有的静态属性
 * 3)、对外提供访问属性的静态方法,确保该对象存在
 *
 * @author Administrator
 *
 */
public class MyJvm {
	private static MyJvm instance;
	private MyJvm(){

	}
	public static MyJvm getInstance (){
		if(null==instance){ //提供效率
			synchronized(MyJvm.class){
				if(null==instance){ //安全
					instance =new MyJvm();
				}
			}
		}
		return instance;
	}


}
/**
 * 饿汉式
   1)、构造器私有化
 * 2)、声明私有的静态属性,同时创建该对象
 * 3)、对外提供访问属性的静态方法
 * @author Administrator
 *
 */
class MyJvm2 {
	private static MyJvm2 instance =new MyJvm2();
	private MyJvm2(){

	}
	public static MyJvm2 getInstance (){
		return instance;
	}

}
/**
 * 类在使用的时候加载 ,延缓加载时间
 * @author Administrator
 *
 */
class MyJvm3 {
	private static class JVMholder{
		private static MyJvm3 instance =new MyJvm3();
	}
	private MyJvm3(){

	}
	public static MyJvm3 getInstance (){
		return JVMholder.instance;
	}

}
synchronized
/**
 * 单例设计模式:确保一个类只有一个对象
 * @author Administrator
 *
 */
public class SynDemo02 {

	/**
	 * @param args
	 */
	public static void main(String[] args) {
		JvmThread thread1 = new JvmThread(100);
		JvmThread thread2 = new JvmThread(500);
		thread1.start();
		thread2.start();

	}

}
class JvmThread extends Thread{
	private long time;
	public JvmThread() {
	}
	public JvmThread(long time) {
		this.time =time;
	}
	@Override
	public void run() {
		System.out.println(Thread.currentThread().getName()+"-->创建:"+Jvm.getInstance(time));
	}
}


/**
 * 单例设计模式
 * 确保一个类只有一个对象
 * 懒汉式  double checking
 * 1、构造器私有化,避免外部直接创建对象
 * 2、声明一个私有的静态变量
 * 3、创建一个对外的公共的静态方法 访问该变量,如果变量没有对象,创建该对象
 */
class Jvm {
	//声明一个私有的静态变量
	private static Jvm instance =null;
	//构造器私有化,避免外部直接创建对象
	private Jvm(){

	}
	//创建一个对外的公共的静态方法 访问该变量,如果变量没有对象,创建该对象
	public static Jvm getInstance(long time){
		// c d e  -->效率  提供 已经存在对象的访问效率
		if(null==instance){
			// a b
			synchronized(Jvm.class){
				if(null==instance ){
					try {
						Thread.sleep(time); //延时 ,放大错误
					} catch (InterruptedException e) {
						e.printStackTrace();
					}
					instance =new Jvm();
				}
			}
	  }//a
	  return instance;
	}


	public static Jvm getInstance3(long time){
		//a b c d e  -->效率不高 c  存在对象也需要等待
		synchronized(Jvm.class){
			if(null==instance ){
				try {
					Thread.sleep(time); //延时 ,放大错误
				} catch (InterruptedException e) {
					e.printStackTrace();
				}
				instance =new Jvm();
			}
			return instance;
		}
	}


	public static synchronized Jvm getInstance2(long time){
		if(null==instance ){
			try {
				Thread.sleep(time); //延时 ,放大错误
			} catch (InterruptedException e) {
				e.printStackTrace();
			}
			instance =new Jvm();
		}
		return instance;
	}


	public static Jvm getInstance1(long time){
		if(null==instance ){
			try {
				Thread.sleep(time); //延时 ,放大错误
			} catch (InterruptedException e) {
				e.printStackTrace();
			}
			instance =new Jvm();
		}
		return instance;
	}
}
生产消费者:
package pro;
public class TestProduce {
	public static void main(String[] args) {
		SyncStack sStack = new SyncStack();
		Shengchan sc = new Shengchan(sStack);
		Xiaofei xf = new Xiaofei(sStack);
		sc.start();
		xf.start();
	}
}

class Mantou {
	int id;
	Mantou(int id){
		this.id=id;
	}
}

class SyncStack{
	int index=0;
	Mantou[] ms = new Mantou[10];

	public synchronized void push(Mantou m){
		while(index==ms.length){
			try {
				this.wait();
				//wait后,线程会将持有的锁释放。sleep是即使睡着也持有互斥锁。
			} catch (InterruptedException e) {
				e.printStackTrace();
			}
		}
		this.notify(); //唤醒在当前对象等待池中等待的第一个线程。notifyAll叫醒所有在当前对象等待池中等待的所有线程。
		//如果不唤醒的话。以后这两个线程都会进入等待线程,没有人唤醒。
		ms[index]=m;
		index++;
	}
	public synchronized Mantou pop(){
		while(index==0){
			try {
				this.wait();
			} catch (InterruptedException e) {
				e.printStackTrace();
			}
		}
		this.notify();
		index--;
		return ms[index];
	}
}

class Shengchan extends Thread{
	SyncStack ss = null;

	public Shengchan(SyncStack ss) {
		this.ss=ss;
	}
	@Override
	public void run() {
		for (int i = 0; i < 20; i++) {
			System.out.println("造馒头:"+i);
			Mantou m = new Mantou(i);
			ss.push(m);
		}
	}
}

class Xiaofei extends Thread{
	SyncStack ss = null;

	public Xiaofei(SyncStack ss) {
		this.ss=ss;
	}
	@Override
	public void run() {
		for (int i = 0; i < 20; i++) {
			Mantou m = ss.pop();
			System.out.println("吃馒头:"+i);

		}
	}
}
一、继承Thread + run()
启动: 创建子类对象 +对象.start()
二、实现Runnable +run()
启动:使用静态代理
1、创建真实角色
2、创建代理角色 Thread+引用
3、代理角色.start()
推荐使用接口:
1、避免单继承局限性
2、便于共享资源
三、了解
通过Callable接口实现多线程
优点:可以获取返回值
Callable 和 Future接口
Callable是类似于Runnable的接口,实现Callable接口的类和实现Runnable的类都是可被其它线程执行的任务。
Callable和Runnable有几点不同:
(1)Callable规定的方法是call(),而Runnable规定的方法是run().
(2)call()方法可抛出异常,而run()方法是不能抛出异常的。
(3) Callable的任务执行后可返回值,运行Callable任务可拿到一个Future对象,而Runnable的任务是不能返回值的。
Future 表示异步计算的结果。它提供了检查计算是否完成的方法,以等待计算的完成,并检索计算的结果。
通过Future对象可了解任务执行情况,可取消任务的执行,还可获取任务执行的结果。
缺点 :繁琐
思路:
1)、创建 Callable实现类+重写call
2)、借助 执行调度服务 ExecutorService,获取Future对象
ExecutorService ser=Executors.newFixedThreadPool(2);
Future result =ser.submit(实现类对象)
3)、获取值 result.get()
4 )、 停止服务 ser.shutdownNow();
同步:并发 多个线程访问同一份资源 确保资源安全 -->线程安全
synchronized -->同步
一、同步块
synchronized(引用类型|this|类.class){
}
二、同步方法
synchronized
三、死锁: 过多的同步容易造成死锁
信号灯法
一、 wait() :等待,释放锁 sleep 不释放锁
二、notify()/notifyAll():唤醒
与 synchronized 一起使用


 被折叠的 条评论
为什么被折叠?
被折叠的 条评论
为什么被折叠?
 到【灌水乐园】发言


