


提要
今天要学习的是cocos2dx中的Box2d物理引擎。
Box2D是一款开元的C++编写的物理引擎,起初是用于Flash的游戏开发中,随后推出了C++版本,其开发和升级工作一直非常活跃,几乎成了2D游戏产品的必备物理引擎。Box2D引擎为开发者提供了一个二维刚体的物理模拟库,借助Box2D的强大功能,游戏中的动画可以更加真实,让游戏世界更具交互性。
Box2D物理引擎所创建的物理引擎具有下面的三个特点:
1.物理世界存在一个重力场;
2.物理世界可以是一个存在边界的范围(有碰撞效果);
3.在世界中加入静态和动态的物体,符合现实的运动规律;
今天要学习的内容还是以实例为主。有不会的细节留言或者自行google。
最简单的Box2D的例子
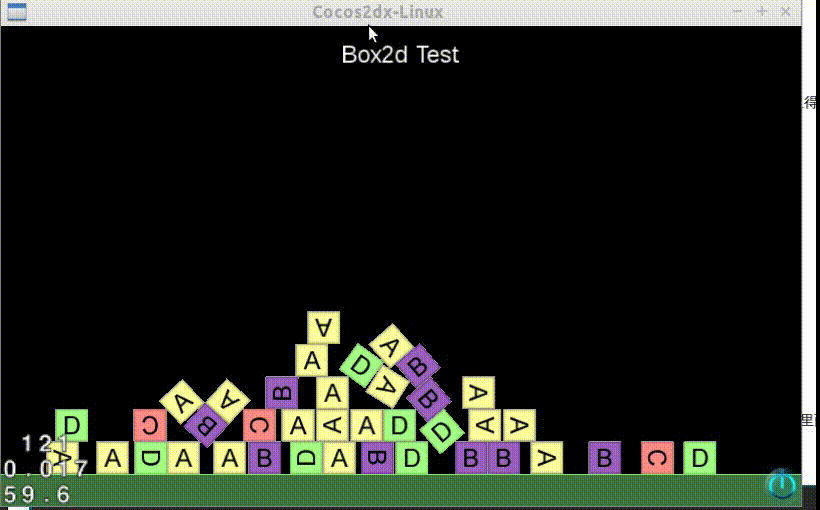
先看最终效果
这个例子的实现思路如下:
1.定义物理世界,定义地面;
2.响应触控操作,在点击的位置创建一个物理世界中的正方块,并用debugdraw显示;
3.将带纹理的精灵和物理世界中的正方块相连接;
关于DebugDraw
当开发者使用物理引擎开发时,需要将物理世界绘制出来,但是我们都知道物理引擎中只存在碰撞检测和物理模拟,没有任何绘制功能,为了方便调试,就加入了调试绘图功能,这个绘图都是一些先狂,并不能作为游戏的画面,只是为了方便开发者,看到物体世界的样子。
利用DebugDraw,开发者可以轻易地看到物体的形状,关节,用于连续碰撞的核心形状,AABB包围盒,接触,质心。
还是按前面两篇教程那样创建工程,然后将cocos2d-x-2.2/samples/Cpp/TestCpp/Classes/Box2DTestBed/GLES-Render.h和cocos2d-x-2.2/samples/Cpp/TestCpp/Classes/Box2DTestBed/GLES-Render.cpp复制到工程的Classes文件夹中,修改pro.linux 的MakeFile和pro.android 的Android.mk,将文件包含进去,接下来是具体的代码实现。
HelloWorld.h
#ifndef __HELLOWORLD_SCENE_H__
#define __HELLOWORLD_SCENE_H__

#include "cocos2d.h"
#include "Box2D/Box2D.h"
#include "GLES-Render.h"

using namespace cocos2d;

class HelloWorld : public cocos2d::CCLayer
{

private:
    b2World *world;
    GLESDebugDraw * m_debugDraw;
    CCTexture2D* m_pSpriteTexture;

public:
    HelloWorld();
    ~HelloWorld();

    // Here's a difference. Method 'init' in cocos2d-x returns bool, instead of returning 'id' in cocos2d-iphone
    virtual bool init();

    void initPhysics();
    virtual void draw();

    void addNewSpriteAtPosition(CCPoint p);
    void update(float dt);
    virtual void ccTouchesEnded(CCSet* touches, CCEvent* event);

    // there's no 'id' in cpp, so we recommend returning the class instance pointer
    static cocos2d::CCScene* scene();

    // a selector callback
    void menuCloseCallback(CCObject* pSender);

    // implement the "static node()" method manually
    CREATE_FUNC(HelloWorld);
};

#endif // __HELLOWORLD_SCENE_H__
private成员里面,world是一个b2World,Box2D程序都是从创建一个b2World对象开始的。b2World就像一个管理内存,物体以及模拟的物理枢纽。你可以在堆,栈或者数据段上创建物理世界。m_debugDraw用于调试绘制,m_pSpriteTexture是一个2d纹理,在绘制Spirit的时候会用到。
public的函数里面,有三个函数要注意,update是更新物体的位置,ccTouchesEnded是在触控结束,也就是手指离开屏幕时触发。addNewSpiriteAtPosition是在某个点添加一个Spirite。函数实现如下:
HelloWorld.cpp
#include "HelloWorldScene.h"

USING_NS_CC;

#define PTM_RATIO 32
enum {
    kTagParentNode = 1,
};

HelloWorld::HelloWorld()
{
    setTouchEnabled( true );
    setAccelerometerEnabled( true );
    this->initPhysics();
    m_pSpriteTexture = CCTextureCache::sharedTextureCache()->addImage("blocks.png");
    scheduleUpdate();

}

HelloWorld::~HelloWorld()
{
    CC_SAFE_DELETE(world);
    world = NULL;
    delete m_debugDraw;
}

CCScene* HelloWorld::scene()
{
    // 'scene' is an autorelease object
    CCScene *scene = CCScene::create();

    // 'layer' is an autorelease object
    HelloWorld *layer = HelloWorld::create();

    // add layer as a child to scene
    scene->addChild(layer);

    // return the scene
    return scene;
}


// on "init" you need to initialize your instance
bool HelloWorld::init()
{
    //
    // 1. super init first
    if ( !CCLayer::init() )
    {
        return false;
    }

    CCSize visibleSize = CCDirector::sharedDirector()->getVisibleSize();
    CCPoint origin = CCDirector::sharedDirector()->getVisibleOrigin();

    /
    // 2. add a menu item with "X" image, which is clicked to quit the program
    //    you may modify it.

    // add a "close" icon to exit the progress. it's an autorelease object
    CCMenuItemImage *pCloseItem = CCMenuItemImage::create(
                "CloseNormal.png",
                "CloseSelected.png",
                this,
                menu_selector(HelloWorld::menuCloseCallback));

    pCloseItem->setPosition(ccp(origin.x + visibleSize.width - pCloseItem->getContentSize().width/2 ,
                                origin.y + pCloseItem->getContentSize().height/2));

    // create menu, it's an autorelease object
    CCMenu* pMenu = CCMenu::create(pCloseItem, NULL);
    pMenu->setPosition(CCPointZero);
    this->addChild(pMenu, 1);

    /
    // 3. add your codes below...

    // add a label shows "Hello World"
    // create and initialize a label

    CCLabelTTF* pLabel = CCLabelTTF::create("Box2d Test", "Arial", 24);

    // position the label on the center of the screen
    pLabel->setPosition(ccp(origin.x + visibleSize.width/2,
                            origin.y + visibleSize.height - pLabel->getContentSize().height));

    // add the label as a child to this layer
    this->addChild(pLabel, 1);


    setTouchEnabled( true );
    setAccelerometerEnabled( true );

    // init physics
    this->initPhysics();

    return true;
}

void HelloWorld::initPhysics()
{
    CCLOG("Init physics!");
    b2Vec2 gravity;
    gravity.Set(0.0f, -10.0f);
    world = new b2World(gravity);

    // Do we want to let bodies sleep?
    world->SetAllowSleeping(true);
    world->SetContinuousPhysics(true);

    m_debugDraw = new GLESDebugDraw( PTM_RATIO );
    world->SetDebugDraw(m_debugDraw);

    uint32 flags = 0;
    flags += b2Draw::e_shapeBit;
    m_debugDraw->SetFlags(flags);

    // Define the ground body.
    b2BodyDef groundBodyDef;
    groundBodyDef.position.Set(0, 0); // bottom-left corner
    CCSize screenSize = CCDirector::sharedDirector()->getVisibleSize();
    // Call the body factory which allocates memory for the ground body
    // from a pool and creates the ground box shape (also from a pool).
    // The body is also added to the world.
    b2Body* groundBody = world->CreateBody(&groundBodyDef);

    // Define the ground box shape.
    b2PolygonShape groundBox;
    groundBox.SetAsBox(screenSize.width, 1.0f);
    groundBody->CreateFixture(&groundBox, 0.0f);
}

void HelloWorld::menuCloseCallback(CCObject* pSender)
{
#if (CC_TARGET_PLATFORM == CC_PLATFORM_WINRT) || (CC_TARGET_PLATFORM == CC_PLATFORM_WP8)
    CCMessageBox("You pressed the close button. Windows Store Apps do not implement a close button.","Alert");
#else
    CCDirector::sharedDirector()->end();
#if (CC_TARGET_PLATFORM == CC_PLATFORM_IOS)
    exit(0);
#endif
#endif
}

void HelloWorld::update(float dt)
{
    int velocityIterations = 8;
    int positionIterations = 1;
    world->Step(dt, velocityIterations, positionIterations);

    for (b2Body* b = world->GetBodyList(); b; b = b->GetNext())
    {
        if (b->GetUserData() != NULL) {
            CCSprite* myActor = (CCSprite*)b->GetUserData();   //获取精灵
            myActor->setPosition( CCPointMake( b->GetPosition().x * PTM_RATIO, b->GetPosition().y * PTM_RATIO) );
            myActor->setRotation( -1 * CC_RADIANS_TO_DEGREES(b->GetAngle()) );
        }
    }
}

void HelloWorld::draw()
{
    // This is only for debug purposes
    // It is recommend to disable it
    CCLayer::draw();
    ccGLEnableVertexAttribs( kCCVertexAttribFlag_Position );
    kmGLPushMatrix();
    world->DrawDebugData();
    kmGLPopMatrix();
}

void HelloWorld::ccTouchesEnded(CCSet* touches, CCEvent* event)
{
    //Add a new body/atlas sprite at the touched location
    CCSetIterator it;
    CCTouch* touch;

    for( it = touches->begin(); it != touches->end(); it++)
    {
        touch = (CCTouch*)(*it);
        if(!touch)
            break;
        CCPoint location = touch->getLocation();
        addNewSpriteAtPosition( location );
    }
}

void HelloWorld::addNewSpriteAtPosition(CCPoint p)
{
    CCLOG("Add sprite %0.2f x %02.f",p.x,p.y);
    // Define the dynamic body.
    //Set up a 1m squared box in the physics world
    b2BodyDef bodyDef;
    bodyDef.type = b2_dynamicBody;
    bodyDef.position.Set(p.x/PTM_RATIO, p.y/PTM_RATIO);
    b2Body *body = world->CreateBody(&bodyDef);

    // Define another box shape for our dynamic body.
    b2PolygonShape dynamicBox;
    dynamicBox.SetAsBox(.5f, .5f);//These are mid points for our 1m box

    // Define the dynamic body fixture.
    b2FixtureDef fixtureDef;
    fixtureDef.shape = &dynamicBox;
    fixtureDef.density = 1.0f;
    fixtureDef.friction = 0.3f;
    body->CreateFixture(&fixtureDef);

//    //We have a 64x64 sprite sheet with 4 different 32x32 images.  The following code is
//    //just randomly picking one of the images
    int idx = (CCRANDOM_0_1() > .5 ? 0:1);
    int idy = (CCRANDOM_0_1() > .5 ? 0:1);
    CCSprite *sprite = CCSprite::createWithTexture(m_pSpriteTexture,CCRectMake(32 * idx,32 * idy,32,32));
    this->addChild(sprite,1);
    body->SetUserData(sprite);
}
具体解析下addNewSpiriteAtPosition。
CCLOG("Add sprite %0.2f x %02.f",p.x,p.y);在eclipse终端打印log显示添加spirit的位置。
    b2BodyDef bodyDef;
    bodyDef.type = b2_dynamicBody;
    bodyDef.position.Set(p.x/PTM_RATIO, p.y/PTM_RATIO);
    b2Body *body = world->CreateBody(&bodyDef);
创建一个刚体。首先需要b2BodyDef 刚体的定义(包含着刚体的坐标,刚体的类型:动态),而创造一个刚体需要世界来创造。
这里说一下world里的坐标,world是个相对来说比较真实的世界,这个世界里刚体用的参数是MKS ,也就是说米/千克/秒 ,而我们精灵用到的是像素,要相互转换,这里的PTM_RATIO也就是代表32个像素是一米,
    // Define another box shape for our dynamic body.
    b2PolygonShape dynamicBox;
    dynamicBox.SetAsBox(.5f, .5f);//These are mid points for our 1m box

    // Define the dynamic body fixture.
    b2FixtureDef fixtureDef;
    fixtureDef.shape = &dynamicBox;
    fixtureDef.density = 1.0f;
    fixtureDef.friction = 0.3f;
    body->CreateFixture(&fixtureDef);
定义一个四边形,设置它的物理参数。
    int idx = (CCRANDOM_0_1() > .5 ? 0:1);
    int idy = (CCRANDOM_0_1() > .5 ? 0:1);
    CCSprite *sprite = CCSprite::createWithTexture(m_pSpriteTexture,CCRectMake(32 * idx,32 * idy,32,32));
    this->addChild(sprite,1);
通过纹理创造一个物体(注意不说刚体),idx和idy随机选择0.5和1,因为纹理是64*64的,而正方形是32*32的,需要再屏幕上体现出来,得创造一个精灵,因为刚体并不能具象的在屏幕上表示。
body->SetUserData(sprite);将刚体和sprite连接起来。
还要注意一下Update里面的一句:
    int velocityIterations = 8;
    int positionIterations = 1;
    world->Step(dt, velocityIterations, positionIterations);
执行一个时间步。这个操作中会执行碰撞检测(collision detection)、集成(integration)、求解约束(constraint solution)。
timeStep 模拟的时间量,这不应该是一个变化的量。
velocityIterations 速度的约束求解量。
positionIterations 位置的约束求解量。
Box2D的物理世界通常包括这样几个对象
world:一个物理世界,所有的刚体都将存在在这个世界里面,这个世界以米为距离单位。尽量贴近真实世界的度量。
body:刚体,存在在物理世界的理想物体,比任何物体都硬,不会发生形变。body对应着一个bodyDef(刚体定义),刚体定义指定了刚体的类型(动态、静态、轨迹运动的)和刚体的位置,world通过刚体定义创建刚体。
fixture:刚体修饰物,描述刚体的一些特征。fixture对应着fixtureDef(修饰物定义),它将形状绑定到刚体上,使刚体具有一些表现特征,如密度、摩擦系数、弹性等等。body通过fixtureDef创建fixture。
shape:一个几何形状,比如圆和多边形。形状是修饰物fixture的一个属性,描述了刚体的碰撞边界。
解释一下b2World, b2Body, b2BodyDef, b2Fixture, b2FixtureDef, shpae之间的关系
1.b2World通过b2BodyDef创建b2Body,没有b2BodyDef,b2Body不知道是什么类型,放在世界什么位置。
2.b2Body通过b2FixtureDef创建b2Fixture,没有b2Fixture,b2Body不知道是什么形状,摩擦、弹性、密度都不知道。shpae提供了碰撞检测的外边框。
学习小节
参考
学习 Box2D 个人笔记(二)b2body - http://blog.csdn.net/adrianous/article/details/8435156
Cocos2d-x游戏开发技术精解
Cocos2d-x by Example Beginner's Guide


 5119
5119

 被折叠的 条评论
为什么被折叠?
被折叠的 条评论
为什么被折叠?
 到【灌水乐园】发言


