


边缘提取
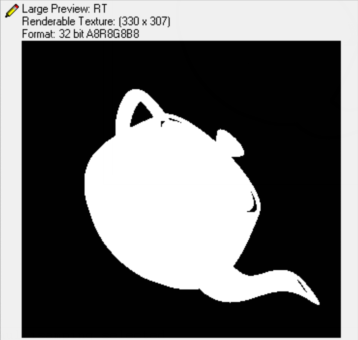
边缘提取有很多种,这里用的是屏幕空间的做法,首先把要提取边缘的物品用纯色绘制到一张rt上,然后用一个一个边缘检测的滤波器在ps中扫一遍。绘制纯色的的ps
float4 ps_main( float4 Diff: COLOR0 ) : COLOR
{
    return 1;
}
绘制完之后就像这样
边缘提取的滤波器称为Sobel filter。
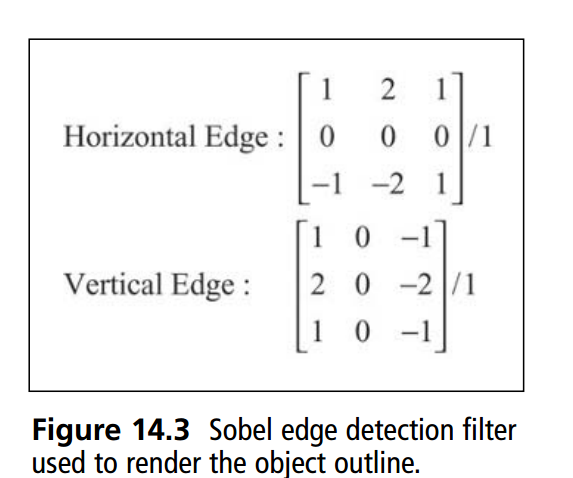
边缘提取的ps如下
sampler RT;
const float off = 1.0 / 256.0;
float4 ps_main( float2 TexCoord : TEXCOORD0 ) : COLOR
{
   // Sample the neighbor pixels
   float s00 = tex2D(RT, TexCoord + float2(-off, -off));
   float s01 = tex2D(RT, TexCoord + float2( 0,   -off));
   float s02 = tex2D(RT, TexCoord + float2( off, -off));

   float s10 = tex2D(RT, TexCoord + float2(-off,  0));
   float s12 = tex2D(RT, TexCoord + float2( off,  0));

   float s20 = tex2D(RT, TexCoord + float2(-off,  off));
   float s21 = tex2D(RT, TexCoord + float2( 0,    off));
   float s22 = tex2D(RT, TexCoord + float2( off,  off));

   // Sobel filter in X and Ydirection
   float sobelX = s00 + 2 * s10 + s20 - s02 - 2 * s12 - s22;
   float sobelY = s00 + 2 * s01 + s02 - s20 - 2 * s21 - s22;

   // Find edge
   float edgeSqr = (sobelX * sobelX + sobelY * sobelY);
   return 1.0-(edgeSqr > 0.07 * 0.07);
}
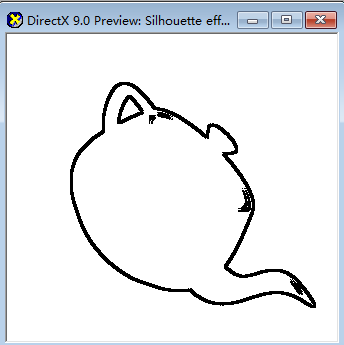
在ps中,要计算两个方向x,y的分量,得到的结果是2d的vector,表示的是这个像素点的方向。
通过这个向量,求取它的长度,得到的就是这个边将要绘制的强度。
结果:
其他的边缘检测思路
边缘检测有很多方式,上面这种有一个很明显的问题就是它只能检测object最外面的轮廓,但是像下面这种情况
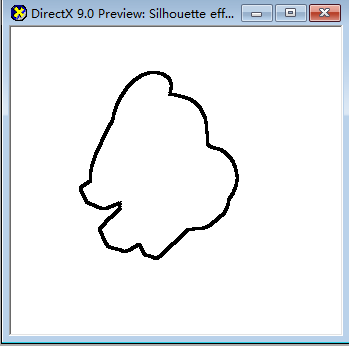
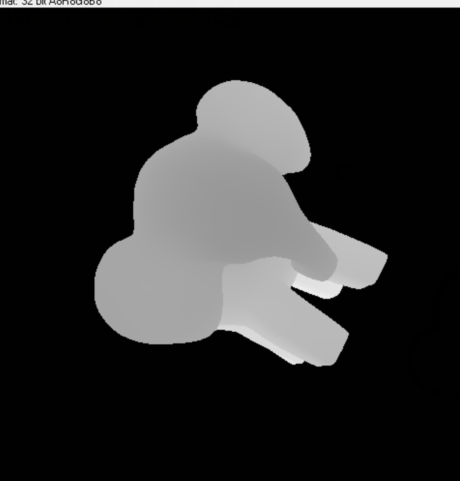
大象的鼻子就没法处理了。这时候一个处理方式是利用深度信息来处理。
渲染深度的vs如下
float4x4 view_proj_matrix;
float depthScale;
struct VS_OUTPUT
{
   float4 Pos: POSITION;
   float texCoord: TEXCOORD;
};

VS_OUTPUT main(float4 Pos: POSITION)
{
   VS_OUTPUT Out;

   // Transform vertex position
   Out.Pos = mul(view_proj_matrix, Pos);

   // Pass the scaled depth value as a texture coordinate
   Out.texCoord = depthScale * Out.Pos.z;

   return Out;
}
Ps中直接return depth。
float4 main(float depth: TEXCOORD) : COLOR
{
   // Simply output the depth to the texture as a color
   return depth;
}
判读边缘的条件变成视线和法线的夹角。
float edge = 1 - (dot(Normal,ViewVec)>0.07);
还有一种方法就是渲两次,第一遍先将对模型进行缩放,第二遍像渲染模型。这样的方法不管是渲染内边缘还是外边缘都是可以的,但是你没办法保证边缘的宽度一致,因为绘制并不是屏幕空间的。
Toon Shading
完成了轮廓绘制了之后,下一步就是shading 了,这里的shading分为两个部分,一个是textureing,另一个是lighting。
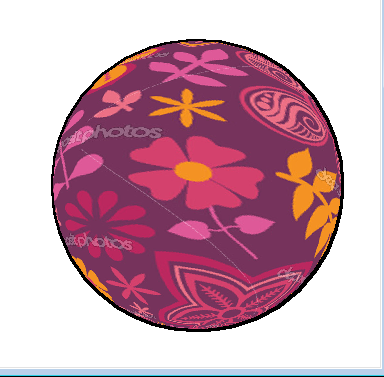
卡通渲染的贴图特点是颜色数量很少,有两种处理的方式,一种是不用贴图,直接将颜色赋给顶点,另一种使用比较卡通的贴图。
将前面的边缘绘制和卡通风格的贴图整合一下,结果如下
接下来加一下 光照
光照直接在vs中计算,只用diffuse就行
float4x4 view_proj_matrix;
float4 Light1_Position;
float4 Light1_Attenuation;
float4 Light1_Color;
struct VS_OUTPUT
{
   float4 Pos:       POSITION;
   float2 TexCoord:   TEXCOORD0;
   float2 Color:      COLOR0;
};

float4 Light_PointDiffuse(float3 VertPos, float3 VertNorm, float3 LightPos,
                          float4 LightColor, float4 LightAttenuation)
{
   // Determine the distance from the light to the vertex and the direction
   float3 LightDir = LightPos - VertPos;
   float  Dist = length(LightDir);
   LightDir = LightDir / Dist;

   // Compute distance based attenuation. This is defined as:
   // Attenuation = 1 / ( LA.x + LA.y*Dist + LA.z*Dist*Dist )
   float DistAttn = clamp(0,1, 1 / ( LightAttenuation.x +
                                     LightAttenuation.y * Dist +
                                     LightAttenuation.z * Dist * Dist ));

   // Compute suface/light angle based attenuation defined as dot(N,L)
   // Note : This must be clamped as it may become negative.
   float AngleAttn = clamp(0, 1, dot(VertNorm, LightDir) );

   // Compute final lighting
   return LightColor * DistAttn * AngleAttn;
}


VS_OUTPUT vs_main(float4 inPos: POSITION, float3 inNormal: NORMAL,float2 inTxr: TEXCOORD0)
{
   VS_OUTPUT Out;

   // Compute the projected position and send out the texture coordinates
   Out.Pos = mul(view_proj_matrix, inPos);
   Out.TexCoord = inTxr;

   // Output the ambient color
   float4 Color = float4(0.4,0.4,0.4,1);

   // Compute light contribution
   Color += Light_PointDiffuse(inPos, inNormal, Light1_Position,
                               Light1_Color, Light1_Attenuation);

   // Output Final Color
   Out.Color = Color;

   return Out;
}
Ps利用取余操作对对diffuse进行分段。
sampler Texture0;
float4 ps_main( float2 Tex: TEXCOORD0, float4 Diffuse:COLOR0) : COLOR
{
    // Clamp diffuse to a fixed set of values and modulate with
    // the texture color
    Diffuse = (int)(Diffuse * 4) / 4.0;
    return Diffuse*tex2D(Texture0, Tex);
}
结果
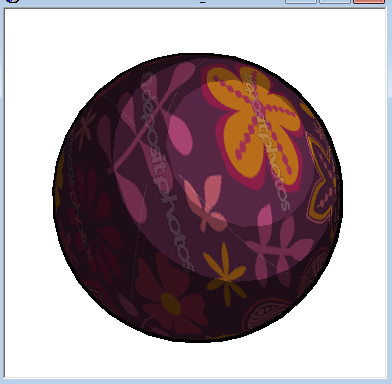
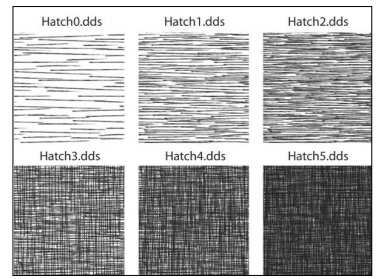
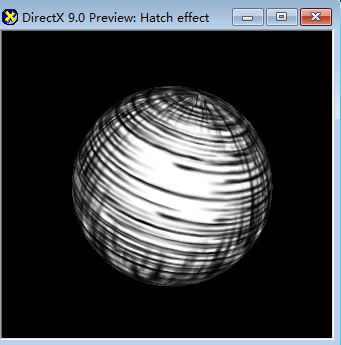
手绘效果
思路非常简单:利用6张手绘贴图表示不同的光照强度,渲染物体的时候根据光照信息blend相应的贴图,问题就转化为求6张贴图的混合系数的问题。
在shader中用两个float3来记录每个贴图的blend值,其实函数根据diffuse的光强。
float hatchFactor = diffuse * 6.0;
float4 Light_Direction;
float4x4 view_matrix;
float4x4 view_proj_matrix;
struct VS_OUTPUT
{
   float4 Pos           : POSITION0;
   float2 TexCoord      : TEXCOORD0;
   float3 HatchWeights0 : TEXCOORD1;
   float3 HatchWeights1 : TEXCOORD2;
};

VS_OUTPUT vs_main( float4 inPos: POSITION0, float3 inNormal: NORMAL0,
                   float2 inTexCoord : TEXCOORD0 )
{
   VS_OUTPUT Out;

   // Compute projected position and transfer texture
   // coordinates for the object
   Out.Pos = mul( view_proj_matrix, inPos );
   Out.TexCoord = inTexCoord;

   // Determine a simple diffuse lighting component based
   // on a directional light in view space
   float3 pos_world    = mul( view_matrix, inPos );
   float3 normal_world = normalize(mul( (float3x3)view_matrix,
                         inNormal ));
   float  diffuse = min(1.0,max(0,dot(-Light_Direction,normal_world)));
   diffuse = diffuse * diffuse;
   diffuse = diffuse * diffuse;

   float  hatchFactor = diffuse * 6.0;
   float3 weight0 = 0.0;
   float3 weight1 = 0.0;

   // Determine the weights for the hatch textures based on the
   // hatch factor which is simply proportional to the diffuse
   // lighting. In other words, the more lit the object, the less
   // dense the hatching will be.
   if (hatchFactor>5.0) { weight0.x = 1.0; }
   else if (hatchFactor>4.0)
   {
      weight0.x = 1.0 - (5.0 - hatchFactor);
      weight0.y = 1.0 - weight0.x;
   }
   else if (hatchFactor>3.0)
   {
      weight0.y = 1.0 - (4.0 - hatchFactor);
      weight0.z = 1.0 - weight0.y;
   }
   else if (hatchFactor>2.0)
   {
      weight0.z = 1.0 - (3.0 - hatchFactor);
      weight1.x = 1.0 - weight0.z;
   }
   else if (hatchFactor>1.0)
   {
      weight1.x = 1.0 - (2.0 - hatchFactor);
      weight1.y = 1.0 - weight1.x;
   }
   else if (hatchFactor>0.0)
   {
      weight1.y = 1.0 - (1.0 - hatchFactor);
      weight1.z = 1.0 - weight1.y;
   }
   Out.HatchWeights0 = weight0;
   Out.HatchWeights1 = weight1;

   return Out;
}
Ps中就比较简单了
sampler Hatch0;
sampler Hatch1;
sampler Hatch2;
sampler Hatch3;
sampler Hatch4;
sampler Hatch5;
sampler Base;
float4 ps_main( float2 TexCoord: TEXCOORD0,
                float3 HatchWeights0: TEXCOORD1,
                float3 HatchWeights1 : TEXCOORD2) : COLOR
{
    // Sample eatch hatch texture based on the object's texture
    // coordinates and weight the pattern based on the factor
    // determined from the lighting.
    float4 hatchTex0 = tex2D(Hatch0,TexCoord) * HatchWeights0.x;
    float4 hatchTex1 = tex2D(Hatch1,TexCoord) * HatchWeights0.y;
    float4 hatchTex2 = tex2D(Hatch2,TexCoord) * HatchWeights0.z;
    float4 hatchTex3 = tex2D(Hatch3,TexCoord) * HatchWeights1.x;
    float4 hatchTex4 = tex2D(Hatch4,TexCoord) * HatchWeights1.y;
    float4 hatchTex5 = tex2D(Hatch5,TexCoord) * HatchWeights1.z;

    // Combine all patterns, the final color is simply the sum
    // of all hatch patterns.
    float4 hatchColor = hatchTex0 +
                        hatchTex1 +
                        hatchTex2 +
                        hatchTex3 +
                        hatchTex4 +
                        hatchTex5;
    return hatchColor;
}
最终结果


 528
528

 被折叠的 条评论
为什么被折叠?
被折叠的 条评论
为什么被折叠?
 到【灌水乐园】发言


