


lamp (linux apache mysql php/perl/phyton)这里编译的是php
对于php 我们还想用到xcache模块 而在php5.4之后的版本是不支持 xcache的 所以这里编译的是 php5.4(不是最新版本了) mysql以5.5为例 httpd(就是所谓的apache)选择最新的4.9版本
首先介绍一下 linux我们这里就不编译了 太费时间 mysql 也有100多M 编译好也要一个多小时 所以采用官网的二进制文件
首先介绍一下httpd 实现http协议的程序 http://baike.baidu.com/link?url=CxySReMBQ-4etYqOITDhgea4KOMjZMG4yz2DXt1Ai98EfEtdWW_oQyNpbvdF6V5PZT-9mbuWtohDj9n6R00I7q 想了解看这里 或者apache官网 httpd.apache.org
mysql 就是一个数据库了 有社区版和商业版 我们这里选择社区办(免费嘛)
php 就是专门做动态网站的脚本语言 (开发非常快)facebook就是用这个写的(当然facebook有个hiphop 程序 将php程序编译成C++二进制文件 当然会增加维护难度 但是会显著提高性能 一般php的运行速度比java慢40倍 )
好了 就介绍这么多 想了解更多的 可以去 php.net apache.org mysql.com 查看吧
系统 :Linux hadoop 2.6.32-358.el6.i686 #1 SMP Thu Feb 21 21:50:49 UTC 2013 i686 i686 i386 GNU/Linux (centos 6.5)
php 5.4.13
mysql 5.5.37
httpd 2.4.9
为什么要自己编译呢 因为要地址自己的平台
好 编译顺序 httpd--->mysql--->php-->xcache 因为依赖关系啊 最好按照这个顺序编译
httpd 是运行在apr(apache protable runtime 类似于java虚拟机jre环境的东西 )上面的 因为我们要安装2.4.9需要比较新的 apr 所以 我们县编译apr 和它提供的工具 apr-util 以为系统中已经安装了这个rpm 但是由于依赖关系比较多 也不方便删除 所以 我们自己编译的安装到另外一个路径 多版本共存嘛
这里我采用apr 1.5.0 apr-util 1.5.1
解压缩
[root@hadoop apr-util-1.5.1]# tar xvf apr-1.5.0\ \(1\).tar.gz
[root@hadoop ~]# cd apr-1.5.0
运行configure脚本 指定安装目录为 usr/local/apr
[root@hadoop apr-1.5.0]# configure --prefix=/usr/local/apr
没有问题
[root@hadoop apr-util-1.5.1]# make&&make install
编译 arp-util
解压缩
[root@hadoop ~]# tar xvf apr-util-1.5.1\ \(1\).tar.bz2
[root@hadoop ~]# cd apr-util-1.5.1
运行configure脚本 并指定 apr路径
[root@hadoop apr-util-1.5.1]# configure--prefix=/usr/local/apr-util --with-apr=/usr/local/apr
[root@hadoop apr-util-1.5.1]# make && make install
好了 这两个都编译好了就可以编译 httpd了
tar xvf httpd-2.4.9.tar.bz2
进入目录
[root@hadoop ~]# cd httpd-2.4.9
首先介绍几个编译httpd常用的选项
configure常用选项:enable-so 支持动态共享模块 这个市必须添加的
enable-ssl 启用ssl的 系统要安装ssl
enable-deflate 支持压缩机制
enable-profix-fcgi 支持fast cgi的 (就是把应用服务器跟httpd服务器分开的那个)
enable-mpm-share 把mpm做成share的 可以启动时调用
with-mpm 选择启用哪个mpm 默认是event
enable-rewite 支持重写url
enable-cgi 支持cgi
enable-cgid 使用event和worker mpm模型需要指定该选项
好运行configure
[root@hadoop httpd-2.4.9]#./configure --prefix=/usr/local/apache --sysconfdir=/etc/httpd --enable-so --enable-ssl --enable-cgi --enable-rewrite --with-zlib --with-pcre --with-apr=/usr/local/apr --with-apr-util=/usr/local/apr-util --enable-modules=most --enable-mpms-shard=most --with-mpm=event
错误 :configure: error: pcre-config for libpcre not found。 PCRE is required and available
出现错误 缺少 pcre的库 好吧 我们安装pcre库
yum install pcre.i686
没有yum的可以自己去下载解压缩 编译的时候制定--with-pcre=/pcrePATH
擦还是不行好吧 只能自己安装pcre了 妈妈的 pcre是一些数学库 这里 后来我发现安装pcre-devde的rpm包就可以了 呵呵
解压缩pcre
[root@hadoop ~]# tar vxf pcre-8.30.tar.gz
root@hadoop ~]# cd pcre-8.30
[root@hadoop pcre-8.30]# configure --prefix=/usr/local/pcre
[root@hadoop pcre-8.30]# make && make install
继续回到httpd 目录编译
[root@hadoop httpd-2.4.9]# ./configure --prefix=/usr/local/apache --sysconfdir=/etc/httpd --enable-so --enable-ssl --enable-cgi --enable-rewrite --with-zlib --with-pcre --with-apr=/usr/local/apr --with-apr-util=/usr/local/apr-util --enable-modules=most --enable-mpms-shard=most --with-mpm=event --with-pcre=/usr/local/pcre/
晕 ssl版本过低 好吧 编译ssl
正好 以前那个心脏出血漏洞在这里打更新了 呵呵
[root@hadoop ~]# tar xvf openssl-1.0.1g.tar.gz
[root@hadoop openssl-1.0.1g]# config --prefix=/usr/local/openssl
[root@hadoop openssl-1.0.1g]# make install
备份原有openssl脚本
[root@hadoop openssl-1.0.1g]# mv /usr/bin/openssl /usr/bin/openssl.old
替换为新生成的openssl
[root@hadoop openssl-1.0.1g]# ln -sv /usr/local/openssl/bin/openssl /usr/bin/openssl
这是oepnssl已经变成最新版本了 呵呵 不过我们还需要导入头文件
[root@hadoop openssl-1.0.1g]# ln -sv /usr/local/openssl/include /usr/include/openssl
还不错 openssl已经升级好了 不用再担心心脏出血漏洞了 下面 继续编译 httpd 注意路径
[root@hadoop httpd-2.4.9]# ./configure --prefix=/usr/local/apache --sysconfdir=/etc/httpd --enable-so --enable-ssl --enable-cgi --enable-rewrite --with-zlib --with-pcre --with-apr=/usr/local/apr --with-apr-util=/usr/local/apr-util --enable-modules=most --enable-mpms-shard=most --with-mpm=event --with-pcre=/usr/local/pcre/ --with-ssl=/usr/local/openssl
ok终于可以 make了
[root@hadoop httpd-2.4.9]# make
[root@hadoop httpd-2.4.9]# make install
编译完毕
[root@hadoop httpd-2.4.9]# cd /usr/local/apache/
启动服务
[root@hadoop apache]# bin/apachectl start
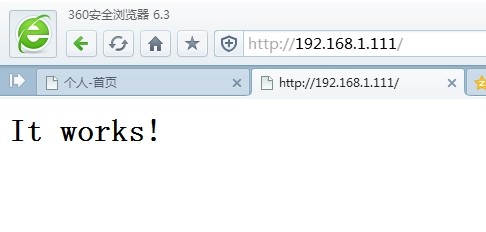
然后我们在浏览器访问以下试试
已经可以工作了
好 配置环境变量
[root@hadoop apache]# vim /etc/profile.d/httpd.sh
环境变量配置好了
好了 httpd已经可以工作了 但是还不算完美啊 我们总是习惯system V风格的服务不是嘛 好 干


编辑http服务脚本
[root@hadoop ~]# vim /etc/rc.d/init.d/httpd
[root@hadoop ~]# vim /etc/rc.d/init.d/httpd
OK
设置开机启动
[root@hadoop ~]# chkconfig httpd on
好 httpd服务器 就到这里
下面俺来安装mysql
因为我们的是 已经变异好的二进制文件 直接解压到/usr/local 就好了
[root@hadoop ~]# tar xvf mysql-5.5.37-linux2.6-i686.tar.gz -C /usr/local/
[root@hadoop ~]# cd /usr/local/
[root@hadoop local]# ln mysql-5.5.37-linux2.6-i686 mysql
好 创建 mysql用户 mysql组
好 这里我打算将mysql建立在一个lvm逻辑 卷组里面 所以这里我先创建逻辑
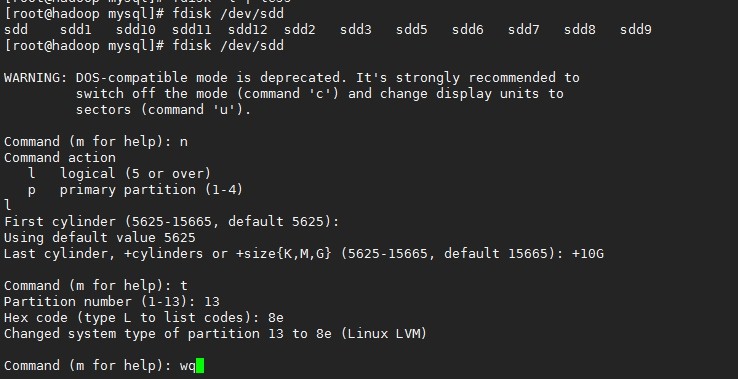
1 分出一块盘 我在 /dev/sdd磁盘分出一块
[root@hadoop mysql]# fdisk /dev/sdd
[root@hadoop ~]# pvcreate /dev/sdd13
[root@hadoop ~]# vgcreate myvg2 /dev/sdd13
[root@hadoop ~]# lvcreate -n mydata -L 5G myvg2
创建ext4 文件系统
[root@hadoop ~]# mkfs.ext4 /dev/myvg2/mydata
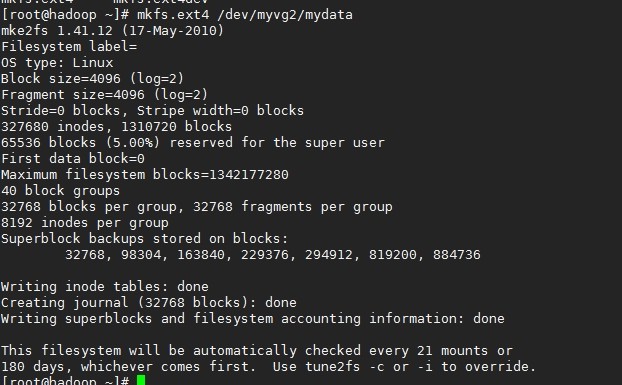
看到没 操作系统课说那些文件系统 多么直观的显示出来
创建文件夹 用于挂载刚才创建好的 lvm
[root@hadoop ~]# mkdir /mydata
编辑 fstable文件
[root@hadoop ~]# vim /etc/fstab
增加这行 19 /dev/myvg2/mydata /mydata ext4 defaults 0 0 下次启动的时候自动挂在
从新挂在fstab上的分区
[root@hadoop ~]# mount -a
给权限
[root@hadoop mydata]# chmod o-rx /mydata/data/
改变mysql下的属主属组
[root@hadoop mysql]# chown -R mysql:mysql /usr/local/mysql/*
好下面我们就能初始化 mysql数据库了
[root@hadoop mydata]# cd /usr/local/mysql
执行初始化脚本那两个参数你应该看得懂 察看更多配置信息 scripts/mysql_install_db --help
[root@hadoop mysql]# scripts/mysql_install_db --user=mysql --datadir=/mydata/data/
用mysql用户运行完初始化脚本可以收回这些命令的权限了
[root@hadoop mysql]# chown -R root /usr/local/mysql/*
这是初始化的帮助文档的一段
[root@hadoop mysql]# cp support-files/mysql.server /etc/rc.d/init.d/mysqld
启动mysql
创建配置文件
mysql的配置文件搜索路径/etc/my.cnf --->/etc/mysql/my.cnf---?$BASEDIR/my.cnf--->~/.my.cnf
这四个路径都会搜索 如果有重复配置的话以最后一个为准
没有配置文件也能跑起来 我们给它添加个配置文件把
在 安装目录下面的
support-files/ 下面提供了几个配置文件 根据内存不同选择不同配置文件
都是ascll的文件里面有帮助信息可以自己察看 我这里512M内存
[root@hadoop mysql]# cp support-files/my-large.cnf /etc/my.cnf
配置[root@hadoop mysql]# vim /etc/my.cnf
thread_concurrency = 2 这项是定制线程数 一般等于cpu个数x2
datadir = /mydata/data 制定datadir
好配置环境变变量
[root@hadoop mysql]# vim /etc/profile.d/mysql.sh
添加
export PATH=$PATH:/usr/local/mysql/bin
增加库文件
[root@hadoop ~]# vim /etc/profile.d/mysql.sh
写入 /usr/local/mysql/lib
更新库缓存
[root@hadoop ~]# ldconfig -v
[root@hadoop ~]# ln -sv /usr/local/mysql/include/* /usr/local/mysql
OK mysql 配置完毕
额额 两晚上了 今天第三晚上
我们来编译php
介绍一些选项
--enable-mbstring 这是编辑多字符功能 就是非ascall编码的文字了 所以作为中国人的我们 必须要提供
--with-freetype-dir 这是字库
--with-mysql 和mysql链接的能驱动
--with-openssl 加密库 ssl
--with-mysqli mysqli 功能 http://jingyan.baidu.com/article/e75aca85545a11142edac6e3.html 想了解 这个网址
--with -jepg-dir 支持图片
--with-png-dir
--with-zlib 压缩库
--with-libxml-dir 指定xml
--enable -xml 编译 xml功能
--enable-sockets 支持 socket链接
--with-bz2 引用bz2
--enable -maintalner-zts 这个与httpd的编译有关 如果httpd是工作在work或者event模式下就要指定这项
--with-apxs2=/usr/local/apache/bin/apxs 指定httpd钩子 通过这个钩子 勾住php编译成httpd的模块
--with-config-file-path 指定配置文件路径
--with-config-file-scan-dir=/etc/php.d 配置文件扫描的文件路径
要想编译成fast-cgi模式 用
--enable-fpm 去掉--with-apxs2=/usr/local/apache/bin/apxs 这项
好 开编译 可能 会出现库的缺失 到时候报错 在一步一步的添加吧
[root@hadoop ~]# tar xvf php-5.4.28.tar.bz2
[root@hadoop ~]# cd php-5.4.28

错误
configure:err xml2-config not found. Please check you libxml12 installation
这里我就不编译了 直接安装rpm了 想编译的可可以
编译完 --with-libxml-dir=这里增加编译安装XML2的路径就好了
[root@hadoop ~]# yum install libxml2.i686 libxml2-devel.i686
继续编译 php
./configure--prefix=/usr/local/php --with-mysql=/usr/local/mysql --with-openssl--with-mysqli=/usr/local/mysql/bin/mysql_config --enable-mbstring--with-freetype-dir --with-jpeg-dir --with-png-dir --with-zlib--with-libxml-dir=/usr --enable-xml --enable-sockets--with-apxs2=/usr/local/apache/bin/apxs --with-config-file-path=/etc--with-config-file-scan-dir=/etc/php.d --with-bz2--enable-maintainer-zts

错误: checking for BZip2 in default path... not found
configure: error: Please reinstall the BZip2 distribution
缺少bz2的库 一般这些bz2这种我们已经安装的 还缺少库 多数是没有安装devel 包 好 我们安装它
[root@hadoop php-5.4.28]# yum install bzip2-devel.i686
继续编译 php
[root@hadoop php-5.4.28]# ./configure --prefix=/usr/local/php --with-mysql=/usr/local/mysql --with-openssl --with-mysqli=/usr/local/mysql/bin/mysql_config --enable-mbstring --with-freetype-dir --with-jpeg-dir --with-png-dir --with-zlib --with-libxml-dir=/usr --enable-xml --enable-sockets --with-apxs2=/usr/local/apache/bin/apxs --with-config-file-path=/etc --with-config-file-scan-dir=/etc/php.d --with-bz2 --enable-maintainer-zts
ok成功
[root@hadoop php-5.4.28]# make
[root@hadoop php-5.4.28]# make install
好 复制配置文件到/etc下面 注意 这里是在编译目录操作的
[root@hadoop php-5.4.28]# cp php.ini-production /etc/php.ini
简单的编辑一下 httpd的配置文件 使之能处理 php格式的脚本
[root@hadoop php-5.4.28]# vim /etc/httpd/httpd.conf
全局配置处 增加如下两 行
找到
DirectoryIndex选项 改为DirectoryIndex index.php index.html
重新启动httpd
[root@hadoop php-5.4.28]# service httpd restart
到我们的网页文件夹 添加php主页
[root@hadoop php-5.4.28]# cd /usr/local/apache/htdocs/
添加如下信息
好在浏览器测试一下
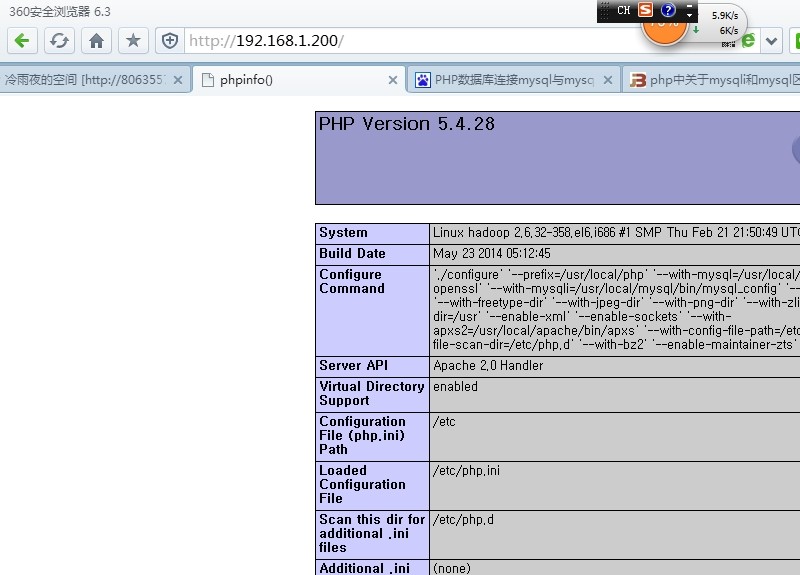
成功 呵呵
在测试一下php链接mysql
将index.php改成如下
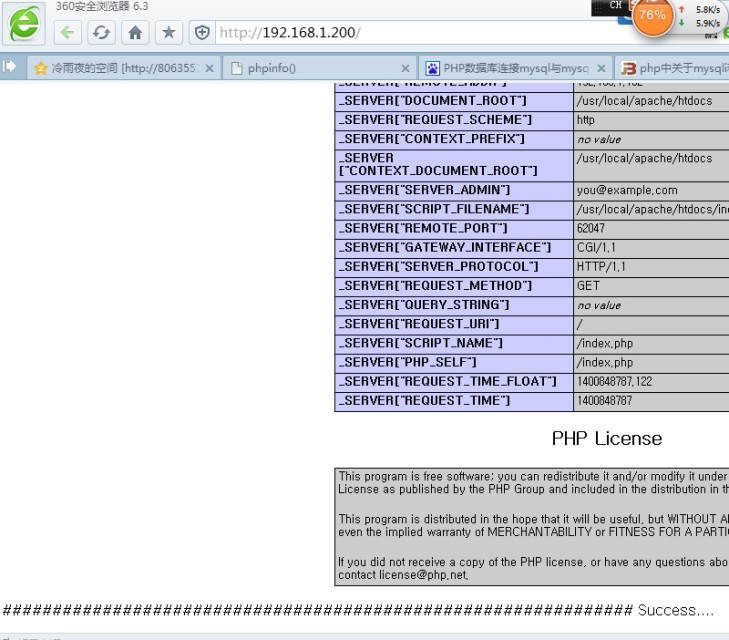
看最下面 链接成功


 212
212


 被折叠的 条评论
为什么被折叠?
被折叠的 条评论
为什么被折叠?
 到【灌水乐园】发言


