


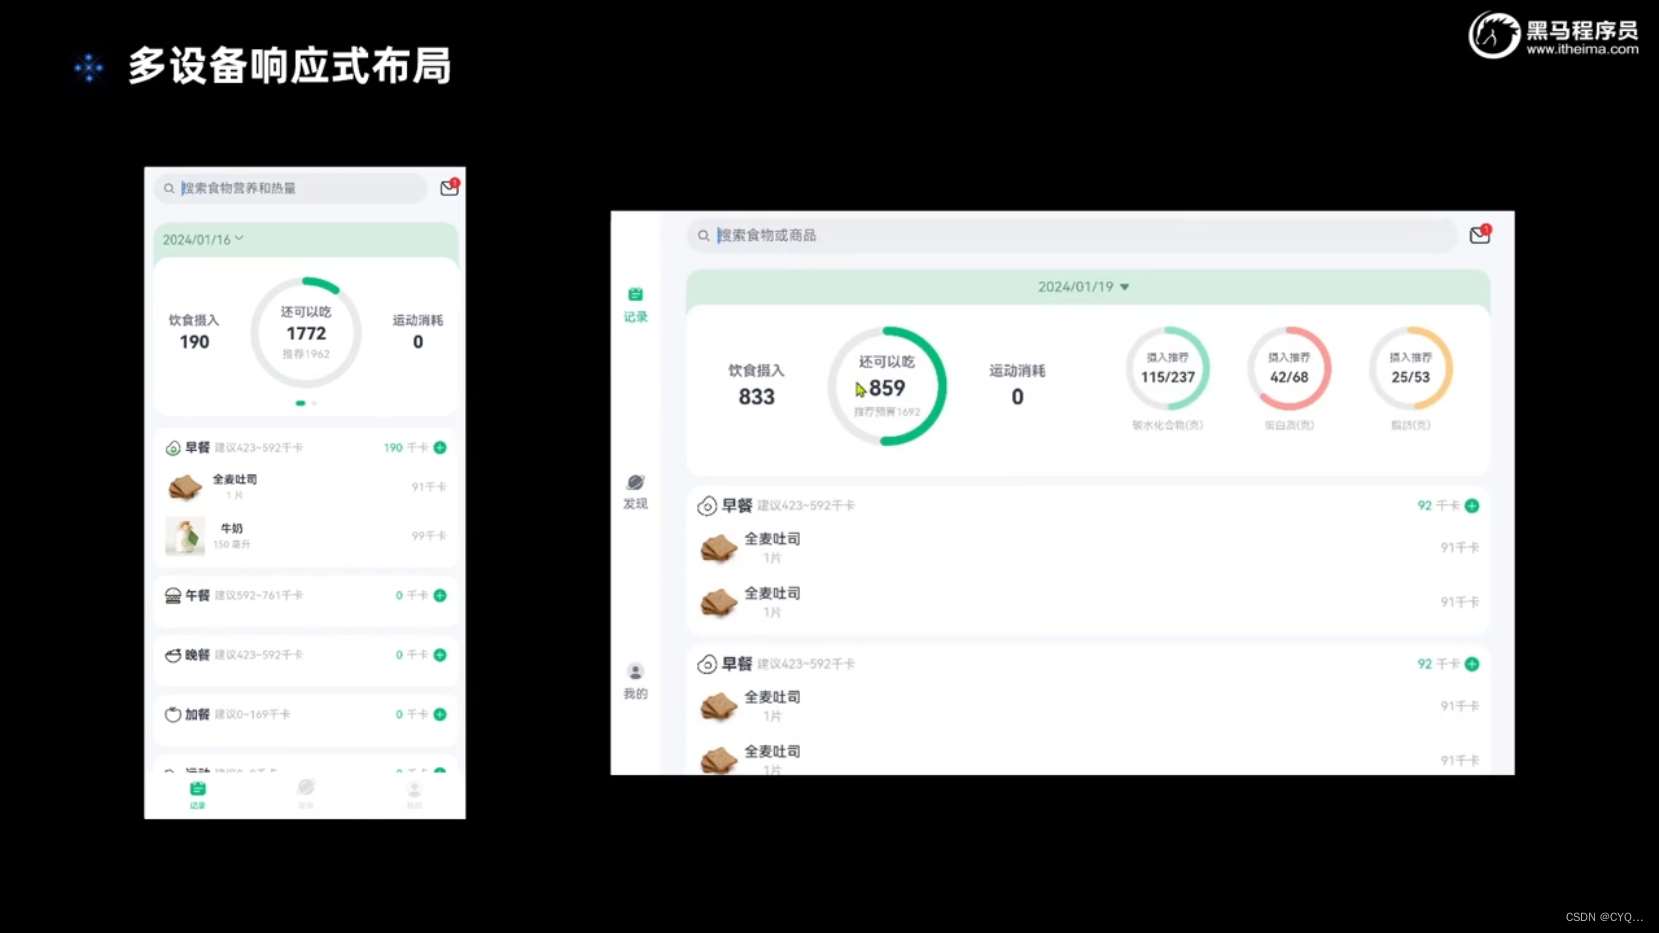
9.1 响应式布局设计
9.2 如何知道什么设备
9.2.1 媒体查询
1. 导入媒体查询模块
import mediaQuery from '@ohos.mediaquery';2.设置媒体查询条件,并获取对应的listener
let listener = mediaQuery.matchMediaSync('(320vp<=width<600vp)')3.给listener设置回调函数,当设备状态变化时会执行回调函数
//设置监听回调函数
listener.on('change', result=>{
//判断是否满足媒体查询条件
if(result.matches)
{
    //记录当前设备状态
}
})
查询条件320vp<=width<600vp这样设置太长太复杂了
可以这样设置用一个状态标记记录下来
| 设备状态 | 媒体查询条件 |
| SM | (320vp<=width<600vp) |
| MD | (600vp<=width<840vp) |
| LG | (840vp<=width) |
4.将设备状态记录到全局状态中
//全局存储
AppStorage.SetOrCreate('currentBreakpoint','SM')
@StorageProp('currentBreakpoint') currentBreakpoint: string = 'SM'
9.3 饮食记录使用多端部署
9.3.1 定义三个监听器(用来监听不同屏幕的绘制范围)
在common下的constants下的BreakpointConstants文件中已经定义好了各种屏幕的范围
 private smListener: mediaQuery.MediaQueryListener = mediaQuery.matchMediaSync(BreakpointConstants.RANGE_SM)
  private mdListener: mediaQuery.MediaQueryListener = mediaQuery.matchMediaSync(BreakpointConstants.RANGE_MD)
  private lgListener: mediaQuery.MediaQueryListener = mediaQuery.matchMediaSync(BreakpointConstants.RANGE_LG)
9.3.2 定义回调函数
  smListenerCallback(result: mediaQuery.MediaQueryResult){
    if(result.matches){
      this.updateCurrentBreakpoint(BreakpointConstants.BREAKPOINT_SM)
    }
  }

  mdListenerCallback(result: mediaQuery.MediaQueryResult){
    if(result.matches){
      this.updateCurrentBreakpoint(BreakpointConstants.BREAKPOINT_MD)
    }
  }

  lgListenerCallback(result: mediaQuery.MediaQueryResult){
    if(result.matches){
      this.updateCurrentBreakpoint(BreakpointConstants.BREAKPOINT_LG)
    }
  }
9.3.3 把公共的抽取出来
 updateCurrentBreakpoint(breakpoint: string){
    AppStorage.SetOrCreate(BreakpointConstants.CURRENT_BREAKPOINT, breakpoint)
  }
9.3.4 给三个listener绑定回调函数
要注册回调函数,但是退出时也要取消监听
 register(){
    this.smListener.on('change', this.smListenerCallback.bind(this))
    this.mdListener.on('change', this.mdListenerCallback.bind(this))
    this.lgListener.on('change', this.lgListenerCallback.bind(this))
  }

  unregister(){
    this.smListener.off('change', this.smListenerCallback.bind(this))
    this.mdListener.off('change', this.mdListenerCallback.bind(this))
    this.lgListener.off('change', this.lgListenerCallback.bind(this))
  }
9.4 初始化
 private  breakpointSystem:BreakpointSystem=new BreakpointSystem()
 aboutToAppear(){
    this.breakpointSystem.register()
  }
  aboutToDisappear(){
    this.breakpointSystem.unregister()
  }
9.6 响应式处理
定义一个判断的函数,利用JavaScript中的定义一个变量p.
sm,md,lg作为它的key,BarPosition.End,Start作为它的value
返回p[this.currentBreakpoint]肯定决定于当前的currentBreakpoint。
chooseBarPosition(){
   return new BreakpointType({
     sm:BarPosition.End,
     md:BarPosition.Start,
     lg:BarPosition.Start
   }).getValue(this.currentBreakpoint)
  }
将Tabs导航栏位置变为
Tabs({barPosition:this.chooseBarPosition()})同时需要对布局进行修改
  .vertical(new BreakpointType({
      sm:false,
      md:true,
      lg:true
    }).getValue(this.currentBreakpoint))
以上是最初的然后进行修改让代码看起来更加好看一些声明一个类型泛型定义一个泛型的类使用时直接new一个然后调用方法。
declare interface BreakpointTypeOptions<T>{
  sm?:T,
  md?:T,
  lg?:T
}//不确定类型定义成泛型


export default class BreakpointType<T>{
  options: BreakpointTypeOptions<T>//把参数给options
//方法封装在类里面
  constructor(options: BreakpointTypeOptions<T>) {
    this.options = options
  }
//返回T类型
  getValue(breakpoint: string): T{
    return this.options[breakpoint]//取出属性
  }
}
chooseBarPosition(){
return new BreakpointType({
sm:BarPosition.End,
md:BarPosition.Start,
lg:BarPosition.Start
}).getValue(this.currentBreakpoint)
}
.vertical(new BreakpointType({
sm:false,
md:true,
lg:true
}).getValue(this.currentBreakpoint))继续修改把那个三种类型在 BreakpointConstants文件中定义为常量
static readonly BAR_POSITION: BreakpointType<BarPosition> = new BreakpointType({
    sm: BarPosition.End,
    md: BarPosition.Start,
    lg: BarPosition.Start,
  })
使用时可以直接调用
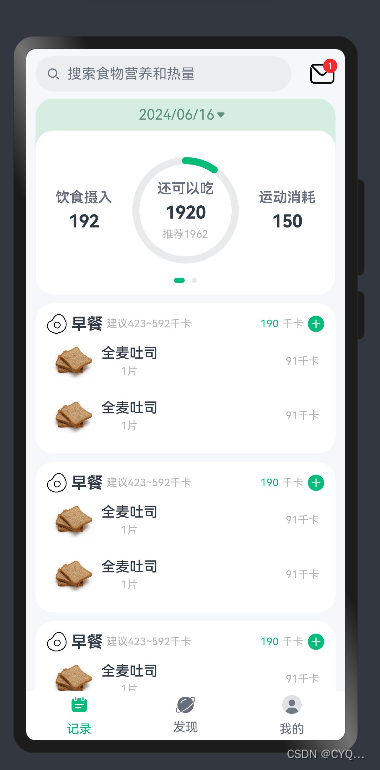
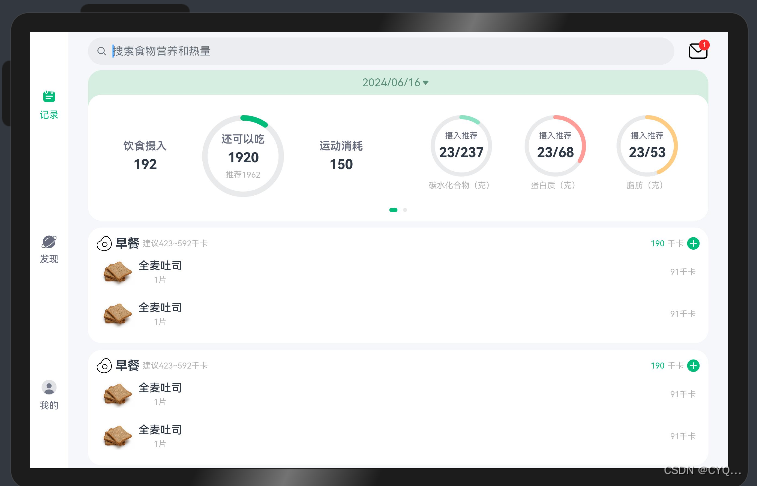
Tabs({barPosition: BreakpointConstants.BAR_POSITION.getValue(this.currentBreakpoint)})同时要对卡片也要做响应式处理当屏幕小或中等时只显示一个当屏幕大时显示2个可以平铺
使用displaycount设置显示几个
 .displayCount(new BreakpointType({
        sm:1,
        md:1,
        lg:2
      }).getValue(this.currentBreakpoint))
      .width('100%')
      .backgroundColor(Color.White)
      .borderRadius(20)
      .indicatorStyle({selectedColor:$r('app.color.primary_color')})
    }
9.7 运行效果


 1234
1234

 被折叠的 条评论
为什么被折叠?
被折叠的 条评论
为什么被折叠?
 到【灌水乐园】发言


