


目录
一、引言
在现代应用程序中,人脸识别和人脸比对技术被广泛应用于安全系统、访问控制、社交媒体等多个领域。本次作业旨在创建一个基于Windows Forms的桌面应用程序,利用百度AI的人脸识别API,实现实时视频流中的人脸检测和比对功能。通过这个项目,我将使用C#结合AForge.Video库进行视频捕捉,并使用百度AI的接口进行人脸识别和比对。
二、准备工作
1.在百度智能云中找到人脸识别模块

2.创建应用
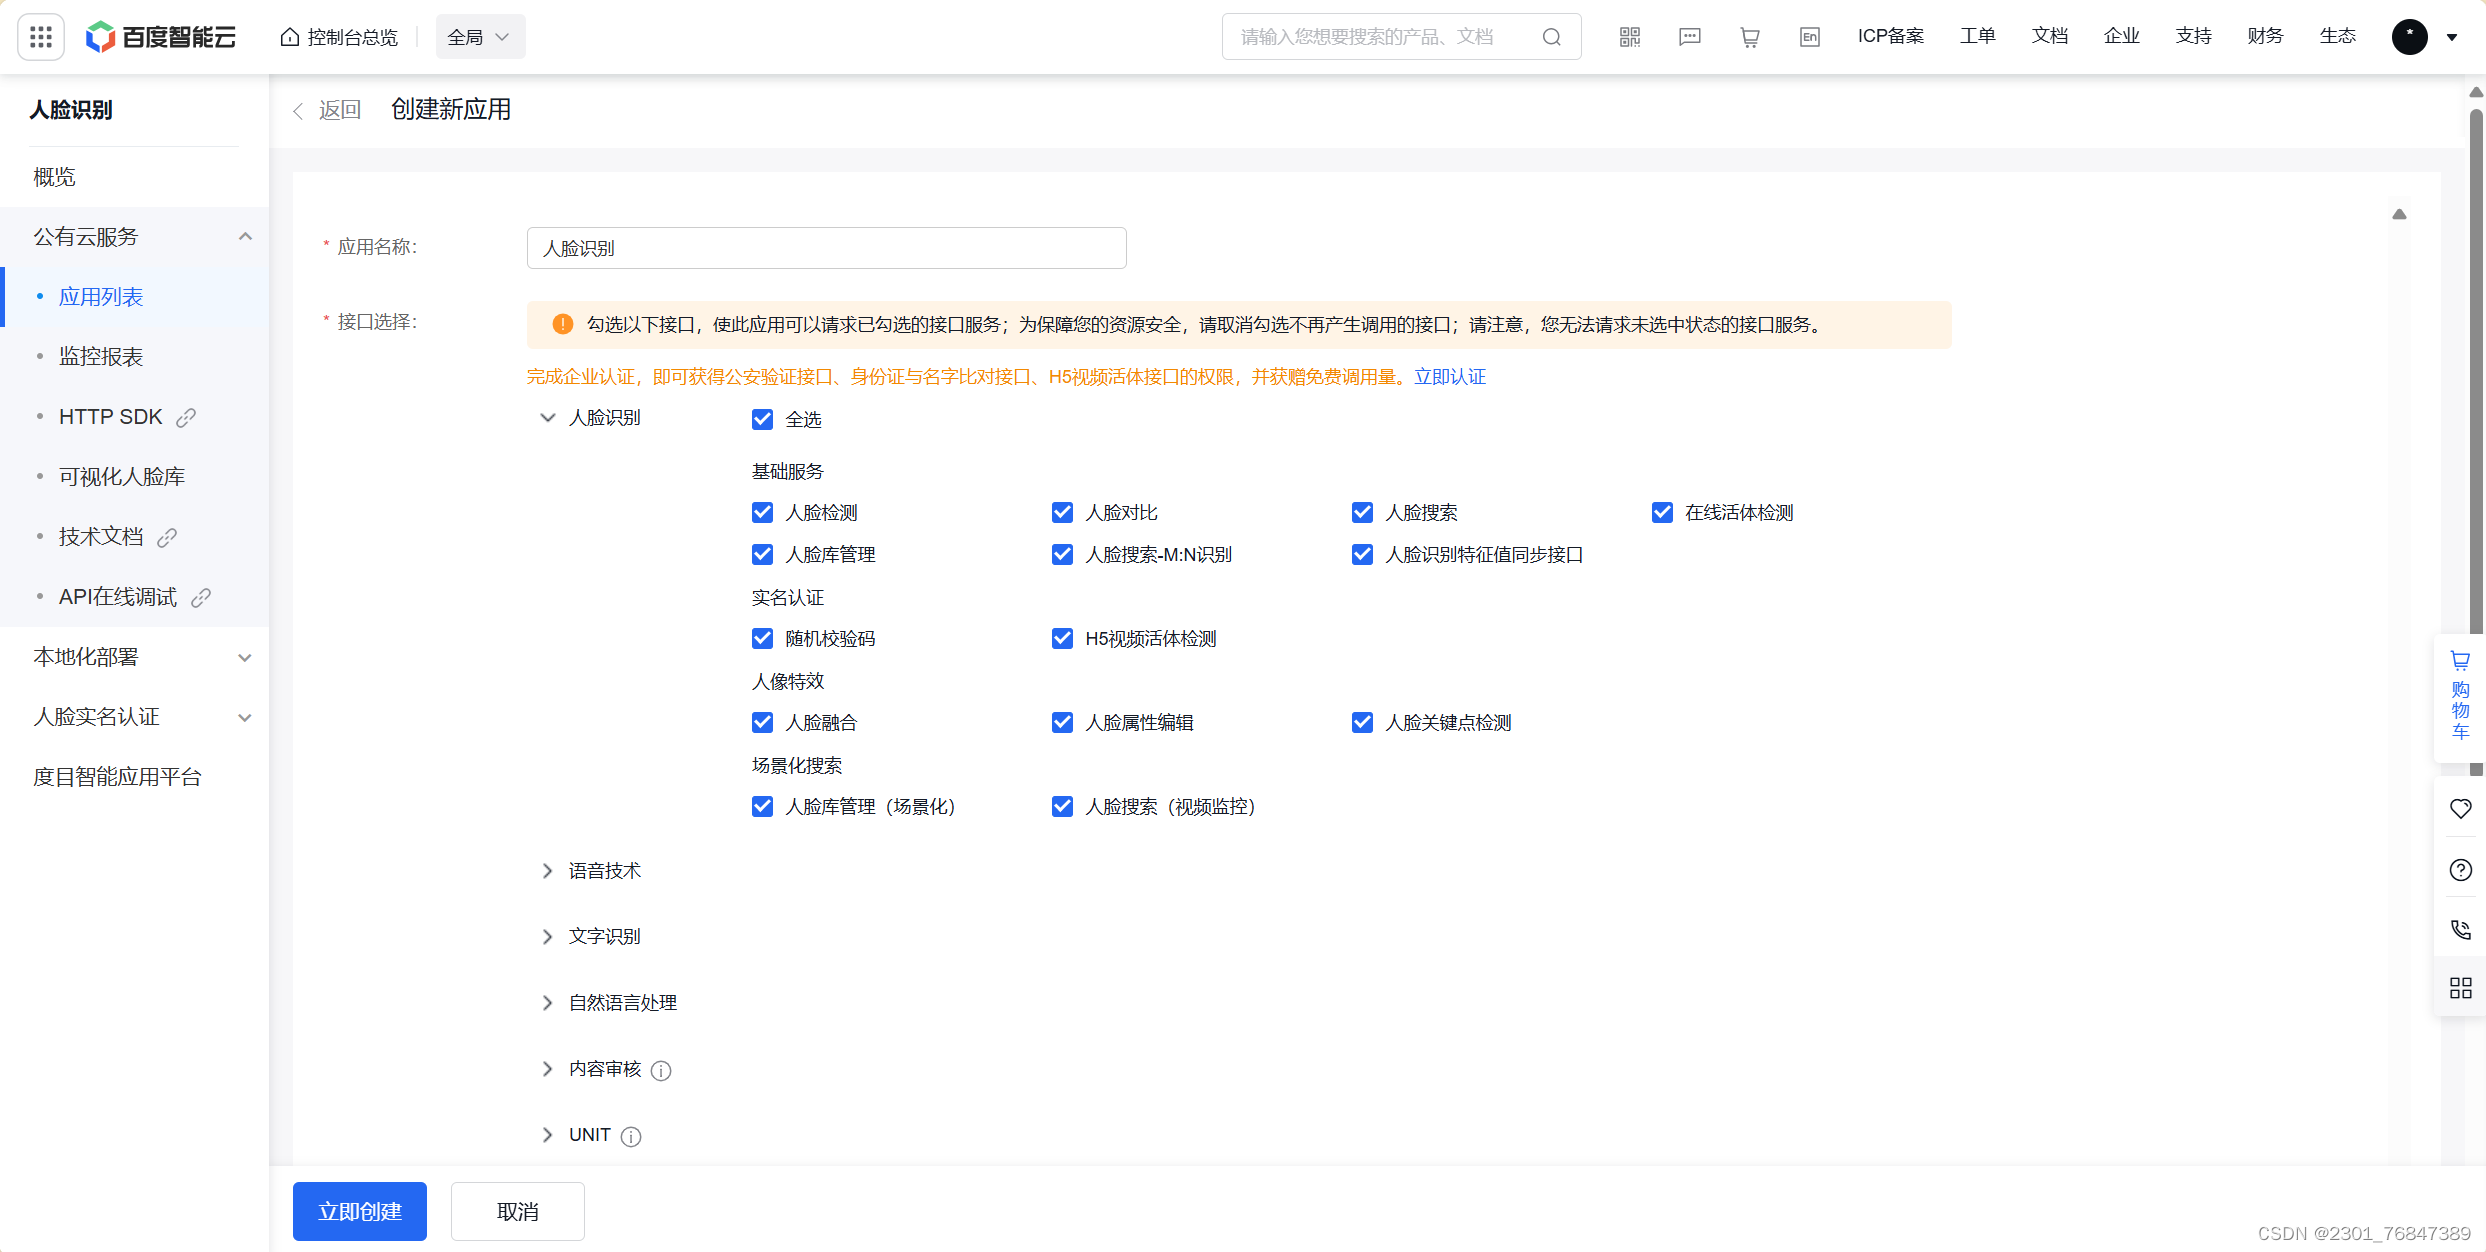
3.获取API Key和Secret Key

4.在vs2022中安装相应的库
安装AForge.Video和Baidu.Aip.Face库
三、人脸识别功能实现
1.初始化代码
方便后续调用百度AI服务
//将你从准备工作获得的appid、api key和secret key替换进去
private string APP_ID = "your-app-id";
private string API_KEY = "your-api-key";
private string SECRET_KEY = "your-secret-key";
private Face client;

public Form1()
{
    InitializeComponent();
    client = new Face(API_KEY, SECRET_KEY);
}
2.将图像转换为Base64
调用百度人脸识别服务时,推荐使用Base64图片格式
/// <summary>
/// 将图像转换为Base64格式字符串
/// </summary>
/// <param name="file">图像文件</param>
/// <returns>Base64格式字符串</returns>
public string ConvertImageToBase64(Image file)
{
    using (MemoryStream memoryStream = new MemoryStream())
    {
        file.Save(memoryStream, file.RawFormat); // 将图像保存到内存流中
        byte[] imageBytes = memoryStream.ToArray(); // 将内存流转换为字节数组
        return Convert.ToBase64String(imageBytes); // 将字节数组转换为Base64字符串
    }
}
3.打开图像文件并识别
使用OpenFileDialog打开图像文件并调用百度AI接口识别
/// <summary>
/// 打开图像文件并进行人脸识别
/// </summary>
private void button1_Click(object sender, EventArgs e)
{
    OpenFileDialog dialog = new OpenFileDialog(); // 创建打开文件对话框
    dialog.Filter = "所有文件|*.*"; // 设置文件过滤器
    if (dialog.ShowDialog() == DialogResult.OK)
    {
        string filename = dialog.FileName;
        try
        {
            Image im = Image.FromFile(filename);
            var image = ConvertImageToBase64(im); // 将图像转换为Base64字符串
            var options = new Dictionary<string, object>{ // 设置识别参数
                {"face_field", "age,beauty"},
                {"face_fields", "age,qualities,beauty"}
            };
            var result = client.Detect(image, "BASE64", options); // 调用百度AI接口进行人脸识别
            textBox1.Text = result.ToString(); // 将结果显示在文本框中
        }
        catch (Exception ex)
        {
            MessageBox.Show(ex.Message); // 显示错误信息
        }
    }
}
四、通过视频进行人脸识别
1.视频设备初始化
首先,需要获取并初始化系统中的视频输入设备,如摄像头。
private FilterInfoCollection videoDevices; // 用于存储所有视频输入设备的信息
private VideoCaptureDevice videoSource; // 用于视频捕获的设备

private void Form1_Load(object sender, EventArgs e)
{
    // 获取系统中的视频输入设备
    videoDevices = new FilterInfoCollection(FilterCategory.VideoInputDevice);
    if (videoDevices != null && videoDevices.Count > 0)
    {
        foreach (FilterInfo device in videoDevices)
        {
            // 将设备名称添加到下拉框中
            comboBox1.Items.Add(device.Name);
        }
        comboBox1.SelectedIndex = 0; // 设置默认选中的设备
    }
    // 订阅新帧事件
    videoSourcePlayer1.NewFrame += VideoSourcePlayer1_NewFrame;
}
2.捕捉视频帧并检测
当视频设备初始化完成后,需要捕捉每一帧视频,并对每帧视频图像进行人脸检测。
private bool IsStart = false; // 标志是否开始检测
private FaceLocation location; // 存储检测到的人脸位置

/// <summary>
/// 每当捕捉到新帧时调用的事件处理方法
/// </summary>
private void VideoSourcePlayer1_NewFrame(object sender, ref Bitmap image)
{
    try
    {
        if (IsStart) // 检查是否可以开始检测
        {
            IsStart = false; // 防止重复检测
            // 使用线程池异步执行检测方法,避免阻塞
            ThreadPool.QueueUserWorkItem(new WaitCallback(this.Detect), image.Clone());
        }
        if (location != null)
        {
            // 在图像上绘制人脸框
            using (Graphics g = Graphics.FromImage(image))
            {
                g.DrawLine(new Pen(Color.Black), new Point(location.left, location.top), new Point(location.left + location.width, location.top));
                g.DrawLine(new Pen(Color.Black), new Point(location.left, location.top), new Point(location.left, location.top + location.height));
                g.DrawLine(new Pen(Color.Black), new Point(location.left, location.top + location.height), new Point(location.left + location.width, location.top + location.height));
                g.DrawLine(new Pen(Color.Black), new Point(location.left + location.width, location.top), new Point(location.left + location.width, location.top + location.height));
            }
        }
    }
    catch (Exception ex)
    {
        // 记录错误日志
        ClassLoger.Error("VideoSourcePlayer1_NewFrame", ex);
    }
}
3.人脸检测方法
具体的人脸检测方法会在捕捉到新视频帧时调用,并调用百度AI的API进行检测。
private void Detect(object state)
{
    Bitmap image = state as Bitmap;
    string base64Image = ConvertImageToBase64(image);

    var options = new Dictionary<string, object>
    {
        {"max_face_num", 2},
        {"face_fields", "age,beauty,qualities"}
    };

    var result = client.Detect(base64Image, "BASE64", options);
    FaceDetectInfo detect = JsonHelper.DeserializeObject<FaceDetectInfo>(result.ToString());

    if (detect != null && detect.result_num > 0)
    {
        location = detect.result[0].location;
        Invoke(new Action(() => {
            ageText.Text = detect.result[0].age.ToString();
            beautyText.Text = detect.result[0].beauty.ToString();
            qualitiesText.Text = detect.result[0].qualities.ToString();
        }));
    }

    IsStart = true; // 设置为true以便处理下一帧
}
4.启动和停止视频捕获
需要提供按钮或其他触发方式来启动和停止视频捕获。
private void StartVideoCapture()
{
    if (comboBox1.Items.Count > 0)
    {
        videoSource = new VideoCaptureDevice(videoDevices[comboBox1.SelectedIndex].MonikerString);
        videoSourcePlayer1.VideoSource = videoSource;
        videoSourcePlayer1.Start();
        IsStart = true; // 开始视频捕获
    }
    else
    {
        MessageBox.Show("请选择视频设备");
    }
}

private void StopVideoCapture()
{
    if (videoSourcePlayer1.IsRunning)
    {
        videoSourcePlayer1.SignalToStop();
        videoSourcePlayer1.WaitForStop();
    }
}
五、人脸比对功能实现
1.选择和读取图像文件
需要选择两个文件
/// <summary>
/// 选择人脸图像文件
/// </summary>
private void button3_Click(object sender, EventArgs e)
{
    OpenFileDialog dialog = new OpenFileDialog(); // 创建打开文件对话框
    dialog.Filter = "所有文件|*.*"; // 设置文件过滤器
    if (dialog.ShowDialog() == DialogResult.OK)
    {
        if (string.IsNullOrEmpty(textBox2.Text)) // 如果第一个文本框为空,将文件名显示在第一个文本框
        {
            textBox2.Text = dialog.FileName;
        }
        else // 否则将文件名显示在第二个文本框
        {
            textBox3.Text = dialog.FileName;
        }
    }
}
2.人脸比对
通过百度AI的比对API进行人脸相似度比对
/// <summary>
/// 人脸比对
/// </summary>
private void button2_Click(object sender, EventArgs e)
{
    if (string.IsNullOrEmpty(textBox2.Text) || string.IsNullOrEmpty(textBox3.Text)) // 检查是否选择了两张人脸图片
    {
        MessageBox.Show("请选择要对比的人脸图片");
        return;
    }
    try
    {
        string path1 = textBox2.Text; // 获取第一张人脸图片路径
        string path2 = textBox3.Text; // 获取第二张人脸图片路径

        var faces = new JArray
        {
            new JObject
            {
                {"image", ReadImg(path1)}, // 读取第一张人脸图片
                {"image_type", "BASE64"},
                {"face_type", "LIVE"},
                {"quality_control", "LOW"},
                {"liveness_control", "NONE"},
            },
            new JObject
            {
                {"image", ReadImg(path2)}, // 读取第二张人脸图片
                {"image_type", "BASE64"},
                {"face_type", "LIVE"},
                {"quality_control", "LOW"},
                {"liveness_control", "NONE"},
            }
        };

        var result = client.Match(faces); // 调用百度AI接口进行人脸比对
        textBox1.Text = result.ToString(); // 显示比对结果
    }
    catch (Exception ex)
    {
        MessageBox.Show(ex.Message); // 显示错误信息
    }
}

/// <summary>
/// 读取图像文件并转换为Base64格式字符串
/// </summary>
public string ReadImg(string img)
{
    return Convert.ToBase64String(File.ReadAllBytes(img)); // 读取图像文件并转换为Base64字符串
}
六、功能展示
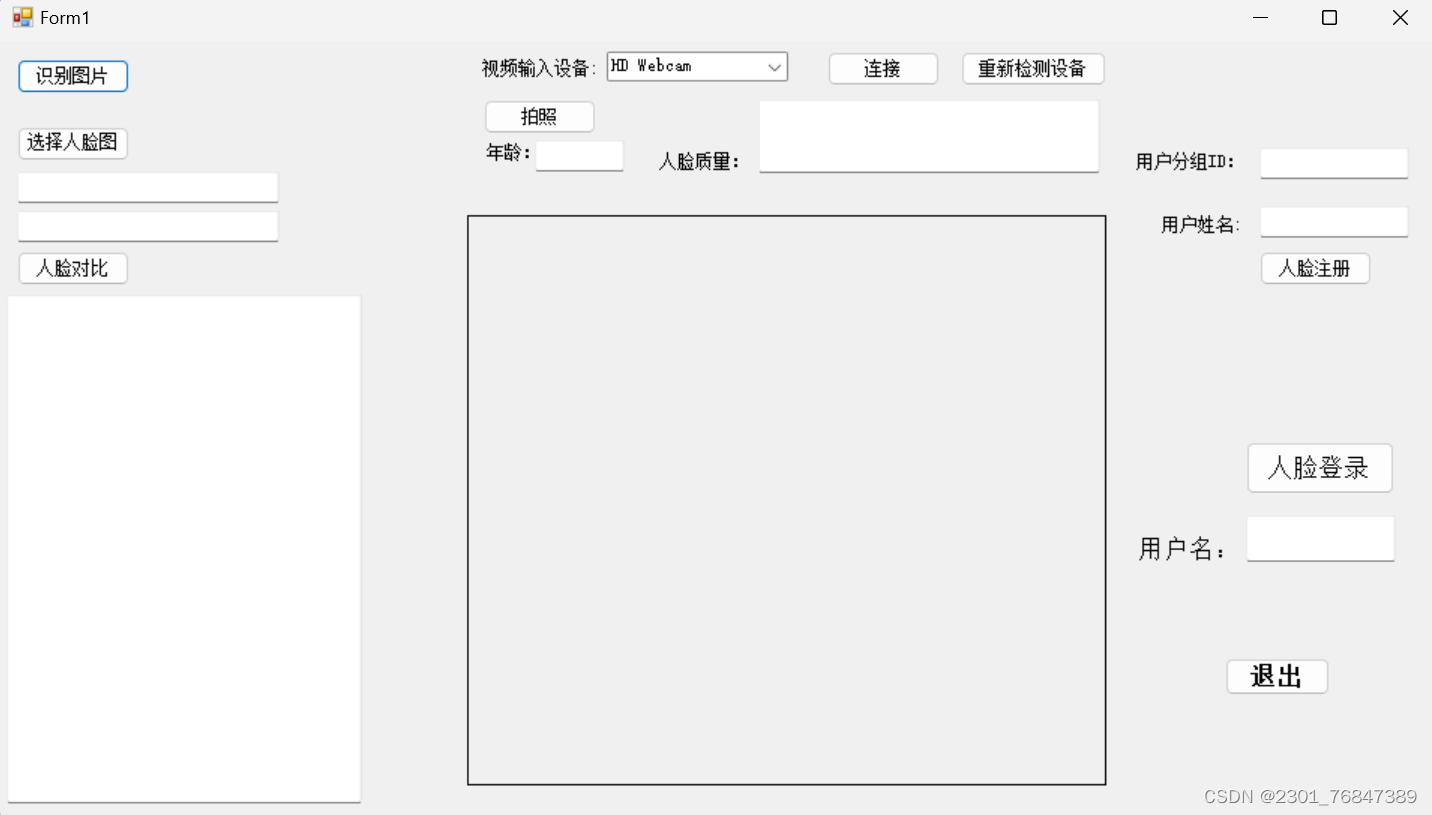
整体布局:
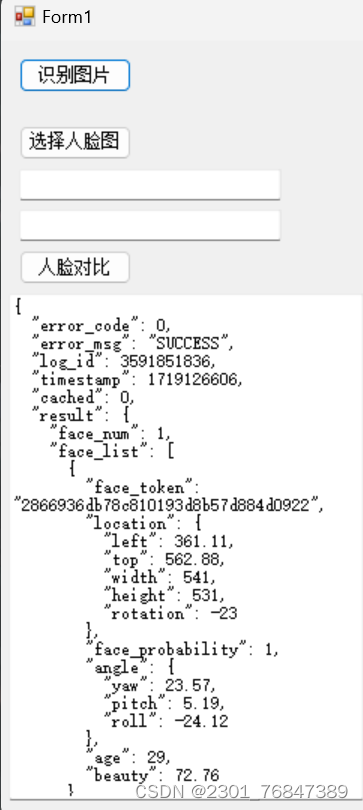
人脸识别:
人脸对比:
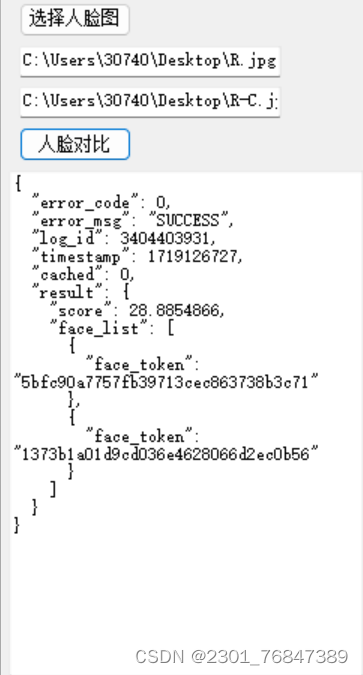
识别返回参数和比对返回参数详情可见:
七、总结和扩展
1.总结
本次作业展示了如何使用C#和百度AI的API在Windows Forms应用程序中实现人脸识别和人脸比对功能。以下是项目的主要功能和实现细节总结:
- 人脸识别功能:通过上传图像文件,调用百度AI的检测API,返回包括年龄、颜值等信息的人脸识别结果。
- 通过视频进行人脸识别功能:从摄像头捕捉视频流,并在每一帧中检测人脸,实时显示检测结果。
- 人脸比对功能:选择两张人脸图像,通过百度AI的比对API进行人脸相似度比对,返回比对结果。
2.拓展
在现有功能的基础上,可以进一步扩展项目,增加更多实用功能,以满足不同应用场景的需求。以下是一些可能的拓展方向和实现思路:
- 人脸注册和登录以及管理功能:为现实应用进一步打下基础。
- 人脸追踪功能:为特定场景下的应用提供可能。
通过这些拓展功能,可以使项目更加完善,满足更多实际应用需求。


 109
109

 被折叠的 条评论
为什么被折叠?
被折叠的 条评论
为什么被折叠?
 到【灌水乐园】发言


