


在安卓开发中,布局和UI交互功能是构建用户友好型应用的关键因素。本文将详细介绍安卓中的五种常见布局:线性布局(LinearLayout)、约束布局(ConstraintLayout)、表格布局(TableLayout)、帧布局(FrameLayout)和相对布局(RelativeLayout),并探讨如何在实际项目中应用它们。同时,本文还将总结我在学习UI界面交互功能实现方法过程中的心得,包括按钮点击事件、列表项点击事件、滑动操作、菜单项和对话框等的实现,并分享我的持续改进措施。
一、安卓开发中的布局
1.线性布局(LinearLayout)
- 定义:将组件按照水平或垂直方向依次排列的布局。
- 特点:
- 排列方式灵活:可以按水平或垂直方向排列界面元素。
- 易于理解和使用:开发人员只需要选择好方向并按照顺序添加元素即可。
- 占用空间均匀:可以根据元素自动分配空间,使得各个元素在界面上等宽或等高排列。
- 内部元素大小可控:可以通过权重属性来设置大小比例,实现不同元素的灵活布局。
- 适用场景:适用于元素排列整齐、顺序固定的场景。
示例代码
<LinearLayout
android:layout_width="match_parent"
android:layout_height="wrap_content"
android:orientation="vertical">
<Button
android:layout_width="wrap_content"
android:layout_height="wrap_content"
android:text="按钮1" />
<Button
android:layout_width="wrap_content"
android:layout_height="wrap_content"
android:text="按钮2" />
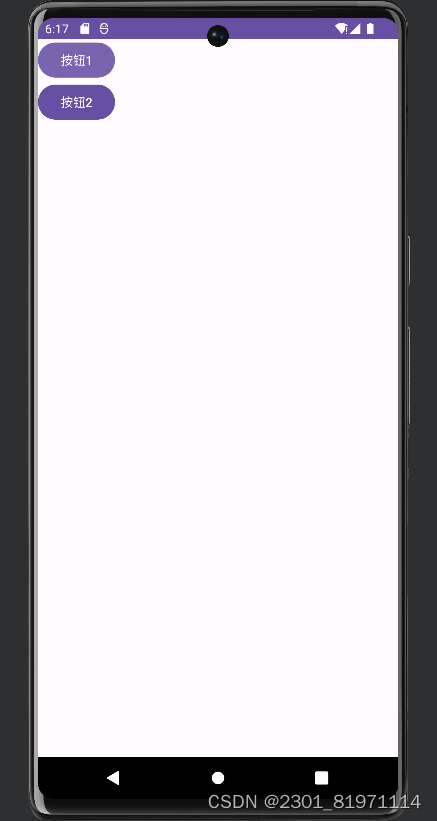
</LinearLayout>效果如下图所示
如需改变布局的排列方向,只需将android:orientation属性设置为horizontal。
2.约束布局(ConstraintLayout)
- 定义:一种相对布局的增强版,通过设置组件之间的相对约束关系来确定组件的位置。
- 特点:
- 灵活性:可以在水平和垂直方向上设置元素的位置和大小,适应不同屏幕尺寸和方向的变化。
- 相对定位:使用约束关系来定义元素之间的位置关系。
- 强大的约束条件:提供了多种约束条件,如对齐、间距等。
- 支持链式布局和动画:可以便捷地管理和控制多个元素的位置和大小,同时支持平滑的过渡效果。
- 性能优化:在布局计算上进行了优化,提高渲染性能。
- 适用场景:适用于需要实现复杂布局和动画效果的场景
示例代码
<androidx.constraintlayout.widget.ConstraintLayout
    xmlns:android="http://schemas.android.com/apk/res/android"
    xmlns:app="http://schemas.android.com/apk/res-auto"
    android:layout_width="match_parent"
    android:layout_height="match_parent">

    <!-- 第一个按钮 -->
    <Button
        android:id="@+id/button1"
        android:layout_width="wrap_content"
        android:layout_height="wrap_content"
        android:text="Button 1"
        app:layout_constraintStart_toEndOf="@id/button2"
        />

    <!-- 第二个按钮 -->
    <Button
        android:id="@+id/button2"
        android:layout_width="wrap_content"
        android:layout_height="wrap_content"
        android:text="Button 2"
    />

</androidx.constraintlayout.widget.ConstraintLayout>
效果如下图所示

3.表格布局(TableLayout)
- 定义:一种使用表格元素来组织和展示数据的页面布局方式。
- 特点:
- 结构清晰:通过行和列的划分,使页面内容结构化。
- 信息展示直观:可以容纳多种类型的数据,如文字、数字、图片等。
- 易于维护:具有较好的可维护性,可以通过添加、删除或修改单元格来调整页面内容。
- 适用场景:适用于展示大量数据和信息列表的场景,如销售数据、用户信息等。
示例代码
<TableLayout xmlns:android="http://schemas.android.com/apk/res/android"
android:layout_width="match_parent"
android:layout_height="match_parent"
android:stretchColumns="*"
android:padding="16dp">
<TableRow
android:layout_width="match_parent"
android:layout_height="wrap_content">
<TextView
android:layout_width="wrap_content"
android:layout_height="wrap_content"
android:text="姓名"
android:padding="8dp"
android:background="#f2f2f2"
android:textColor="#000000"
android:textStyle="bold"/>
<TextView
android:layout_width="wrap_content"
android:layout_height="wrap_content"
android:text="邮箱"
android:padding="8dp"
android:background="#f2f2f2"
android:textColor="#000000"
android:textStyle="bold"/>
<TextView
android:layout_width="wrap_content"
android:layout_height="wrap_content"
android:text="年龄"
android:padding="8dp"
android:background="#f2f2f2"
android:textColor="#000000"
android:textStyle="bold"/>
</TableRow>
<TableRow
android:layout_width="match_parent"
android:layout_height="wrap_content">
<TextView
android:layout_width="wrap_content"
android:layout_height="wrap_content"
android:text="张三"
android:padding="8dp"
android:textColor="#000000"/>
<TextView
android:layout_width="wrap_content"
android:layout_height="wrap_content"
android:text="zhangsan@example.com"
android:padding="8dp"
android:textColor="#000000"/>
<TextView
android:layout_width="wrap_content"
android:layout_height="wrap_content"
android:text="30"
android:padding="8dp"
android:textColor="#000000"/>
</TableRow>
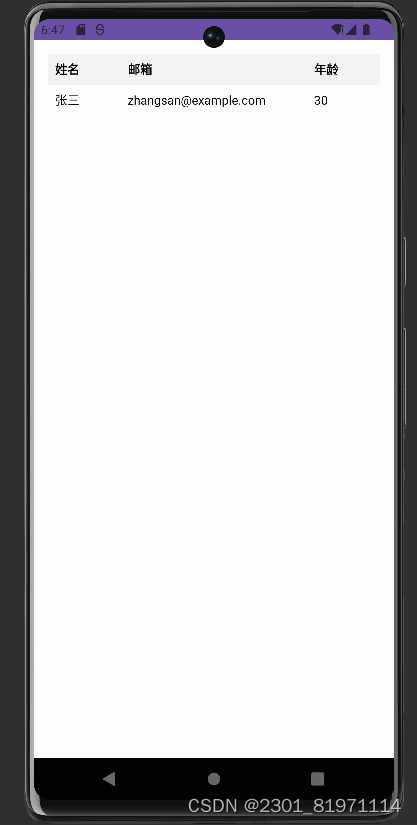
</TableLayout>效果如下图所示
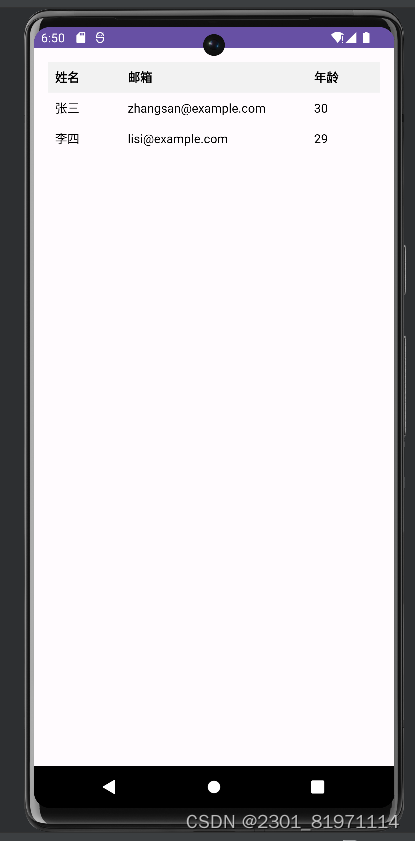
我们还可以增加表格的形式继续完成这块布局
    <TableRow
        android:layout_width="match_parent"
        android:layout_height="wrap_content">

        <TextView
            android:layout_width="wrap_content"
            android:layout_height="wrap_content"
            android:text="张三"
            android:padding="8dp"
            android:textColor="#000000"/>

        <TextView
            android:layout_width="wrap_content"
            android:layout_height="wrap_content"
            android:text="zhangsan@example.com"
            android:padding="8dp"
            android:textColor="#000000"/>

        <TextView
            android:layout_width="wrap_content"
            android:layout_height="wrap_content"
            android:text="30"
            android:padding="8dp"
            android:textColor="#000000"/>

    </TableRow>
效果如图所示
4.帧布局(FrameLayout)
- 定义:将组件按照层叠的方式放置在同一个位置上的布局。
- 特点:
- 层叠式布局:后添加的控件会层叠在先添加的控件上。
- 控件大小决定布局大小:帧布局的大小由控件中最大的子控件决定。
- 控件位置可调整:虽然默认会将控件放置在左上角,但可以通过属性指定添加到其他的位置。
- 适用场景:适用于需要重叠显示控件的场景,如弹窗、图片覆盖等。
示例代码
<FrameLayout xmlns:android="http://schemas.android.com/apk/res/android"
android:layout_width="match_parent"
android:layout_height="match_parent"
android:padding="16dp">
<Button
android:id="@+id/button_bottom"
android:layout_width="wrap_content"
android:layout_height="wrap_content"
android:text="底部按钮"
android:layout_gravity="bottom|center_horizontal" />
<TextView
android:id="@+id/text_top"
android:layout_width="wrap_content"
android:layout_height="wrap_content"
android:text="顶部文本"
android:textSize="24sp"
android:layout_gravity="top|center_horizontal" />
<ImageView
android:id="@+id/image_center"
android:layout_width="wrap_content"
android:layout_height="wrap_content"
android:src="@mipmap/ic_launcher"
android:layout_gravity="center" />
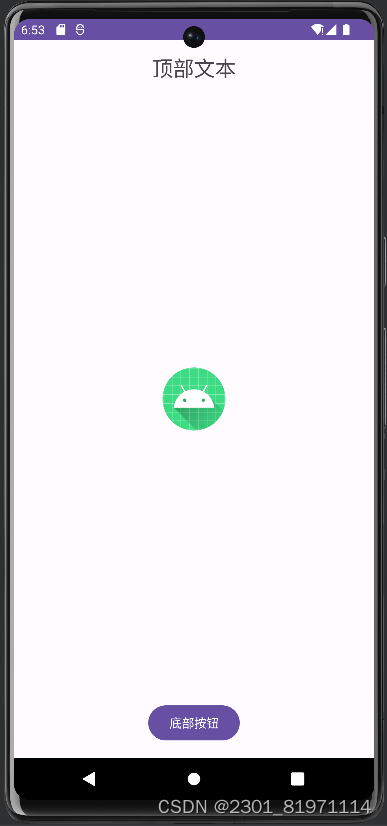
</FrameLayout>效果如图所示
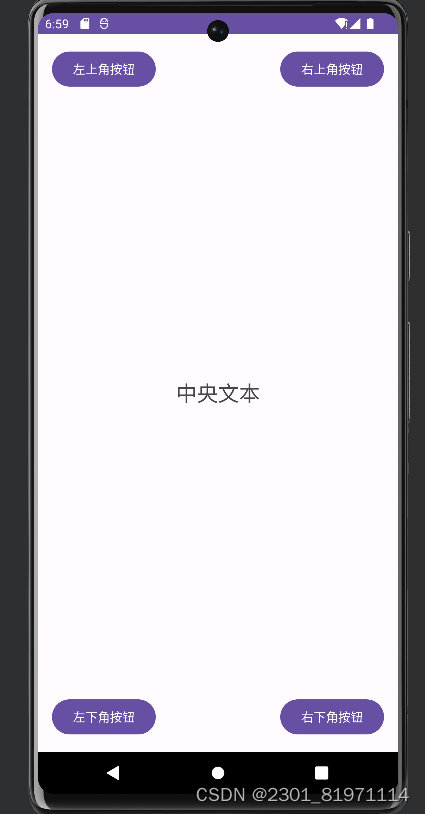
5.相对布局(RelativeLayout)
- 定义:通过相对于其他组件的位置来确定自身位置的布局。
- 特点:
- 灵活性:可以根据控件之间的相对关系来确定其位置和大小。
- 自适应:可以根据屏幕的大小和方向进行自适应,以适应不同的设备和屏幕尺寸。
- 可调整性:可以通过设置控件之间的相对关系来实现自适应布局,而不需要指定具体的位置和大小。
- 适用场景:适用于界面元素之间相对位置关系比较重要的场景,如表单布局等。
示例代码
<RelativeLayout xmlns:android="http://schemas.android.com/apk/res/android"
    xmlns:app="http://schemas.android.com/apk/res-auto"
    xmlns:tools="http://schemas.android.com/tools"
    android:layout_width="match_parent"
    android:layout_height="match_parent"
    android:padding="16dp">

    <Button
        android:id="@+id/button_left_top"
        android:layout_width="wrap_content"
        android:layout_height="wrap_content"
        android:text="左上角按钮"
        android:layout_alignParentTop="true"
        android:layout_alignParentLeft="true" />

    <Button
        android:id="@+id/button_right_top"
        android:layout_width="wrap_content"
        android:layout_height="wrap_content"
        android:text="右上角按钮"
        android:layout_alignParentTop="true"
        android:layout_alignParentRight="true" />

    <Button
        android:id="@+id/button_left_bottom"
        android:layout_width="wrap_content"
        android:layout_height="wrap_content"
        android:text="左下角按钮"
        android:layout_alignParentBottom="true"
        android:layout_alignParentLeft="true" />

    <Button
        android:id="@+id/button_right_bottom"
        android:layout_width="wrap_content"
        android:layout_height="wrap_content"
        android:text="右下角按钮"
        android:layout_alignParentBottom="true"
        android:layout_alignParentRight="true" />

    <TextView
        android:id="@+id/text_center"
        android:layout_width="wrap_content"
        android:layout_height="wrap_content"
        android:text="中央文本"
        android:textSize="24sp"
        android:layout_centerInParent="true" />

</RelativeLayout>
效果如下如图所示
使用 RelativeLayout 时,还可以通过调整不同的属性来改变子视图之间的相对位置。
二、UI界面交互功能的实现
在学习UI界面交互功能的实现过程中,我深入了解了Android和iOS等移动平台上的多种交互元素及其实现方法。以下是我对按钮点击事件、列表项点击事件、滑动操作、菜单项和对话框等功能的实现方法总结,以及我的学习反思和持续改进措施。
一、实现方法
-
按钮点击事件
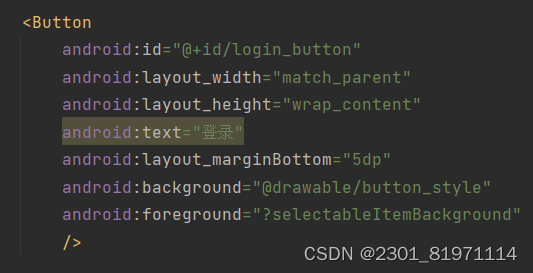
按钮是UI界面中最常见的交互元素之一。例如我在我开发的记事本aap中使用了button控件,如下图所示
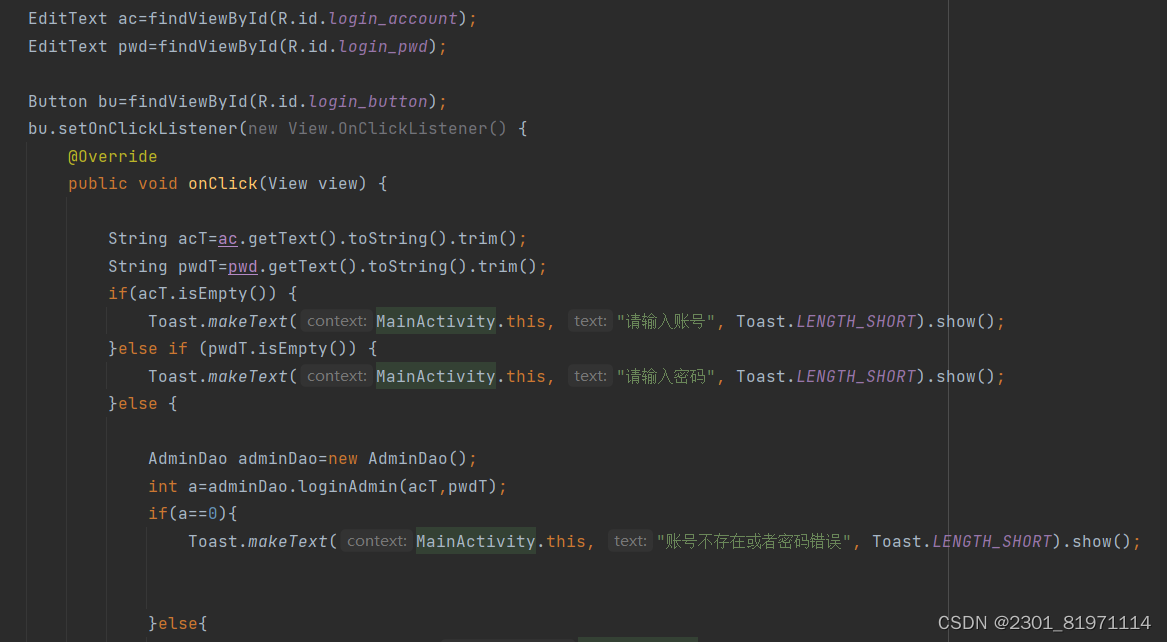
在Android中,我通过为按钮设置OnClickListener监听器来实现点击事件。例如,在Java代码中,我使用button.setOnClickListener(new View.OnClickListener() {...})来定义点击事件的处理逻辑。如下图所示(部分代码)
-
点击事件
在开发过程中,我使用了监听器来监听导航图标的点击事件。
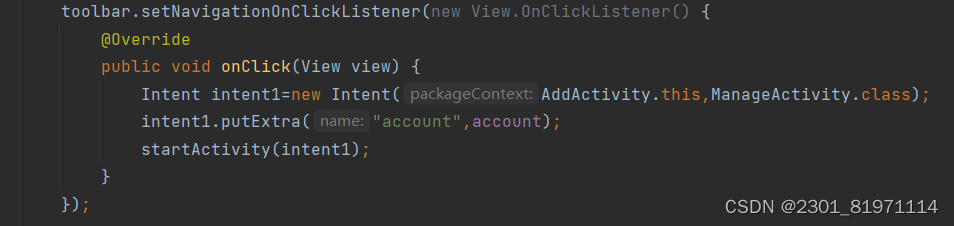
这段代码中,我首先创建了一个 Intent 对象,用于从当前的 AddActivity(添加界面) 跳转到 ManageActivity(主界面)。通过 intent1.putExtra("account", account); 将"account" 的额外数据添加到 Intent 中。最后,通过调用 startActivity(intent1);,启动 ManageActivity,并将带有 "account" 数据的 Intent 传递给它。
最终当用户点击 Toolbar 上的返回图标时,应用会跳转到 ManageActivity(主界面),并将 account 数据传递给这个新的 Activity。
-
滑动操作
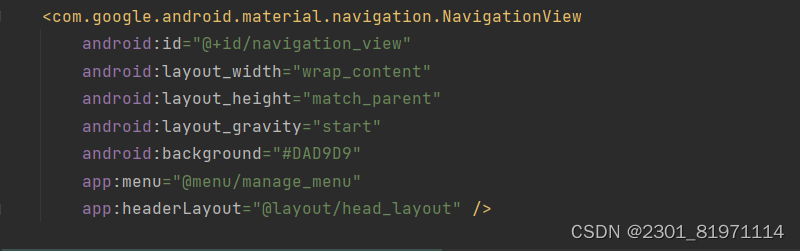
滑动操作常用于实现滑动视图、滑动菜单等功能。在开发中,我使用Android开发中Material Design组件库,以在应用的左侧或右侧创建一个可滑动的导航抽屉。
-
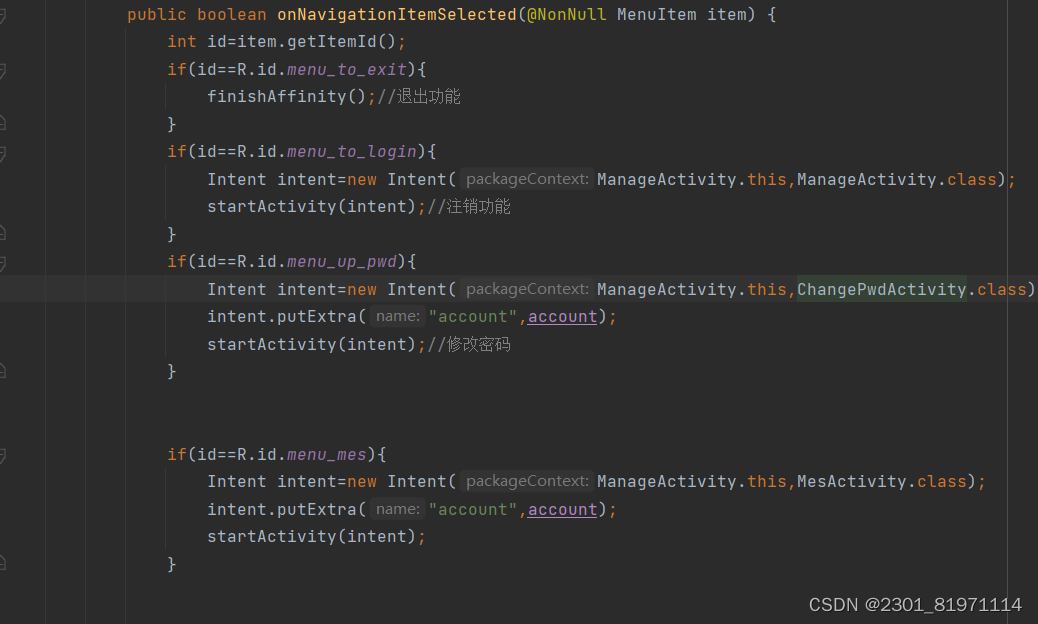
菜单项
菜单项常用于提供用户操作的快捷方式。在开发过程中,我使用onNavigationSelected来处理导航菜单项的点击事件并响应从
NavigationView(侧边栏菜单项)中选择的菜单项。
-
对话框
对话框暂无实现功能,遂略。
二、学习反思
在深入学习UI界面交互功能的实现方法过程中,我深刻体会到了持续学习和实践的重要性。以下是我对学习过程的一些反思:
-
理论与实践的结合:最初,我更多地关注理论知识的学习,而忽略了与实践的结合。通过后续的实践项目,我发现理论知识只有在实践中才能真正得到巩固和应用。因此,我意识到需要将理论与实践紧密结合,通过实践来检验和加深理论知识的理解。
-
细节决定成败:在处理UI交互功能时,我逐渐认识到细节的重要性。一个小小的错误或疏漏都可能影响到用户体验。因此,我需要更加细心和耐心地对待每一个细节,确保每个功能都能够正常运行并给用户带来良好的体验。
-
不断迭代和优化:在学习过程中,我遇到了很多挑战和困难。然而,正是这些挑战和困难促使我不断迭代和优化我的代码和设计方案。通过不断地尝试和改进,我逐渐提高了自己的技能水平和解决问题的能力。
-
学习社区的重要性:我深刻体会到学习社区对于个人成长的重要性。在学习过程中,我积极参与了各种开发者社区和论坛的讨论,与其他开发者交流经验和心得。这些交流不仅让我获得了更多的知识和技巧,还让我感受到了学习的乐趣和动力。
三、持续改进措施
-
定期回顾和总结:我会定期回顾和总结自己的学习过程和实践经验,分析自己的不足和需要改进的地方。通过不断地反思和总结,我能够发现自己的问题并及时采取措施进行改进。
-
持续学习和实践:我会保持对新技术和新知识的关注和学习,积极参加各种技术培训和交流活动。同时,我也会将所学知识应用到实践中去,通过实践来检验和巩固所学知识。
-
参与开源项目和社区贡献:我会积极参与开源项目的开发和社区贡献,与其他开发者一起合作解决问题和分享经验。通过参与开源项目和社区贡献,我能够接触到更多的技术和场景,提高自己的技能水平和解决问题的能力。
-
寻求反馈和建议:我会积极寻求他人的反馈和建议,不断改进自己的代码和设计方案。通过接受他人的反馈和建议,我能够发现自己的不足和需要改进的地方,并及时采取措施进行改进。


 318
318

 被折叠的 条评论
为什么被折叠?
被折叠的 条评论
为什么被折叠?
 到【灌水乐园】发言


