


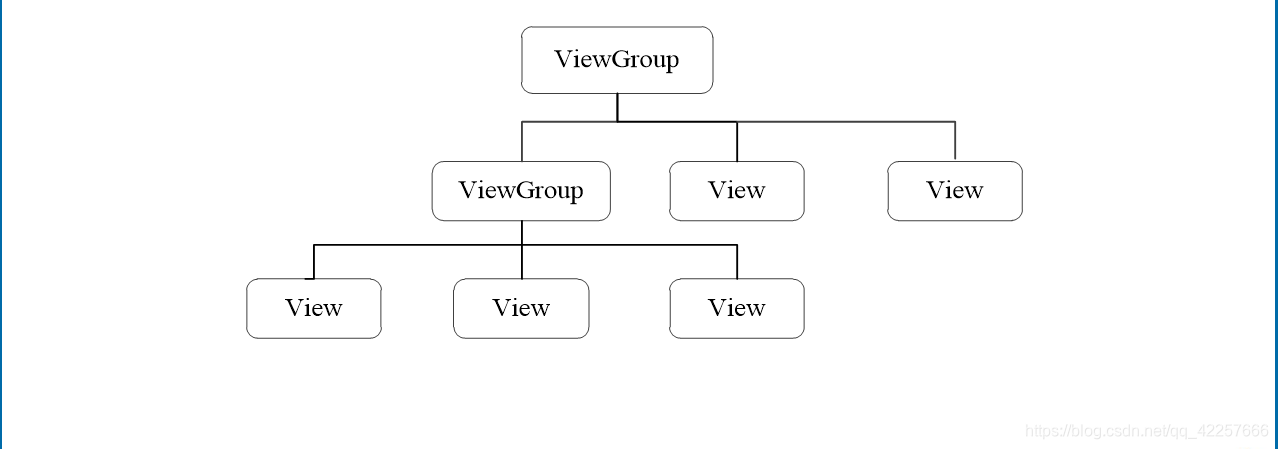
一、View视图
所有的UI元素都是通过View与ViewGroup构建的,对于一个Android应用的用户界面来说,ViewGroup作为容器盛装界面中的控件,它可以包含普通的View控件,也可以包含ViewGroup。
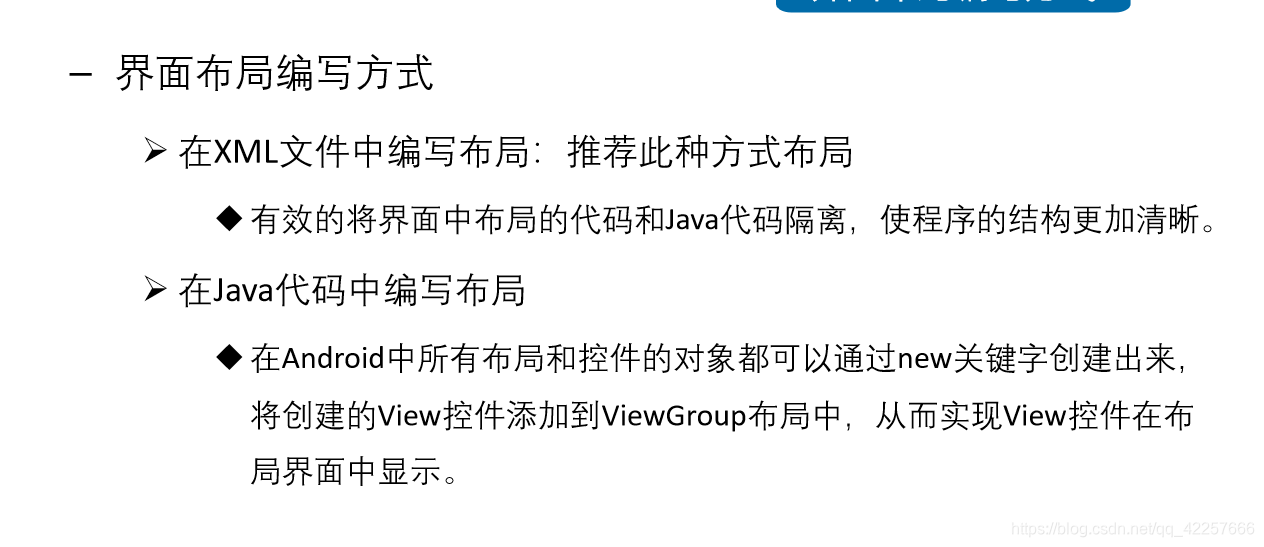
二、界面布局编写方式
有两种界面布局方式,第一种是在XML文件中编写布局,最常用的也是这种;第二种是在java代码中编写布局,如图:
1、在XML文件中编写布局
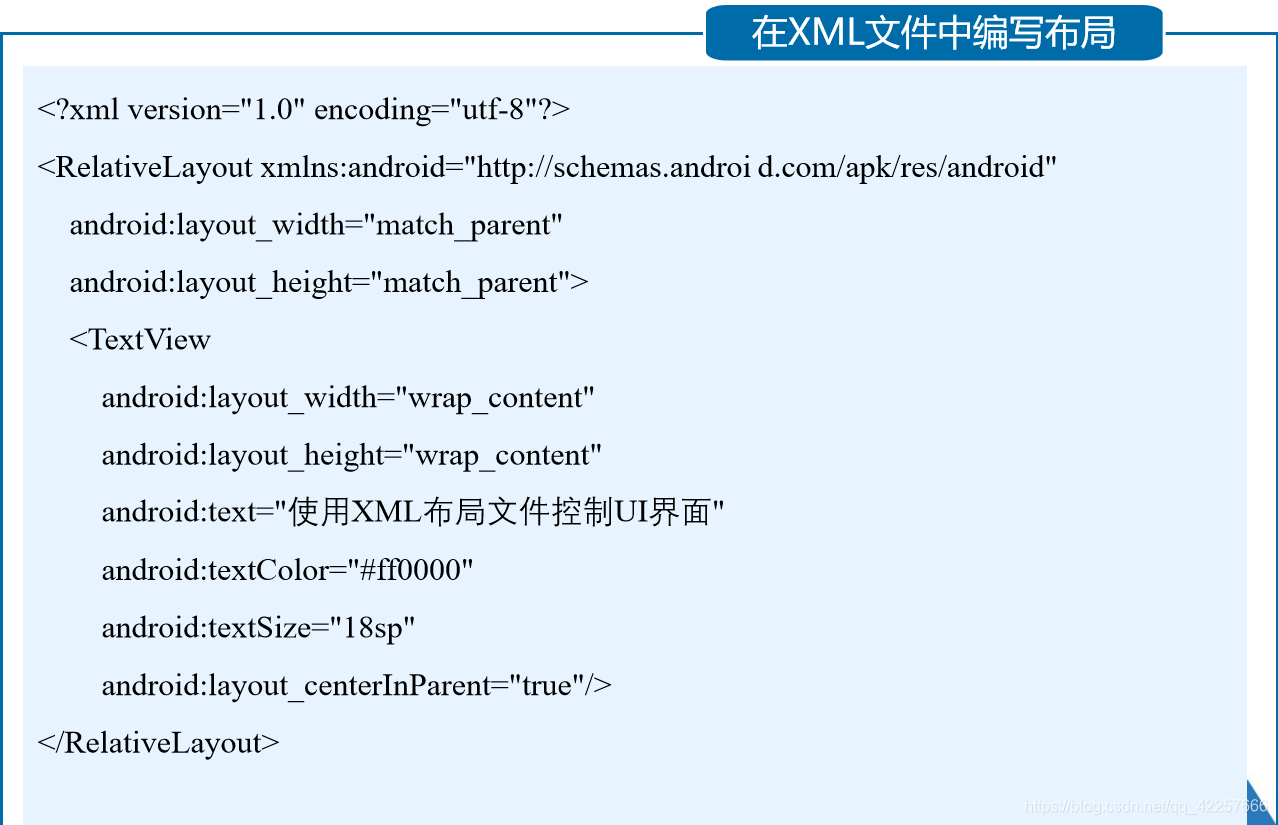
UI(User Interface)如图:

2、在java代码中编写布局
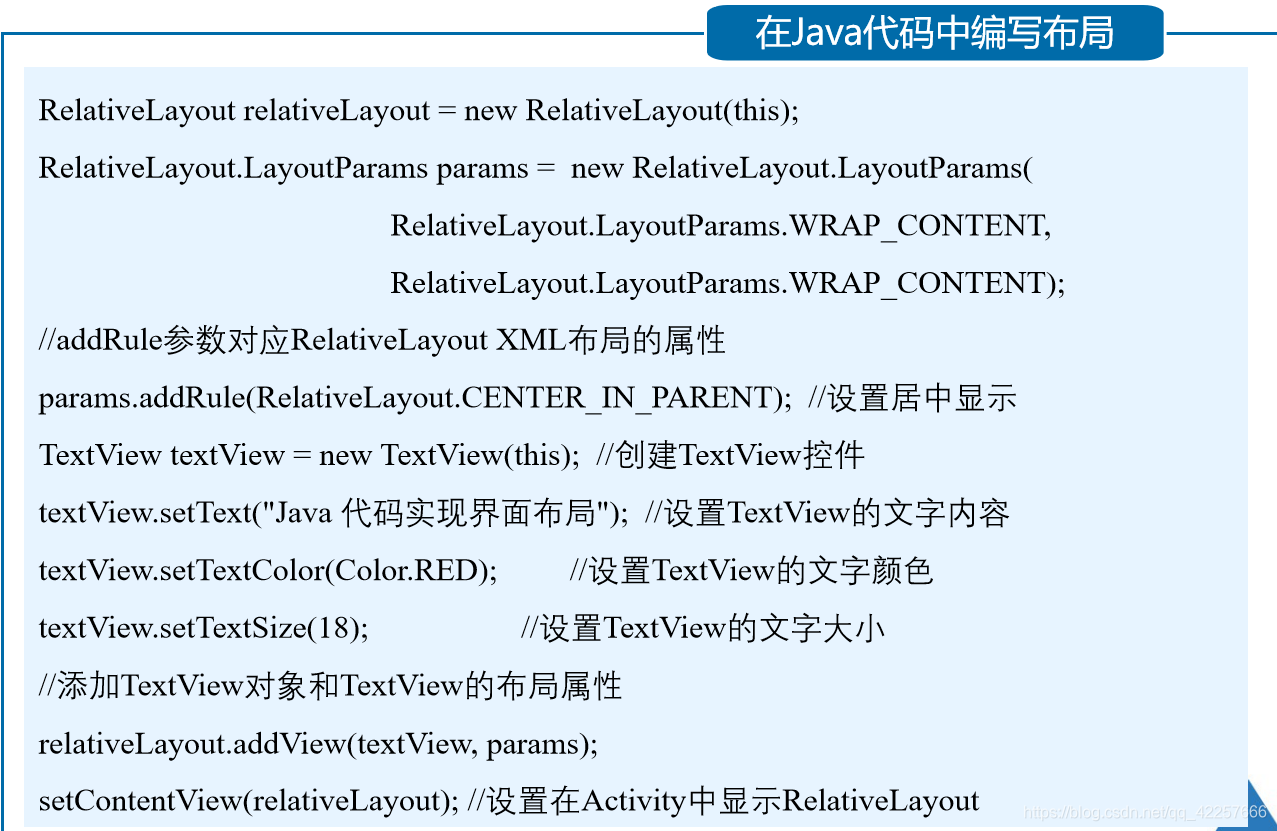
UI如图:

三、常见界面布局
1、常用布局及特点:

2、布局的通用属性
Android系统提供的五种常用布局直接或者间接继承自ViewGroup,因此它们也支持在ViewGroup中定义的属性,这些属性可以看作是布局的通用属性。

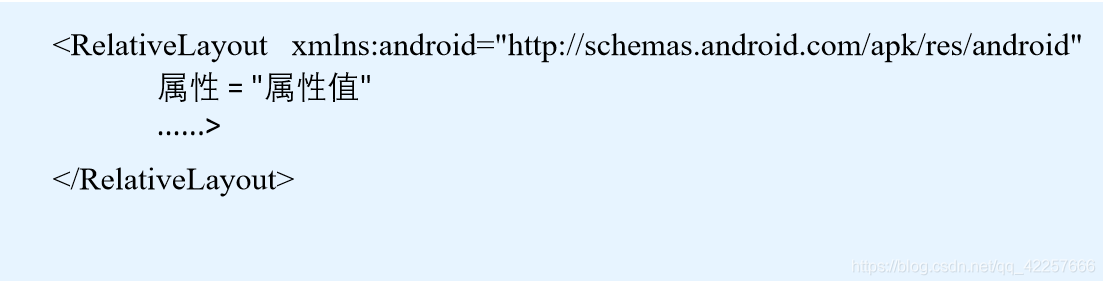
3、RelativeLayout相对布局
- 概述
相对布局(RelativeLayout)是通过相对定位的方式指定子控件位置,即以其它控件或父容器为参照物,摆放控件位置。 - 定义格式
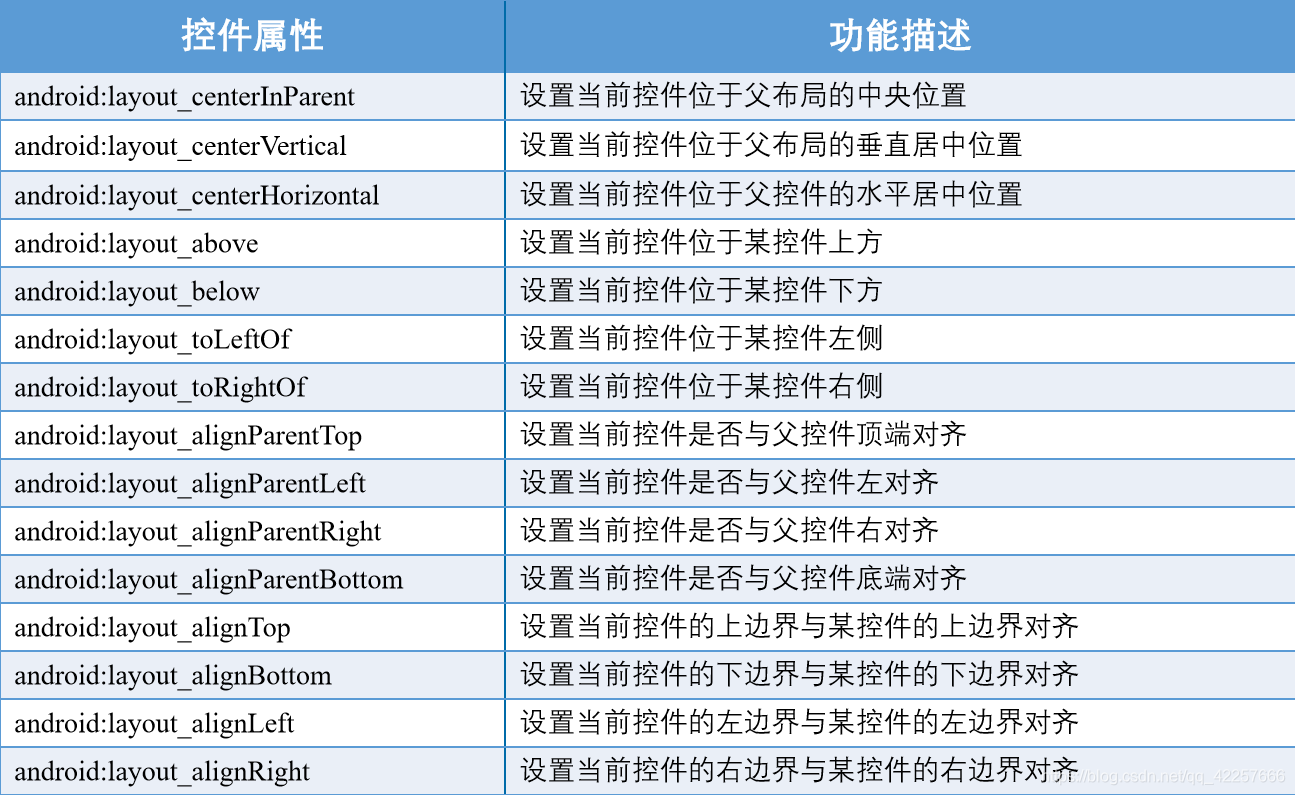
- 相对布局—控件位置属性
- UI

4、LinearLayout线性布局
- 概述
线性布局(LinearLayout)主要以水平或垂直方式来显示界面中的控件。当控件水平排列时,显示顺序依次为从左到右,当控件垂直排列时,显示顺序依次为从上到下。
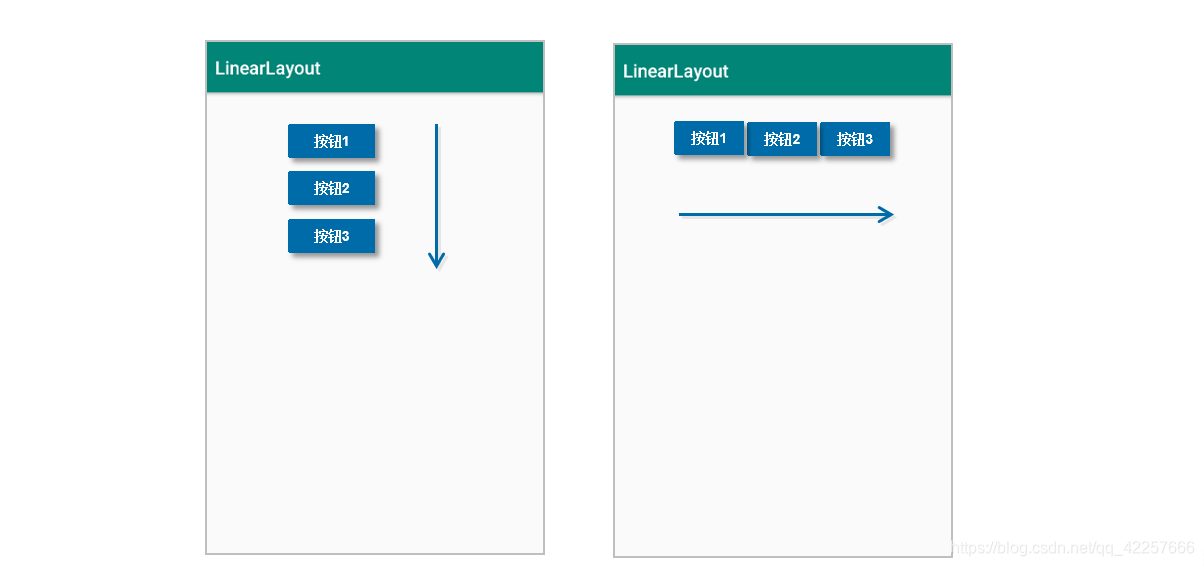
- orientation属性
orientation属性控制控件排列方向,包含两个属性值:vertical(垂直)、horizontal(水平);weight属性表示权重。
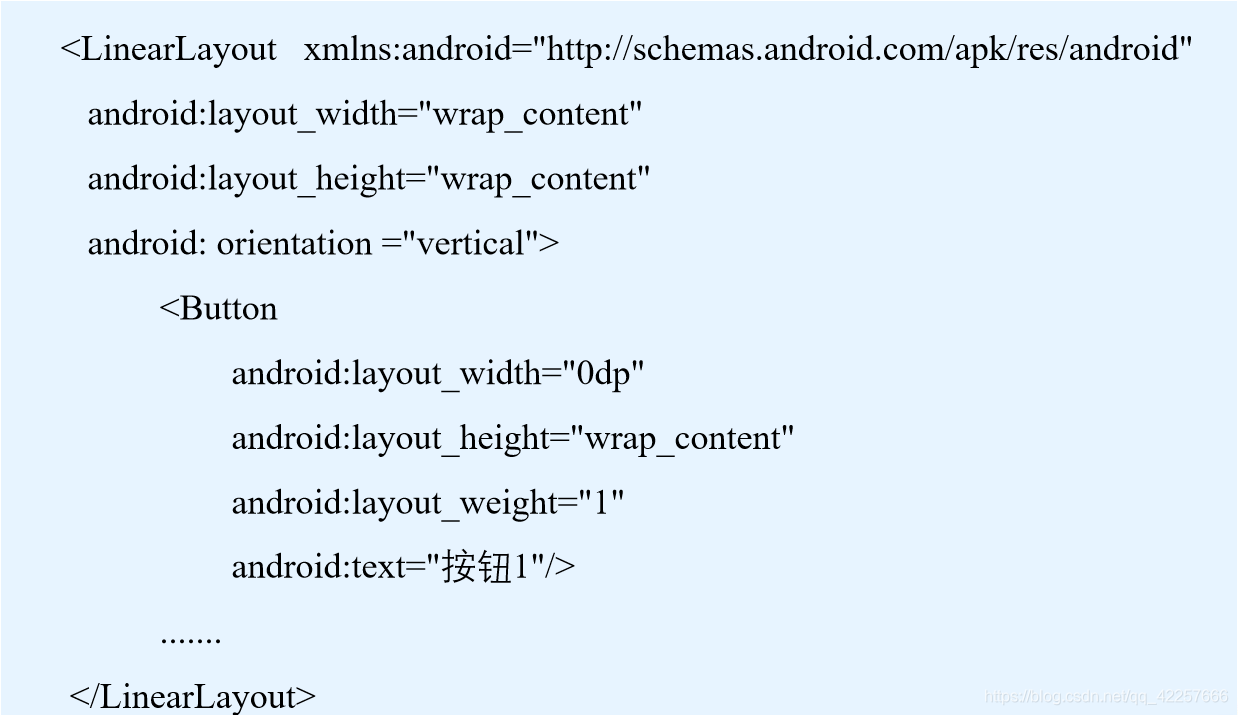
比如一共有三个按钮水平排列,分别为按钮1、按钮2、按钮3,那么orientation属性为horizontal,按钮1的weight为1,按钮2的weight为1,按钮3的weight为2。那么它们的宽度将按照比重来,按钮1占1/4,按钮2占1/4,按钮3占1/2也就是一半,如图:

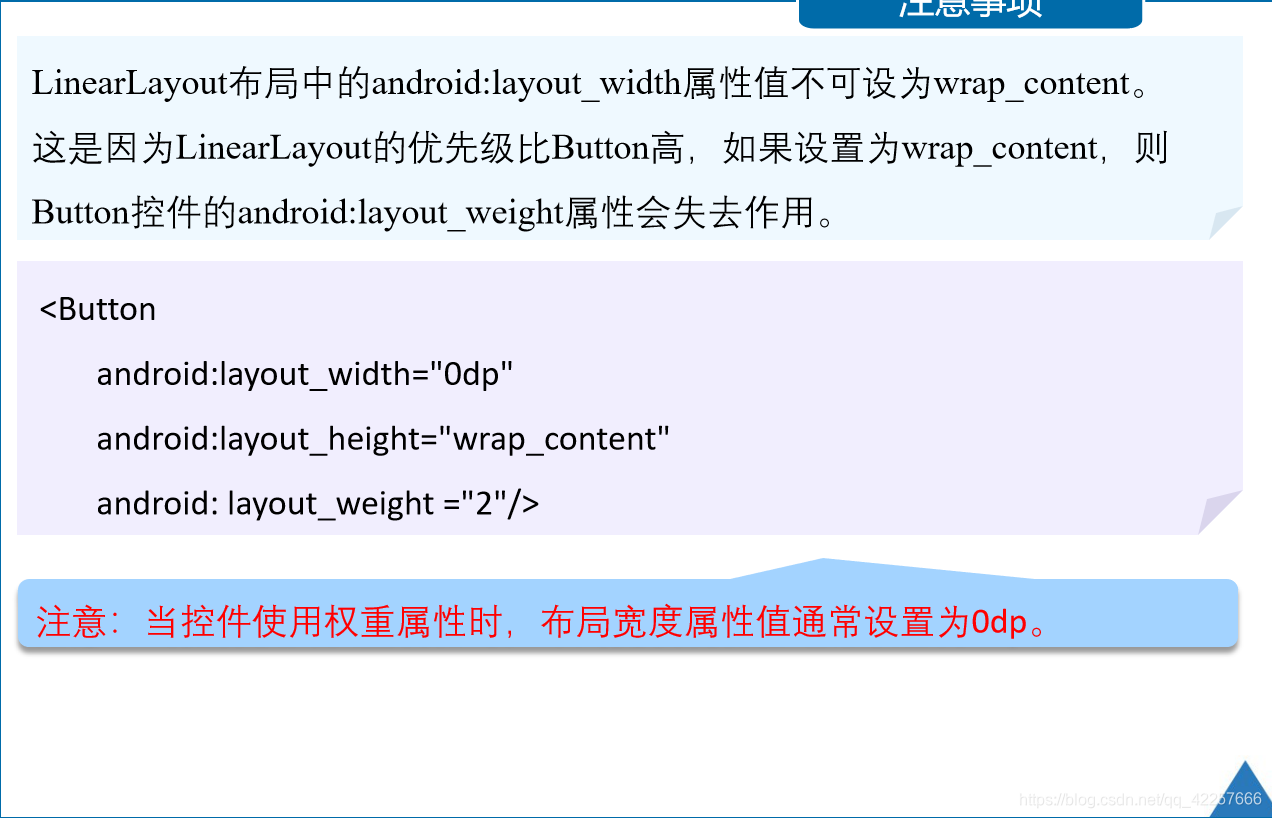
(3)线性布局—注意事项
5、TableLayout表格布局
- 概述
采用行、列的形式来管理控件,它不需要明确声明包含多少行、多少列,而是通过在TableLayout布局中添加TableRow布局来控制表格的行数,通过在TableRow布局中添加控件来控制表格的列数。
- 代码样式
<TableLayout xmlns:android="http://schemas.android.com/apk/res/android"
             属性 = ”属性值”>
             <TableRow>
	UI控件
             </TableRow>
                 ......
</TableLayout>
- 布局属性和控件属性

- UI设计
<TableLayout xmlns:android="http://schemas.android.com/apk/res/android"
        android:layout_width="wrap_content"
        android:layout_height="wrap_content"
        android:stretchColumns="2">//第3列可被拉伸
        <TableRow>
            <Button
                android:layout_width="wrap_content"
                android:layout_height="wrap_content"
                android:layout_column="0"//设置控件所在列
                android:text="按钮1" />
	......
        </TableRow>
    </TableLayout>

6、FrameLayout帧布局
- 概述
帧布局(FrameLayout)用于在屏幕上创建一块空白区域,添加到该区域中的每个子控件占一帧,这些帧会一个一个叠加在一起,后加入的控件会叠加在上一个控件上层,所有控件都默认显示在屏幕左上角。
- 定义格式
<FrameLayout xmlns:android="http://schemas.android.com/apk/res/android"
    属性 ="属性值">
</FrameLayout>
- UI界面
<FrameLayout xmlns:android="http://schemas.android.com/apk/res/android"
        android:layout_width="match_parent"
        android:layout_height="match_parent"
        android:foreground="@mipmap/ic_launcher"//设置帧布局容器的前景图像(始终在所有子控件之上)
        android:foregroundGravity="left" >//设置前景图像显示位置
    </FrameLayout>

7、ConstraintLayout约束布局
- 概述
ConstraintLayout是Android Studio2.2新添加的布局。
它适合使用可视化的方式编写界面布局——当然,可视化操作的背后仍然是使用XML代码实现的,只不过这些代码是Android Studio根据我们的操作自动生成的。包含相对定位、居中定位和倾向、Chain三项。
- 相对定位
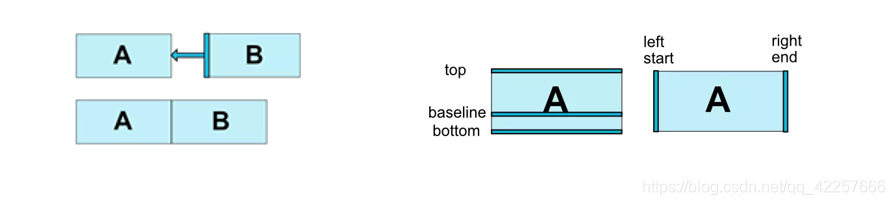
相对定位是在ConstraintLayout中创建布局的基本构建方法之一。相对定位即一个控件相对于另一个控件进行定位。ConstraintLayout布局中的控件可以在横向和纵向上以添加约束关系的方式进行相对定位,其中,横向边包括Left、Start、Right、End,纵向边包括Top、Bottom、Baseline(文本底部的基准线)。
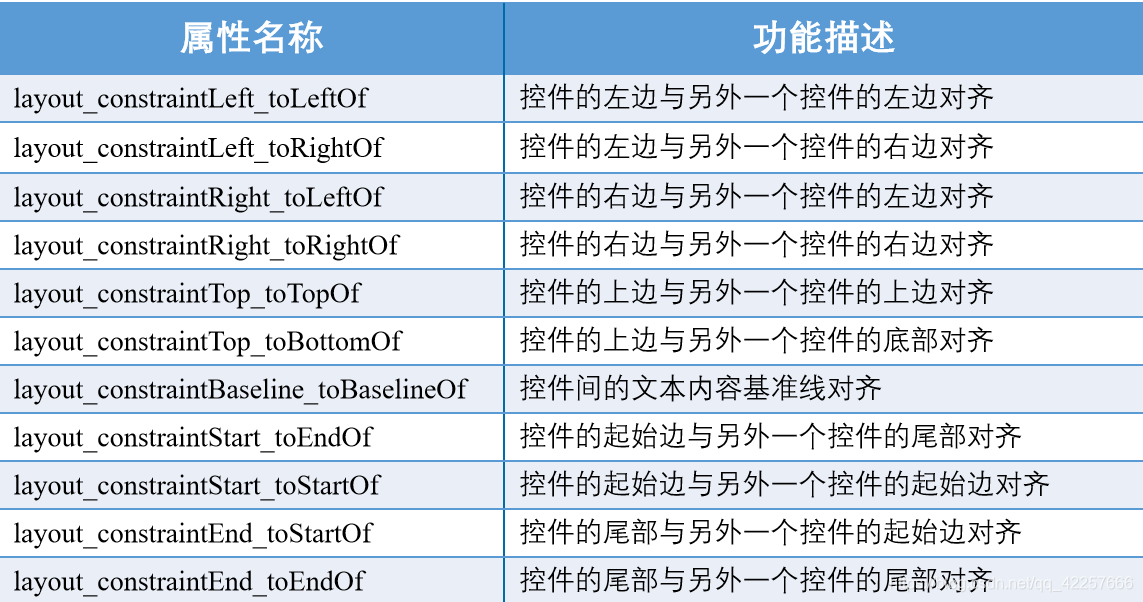
- 相对定位关系的属性
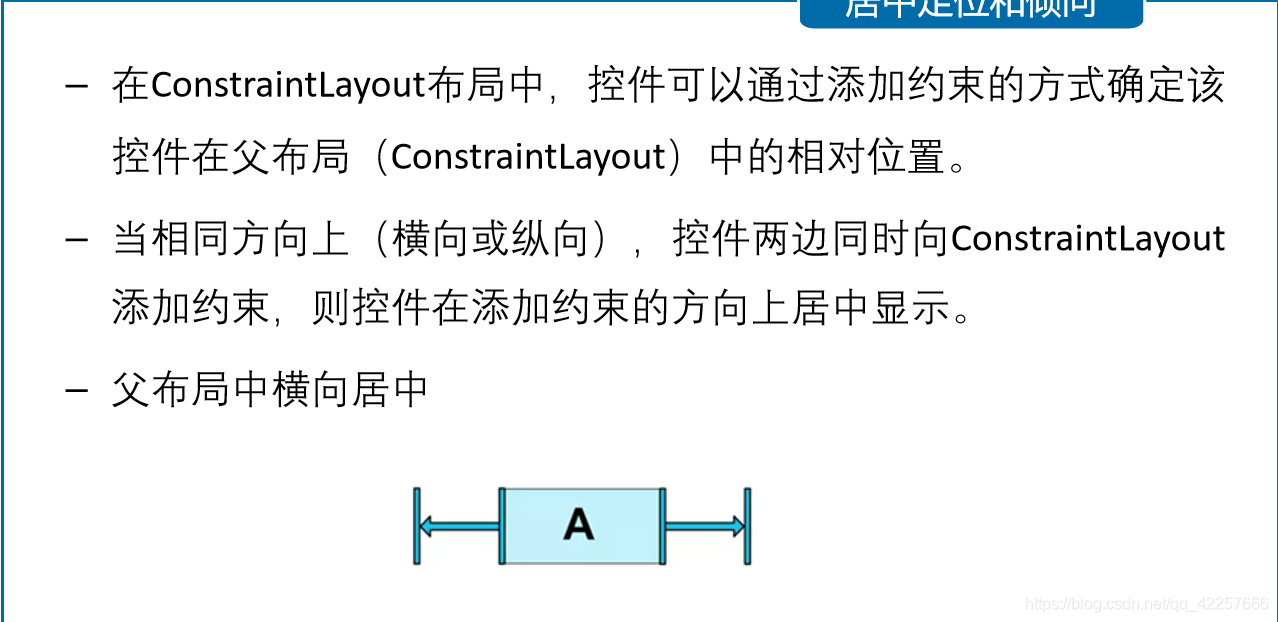
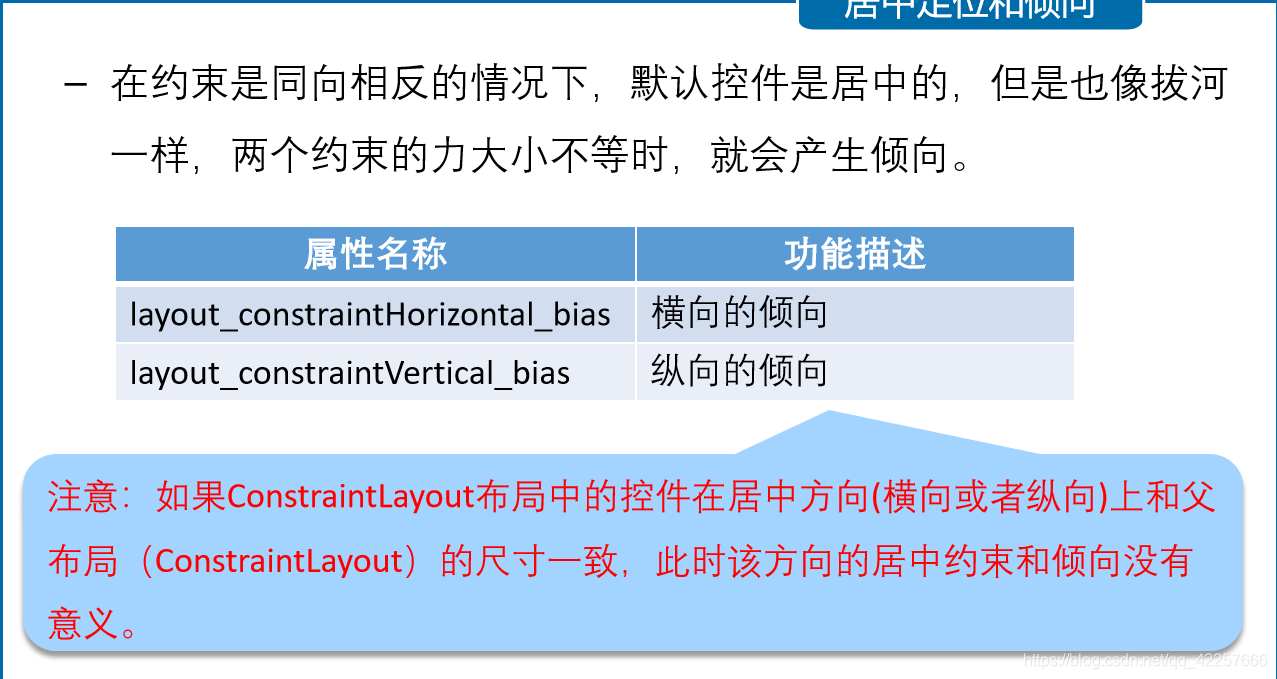
- 居中定位和倾向
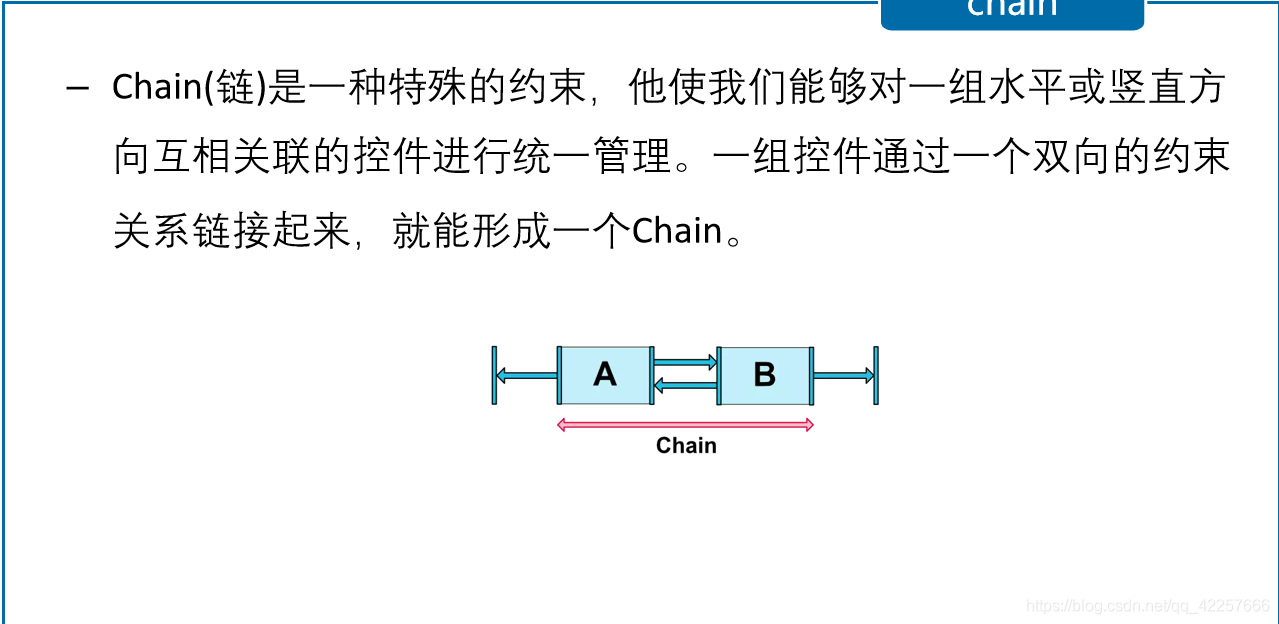
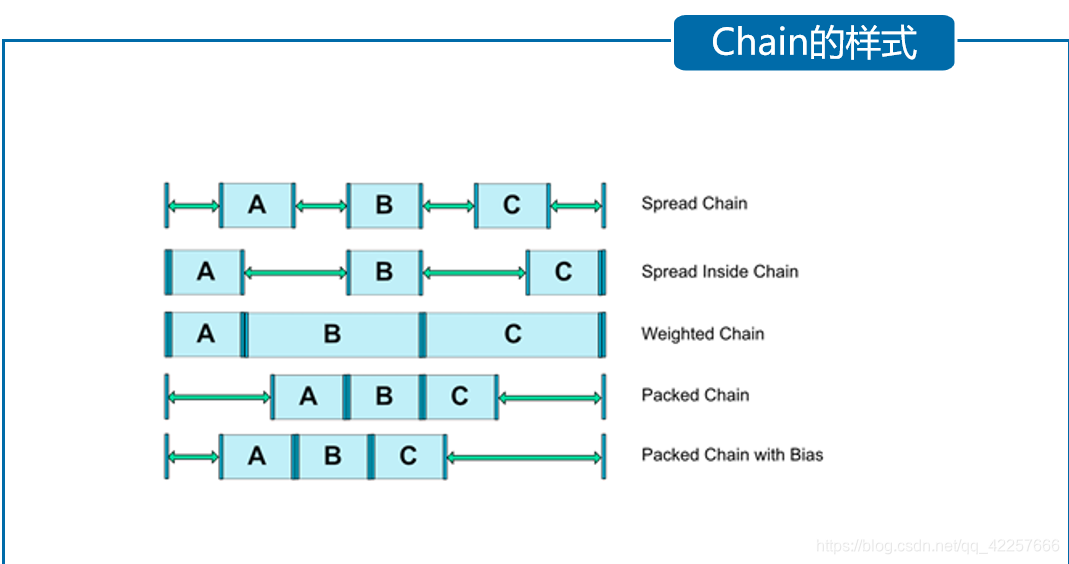
- Chain
四、总结:
博客内容主要针对Android界面布局的相关知识进行讲解。通过本次的学习,我们希望读者能够掌握View和ViewGroup的功能、掌握不同界面布局以及布局中控件属性的使用,因为在Android应用中,所有功能大部分都体现在界面上,界面的美观会给用户一个友好的体验。
有些东西,并不是越浓越好,要恰到好处。深深的话我们浅浅地说,长长的路我们慢慢地走。


 811
811

 被折叠的 条评论
为什么被折叠?
被折叠的 条评论
为什么被折叠?
 到【灌水乐园】发言


