


目录
Linux
- Apache
- Nginx
Windows
- IIS
Nginx 与 Apache 的区别?
- 最核心的区别在于 Nginx 采用异步非阻塞机制,多个连接可以对应一个进程;Apache 采用的是同步阻塞+多进程/线程模型,一个连接对应一个进程
- Nginx 抗并发能力更高
- Nginx 更轻量,内存、CPU资源消耗更少
- Nginx 配置简洁,使用场景多,稳定性高
Nginx 有哪些应用场景?
- 用作Web网站服务,处理http静态页面请求
- 用作虚拟主机,实现一个服务器用于做多个网站站点
- 用作反向代理、负载均衡,可以作为网关代理服务器接收客户端的请求转发给后端节点服务器集群
- 用作web缓存服务器
Nginx 有哪些进程?
- master进程:管理worker进程,加载配置文件
- worker进程:处理请求连接
 worker_processes 1; #工作进程数量,一般设置为和 CPU 核数一样;设置为auto,nginx将会自己获取这个数值
Nginx 的最大并发如何设置?
nginx应用程序配置文件设置
worker_processes(工作进程数,一般设置为与CPU数量相同,或auto)
worker_connections(每个worker进程能够处理的连接数)
worker_rlimit_nofile(设置每个worker进程最大可以打开的文件数)
nginx服务器系统设置
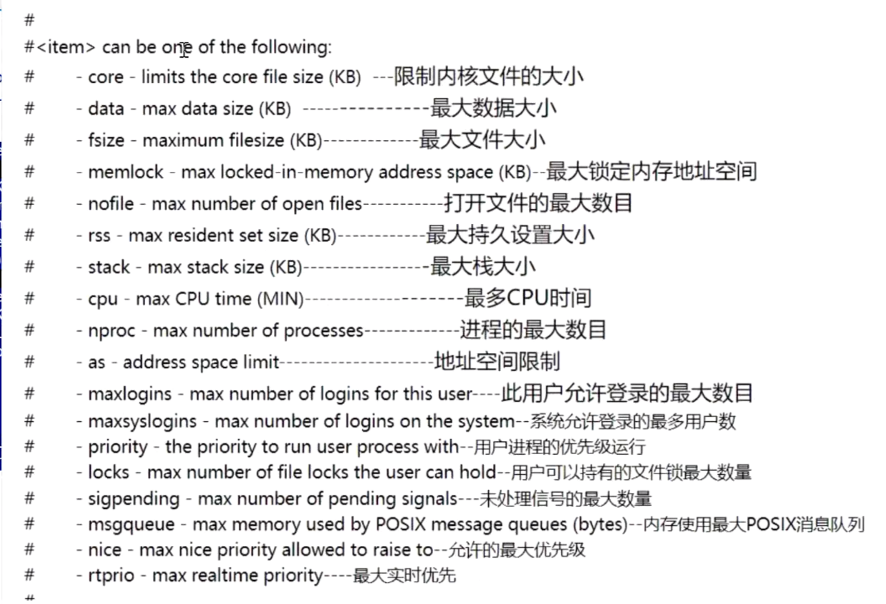
ulimit -n 65535 #指定进程能够打开的文件数
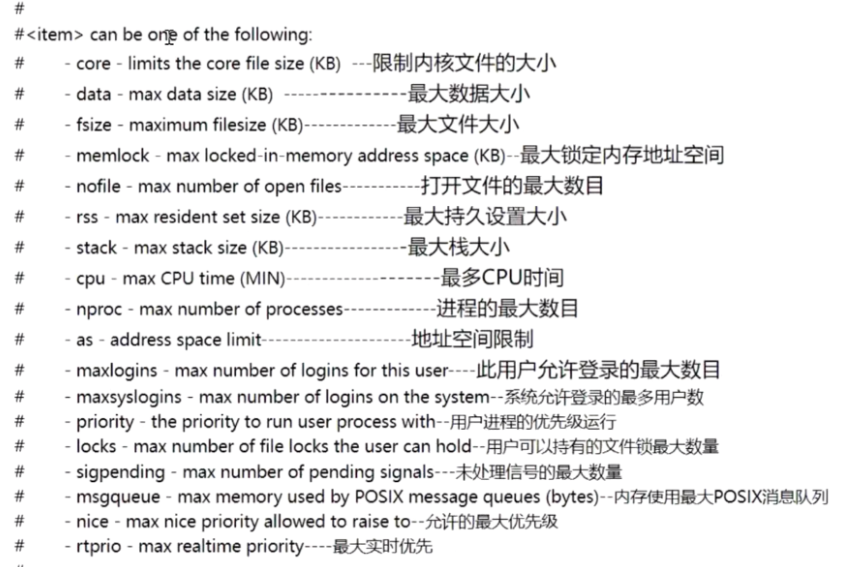
vim /etc/security/limits.conf --> * soft nofile 65535 (最小连接数)
* hard nofile 65535 (最大连接数)
nginx 的 root 和 alias 指定路径的区别?
root(根目录)
location /abc {
root /var/www;
}处理方式: root路径+location路径
http://192.168.80.20/abc/xy101/cywl.html --> /var/www/abc/xy101/cywl.html
alias(别名目录、虚拟目录)
location /abc {
alias /var/www;
}处理方式: alias路径替换location路径
http://192.168.80.20/abc/xy101/cywl.html --> /var/www/xy101/cywl.html
nginx 服务器当前的并发量怎么看?
1)开启状态统计模块 --with-http_stub_status_module ,修改配置文件 开启状态统计功能 stub_status on; ,访问状态统计页面,看 Active connections: 行的数组
2)ss -antp | grep nginx | grep -c ESTAB
netstat
nginx 访问状态统计
1)安装nginx时添加状态统计模块 ./configure --with-http_stub_status_module
2)修改配置文件,开启状态统计功能 stub_status on; access_log off;
3)测试验证 curl -s
查看Nginx已安装模块
查看已安装的 Nginx 是否包含HTTP_STUB_STATUS 模块
[root@l2 logs]# /usr/local/nginx/sbin/nginx -V
nginx version: nginx/1.26.0
built by gcc 4.8.5 20150623 (Red Hat 4.8.5-44) (GCC)
built with OpenSSL 1.0.2k-fips  26 Jan 2017
TLS SNI support enabled
configure arguments: --prefix=/usr/local/nginx --user=nginx --group=nginx --with-http_stub_status_module --with-http_ssl_module
[root@l2 logs]#
修改 nginx.conf 配置文件
[root@l2 logs]# cd /usr/local/nginx/conf
[root@l2 conf]# cp nginx.conf nginx.conf.bak    //备份原来的配置文件
[root@l2 conf]# vim /usr/local/nginx/conf/nginx.conf
http {
	......
		server {
			listen 80;
			server_name www.kgc.com;
			charset utf-8;
			location / {
				root html;
				index index.html index.php;
			}
			##添加 stub_status 配置##
			location /status { 					#访问位置为/status
				stub_status on; 				#打开状态统计功能
				access_log off; 				#关闭此位置的日志记录
			}
		}
	}
location /status {
            stub_status on;
            access_log off;
}

重启服务,访问测试
nginx -t           //检查配置文件是否配置正确
systemctl restart nginx
[root@l2 conf]# nginx -t
nginx: the configuration file /usr/local/nginx/conf/nginx.conf syntax is ok
nginx: configuration file /usr/local/nginx/conf/nginx.conf test is successful
[root@l2 conf]# systemctl restart nginx 
nginx 访问认证
1)安装 httpd-tools 软件包,使用 htpasswd 生成用户认证文件,并修改文件的归属nginx和权限400
2)修改配置文件,添加 basic_auth basic_auth_user_file 配置
3)测试验证
nginx 访问控制
在 http{...}配置块(对所有站点生效) server{...}配置块(对当前站点所有的访问路径生效) location{...}配置块(只对当前站点指定的URL访问路径生效) 中添加配置
黑名单配置 deny IP|网段;
白名单配置 allow IP|网段;
deny all;
nginx虚拟主机
基于域名的虚拟主机
server {
server_name XXX; #指定不同的域名
}
基于IP的虚拟主机
server {
listen <IP>:端口; #指定不同的IP
}
基于端口的虚拟主机
server {
listen IP:<端口>; #指定不同的端口
}
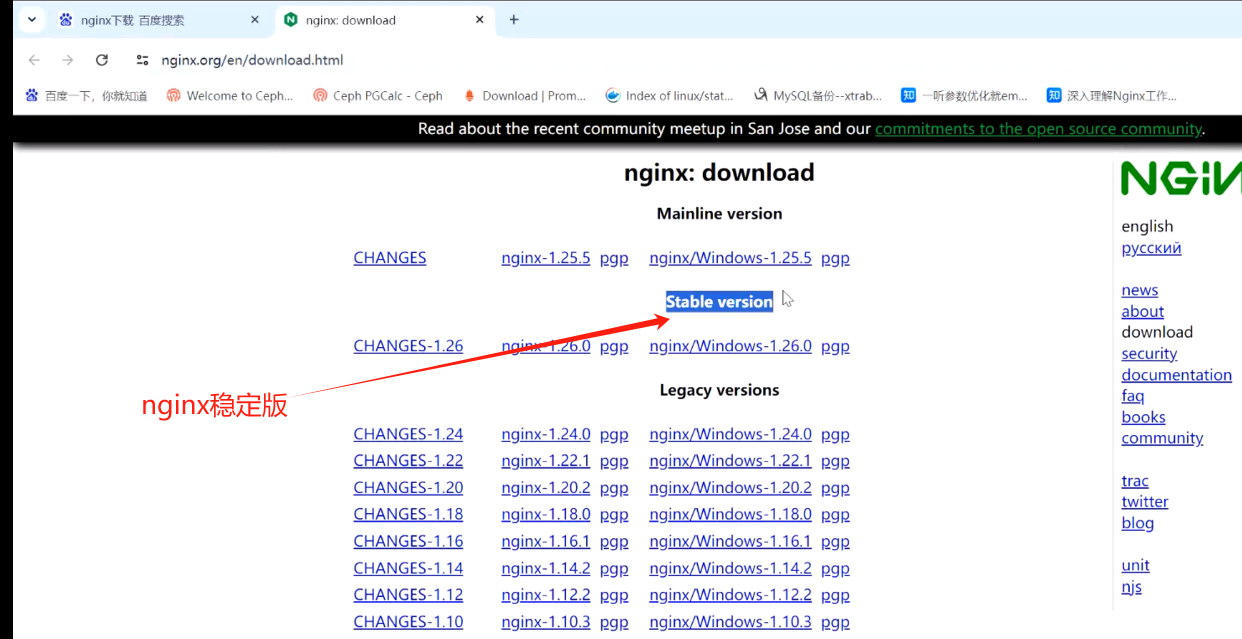
平滑升级:
先去官网下载最新版本的nginx,再上传到nginx服务器,在进行解压,
先用.configure进行配置,按照原有的配置配置,再用make编译升级成二进制文件,
然后把二进制文件nginx替换掉原有的老文件,
然后在用make upgrade进行升级或用kill -USR2 $(cat /usr/local/nginx/logs/nginx.pid)
编译安装Nginx服务
关闭防火墙
[root@l1 ~]# systemctl disable --now firewalld
Removed symlink /etc/systemd/system/multi-user.target.wants/firewalld.service.
Removed symlink /etc/systemd/system/dbus-org.fedoraproject.FirewallD1.service.
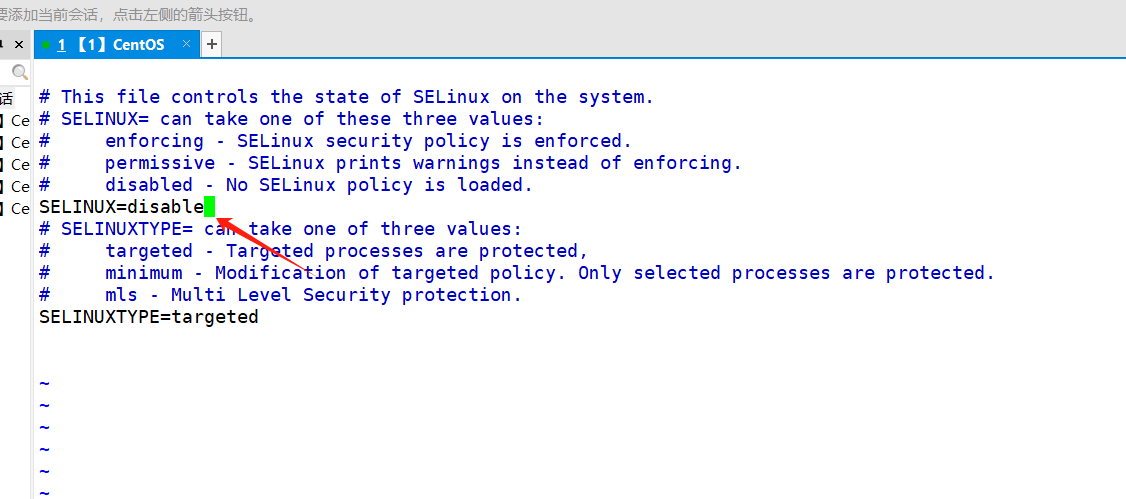
[root@l1 ~]# setenforce 0
[root@l1 ~]# vim /etc/selinux/config
下载软件包
[root@l1 ~]# cd /opt/
[root@l1 opt]# ls
rh
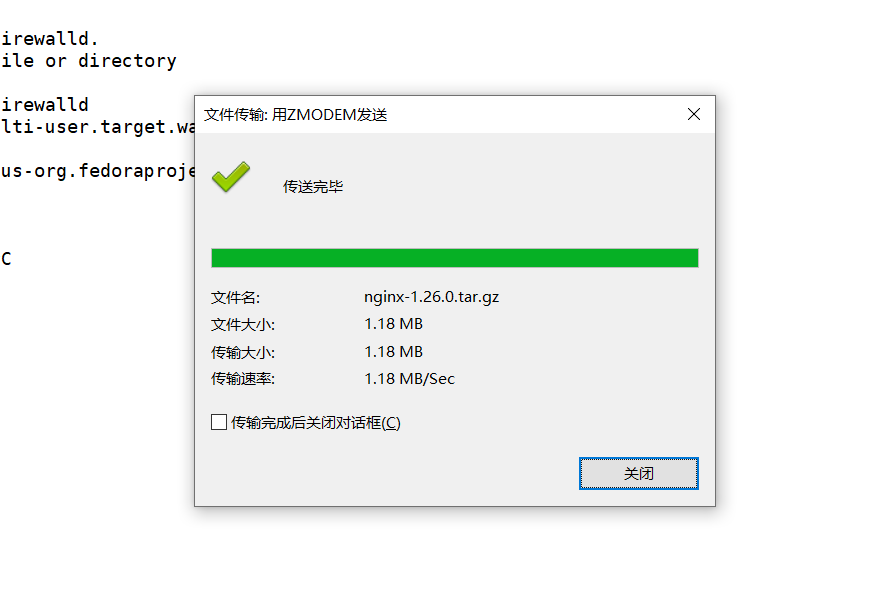
[root@l1 opt]# rz -E
rz waiting to receive.
[root@l1 opt]# ls
nginx-1.26.0.tar.gz  rh
[root@l1 opt]#
[root@l1 opt]# tar xf nginx-1.26.0.tar.gz  //解压软件包
[root@l1 opt]# ls
nginx-1.26.0  nginx-1.26.0.tar.gz  rh
[root@l1 opt]#
[root@l1 opt]# cd nginx-1.26.0/
[root@l1 nginx-1.26.0]#
安装依赖包
#nginx的配置及运行需要pcre、zlib、openssl等软件包的支持,因此需要安装这些软件的开发包,以便提供相应的库和头文件。
yum -y install pcre-devel zlib-devel openssl-devel gcc gcc-c++ make
[root@l1 nginx-1.26.0]# yum -y install pcre-devel zlib-devel openssl-devel gcc gcc-c++ make
创建运行用户、组
(Nginx 服务程序默认以 nobody 身份运行,建议为其创建专门的用户账号,以便更准确地控制其访问权限)
[root@l1 nginx-1.26.0]# useradd -M -s /sbin/nologin nginx
[root@l1 nginx-1.26.0]#
编译安装Nginx
cd nginx-1.12.0/
./configure \
--prefix=/usr/local/nginx \							#指定nginx的安装路径
--user=nginx \										#指定用户名
--group=nginx \										#指定组名
--with-http_stub_status_module						#启用 http_stub_status_module 模块以支持状态统计

make && make install
[root@l1 nginx-1.26.0]# ./configure --prefix=/usr/local/nginx --user=nginx --group=nginx --with-http_stub_status_module --with-http_ssl_module
//指定安装路径,指定运行用户,运行组 ,开启模块,htps协议
./configure \
--prefix=/usr/local/nginx \
--user=nginx \
--group=nginx \
--with-http_stub_status_module
make && make install[root@l1 nginx-1.26.0]# make -j 2 //进行编译[root@l1 nginx-1.26.0]# make install //安装[root@l1 nginx-1.26.0]# cd /usr/local/
[root@l1 local]# ls
bin games lib libexec sbin src
etc include lib64 nginx share
[root@l1 local]#
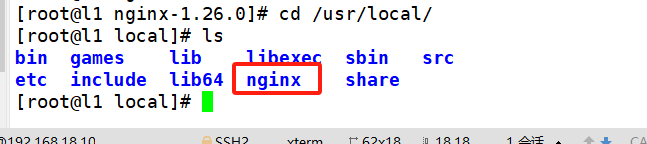
[root@l1 local]# cd nginx/
[root@l1 nginx]# ls
conf  html  logs  sbin
[root@l1 nginx]# ls sbin/
nginx
[root@l1 nginx]#
[root@l1 nginx]# ln -s /usr/local/nginx/sbin/nginx /usr/local/sbin/
                  //创建软连接     #让系统识别nginx的操作命令
[root@l1 nginx]# ng   //(按两下tab)
ngettext  nginx
[root@l1 nginx]# ng
[root@l1 nginx]# cd sbin/
[root@l1 sbin]# ls
nginx
[root@l1 sbin]# pwd
/usr/local/nginx/sbin
[root@l1 sbin]#
检查、启动、重启、停止 nginx服务
nginx -t							#检查配置文件是否配置正确
#启动
/usr/local/nginx/sbin/nginx
#停止
cat /usr/local/nginx/logs/nginx.pid		#先查看nginx的PID号
kill -3 <PID号>
kill -s QUIT <PID号>
killall -3 nginx
killall -s QUIT nginx
#重载
kill -1 <PID号>
kill -s HUP <PID号>
killall -1 nginx
killall -s HUP nginx
#日志分割,重新打开日志文件
kill -USR1 <PID号>
#平滑升级
kill -USR2 <PID号>
#启动
/usr/local/nginx/sbin/nginx
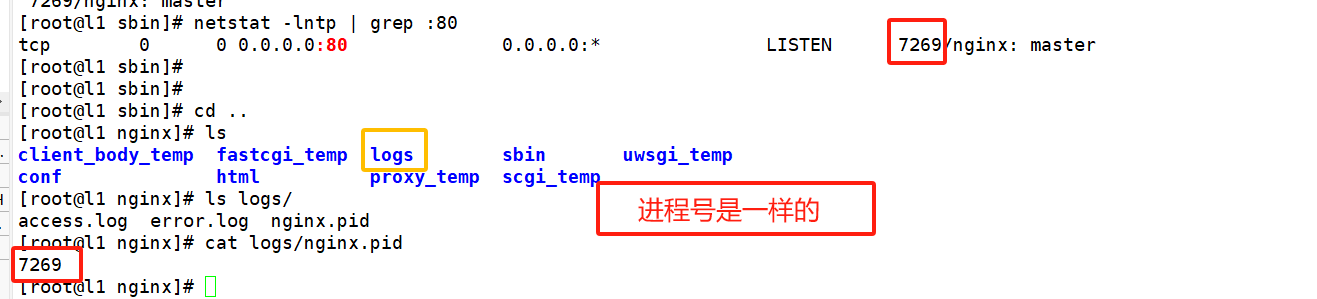
[root@l1 sbin]# netstat -lntp | grep :80 //查看所有监听的 TCP 端口中是否有 80 端口
[root@l1 sbin]# /usr/local/nginx/sbin/nginx   //启动nginx
[root@l1 sbin]# netstat -lntp | grep :80
tcp        0      0 0.0.0.0:80              0.0.0.0:*               LISTEN      7269/nginx: master
nginx启动后会在logs中生成文件
#停止
cat /usr/local/nginx/logs/nginx.pid #先查看nginx的PID号
kill -3 <PID号>
kill -s QUIT <PID号>
killall -3 nginx
killall -s QUIT nginx

nginx -h (查看帮助)
[root@l1 nginx]# nginx -s quit   //关闭进程
[root@l1 nginx]# netstat -lntp | grep :80
[root@l1 nginx]#
[root@l1 nginx]# /usr/local/nginx/sbin/nginx   //启动
[root@l1 nginx]# netstat -lntp | grep :80
tcp        0      0 0.0.0.0:80              0.0.0.0:*               LISTEN      7386/nginx: master
#日志分割,重新打开日志文件
kill -USR1 <PID号>
[root@l1 nginx]# cd logs/
[root@l1 logs]# ls
access.log  error.log  nginx.pid
[root@l1 logs]# rm -f *.log   //清空所有日志文件
[root@l1 logs]# ls              //没有日志文件
nginx.pid

[root@l1 logs]# kill -USR1 $(cat nginx.pid)   //自动获取pid号
[root@l1 logs]# ls                              //重新新建了两个日志文件
access.log  error.log  nginx.pid
[root@l1 logs]#
#平滑升级
kill -USR2 <PID号>
//查看nginx版本
[root@l1 logs]# nginx -v    //查看nginx版本
nginx version: nginx/1.26.0
[root@l1 logs]#
安装一个1.25版本实验一下
[root@l2 ~]# cd /opt/
[root@l2 opt]# 
[root@l2 opt]# ls
nginx-1.25.5.tar.gz  nginx-1.26.0.tar.gz  rh
进行初始化配置
[root@l2 opt]# systemctl disable --now firewalld.service
Removed symlink /etc/systemd/system/multi-user.target.wants/firewalld.service.
Removed symlink /etc/systemd/system/dbus-org.fedoraproject.FirewallD1.service.
[root@l2 opt]# setenforce 0
[root@l2 opt]# vim /etc/selinux/config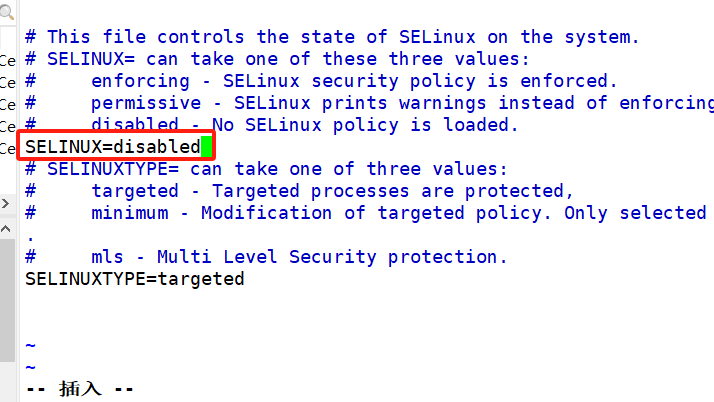
安装软件包
[root@l2 opt]# df
文件系统                   1K-块    已用     可用 已用% 挂载点
devtmpfs                 1913548       0  1913548    0% /dev
tmpfs                    1930628       0  1930628    0% /dev/shm
tmpfs                    1930628   12528  1918100    1% /run
tmpfs                    1930628       0  1930628    0% /sys/fs/cgroup
/dev/mapper/centos-root 38770180 5714188 33055992   15% /
/dev/sda1                1038336  191100   847236   19% /boot
tmpfs                     386128      12   386116    1% /run/user/42
tmpfs                     386128       0   386128    0% /run/user/0
[root@l2 opt]# mount /dev/sr0 /mnt
mount: /dev/sr0 写保护,将以只读方式挂载
[root@l2 opt]# yum -y install pcre-devel zlib-devel openssl-devel gcc gcc-c++ make
//安装软件包
创建用户
[root@l2 opt]# useradd -M -s /sbin/nolongin nginx编译安装Nginx
[root@l2 opt]# cd /opt/
[root@l2 opt]# ls
nginx-1.25.5.tar.gz  nginx-1.26.0.tar.gz  rh
[root@l2 opt]# tar xf nginx-1.25.5.tar.gz   //解压
[root@l2 opt]# cd nginx-1.25.5/
[root@l2 nginx-1.25.5]#
./configure \
--prefix=/usr/local/nginx \
--user=nginx \
--group=nginx \
--with-http_stub_status_module
[root@l2 nginx-1.25.5]# ./configure --prefix=/usr/local/nginx --user=nginx --group=nginx --with-http_stub_status_module --with-http_ssl_module
//指定安装路径,指定运行用户,运行组 ,开启模块,htps协议[root@l2 nginx-1.25.5]# make && make install
设置软链接,可以直接调用nginx命令来进行管理
[root@l2 nginx-1.25.5]# cd /usr/local/nginx/
[root@l2 nginx]# ls sbin/
nginx
[root@l2 nginx]# ln -s /usr/local/nginx/sbin/nginx /usr/local/sbin/
[root@l2 nginx]#
[root@l2 nginx]# /usr/local/nginx/sbin/nginx  //运行
[root@l2 nginx]#
启动nginx服务
/usr/local/nginx/sbin/nginx

netstat -lntp | grep 80
查看pid进程号
[root@l2 ~]# cat /usr/local/nginx/logs/nginx.pid
14039
[root@l2 ~]#
查看版本
[root@l2 ~]# nginx -v
nginx version: nginx/1.25.5
[root@l2 ~]#
[root@l2 ~]# netstat -lntp | grep 80
tcp 0 0 0.0.0.0:80 0.0.0.0:* LISTEN 14039/nginx: master
//已在运行升级
新版本升级:
tar -zxvf nginx-1.xx.xx.tar.gz
cd nginx-1.xx.xx
./configure \
--prefix=/usr/local/nginx \
--user=nginx \
--group=nginx \
--with-http_stub_status_module
--with-http_ssl_module
[root@l2 ~]# cd /opt/
[root@l2 opt]# ls
nginx-1.25.5  nginx-1.25.5.tar.gz  nginx-1.26.0.tar.gz  rh
[root@l2 opt]# tar xf nginx-1.26.0.tar.gz
[root@l2 opt]#
[root@l2 opt]# ls
nginx-1.25.5         nginx-1.26.0         rh
nginx-1.25.5.tar.gz  nginx-1.26.0.tar.gz
[root@l2 opt]# cd nginx-1.26.0/
[root@l2 nginx-1.26.0]#
[root@l2 nginx-1.26.0]# ls
auto     CHANGES.ru  configure  html     man     src
CHANGES  conf        contrib    LICENSE  README
[root@l2 nginx-1.26.0]# ./configure --prefix=/usr/local/nginx --user=nginx --group=nginx --with-http_stub_status_module  --with-http_ssl_module
//做配置
./configure \
--prefix=/usr/local/nginx \
--user=nginx \
--group=nginx \
--with-http_stub_status_module
--with-http_ssl_module
[root@l2 nginx-1.26.0]# make -j 2
//进行编译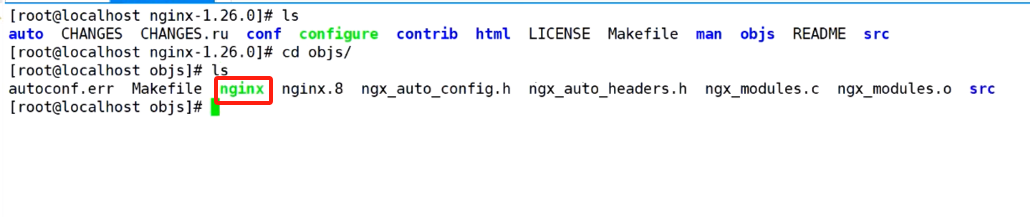
nginx文件做个替换
[root@l2 objs]# cd /usr/local/nginx/sbin/
[root@l2 sbin]# ls
nginx
[root@l2 sbin]# mv nginx nginx_old    //做个备份
[root@l2 sbin]#
[root@l2 sbin]# cp /opt/nginx-1.26.0/objs/nginx ./ //新版本的Nginx移动到安装目录
[root@l2 sbin]# ls
nginx nginx_old
[root@l2 sbin]#
升级
[root@l2 sbin]# cd /opt/nginx-1.26.0/
[root@l2 nginx-1.26.0]# ls
auto     CHANGES.ru  configure  html     Makefile  objs    src
CHANGES  conf        contrib    LICENSE  man       README
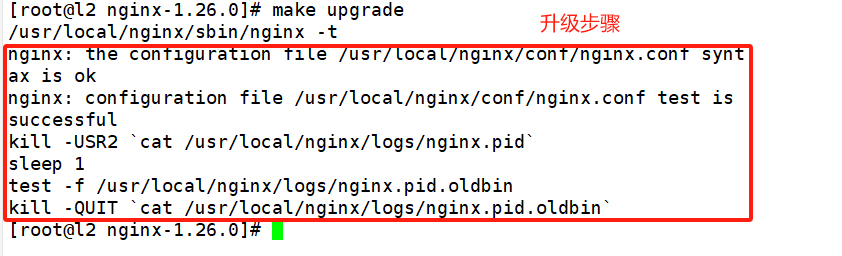
[root@l2 nginx-1.26.0]# make upgrade   //升级
/usr/local/nginx/sbin/nginx -t
nginx: the configuration file /usr/local/nginx/conf/nginx.conf syntax is ok
nginx: configuration file /usr/local/nginx/conf/nginx.conf test is successful
kill -USR2 `cat /usr/local/nginx/logs/nginx.pid`
sleep 1
test -f /usr/local/nginx/logs/nginx.pid.oldbin
kill -QUIT `cat /usr/local/nginx/logs/nginx.pid.oldbin`
[root@l2 nginx-1.26.0]#
查看版本
[root@l2 nginx-1.26.0]# nginx -v
nginx version: nginx/1.26.0
[root@l2 nginx-1.26.0]#
[root@l2 nginx-1.26.0]# nginx -V
nginx version: nginx/1.26.0
built by gcc 4.8.5 20150623 (Red Hat 4.8.5-44) (GCC)
built with OpenSSL 1.0.2k-fips  26 Jan 2017
TLS SNI support enabled
configure arguments: --prefix=/usr/local/nginx --user=nginx --group=nginx --with-http_stub_status_module --with-http_ssl_module
[root@l2 nginx-1.26.0]# 
注:mv /usr/local/nginx/sbin/nginx /usr/local/nginx/sbin/nginx_old
cp objs/nginx /usr/local/nginx/sbin/nginx
make upgrade #要保证当前 nginx 进程是通过 /usr/local/nginx/sbin/nginx 启动的,而不是通过查找环境变量中那个 nginx 命令启动的
#或者先 killall nginx ,再/usr/local/nginx/sbin/nginx
添加 Nginx 系统服务
方法一:
方法一:
vim /etc/init.d/nginx
#!/bin/bash
#chkconfig: - 99 20
#description:Nginx Service Control Script
COM="/usr/local/nginx/sbin/nginx"
PID="/usr/local/nginx/logs/nginx.pid"
case "$1" in
start)
  $COM
;;

stop)
  kill -s QUIT $(cat $PID)
;;

restart)
  $0 stop
  $0 start
;;

reload)
  kill -s HUP $(cat $PID)
;;

*)
echo "Usage: $0 {start|stop|restart|reload}"
exit 1

esac
exit 0


chmod +x /etc/init.d/nginx
chkconfig --add nginx							#添加为系统服务
systemctl stop nginx
systemctl start nginx
方法二:
方法二:
vim /lib/systemd/system/nginx.service
[Unit]
Description=nginx
After=network.target
[Service]
Type=forking
PIDFile=/usr/local/nginx/logs/nginx.pid
ExecStart=/usr/local/nginx/sbin/nginx
ExecReload=/bin/kill -s HUP $MAINPID
ExecStop=/bin/kill -s QUIT $MAINPID
PrivateTmp=true
[Install]
WantedBy=multi-user.target
---------------------------------------------------------
[Unit]:服务的说明
Description:描述服务
After:依赖,当依赖的服务启动之后再启动自定义的服务

[Service]服务运行参数的设置
Type=forking是后台运行的形式,使用此启动类型应同时指定PIDFile=,以便systemd能够跟踪服务的主进程。
ExecStart为服务的具体运行命令
ExecReload为重启命令
ExecStop为停止命令
PrivateTmp=True表示给服务分配独立的临时空间
注意:启动、重启、停止命令全部要求使用绝对路径

[Install]服务安装的相关设置,可设置为多用户
---------------------------------------------------------

chmod 754 /lib/systemd/system/nginx.service
systemctl start nginx.service
systemctl enable nginx.service
root@l2 sbin]# nginx -s quit ///关闭nginx
[root@l2 sbin]# netstat -lntp | grep :80 //判断nginx有没有启动[root@l1 logs]# cd /usr/lib/systemd/system
[root@l1 system]# vim nginx.service
[root@l1 system]# 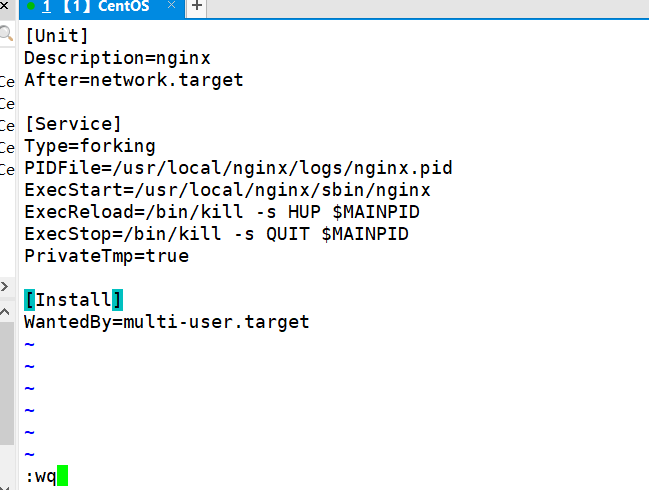
[Unit]
Description=nginx
After=network.target

[Service]
Type=forking
PIDFile=/usr/local/nginx/logs/nginx.pid
ExecStart=/usr/local/nginx/sbin/nginx
ExecReload=/bin/kill -s HUP $MAINPID
ExecStop=/bin/kill -s QUIT $MAINPID
PrivateTmp=true

[Install]
WantedBy=multi-user.target
[root@l2 system]# chmod 754 /lib/systemd/system/nginx.service //给权限
[root@l2 system]# systemctl start nginx.service
[root@l2 system]# systemctl enable nginx.service
Created symlink from /etc/systemd/system/multi-user.target.wants/nginx.service to /usr/lib/systemd/system/nginx.service.
[root@l1 system]# netstat -lntp | grep :80    //判断nginx有没有启动
tcp        0      0 0.0.0.0:80              0.0.0.0:*               LISTEN      7386/nginx: master
[root@l1 system]#
[root@l1 system]# nginx -s quit   //关闭nginx
[root@l1 system]# netstat -lntp | grep :80    //查看ng有没有启动
[root@l1 system]#
启动关闭nginx
[root@l1 system]# systemctl start nginx.service   //启动ng
[root@l1 system]# netstat -lntp | grep :80       //查看
tcp        0      0 0.0.0.0:80              0.0.0.0:*               LISTEN      14709/nginx: master
[root@l1 system]#
[root@l1 system]# systemctl stop nginx.service //关闭ng
[root@l1 system]# netstat -lntp | grep :80 //查看
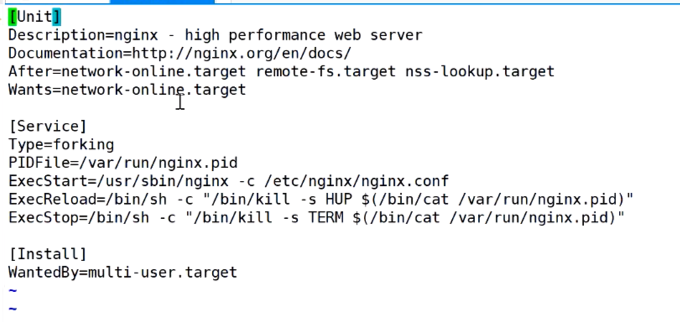
[root@l1 system]# 通过yum快速获取nginx.service文件
[root@l1 system]# ls nginx.service
nginx.service
[root@l1 system]#
开一台新的虚拟机
[root@l2 ~]# cd /etc/yum.repos.d/
[root@l2 yum.repos.d]# ls
local.repo  repo.bak
[root@l2 yum.repos.d]# ls
local.repo  nginx.repo  repo.bak
[root@l2 yum.repos.d]#
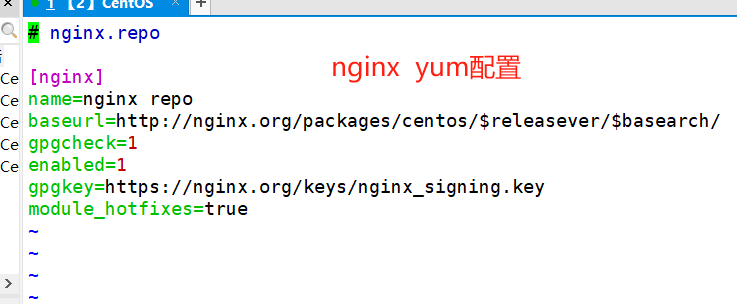
[root@l2 yum.repos.d]# vim nginx.repo
[root@l2 yum.repos.d]# yum install -y nginx.repo
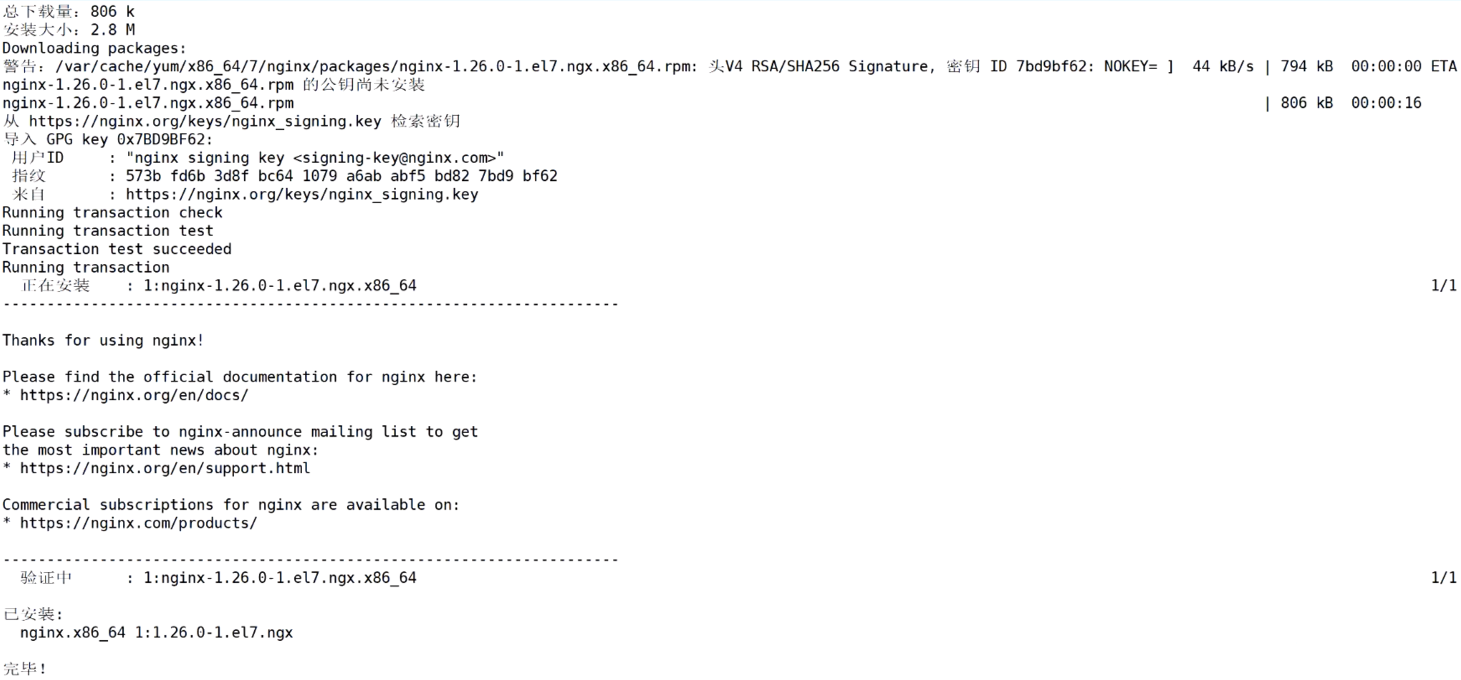
 文件位置
文件位置

![]()
 -
-
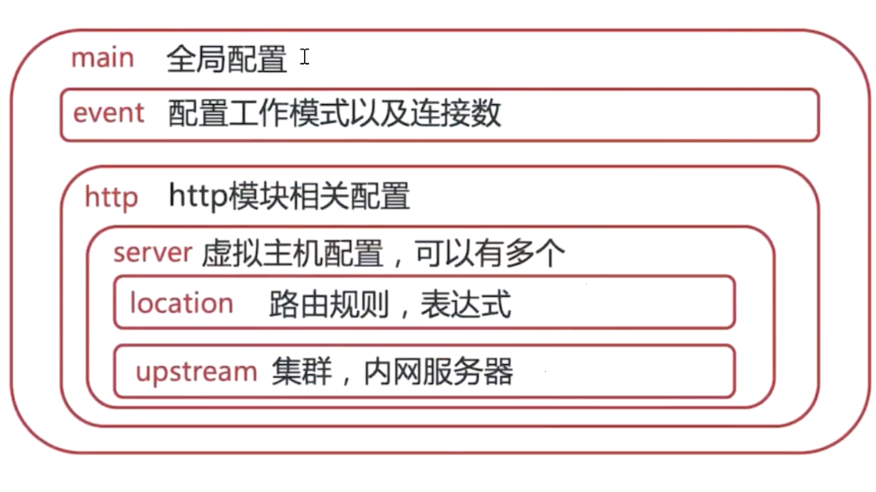
认识Nginx服务的主配置文件 nginx.conf
-------认识Nginx服务的主配置文件 nginx.conf--------
1、全局块:全局配置,对全局生效;
2、events块:配置影响 Nginx 服务器与用户的网络连接;
3、http块:配置代理,缓存,日志定义等绝大多数功能和第三方模块的配置;
4、server块:配置虚拟主机的相关参数,一个 http 块中可以有多个 server 块;
5、location块:用于配置匹配的 uri ;
6、upstream:配置后端服务器具体地址,负载均衡配置不可或缺的部分。
[root@l1 ~]# cd /usr/local/nginx/
[root@l1 nginx]# ls
client_body_temp fastcgi_temp logs sbin uwsgi_temp
conf html proxy_temp scgi_temp
[root@l1 nginx]# cd conf/
[root@l1 conf]# ls
fastcgi.conf koi-win scgi_params
fastcgi.conf.default mime.types scgi_params.default
fastcgi_params mime.types.default uwsgi_params
fastcgi_params.default nginx.conf uwsgi_params.default
koi-utf nginx.conf.default win-utf
[root@l1 conf]# pwd
/usr/local/nginx/conf //源码编译安装
[root@l1 conf]#
yum安装文件位置


![]()
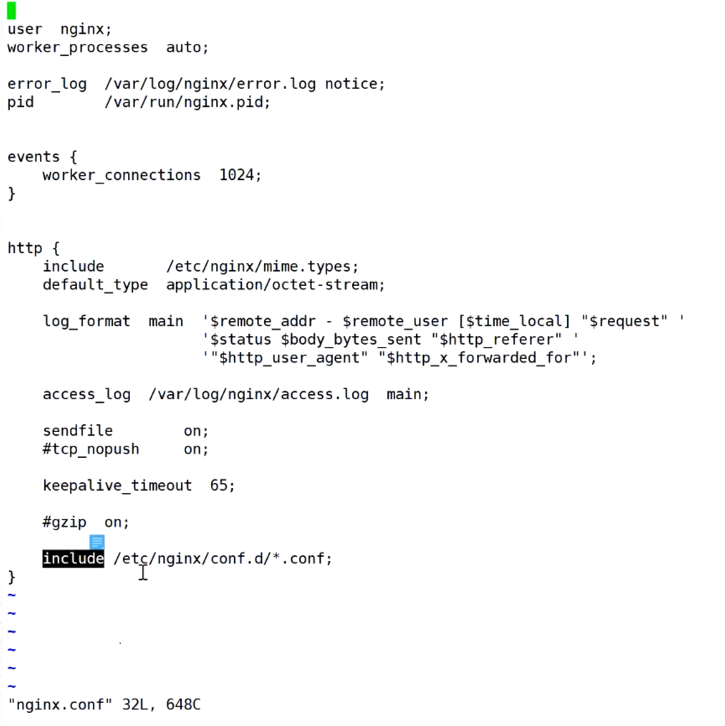
源码
[root@l1 conf]# vim nginx.conf

-------认识Nginx服务的主配置文件 nginx.conf--------
1、全局块:全局配置,对全局生效;
2、events块:配置影响 Nginx 服务器与用户的网络连接;
3、http块:配置代理,缓存,日志定义等绝大多数功能和第三方模块的配置;
4、server块:配置虚拟主机的相关参数,一个 http 块中可以有多个 server 块;
5、location块:用于配置匹配的 uri ;
6、upstream:配置后端服务器具体地址,负载均衡配置不可或缺的部分。
vim /usr/local/nginx/conf/nginx.conf
1.全局配置
#user nobody; #运行用户,若编译时未指定则默认为 nobody
worker_processes 1; #工作进程数量,一般设置为和 CPU 核数一样;设置为auto,nginx将会自己获取这个数值
#error_log logs/error.log; #错误日志文件的位置
#pid logs/nginx.pid; #PID 文件的位置
worker_rlimit_nofile 65535; #指定 worker 子进程可以打开的最大文件句柄数,默认为1024
2.I/O 事件配置
events {
use epoll; #使用 epoll I/O模型,2.6及以上版本的系统内核,建议使用epoll模型以提高性能
worker_connections 65535; #每个 worker 子进程能够处理的最大并发连接数
multi_accept on; #是否一次性将监听到的连接全接收进来,默认为off,关闭时一次接收一条连接
accept_mutex on; #默认为on,开启时表示以串行方式接入新连接,否则将通报给所有worker。这可能会浪费资源并产生不可预计的后果,例如惊群问题
}
#如提高每个进程的连接数还需执行“ulimit -HSn 65535”命令临时修改本地每个进程可以同时打开的最大文件数。
#在Linux平台上,在进行高并发TCP连接处理时,最高的并发数量都要受到系统对用户单一进程同时可打开文件数量的限制(这是因为系统为每个TCP连接都要创建一个socket句柄,每个socket句柄同时也是一个文件句柄)。
#可使用ulimit -a命令查看系统允许当前用户进程打开的文件数限制。
#epoll是Linux内核为处理大批句柄而作改进的poll,是Linux下多路复用IO接口select/poll的增强版本,它能显著的减少程序在大量并发连接中只有少量活跃的情况下的系统CPU利用率。
#worker_processes的值和work_connections的值决定了最大并发数量,最大并发数计算方式为:worker_processes*worker_connections。但在反向代理场景中计算方法不同,因为nginx既要维持和客户端的连接,又要维持和后端服务器的连接,因此处理一次连接要占用2个连接,所以最大并发数计算方式为:worker_processes*worker_connections/2。

3.HTTP 配置
http {
    ##文件扩展名与文件类型映射表
    include       mime.types;
    ##默认文件类型
    default_type  application/octet-stream;
    ##日志格式设定
    #log_format  main  '$remote_addr - $remote_user [$time_local] "$request" '
    #                  '$status $body_bytes_sent "$http_referer" '
    #                  '"$http_user_agent" "$http_x_forwarded_for"';
    ##访问日志位置
    #access_log  logs/access.log  main;
    ##开启高效的文件传输模式
    sendfile        on;
    ##开启tcp_nopush和tcp_nodelay用于防止网络阻塞
    tcp_nopush     on;
    tcp_nodelay    on;
    ##连接保持超时时间,单位是秒
    #keepalive_timeout  0;
    keepalive_timeout  65;
    ##gzip模块设置,设置是否开启gzip压缩输出
    #gzip  on;

    ##Web 服务的监听配置
    server {
        ##监听地址及端口
        listen 80;
        ##站点域名,可以有多个,用空格隔开
        server_name www.kgc.com;
        ##网页的默认字符集
        charset utf-8;
        ##根目录配置
        location / {
            ##网站根目录的位置/usr/local/nginx/html
            root html;
            ##默认首页文件名
            index index.html index.php;
        }
        ##内部错误的反馈页面
        error_page 500 502 503 504 /50x.html;
        ##错误页面配置
        location = /50x.html {
            root html;
        }
    }
}
日志格式设定:
日志格式设定:
$remote_addr与$http_x_forwarded_for用以记录客户端的ip地址;
$remote_user:用来记录客户端用户名称;
$time_local: 用来记录访问时间与时区;
$request: 用来记录请求的url与http协议;
$status: 用来记录请求状态;成功是200,
$body_bytes_sent :记录发送给客户端文件主体内容大小;
$http_referer:用来记录从哪个页面链接访问过来的;
$http_user_agent:记录客户浏览器的相关信息;
通常web服务器放在反向代理的后面,这样就不能获取到客户的IP地址了,通过$remote_add拿到的IP地址是反向代理服务器的iP地址。反向代理服务器在转发请求的http头信息中,可以增加x_forwarded_for信息,用以记录原有客户端的IP地址和原来客户端的请求的服务器地址。

location常见配置指令,root、alias、proxy_pass
root(根路径配置,可以写在 http、server、location 等配置中):root /var/www/html
请求www.kgc.com/test/1.html,会返回文件/var/www/html/test/1.html

alias(别名配置,只能写在 location 中):alias /var/www/html/            注:使用 alias 末尾要添加 /
请求www.kgc.com/test/1.html,会返回文件/var/www/html/1.html

proxy_pass(反向代理配置) 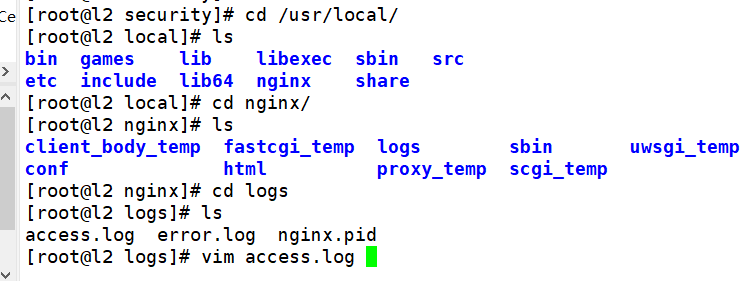
[root@l2 logs]# vim access.log    //查看日志返回信息
[root@l2 logs]# 
访问状态统计配置
--------访问状态统计配置--------
1.先使用命令/usr/local/nginx/sbin/nginx -V 查看已安装的 Nginx 是否包含 HTTP_STUB_STATUS 模块
cat /opt/nginx-1.12.0/auto/options | grep YES     #可查看 nginx 已安装的所有模块

2.修改 nginx.conf 配置文件,指定访问位置并添加 stub_status 配置
cd /usr/local/nginx/conf
cp nginx.conf nginx.conf.bak
vim /usr/local/nginx/conf/nginx.conf
......
http {
......
	server {
		listen 80;
		server_name www.kgc.com;
		charset utf-8;
		location / {
			root html;
			index index.html index.php;
		}
		##添加 stub_status 配置##
		location /status { 					#访问位置为/status
			stub_status on; 				#打开状态统计功能
			access_log off; 				#关闭此位置的日志记录
		}
	}
}
重启服务,访问测试
3.重启服务,访问测试
systemctl restart nginx

浏览器访问 http://192.168.80.10/status
Active connections:表示当前的活动连接数,即当前与 Nginx 服务器建立的连接数。
server accepts handled requests :表示已经处理的连接信息
三个数字依次表示服务器已接收的连接数;服务器成功处理的连接数;服务器累计处理的总请求数(在保持连接模式下,请求数量可能会大于连接数量)
Reading:表示当前正在从客户端读取数据的连接数。
Writing:表示当前正在向客户端写入数据的连接数。
Waiting:表示当前空闲并等待请求的连接数。

可 curl -Ls http://192.168.80.10/status 结合 awk与if 语句进行性能监控。
基于授权的访问控制
1.生成用户密码认证文件
--------基于授权的访问控制--------
1.生成用户密码认证文件
yum install -y httpd-tools
htpasswd -c /usr/local/nginx/passwd.db zhangsan
chown nginx /usr/local/nginx/passwd.db
chmod 400 /usr/local/nginx/passwd.db
2.修改主配置文件相对应目录,添加认证配置项
2.修改主配置文件相对应目录,添加认证配置项
vim /usr/local/nginx/conf/nginx.conf
......
    server {
        location / {
            ......
            ##添加认证配置##
            auth_basic "secret";                #设置密码提示框文字信息
            auth_basic_user_file /usr/local/nginx/passwd.db;
        }
    }
3.重启服务,访问测试
3.重启服务,访问测试
nginx -t
systemctl restart nginx

浏览器访问 http://192.168.80.10
基于客户端的访问控制
--------基于客户端的访问控制--------
访问控制规则如下:
deny IP/IP 段:拒绝某个 IP 或 IP 段的客户端访问。
allow IP/IP 段:允许某个 IP 或 IP 段的客户端访问。
规则从上往下执行,如匹配则停止,不再往下匹配。

vim /usr/local/nginx/conf/nginx.conf
......
	server {
		location / {
			......
			##添加控制规则##
			allow 192.168.80.200; 					#允许访问的客户端 IP
			deny all;								#拒绝其它IP客户端访问
		}
	}

systemctl restart nginx
基于域名的 Nginx 虚拟主机
--------基于域名的 Nginx 虚拟主机--------
1.为虚拟主机提供域名解析
echo "192.168.80.10 www.kgc.com www.benet.com" >> /etc/hosts

2.为虚拟主机准备网页文档
mkdir -p /var/www/html/benet
mkdir -p /var/www/html/kgc
echo "<h1>www.kgc.com</h1>" > /var/www/html/kgc/index.html
echo "<h1>www.benet.com</h1>" > /var/www/html/benet/index.html

3.修改Nginx的配置文件
vim /usr/local/nginx/conf/nginx.conf
......
http {
......
	server {
		listen 80;
		server_name www.kgc.com;					#设置域名www.kgc.com
		charset utf-8;
		access_log logs/www.kgc.access.log; 		#设置日志名
		location / {
			root /var/www/html/kgc;					#设置www.kgc.com 的工作目录
			index index.html index.php;
		}
		error_page 500 502 503 504 /50x.html;
		location = 50x.html{
			root html;
		}
	}

	server {
		listen 80;
		server_name www.benet.com;					#设置域名www.benet.com
		charset utf-8;
		access_log logs/www.benet.access.log;
		location / {
			root /var/www/html/benet;
			index index.html index.php;
		}
		error_page 500 502 503 504 /50x.html;
		location = 50x.html{
			root html;
		}
	}
}

4.重启服务,访问测试
systemctl restart nginx

浏览器访问
http://www.kgc.com
http://www.benet.com
基于IP 的 Nginx 虚拟主机
--------基于IP 的 Nginx 虚拟主机--------
ifconfig ens33:0 192.168.80.11 netmask 255.255.255.0

vim /usr/local/nginx/conf/nginx.conf
......
http {
......
	server {
		listen 192.168.80.10:80;					#设置监听地址192.168.80.10
		server_name www.kgc.com;
		charset utf-8;
		access_log logs/www.kgc.access.log;
		location / {
			root /var/www/html/kgc;
			index index.html index.php;
		}
		error_page 500 502 503 504 /50x.html;
		location = 50x.html{
			root html;
		}
	}

	server {
		listen 192.168.80.11:80;					#设置监听地址192.168.80.11
		server_name www.benet.com;
		charset utf-8;
		access_log logs/www.benet.access.log;
		location / {
			root /var/www/html/benet;
			index index.html index.php;
		}
		error_page 500 502 503 504 /50x.html;
		location = 50x.html{
			root html;
		}
	}
}


systemctl restart nginx

浏览器访问
http://192.168.80.10
http://192.168.80.11
基于端口的 Nginx 虚拟主机
--------基于端口的 Nginx 虚拟主机--------
vim /usr/local/nginx/conf/nginx.conf
......
http {
......
server {
listen 192.168.80.10:8080; #设置监听 8080 端口
server_name www.kgc.com;
charset utf-8;
access_log logs/www.kgc.access.log;
location / {
root /var/www/html/kgc;
index index.html index.php;
}
error_page 500 502 503 504 /50x.html;
location = 50x.html{
root html;
}
}
server {
listen 192.168.80.10:8888; #设置监听 8888 端口
server_name www.benet.com;
charset utf-8;
access_log logs/www.benet.access.log;
location / {
root /var/www/html/benet;
index index.html index.php;
}
error_page 500 502 503 504 /50x.html;
location = 50x.html{
root html;
}
}
}
systemctl restart nginx
浏览器访问
http://192.168.80.11:8080
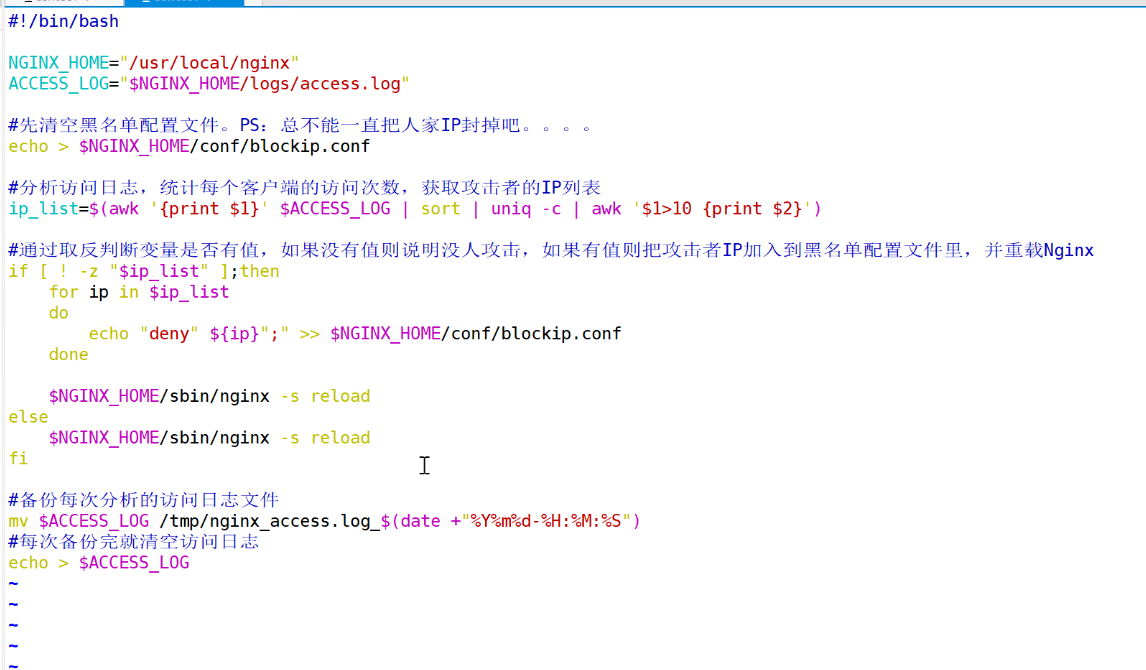
http://192.168.80.11:8888日志分析脚本


 6893
6893

 被折叠的 条评论
为什么被折叠?
被折叠的 条评论
为什么被折叠?
 到【灌水乐园】发言


