


 本文详细介绍了在Android项目中使用Cmake配置和创建Native模块,包括如何集成X264库进行视频编码,以及CMakeLists.txt和Android.mk文件的配置。作者强调了注意事项和可能遇到的问题解决方法。
下面会详细介绍这两种方式的使用方法。
Cmake
-
创建一个Android的原生项目(Native)。怎么创建?请参考《Android音视频开发:音频非压缩编码和压缩编码》,里面介绍了如何创建一个Native项目。
-
创建完成项目之后,将上述提到的
include文件夹里面的头文件放入cpp这个文件夹下
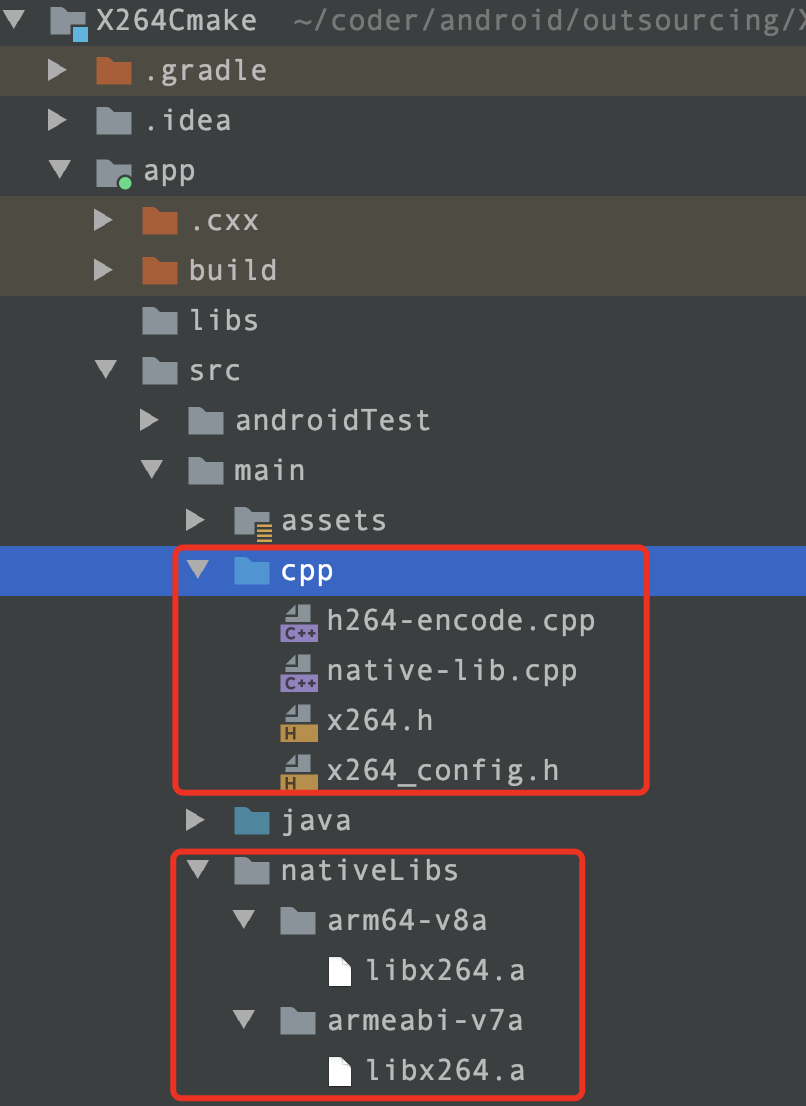
请先忽略这个
h264-encode的这个c++文件,在后面会介绍
-
然后在
main目录下创建nativeLibs文件夹,将arm64-v8a和armeabi-v7a的两个文件夹的内容拷贝进去,如上图那样。 -
创建
h264-encode.cpp的编码视频的处理程序。粘贴代码如下:
#include <stdio.h>
#include <stdint.h>
#include <stdlib.h>
#include “android/log.h”
extern “C” {
#include “x264.h”
#include “jni.h”
}
#define LOGD(…) __android_log_print(ANDROID_LOG_DEBUG , “h264-encode”, VA_ARGS)
#define LOGI(…) __android_log_print(ANDROID_LOG_INFO , “h264-encode”, VA_ARGS)
#define LOGE(…) __android_log_print(ANDROID_LOG_ERROR , “h264-encode”, VA_ARGS)
extern “C”
JNIEXPORT jint JNICALL
Java_com_coder_x264cmake_X264Encode_encode(
JNIEnv *env, jobject thiz,
jint width, jint height,
jstring yuv_path, jstring h264_path, jint yuv_csp) {
int ret = 0;
// TODO: implement encode()
if (width == 0 || height == 0) {
LOGE(“width or height cannot be zero!”);
}
const char *yuv_file_path = env->GetStringUTFChars(yuv_path, JNI_FALSE);
const char *h264_file_path = env->GetStringUTFChars(h264_path, JNI_FALSE);
if (!yuv_file_path) {
LOGE(“yuv path cannot be null”);
return -1;
}
if (!h264_file_path) {
LOGE(“h264 path cannot be null”);
return -1;
}
// 打开yuv
FILE *yuv_file = fopen(yuv_file_path, “rb”);
if (yuv_file == NULL) {
LOGE(“cannot open yuv file”);
return -1;
}
FILE *h264_file = fopen(h264_file_path, “wb”);
if (h264_file == NULL) {
LOGE(“cannot open h264 file”);
return -1;
}
// 设置x264处理的yuv格式默认为YUV420
int csp = X264_CSP_I420;
switch (yuv_csp) {
case 0:
csp = X264_CSP_I420;
break;
case 1:
csp = X264_CSP_I422;
break;
case 2:
csp = X264_CSP_I444;
break;
default:
csp = X264_CSP_I420;
}
LOGI(“the params is success:\n %dx%d %s %s:”, width, height, yuv_file_path, h264_file_path);
int frame_number = 0;
// 处理h264单元数据
int i_nal = 0;
x264_nal_t *nal = NULL;
// x264
x264_t *h = NULL;
x264_param_t *param = (x264_param_t *) malloc(sizeof(x264_param_t));
x264_picture_t *pic_in = (x264_picture_t *) (malloc(sizeof(x264_picture_t)));
x264_picture_t *pic_out = (x264_picture_t *) (malloc(sizeof(x264_picture_t)));
// 初始化编码参数
x264_param_default(param);
param->i_width = width;
param->i_height = height;
param->i_csp = csp;
// 配置处理级别
x264_param_apply_profile(param, x264_profile_names[2]);
// 通过配置的参数打开编码器
h = x264_encoder_open(param);
x264_picture_init(pic_out);
x264_picture_alloc(pic_in, param->i_csp, param->i_width, param->i_height);
// 编码前每一帧的字节大小
int size = param->i_width * param->i_height;
// 计算视频帧数
fseek(yuv_file, 0, SEEK_END);
switch (csp) {
case X264_CSP_I444:
// YUV444
frame_number = ftell(yuv_file) / (size * 3);
break;
case X264_CSP_I422:
// YUV422
frame_number = ftell(yuv_file) / (size * 2);
break;
case X264_CSP_I420:
//YUV420
frame_number = ftell(yuv_file) / (size * 3 / 2);
break;
default:
LOGE(“Colorspace Not Support.”);
return -1;
}
fseek(yuv_file, 0, SEEK_SET);
// 循环执行编码
for (int i = 0; i < frame_number; i++) {
switch (csp) {
case X264_CSP_I444:
fread(pic_in->img.plane[0], size, 1, yuv_file);
fread(pic_in->img.plane[1], size, 1, yuv_file);
fread(pic_in->img.plane[2], size, 1, yuv_file);
break;
case X264_CSP_I422:
fread(pic_in->img.plane[0], size, 1, yuv_file);
fread(pic_in->img.plane[1], size / 2, 1, yuv_file);
fread(pic_in->img.plane[2], size / 2, 1, yuv_file);
break;
case X264_CSP_I420:
fread(pic_in->img.plane[0], size, 1, yuv_file);
fread(pic_in->img.plane[1], size / 4, 1, yuv_file);
fread(pic_in->img.plane[2], size / 4, 1, yuv_file);
break;
}
pic_in->i_pts = i;
// 对每一帧执行编码
ret = x264_encoder_encode(h, &nal, &i_nal, pic_in, pic_out);
if (ret < 0) {
LOGE(“x264 encode error”);
return -1;
}
LOGI(“encode frame:%5d”, i);
// 将编码数据循环写入目标文件
for (int j = 0; j < i_nal; ++j) {
fwrite(nal[j].p_payload, 1, nal[j].i_payload, h264_file);
}
}
// 冲刷缓冲区,不执行可能造成数据不完整
int i = 0;
while (1) {
ret = x264_encoder_encode(h, &nal, &i_nal, NULL, pic_out);
if (ret == 0) {
break;
}
LOGD(“flush 1 frame”);
// 将编码数据循环写入目标文件
for (int j = 0; j < i_nal; ++j) {
fwrite(nal[j].p_payload, 1, nal[j].i_payload, h264_file);
}
i++;
}
x264_picture_clean(pic_in);
x264_encoder_close(h);
// 释放分配的空间
free(pic_in);
free(pic_out);
free(param);
// 关闭文件输入
fclose(yuv_file);
fclose(h264_file);
return ret;
}
这段代码有点长,而且还是C语言相关代码,读不懂没有关系,将上述代码直接粘贴到你的项目中即可。
注意:
- 当前程序只支持
YUV420、YUV422以及YUV444三种裸流处理。Java_com_coder_x264cmake_X264Encode_encode这个意思是指在com.coder.x264cmake的包名下的X264Encode类中的encode的方法。需要对应成你自己的完整路径。
- 配置
CmakeLists.txt,一定要注意这个的配置,稍微一点点配置错误,就会出现如下错误
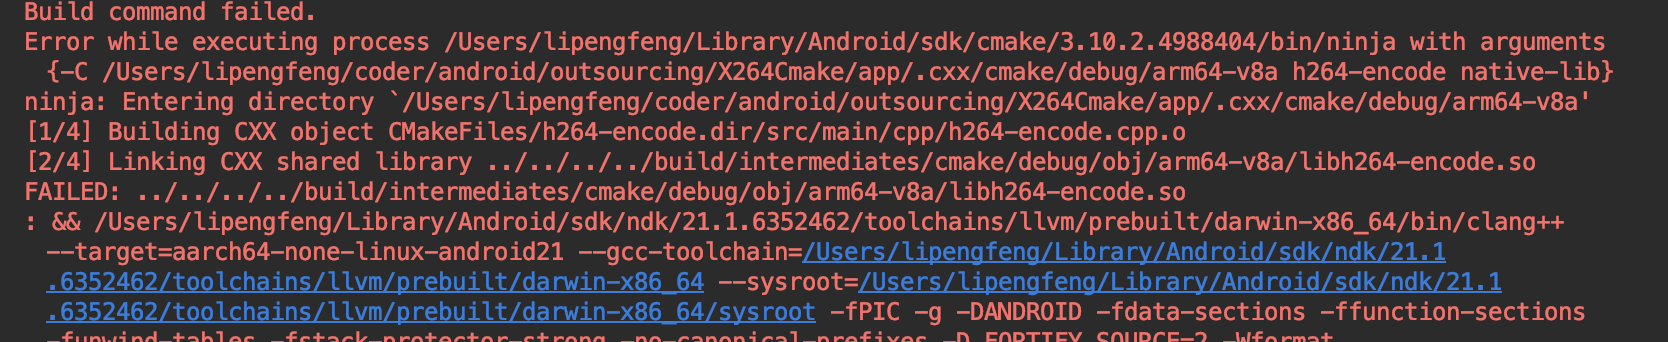
为了防止大家配置错误,我将CmakeLists.txt的配置粘贴如下:
For more information about using CMake with Android Studio, read the
documentation: https://d.android.com/studio/projects/add-native-code.html
Sets the minimum version of CMake required to build the native library.
cmake_minimum_required(VERSION 3.10.2)
Declares and names the project.
project(“x264cmake”)
set( JNI_LIBS_DIR src/main/nativeLibs)
Creates and names a library, sets it as either STATIC
or SHARED, and provides the relative paths to its source code.
You can define multiple libraries, and CMake builds them for you.
Gradle automatically packages shared libraries with your APK.
add_library(
h264
STATIC
IMPORTED
)
set_target_properties(
h264
PROPERTIES IMPORTED_LOCATION
C
M
A
K
E
S
O
U
R
C
E
D
I
R
/
{CMAKE_SOURCE_DIR}/
CMAKESOURCEDIR/{JNI_LIBS_DIR}/${CMAKE_ANDROID_ARCH_ABI}/libx264.a
)
include_directories(src/main/cpp)
add_library(
h264-encode
SHARED
src/main/cpp/h264-encode.cpp
)
add_library(
native-lib
SHARED
src/main/cpp/native-lib.cpp
)
Searches for a specified prebuilt library and stores the path as a
variable. Because CMake includes system libraries in the search path by
default, you only need to specify the name of the public NDK library
you want to add. CMake verifies that the library exists before
completing its build.
find_library( # Sets the name of the path variable.
log-lib
Specifies the name of the NDK library that
you want CMake to locate.
log )
Specifies libraries CMake should link to your target library. You
can link multiple libraries, such as libraries you define in this
build script, prebuilt third-party libraries, or system libraries.
target_link_libraries( # Specifies the target library.
h264-encode
h264
Links the target library to the log library
included in the NDK.
${log-lib} )
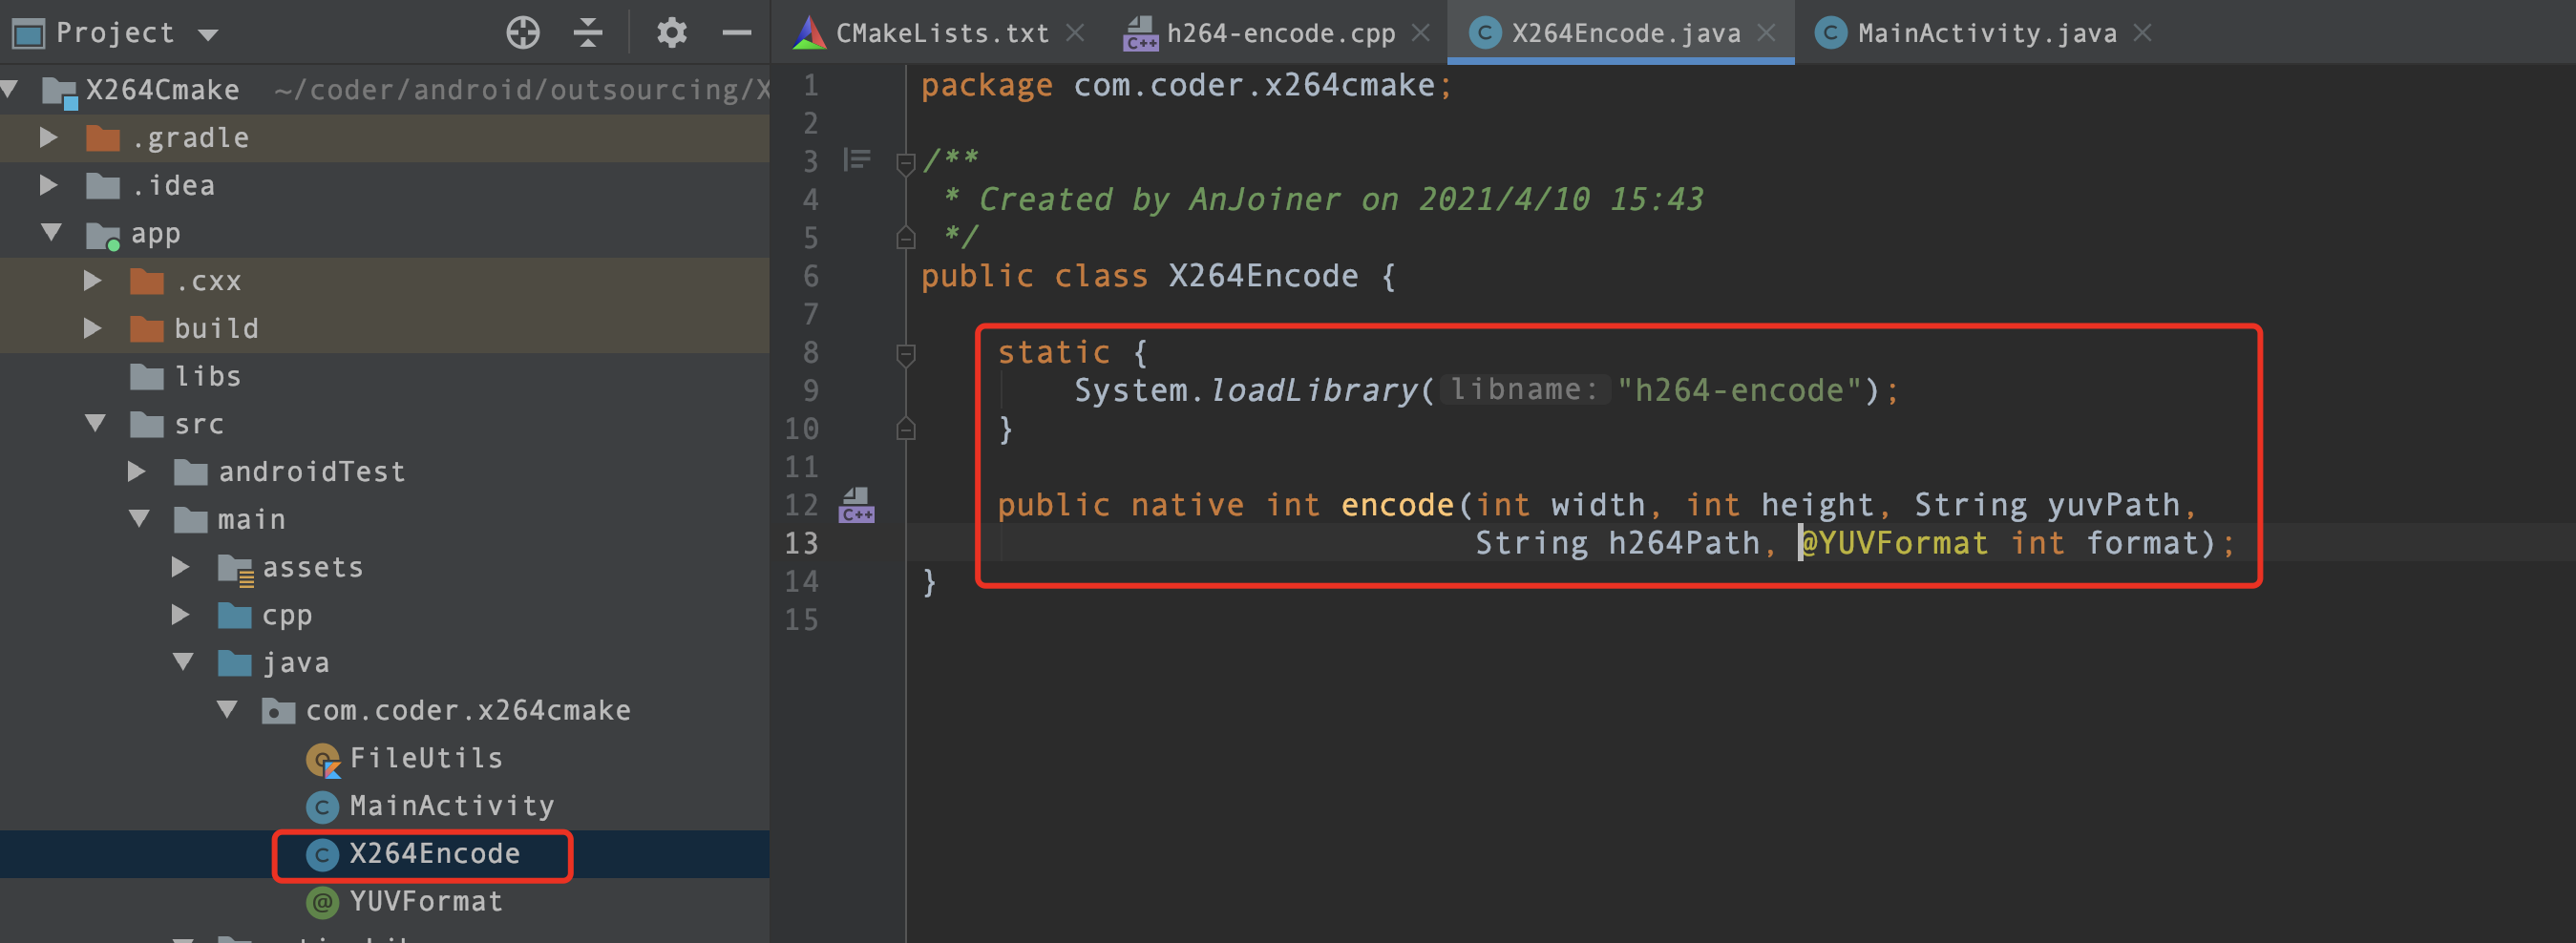
- 在
X264Cmake中添加加载二进制库,并添加编码方法。
这样就可以直接运行了,如果出现错误,可以参考X264Cmake
注意:
X264Cmake项目中assets目录下test.yuv文件由于太大,所以无法上传,可在终端通过下面命令将任意视频转为YUV420格式的裸流。
ffmpeg -i input.mp4 test.yuv
这里可能就会有人问了: 不是说不使用FFmpeg了吗?你这里怎么还自己用上了?
注意:上文说的是在APP中使用的时候
还有一个地方需要注意,当我们把mp4的视频文件转为yuv的时候,视频体积会增大数十倍,打个比方:就是1M的mp4视频,转成yuv的视频裸流后,视频大小大概是几百M。而且yuv只有视频数据,音频内容被去掉了。
ndk-build
通过ndk-build的方式,直接编译成动态链接文件,可以直接放在jniLibs目录下以供使用,就行正常的时候引入二进制文件一样。不需要再创建原生项目,也不需要配置CmakeLists.txt文件。

- 在
x264下创建一个build文件夹,然后进入build文件夹,在创建一个jni文件夹。

- 进入
jni文件夹,将上面用到的几个文件拷贝进当前目录。
x264.hx264_config.hh264-encode.cpp
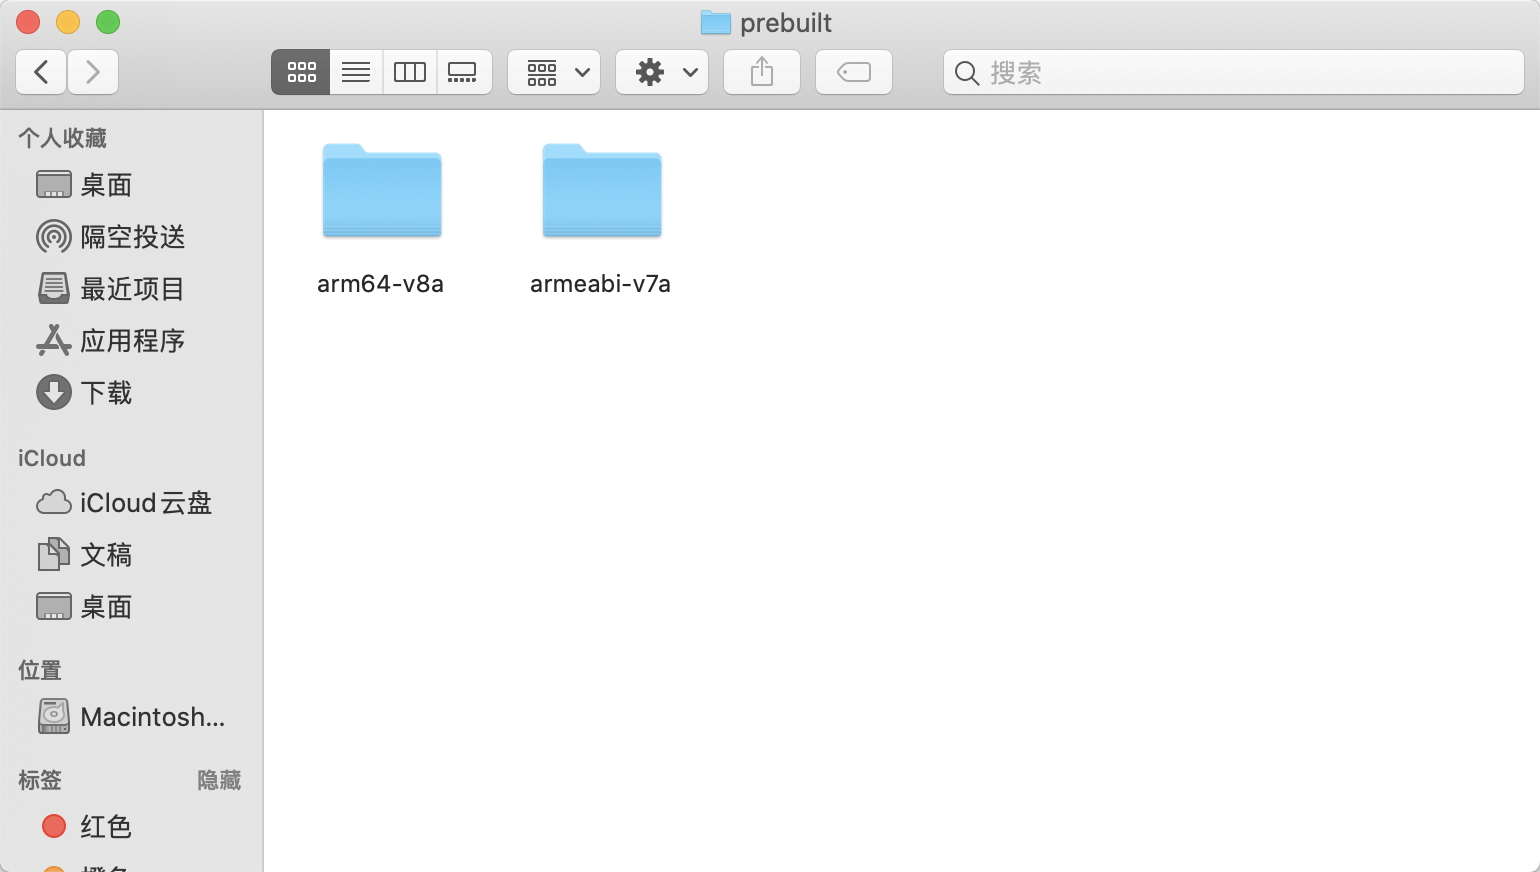
- 在
jni目录下创建prebuilt文件夹,将Cmake方式中nativeLibs下的内容全部拷入。
- 在
jni目录下创建Android.mk文件,并添加如下内容。
最后
今天关于面试的分享就到这里,还是那句话,有些东西你不仅要懂,而且要能够很好地表达出来,能够让面试官认可你的理解,例如Handler机制,这个是面试必问之题。有些晦涩的点,或许它只活在面试当中,实际工作当中你压根不会用到它,但是你要知道它是什么东西。
最后在这里小编分享一份自己收录整理上述技术体系图相关的几十套腾讯、头条、阿里、美团等公司2021年的面试题,把技术点整理成了视频和PDF(实际上比预期多花了不少精力),包含知识脉络 + 诸多细节,由于篇幅有限,这里以图片的形式给大家展示一部分。
还有 高级架构技术进阶脑图、Android开发面试专题资料,高级进阶架构资料 帮助大家学习提升进阶,也节省大家在网上搜索资料的时间来学习,也可以分享给身边好友一起学习。

【算法合集】

【延伸Android必备知识点】

【Android部分高级架构视频学习资源】
**Android精讲视频领取学习后更加是如虎添翼!**进军BATJ大厂等(备战)!现在都说互联网寒冬,其实无非就是你上错了车,且穿的少(技能),要是你上对车,自身技术能力够强,公司换掉的代价大,怎么可能会被裁掉,都是淘汰末端的业务Curd而已!现如今市场上初级程序员泛滥,这套教程针对Android开发工程师1-6年的人员、正处于瓶颈期,想要年后突破自己涨薪的,进阶Android中高级、架构师对你更是如鱼得水,赶快领取吧!
网上学习资料一大堆,但如果学到的知识不成体系,遇到问题时只是浅尝辄止,不再深入研究,那么很难做到真正的技术提升。
一个人可以走的很快,但一群人才能走的更远!不论你是正从事IT行业的老鸟或是对IT行业感兴趣的新人,都欢迎加入我们的的圈子(技术交流、学习资源、职场吐槽、大厂内推、面试辅导),让我们一起学习成长!
务Curd而已!现如今市场上初级程序员泛滥,这套教程针对Android开发工程师1-6年的人员、正处于瓶颈期,想要年后突破自己涨薪的,进阶Android中高级、架构师对你更是如鱼得水,赶快领取吧!
网上学习资料一大堆,但如果学到的知识不成体系,遇到问题时只是浅尝辄止,不再深入研究,那么很难做到真正的技术提升。
一个人可以走的很快,但一群人才能走的更远!不论你是正从事IT行业的老鸟或是对IT行业感兴趣的新人,都欢迎加入我们的的圈子(技术交流、学习资源、职场吐槽、大厂内推、面试辅导),让我们一起学习成长!


 589
589


 被折叠的 条评论
为什么被折叠?
被折叠的 条评论
为什么被折叠?
 到【灌水乐园】发言


