


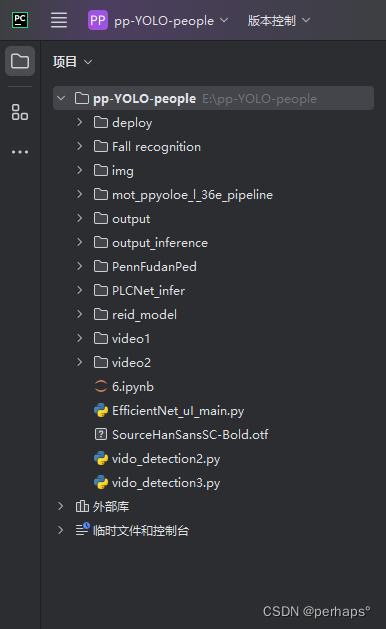
这里用到的模型链接是 添加链接描述
下载好模型放入文件夹,在克隆模型库
设置配置文件
crop_thresh: 0.5
attr_thresh: 0.5
kpt_thresh: 0.2
visual: True
warmup_frame: 50

DET:
  model_dir: ./mot_ppyoloe_l_36e_pipeline
  batch_size: 1

MOT:
  model_dir: ./mot_ppyoloe_l_36e_pipeline
  tracker_config: deploy/pipeline/config/tracker_config.yml
  batch_size: 1
  skip_frame_num: -1 # preferably no more than 3
  enable: True

KPT:
  model_dir: https://bj.bcebos.com/v1/paddledet/models/pipeline/dark_hrnet_w32_256x192.zip
  batch_size: 8

ATTR:
  model_dir:  ./output_inference/PPHGNet_small_person
  batch_size: 8
  enable: True

VIDEO_ACTION:
  model_dir: https://videotag.bj.bcebos.com/PaddleVideo-release2.3/ppTSM_fight.zip
  batch_size: 1
  frame_len: 8
  sample_freq: 7
  short_size: 340
  target_size: 320
  enable: False

SKELETON_ACTION:
  model_dir: https://bj.bcebos.com/v1/paddledet/models/pipeline/STGCN.zip
  batch_size: 1
  max_frames: 50
  display_frames: 80
  coord_size: [384, 512]
  enable: False

ID_BASED_DETACTION:
  model_dir:  https://bj.bcebos.com/v1/paddledet/models/pipeline/ppyoloe_crn_s_80e_smoking_visdrone.zip
  batch_size: 8
  threshold: 0.6
  display_frames: 80
  skip_frame_num: 2
  enable: False

ID_BASED_CLSACTION:
  model_dir: https://bj.bcebos.com/v1/paddledet/models/pipeline/PPHGNet_tiny_calling_halfbody.zip
  batch_size: 8
  threshold: 0.8
  display_frames: 80
  skip_frame_num: 2
  enable: False

REID:
  model_dir:  https://bj.bcebos.com/v1/paddledet/models/pipeline/reid_model.zip
  batch_size: 16
  enable: False
GUI界面设计
import torch.nn as nn
import tkinter as tk
from tkinter import filedialog, messagebox
from PIL import Image, ImageTk,ImageDraw,ImageFont
import torch
from torchvision import transforms, models
from efficientnet_pytorch import EfficientNet
import numpy as np
import cv2
import tkinter.ttk as ttk
import time
from tkinter import filedialog
import subprocess
import os
import re
import threading

window = tk.Tk()
window.title("图像目标检测系统")
window.geometry('1400x700')  # 设置窗口大小
selected_image_path = None
label_text = None
right_canvas_image = None
progress = None
def upload_image():
    global selected_image_path, label_text,progress
    file_path = filedialog.askopenfilename()
    if file_path:
        selected_image_path = file_path
        image = Image.open(file_path)

        # 调整图片大小为500x400
        image = image.resize((500, 400), Image.Resampling.LANCZOS)

        # 居中图片
        photo = ImageTk.PhotoImage(image)
        canvas_left.create_image(0, 0, anchor='nw', image=photo)
        canvas_left.image = photo  # Keep a reference!

        # 创建进度条


def process_image2():
    global progress, label_text
    if selected_image_path is None:
        messagebox.showwarning("警告", "请先上传图片")
        return
    progress = ttk.Progressbar(window, orient='horizontal', length=160, mode='determinate', maximum=100)
    progress.place(x=1000, y=160)
    label_text = tk.Label(window, text="等待处理")  # 创建一个Label组件
    label_text.place(x=1200, y=160)  # 将Label组件添加到窗口中

    # 更新标签文本
    label_text.config(text="处理中...")
    # 模拟多车辆框选处理
    steps = 4  # 假设有3个处理步骤
    for i in range(steps):
        time.sleep(1)  # 每个步骤耗时1秒
        progress['value'] += 33.33  # 每个步骤增加33.33%的进度
        window.update_idletasks()  # 更新进度条显示

    # 构建命令行参数
    command = [
        "python",
        r"./deploy/pipeline/pipeline.py",  # 使用绝对路径
        "--config",
        r".\mot_ppyoloe_l_36e_pipeline\infer_cfg_pphuman.yml",  # 使用绝对路径
        "--image_file",
        selected_image_path
    ]

    # 使用subprocess.run()执行命令
    # capture_output=True captures the stdout and stderr, text=True decodes the output using the default encoding
    # We will handle the decoding manually to avoid the UnicodeDecodeError
    result = subprocess.run(command, capture_output=True, text=False)

    # Decode the stdout and stderr using 'utf-8'
    try:
        stdout = result.stdout.decode('utf-8')
        stderr = result.stderr.decode('utf-8')
    except UnicodeDecodeError:
        # If 'utf-8' decoding fails, try 'gbk' as a fallback
        stdout = result.stdout.decode('gbk')
        stderr = result.stderr.decode('gbk')

    print(stdout)
    print(stderr)

    output_folder_path = r'.\output'
    # 获取输出文件夹中的所有图片文件
    images = [f for f in os.listdir(output_folder_path) if f.endswith(('.png', '.jpg', '.jpeg', '.webp'))]

    # 获取每个图片文件的修改时间
    image_times = [(os.path.getmtime(os.path.join(output_folder_path, f)), f) for f in images]

    # 按修改时间排序,找到最新的图片
    latest_image_time, latest_image_name = max(image_times)
    latest_image_path = os.path.join(output_folder_path, latest_image_name)

    # 打开并显示最新的图片
    detection_image = Image.open(latest_image_path)
    detection_image = detection_image.resize((500, 400), Image.Resampling.LANCZOS)
    detection_photo = ImageTk.PhotoImage(detection_image)
    canvas_right.create_image(0, 0, anchor='nw', image=detection_photo)
    canvas_right.image = detection_photo  # 保持引用

    # 停止进度条
    progress.stop()
    progress.grid_forget()  # 隐藏进度条

    # 更新处理中标签
    label_text.config(text="处理完成")

    # 其他处理逻辑...

def video_detection_main():
    # 在新线程中运行EfficientNet_uI_main.py脚本
    def run_script():
        subprocess.run(['python', 'vido_detection2.py'])

    threading.Thread(target=run_script).start()

    # 等待子进程启动后立即销毁主窗口
    window.destroy()
# 创建主窗口

def Fall_detection():
    # 在新线程中运行EfficientNet_uI_main.py脚本
    def run_script():
        subprocess.run(['python', 'vido_detection3.py'])

    threading.Thread(target=run_script).start()

    # 等待子进程启动后立即销毁主窗口
    window.destroy()

# 创建背景画布并使用grid布局管理器
canvas_background = tk.Canvas(window, width=1400, height=700)
canvas_background.grid(row=0, column=0, columnspan=2, rowspan=4, sticky='nsew')  # 使用grid管理器


# 打开图片
image = Image.open(r"img\9.jpg")
# image = image.resize(1400, 700)
# 转换图像模式为RGB
image = image.convert("RGB")
draw = ImageDraw.Draw(image)
# 定义要画的文字和位置
text = "待检测的图片:"
position = (440, 190)  # 文字的左上角位置坐标
# 定义字体和字号
font = ImageFont.truetype("SourceHanSansSC-Bold.otf", 30)  # 使用字体,字号30
# 画文字
draw.text(position, text, fill=(0, 0, 0), font=font)  # fill参数为文字颜色

text2 = "检测结果:"
position = (1180, 190)  # 文字的左上角位置坐标
# 定义字体和字号
font = ImageFont.truetype("SourceHanSansSC-Bold.otf", 30)  # 使用字体,字号30
# 画文字
draw.text(position, text2, fill=(0, 0, 0), font=font)  # fill参数为文字颜色


text3 = "基于深度学习的行人检测系统"
position = (580, 10)  # 文字的左上角位置坐标
# 定义字体和字号
font = ImageFont.truetype("SourceHanSansSC-Bold.otf", 50)  # 使用字体,字号30
# 画文字
draw.text(position, text3, fill=(0, 0, 0), font=font)  # fill参数为文字颜色

text4 = "功能区"
position = (130, 200)
# 定义字体和字号
font = ImageFont.truetype("SourceHanSansSC-Bold.otf", 30)  # 使用字体,字号30
# 画文字
draw.text(position, text4, fill=(0, 0, 0), font=font)  # fill参数为文字颜色

draw.line((30, 220, 120, 220), fill='black',width=3)
draw.line((30, 220, 30, 730), fill='black',width=3)
draw.line((30, 730, 320, 730), fill='black',width=3)
draw.line((320, 730, 320, 220), fill='black',width=3)
draw.line((320, 220, 230, 220), fill='black',width=3)
# 加载背景图像
background_image = image
background_image = background_image.resize((1400, 700), Image.Resampling.LANCZOS)  # 调整图像大小以适应窗口
background_photo = ImageTk.PhotoImage(background_image)

# 在背景画布上绘制背景图像
canvas_background.create_image(0, 0, anchor='nw', image=background_photo)
canvas_background.image = background_photo  # 保持对图像的引用

# 创建两个画布区域
canvas_left = tk.Canvas(window, width=500, height=400, bg="#e6f2ff")
canvas_right = tk.Canvas(window, width=500, height=400, bg="#e6f2ff")

# 将两个画布区域放置在主窗口中
canvas_left.place(x=325, y=200)
canvas_right.place(x=865, y=200)


# 创建按钮并放置在主窗口上
button_upload = tk.Button(window, width=13, text='上传图片', font=14, command=upload_image)
button_start_detection = tk.Button(window, width=13, text='行人检测', font=14, command=process_image2)


# 将按钮放置在主窗口上
button_upload.place(x=70, y=220)
button_start_detection.place(x=70, y=280)

#检测按钮
video_detection_main_button = tk.Button(window, width=13,text="视频检测",font=14, command=video_detection_main)
video_detection_main_button.place(x=70, y=340)
video_Fall_detection_button = tk.Button(window, width=13,text="摔倒检测",font=14, command=Fall_detection)
video_Fall_detection_button.place(x=70, y=400)
# 运行主窗口
window.mainloop()
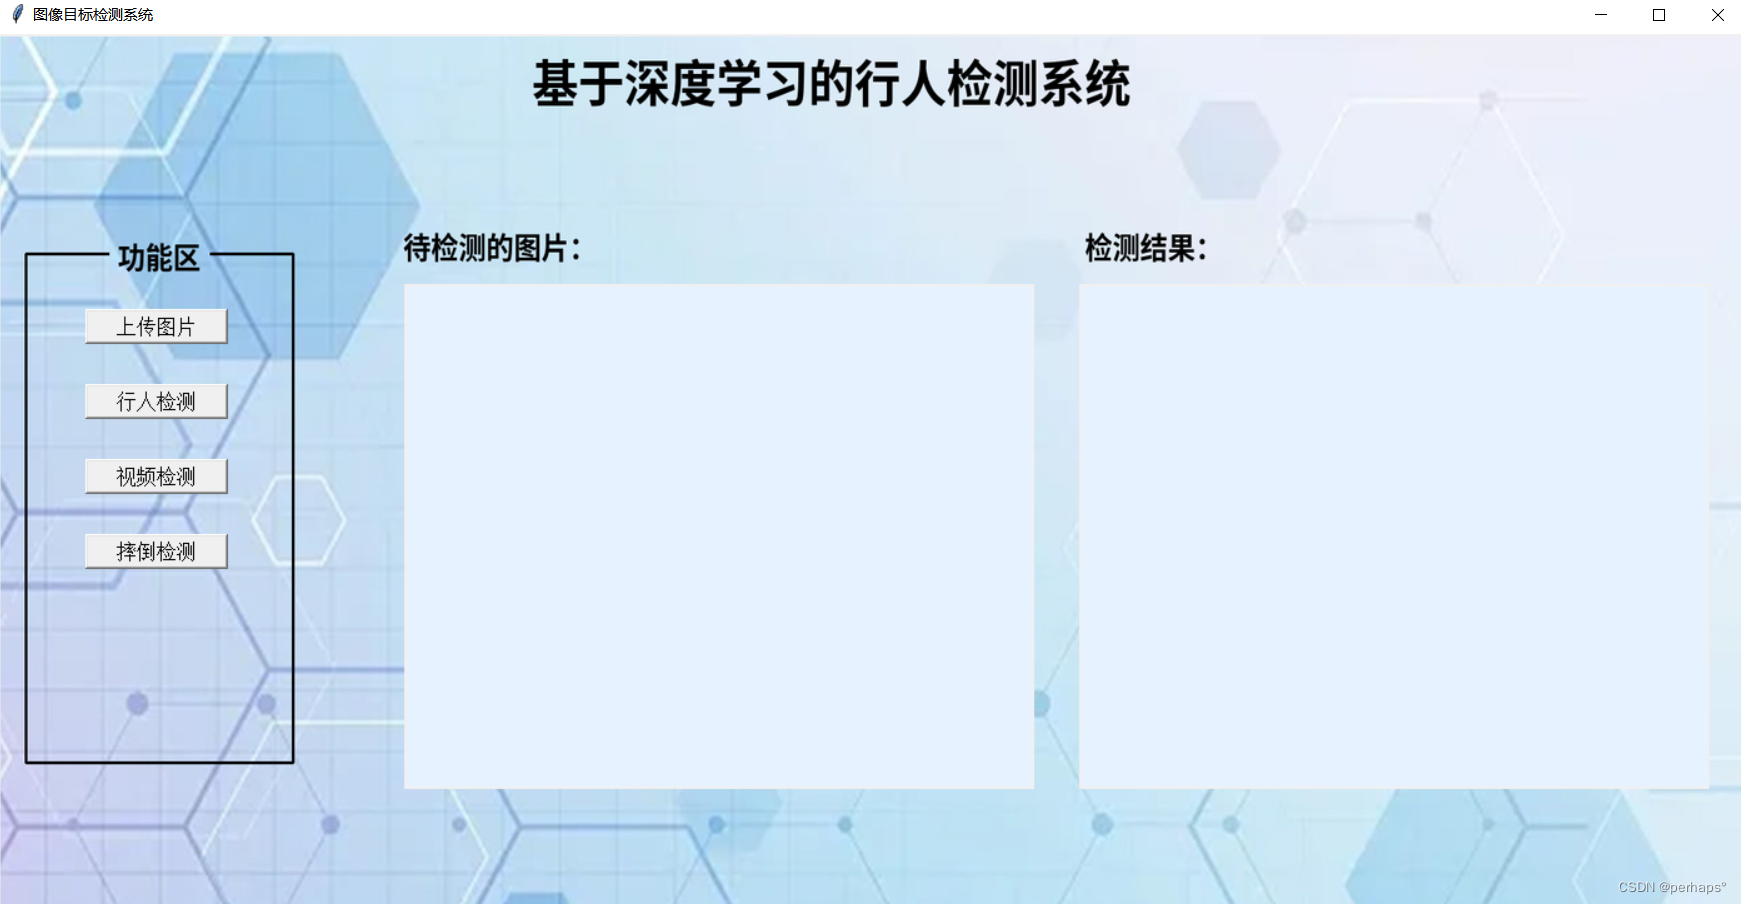
行人图片检测

行人视频检测
import torch.nn as nn
import tkinter as tk
from tkinter import filedialog, messagebox
from PIL import Image, ImageTk,ImageDraw,ImageFont
import torch
from torchvision import transforms, models
from efficientnet_pytorch import EfficientNet
import numpy as np
import cv2
import tkinter.ttk as ttk
import time
from tkinter import filedialog
import subprocess
import os
import re
import threading
import tkinter.messagebox as tkMessageBox
selected_video_path = None
label_text = None
cap = None
video_playing = False
# 创建主窗口
window = tk.Tk()
window.title("图像目标检测系统")
window.geometry('1400x700')  # 设置窗口大小

# 创建背景画布并使用grid布局管理器
canvas_background = tk.Canvas(window, width=1400, height=700)
canvas_background.grid(row=0, column=0, columnspan=2, rowspan=4, sticky='nsew')  # 使用grid管理器

# 打开图片
image = Image.open(r"img\9.jpg")
# 转换图像模式为RGB
image = image.convert("RGB")
draw = ImageDraw.Draw(image)
# 定义要画的文字和位置
text = "待检测的视频:"
position = (440, 190)  # 文字的左上角位置坐标
# 定义字体和字号
font = ImageFont.truetype("SourceHanSansSC-Bold.otf", 30)  # 使用字体,字号30
# 画文字
draw.text(position, text, fill=(0, 0, 0), font=font)  # fill参数为文字颜色

text2 = "检测结果:"
position = (1180, 190)  # 文字的左上角位置坐标
# 定义字体和字号
font = ImageFont.truetype("SourceHanSansSC-Bold.otf", 30)  # 使用字体,字号30
# 画文字
draw.text(position, text2, fill=(0, 0, 0), font=font)  # fill参数为文字颜色

# 定义要画的文字和位置
text = "待检测的视频:"
position = (300, 50)  # 文字的左上角位置坐标
# 定义字体和字号
font = ImageFont.truetype("SourceHanSansSC-Bold.otf", 30)  # 使用字体,字号30
# 画文字
draw.text(position, text, fill=(0, 0, 0), font=font)  # fill参数为文字颜色

text3 = "基于深度学习的行人检测系统"
position = (580, 10)  # 文字的左上角位置坐标
# 定义字体和字号
font = ImageFont.truetype("SourceHanSansSC-Bold.otf", 50)  # 使用字体,字号30
# 画文字
draw.text(position, text3, fill=(0, 0, 0), font=font)  # fill参数为文字颜色

text4 = "功能区"
position = (100, 135)
# 定义字体和字号
font = ImageFont.truetype("SourceHanSansSC-Bold.otf", 30)  # 使用字体,字号30
# 画文字
draw.text(position, text4, fill=(0, 0, 0), font=font)  # fill参数为文字颜色

draw.line((12, 157, 91, 157), fill='black',width=3)
draw.line((12, 157, 12, 600), fill='black',width=3)
draw.line((12, 600, 285, 600), fill='black',width=3)
draw.line((285, 600, 285, 157), fill='black',width=3)
draw.line((285, 157, 192, 157), fill='black',width=3)
# 加载背景图像
background_image = image
background_image = background_image.resize((1400, 700), Image.Resampling.LANCZOS)  # 调整图像大小以适应窗口
background_photo = ImageTk.PhotoImage(background_image)

# 在背景画布上绘制背景图像
canvas_background.create_image(0, 0, anchor='nw', image=background_photo)
canvas_background.image = background_photo  # 保持对图像的引用


def upload_video(canvas):
    global cap, selected_video_path
    # 指定video1文件夹的路径
    folder_path = "video1"  # 请确保此路径正确指向您的video1文件夹
    # 使用filedialog.askopenfilename打开文件对话框,并限制路径为video1文件夹
    file_path = filedialog.askopenfilename(initialdir=folder_path, filetypes=[("Video files", "*.mp4 *.avi *.mkv")])

    # 检查文件路径是否包含指定的文件夹路径
    if file_path and folder_path in file_path:
        # 打开视频文件
        cap = cv2.VideoCapture(file_path)
        if not cap.isOpened():
            messagebox.showerror("Error", "无法打开视频文件")
            return

        # 读取视频的第一帧
        ret, frame = cap.read()
        if not ret:
            messagebox.showerror("Error", "无法读取视频帧")
            cap.release()
            return

        # 将OpenCV的BGR图像转换为RGB图像
        frame = cv2.cvtColor(frame, cv2.COLOR_BGR2RGB)
        # 将图像转换为PIL格式
        image = Image.fromarray(frame)
        # 将PIL图像转换为Tkinter兼容的图片
        image_tk = ImageTk.PhotoImage(image)

        # 在画布上显示图像
        canvas.create_image(0, 0, anchor='nw', image=image_tk)
        canvas.image = image_tk  # 保留对图像的引用

        # 设置selected_video_path
        selected_video_path = file_path

        # 使用after方法更新画布
        def update_canvas():
            if cap.isOpened():
                ret, frame = cap.read()
                if ret:
                    # 将OpenCV的BGR图像转换为RGB图像
                    frame = cv2.cvtColor(frame, cv2.COLOR_BGR2RGB)
                    # 将图像转换为PIL格式
                    image = Image.fromarray(frame)
                    # 将PIL图像转换为Tkinter兼容的图片
                    image_tk = ImageTk.PhotoImage(image)
                    # 在画布上显示图像
                    canvas.create_image(0, 0, anchor='nw', image=image_tk)
                    canvas.image = image_tk  # 保留对图像的引用
                    # 20毫秒后再次更新画布
                    window.after(20, update_canvas)
                else:
                    # 释放视频流
                    cap.release()

        # 开始更新画布
        update_canvas()
    else:
        # 如果用户选择的文件不在video1文件夹中,显示警告框
        tkMessageBox.showwarning("警告", "请选择video1文件夹中的视频文件。")


def return_main():
    # 在新线程中运行EfficientNet_uI_main.py脚本
    def run_script():
        subprocess.run(['python', 'EfficientNet_uI_main.py'])

    threading.Thread(target=run_script).start()

    # 等待子进程启动后立即销毁主窗口
    window.destroy()


def video_detection():
    global cap
    if cap:
        cap.release()  # 关闭上传视频正在播放的视频
    if not cap:
        messagebox.showerror("Error", "请先上传视频")
        return

    # 获取上传的视频文件名称
    video_name = os.path.basename(selected_video_path)

    # 获取E:\ch_PP-OCRv3\output文件夹中的所有视频文件
    output_folder_path = 'output\\'
    videos = [f for f in os.listdir(output_folder_path) if f.endswith(('.mp4', '.avi', '.mkv'))]

    # 检查是否有匹配的视频文件
    if video_name in videos:
        # 播放匹配的视频文件
        matching_video_path = os.path.join(output_folder_path, video_name)
        detection_video = cv2.VideoCapture(matching_video_path)
        if detection_video.isOpened():
            # 获取视频的原始分辨率
            width = int(detection_video.get(cv2.CAP_PROP_FRAME_WIDTH))
            height = int(detection_video.get(cv2.CAP_PROP_FRAME_HEIGHT))

            # 降低视频分辨率
            new_width = 1080
            new_height = int(height * (new_width / width))
            detection_video.set(cv2.CAP_PROP_FRAME_WIDTH, new_width)
            detection_video.set(cv2.CAP_PROP_FRAME_HEIGHT, new_height)

            # 创建一个新窗口
            new_window = tk.Toplevel(window)
            new_window.title("检测到的视频")
            new_window.geometry(f"{new_width}x{new_height}")

            # 创建一个画布用于在新窗口中显示视频
            canvas_video = tk.Canvas(new_window, width=new_width, height=new_height)
            canvas_video.pack()

            # 在新窗口的画布上播放检测完的视频
            def play_detected_video():
                global video_playing
                video_playing = True
                frame_count = 0
                while True:
                    ret, frame = detection_video.read()
                    if not ret:
                        break  # 视频播放完毕

                    # 使用opencv-python处理图像
                    frame = cv2.cvtColor(frame, cv2.COLOR_BGR2RGB)
                    image = Image.fromarray(frame)
                    image_tk = ImageTk.PhotoImage(image)

                    # 在画布上显示图像
                    def update_canvas_image():
                        if canvas_video and canvas_video.winfo_exists():
                            canvas_video.create_image(0, 0, anchor='nw', image=image_tk)
                            canvas_video.image = image_tk  # 保留对图像的引用
                        else:
                            video_playing = False

                    window.after(0, update_canvas_image)

                    frame_count += 1
                    time.sleep(1 / 30)  # Wait for about 30 frames per second

                # 释放视频流
                detection_video.release()
                video_playing = False

            # 在单独的线程中播放视频,以避免阻塞Tkinter的事件循环
            thread = threading.Thread(target=play_detected_video)
            thread.start()
        else:
            messagebox.showerror("Error", "无法打开视频文件")
    else:
        messagebox.showerror("Error", "output文件夹中没有匹配的视频文件")


# 创建一个大的画布区域
canvas_large = tk.Canvas(window, width=900, height=580, bg="#e6f2ff")
canvas_large.place(x=300, y=100)

# 创建按钮并放置在主窗口上
button_upload = tk.Button(window, width=13, text='上传视频', font=14, command=lambda: upload_video(canvas_large))
button_start_detection = tk.Button(window, width=13, text='视频检测', font=14, command=video_detection)
return_start_detection = tk.Button(window, width=13, text='返回系统', font=14, command=return_main)
# 将按钮放置在主窗口上
button_upload.place(x=35, y=170)
button_start_detection.place(x=35, y=230)
return_start_detection.place(x=35, y=290)
window.mainloop()
Python终端输入
#单张图片
python deploy/pipeline/pipeline.py --config deploy/pipeline/config/infer_cfg_pphuman.yml \
                                                   --image_file=test_image.jpg \
                                                   --device=gpu \

#图片文件夹
python deploy/pipeline/pipeline.py --config deploy/pipeline/config/infer_cfg_pphuman.yml \
                                                   --image_dir=images/ \
                                                   --device=gpu \
效果


 711
711


 被折叠的 条评论
为什么被折叠?
被折叠的 条评论
为什么被折叠?
 到【灌水乐园】发言


