


 本文详细介绍了如何在SpringBoot项目中使用JSR303进行数据验证,包括添加依赖、修改Java类以应用验证注解、配置多环境YAML文件以及如何在不同环境中切换。同时探讨了配置文件加载策略和使用命令行参数指定配置文件位置。
2024.4.24 Wednesday
Contents
- 4. JSR303 Data Validation and Environment Switching
- 4.1. JSR303 Data Validation (for reference)
- 4.2. Switching Environments
- 4.2.1. Delete Redundant Files in the Project
- 4.2.2. Multiple Configuration Files
- 4.2.3. Yaml's Multi-Document Blocks
- 4.2.3.1. Similar to the properties configuration files, but using Yaml is more convenient as it does not require creating multiple files
- 4.2.3.2. Note: If both yml and properties are configured with a port, and no other environment is activated, the properties configuration file will be used by default! (Delete the .properties file)
- 4.2.4. Configuration File Loading Locations
- 4.2.4.1. There are numerous methods to externally load a configuration file (adding valid paths for application.yaml), and we can choose the most commonly used one, configuring it in the development resources!
- 4.2.4.2. Spring Boot will scan the following locations for application.properties or application.yml files as the default configuration file for Spring Boot:
- 4.2.5. Extension, Operational Tips
4. JSR303 Data Validation and Environment Switching
4.1. JSR303 Data Validation (for reference)
4.1.1. Modify Person.java
Add two dependencies (@Validated and @Email)
package com.p8.springboot02config.pojo;
import org.springframework.beans.factory.annotation.Value;
import org.springframework.boot.context.properties.ConfigurationProperties;
import org.springframework.context.annotation.PropertySource;
import org.springframework.stereotype.Component;
import org.springframework.validation.annotation.Validated;
import javax.validation.constraints.Email;
import java.util.Date;
import java.util.List;
import java.util.Map;
@Component // Register bean
@ConfigurationProperties(prefix = "person")
@Validated // Data validation
public class Person {
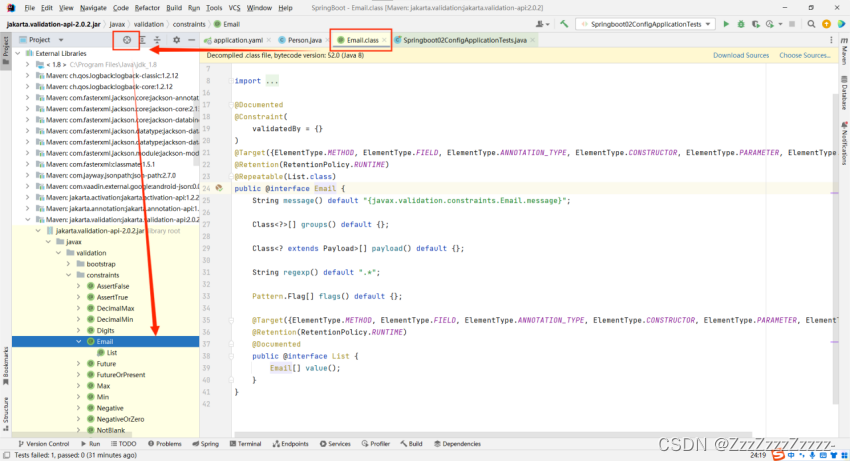
// If there is no @Email annotation hint or error, add the hibernate-validator dependency
@Email() // Writing message = "Incorrect format" inside the parentheses will change the error message to "Incorrect format"
private String name; // Note, you can use shift + f6 to change all names at once
private Integer age;
private Boolean happy;
private Date birth;
private Map<String,Object> maps;
private List<Object> lists;
private Dog dog;
...
}
4.1.2. Modify pom.xml (add dependency)
<dependency>
    <groupId>org.springframework.boot</groupId>
    <artifactId>spring-boot-starter-validation</artifactId>
</dependency>
4.1.3. Run Springboot02ConfigApplicationTests.java for testing
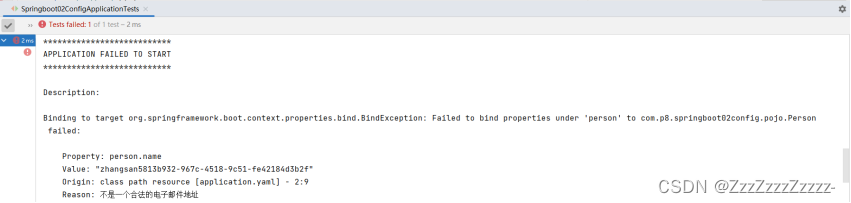
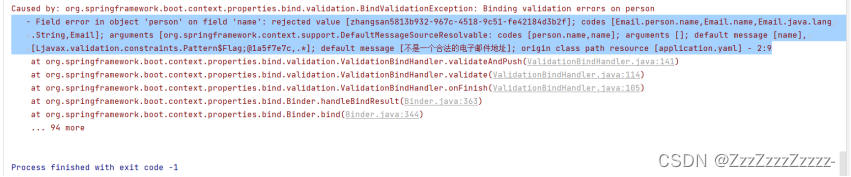
4.1.4. Use Data Validation (Backend) to ensure data correctness
4.1.5. Common Parameters
@NotNull(message="Name cannot be empty")
private String userName;
@Max(value=120, message="Age must not exceed 120")
private int age;
@Email(message="Email format is incorrect")
private String email;

Null checks
@Null       Validates if the object is null
@NotNull    Validates if the object is not null, cannot check strings of length 0
@NotBlank   Checks if the constraint string is not null and its trimmed length is greater than 0, applicable only to strings and trims spaces.
@NotEmpty   Checks if the constrained element is not NULL or EMPTY.

Boolean checks
@AssertTrue     Validates if the Boolean object is true
@AssertFalse    Validates if the Boolean object is false

Length checks
@Size(min=, max=) Validates that the object (Array, Collection, Map, String) length is within the given range
@Length(min=, max=) Validates that the string is between min and max included.

Date checks
@Past       Validates that Date and Calendar objects are before the current time
@Future     Validates that Date and Calendar objects are after the current time
@Pattern    Validates that the String object adheres to the **regular expression** rules
…etc.
Additionally, we can also define custom data validation rules.
4.2. Switching Environments
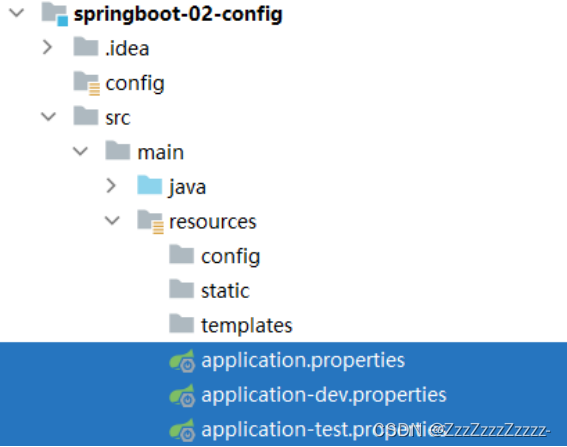
4.2.1. Delete Redundant Files in the Project
As follows:
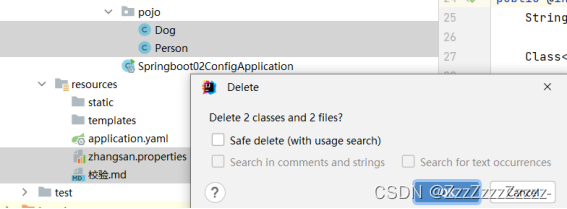
Empty the contents of application.yaml and Springboot02ConfigApplicationTests.java
Profiles in Spring provide support for different configurations across various environments, allowing for quick switching between them.
4.2.2. Multiple Configuration Files
When writing the main configuration file, the file name can be application-{profile}.properties/yml, specifying multiple environment versions.
For example
(Create: application.properties, application-test.properties, application-dev.properties)
application-test.properties represents test environment configuration
server.port=8081
application-dev.properties represents development environment configuration
server.port=8082
However, Spring Boot does not directly launch these configuration files; it defaults to using the application.properties main configuration file
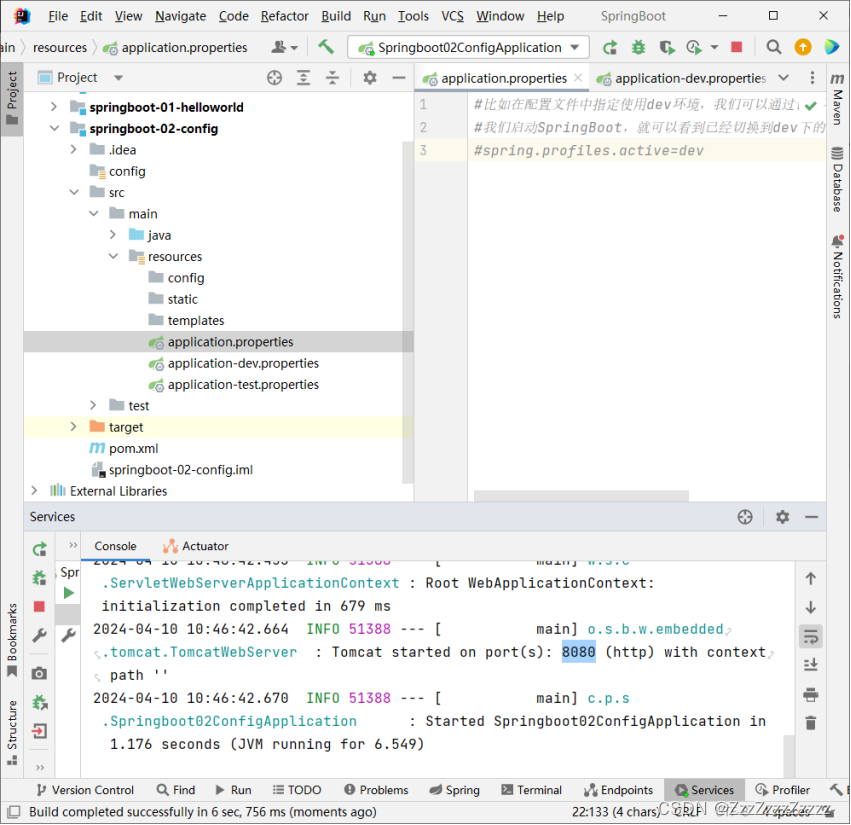
-> We need to use a setting to select the environment to activate:
# For example, in the configuration file, specify using the dev environment, we can test by setting different port numbers;
# When we start Spring Boot, we can see that it has switched to the dev configuration;
spring.profiles.active=dev
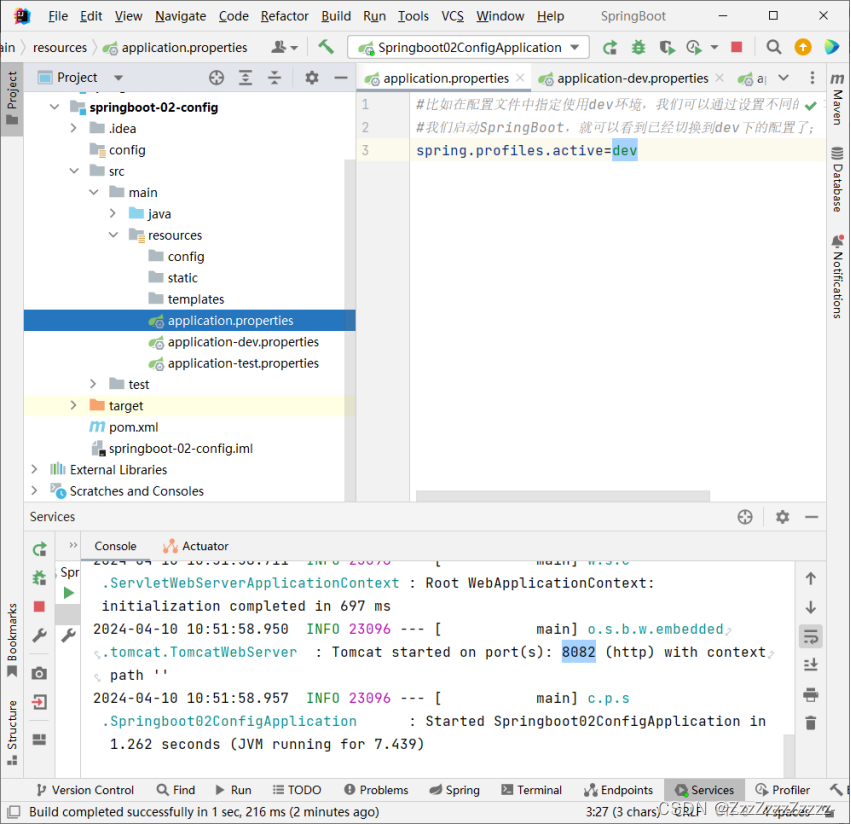
If dev is changed to test, then run application-test.properties

4.2.3. Yaml’s Multi-Document Blocks
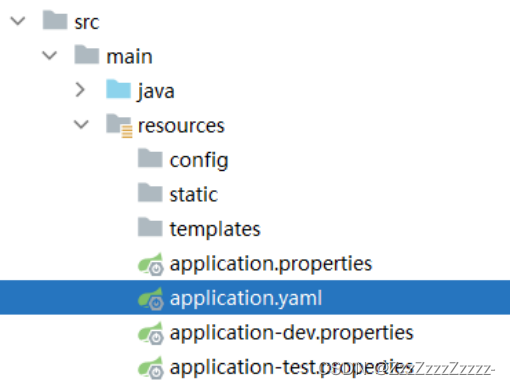
4.2.3.1. Similar to the properties configuration files, but using Yaml is more convenient as it does not require creating multiple files
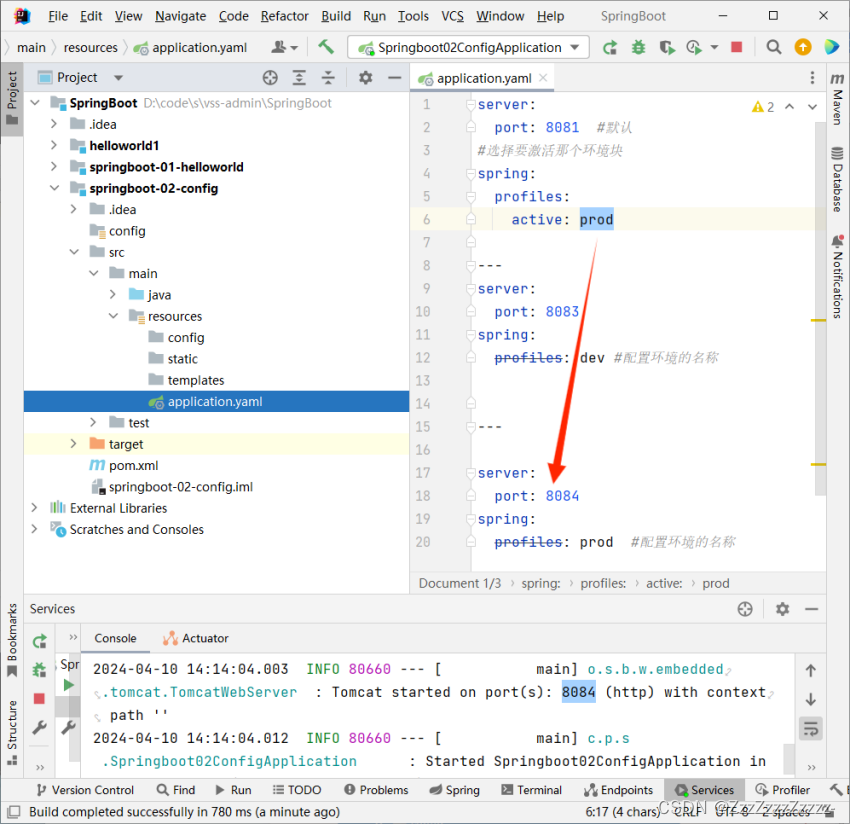
Create application.yaml
server:
  port: 8081  #default
#Select which environment block to activate
spring:
  profiles:
    active: prod

---
server:
  port: 8083
spring:
  profiles: dev #Configuring the environment name


---

server:
  port: 8084
spring:
  profiles: prod  #Configuring the environment name
4.2.3.2. Note: If both yml and properties are configured with a port, and no other environment is activated, the properties configuration file will be used by default! (Delete the .properties file)
4.2.4. Configuration File Loading Locations
4.2.4.1. There are numerous methods to externally load a configuration file (adding valid paths for application.yaml), and we can choose the most commonly used one, configuring it in the development resources!
https://docs.spring.io/spring-boot/docs/2.7.13/reference/htmlsingle/#features.external-config
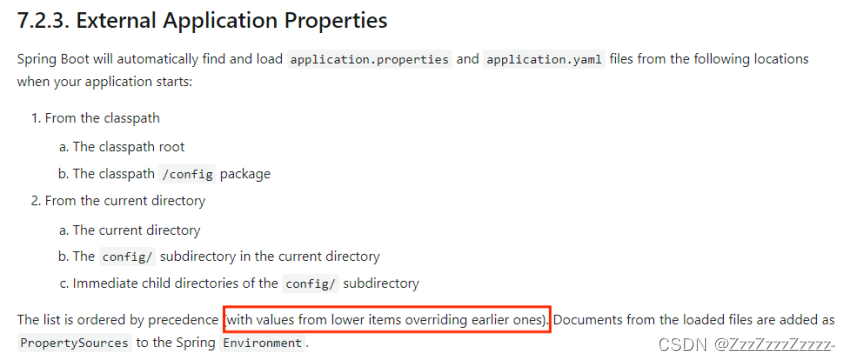
The highest priority is given to the content in the red box in the image below.
After creating a new folder, you need to change the folder type.
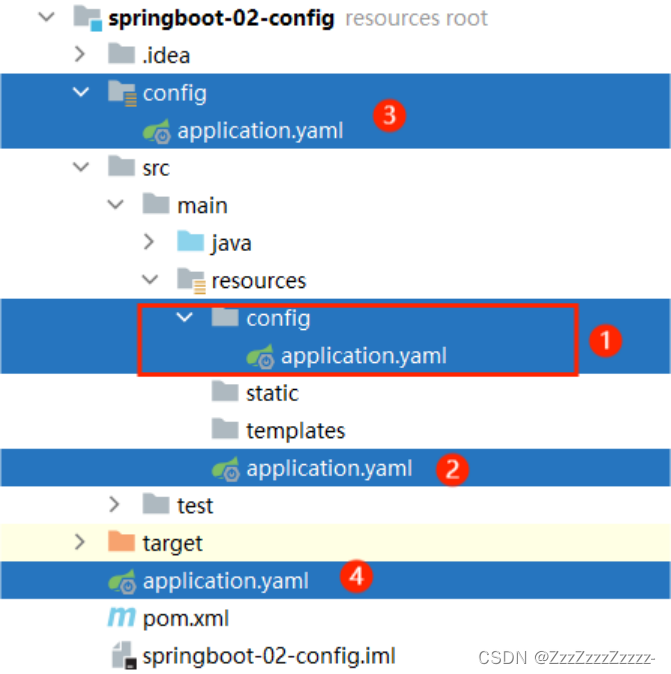
4.2.4.2. Spring Boot will scan the following locations for application.properties or application.yml files as the default configuration file for Spring Boot:
- Priority 1: Configuration file in the config folder under the project path (src/main/resources/config/application.yaml)
#src/main/resources/config/application.yaml
server:
  port: 8081

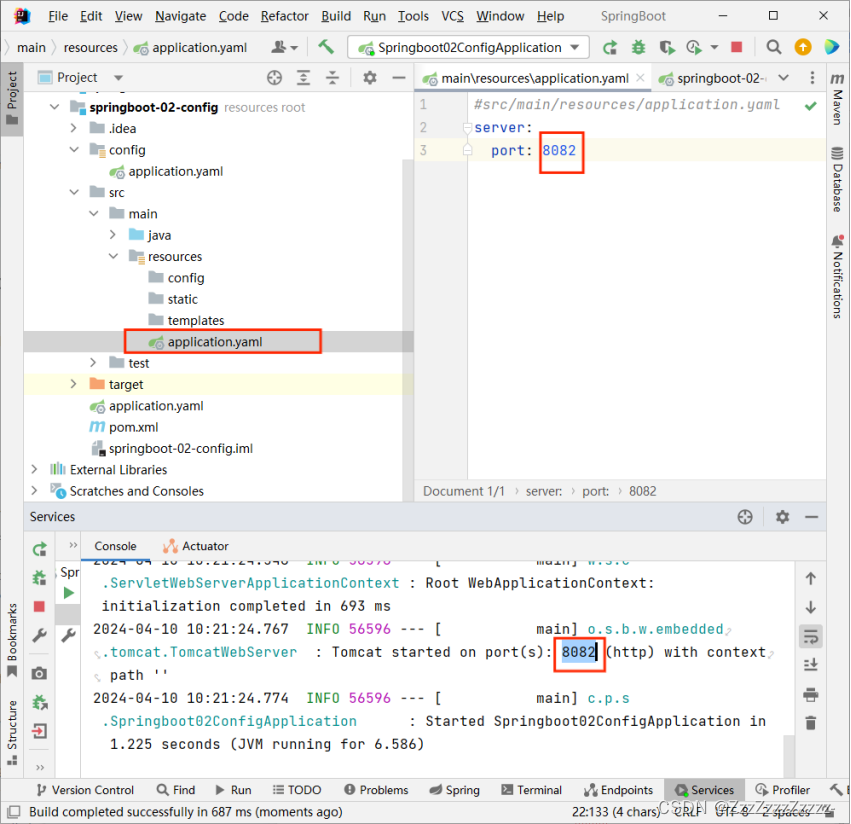
- Priority 2: Configuration file under the project path (src/main/resources/application.yaml)
After deleting the previous priority file, this one will run next; the same operations apply (refresh Maven after deleting the configuration file).
#src/main/resources/application.yaml
server:
  port: 8082
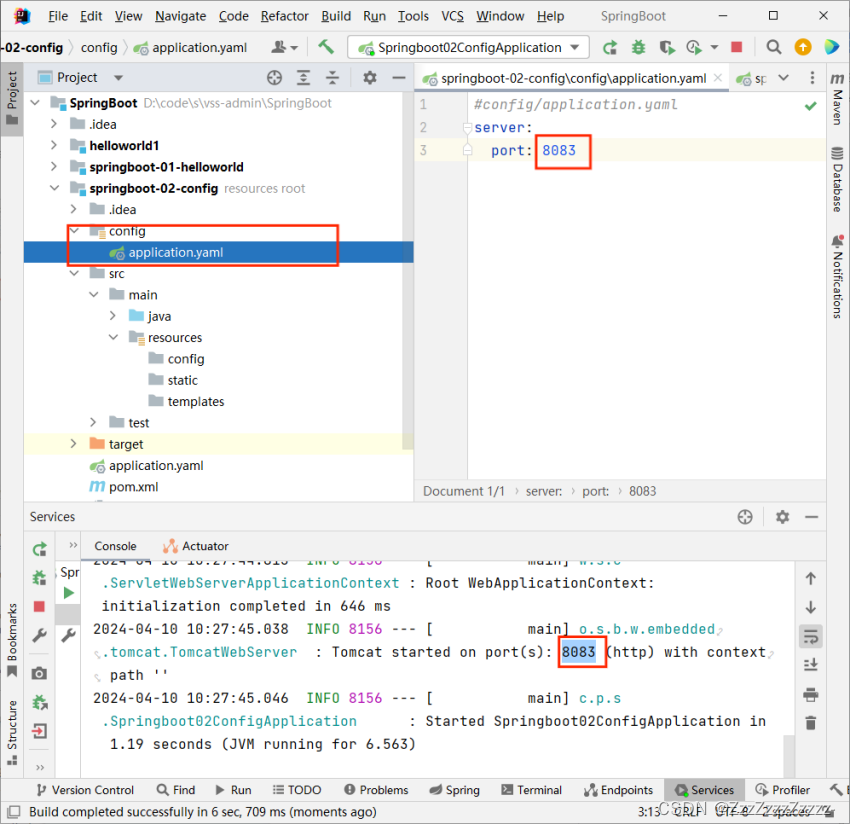
- Priority 3: Configuration file in the config folder under the resource path (config/application.yaml)
#config/application.yaml
server:
  port: 8083
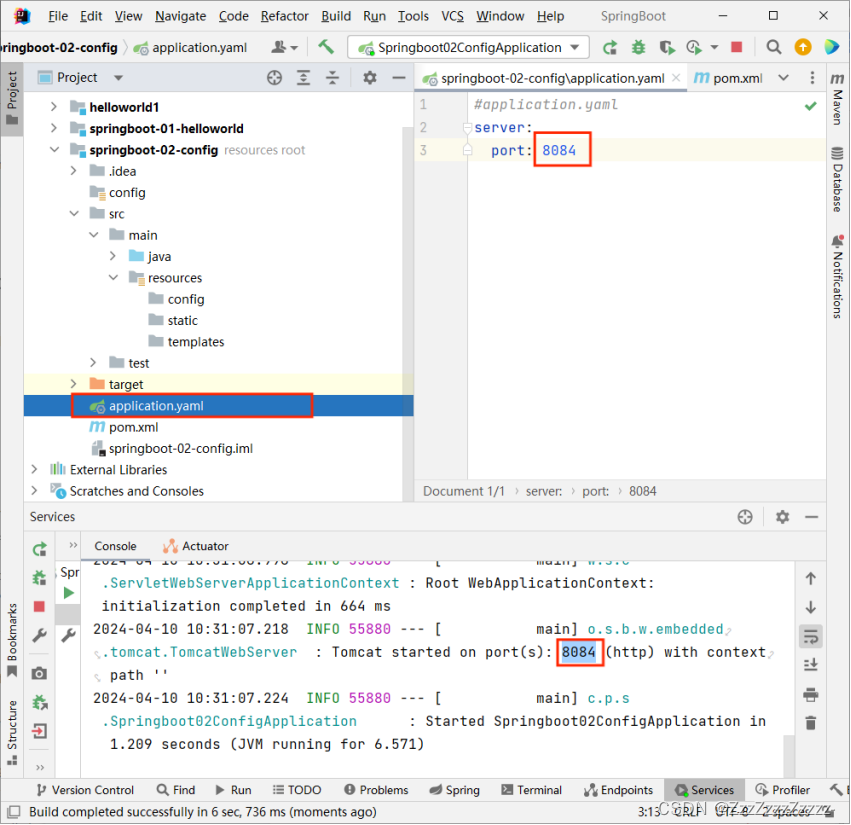
- Priority 4: Configuration file under the resource path (application.yaml)
#application.yaml
server:
  port: 8084
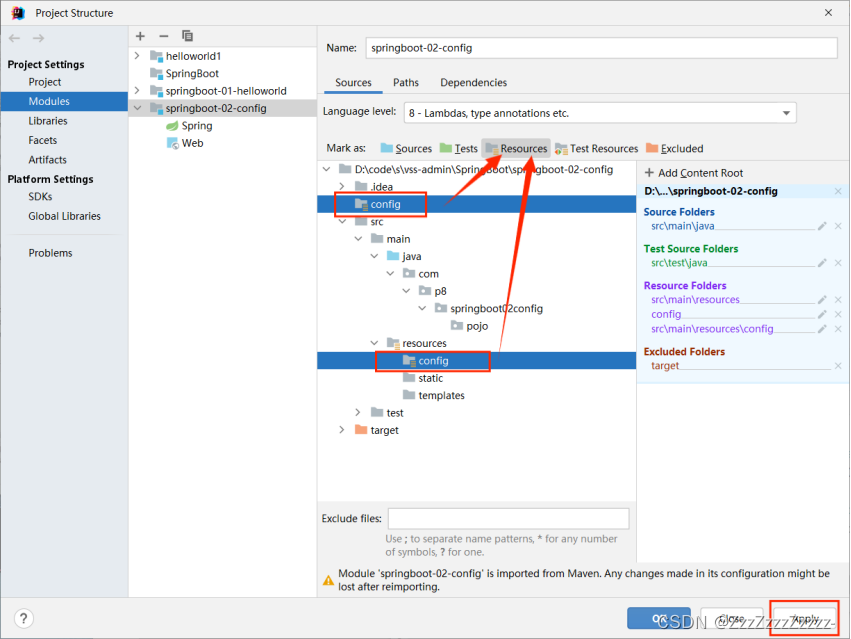
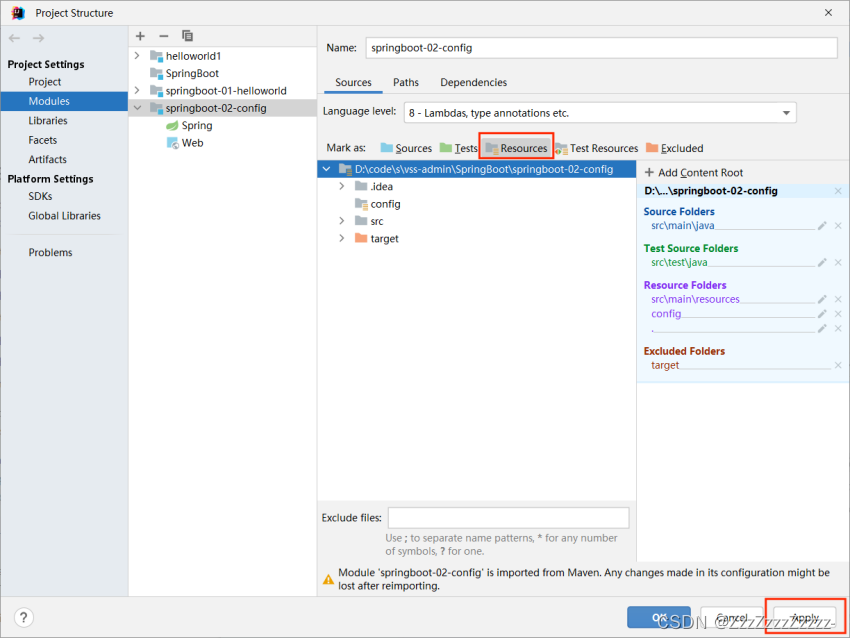
Here, the application files might not be automatically recognized (indicated by a red yml icon, like:

), how to change it to a green pea shooter icon?
Change Project Settings -> Modules -> Find the project -> Change to resources type
Priorities run from high to low, with higher priority configurations overriding lower priority configurations;
Spring Boot will load the main configuration files from all four locations; complementing configurations.
4.2.5. Extension, Operational Tips
Specify location for loading configuration files
We can also change the default configuration file location using spring.config.location
After the project is packaged, we can use command line parameters to specify the new location of the configuration file when launching the project; this scenario is generally handled by operations later on, with external configuration files having the highest priority
java -jar spring-boot-config.jar --spring.config.location=F:/application.properties


 1万+
1万+


 被折叠的 条评论
为什么被折叠?
被折叠的 条评论
为什么被折叠?
 到【灌水乐园】发言


